
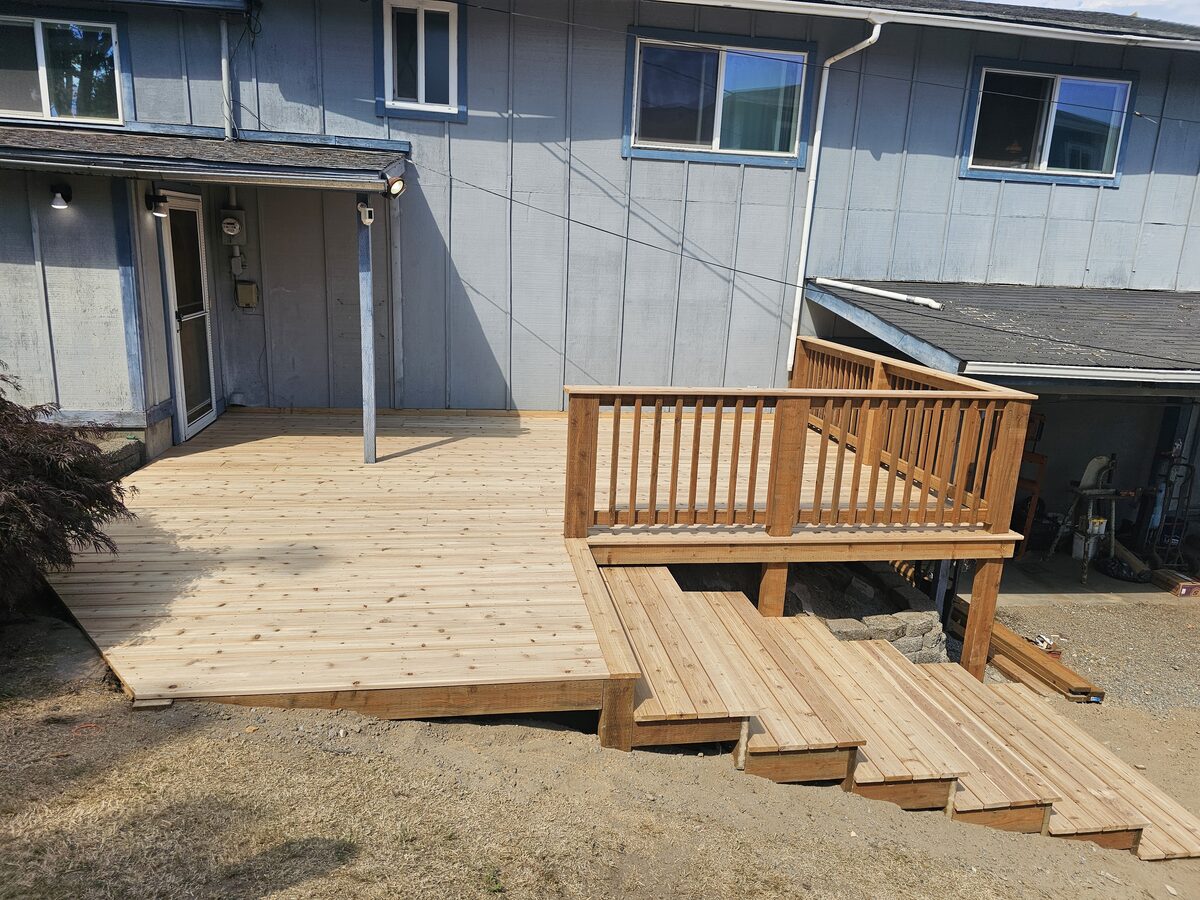
The space under an elevated deck is one of the most underutilized and most misunderstood zones in a Seattle yard. Most homeowners either leave it as bare, muddy ground — sometimes with a few dead plants from an optimistic planting attempt — or ignore it entirely until they're selling the house and a home inspector mentions the erosion, the standing water, or the pest activity. What they don't realize is that the space under an elevated deck in Seattle has genuine potential: as dry storage, as a landscaped shade garden using PNW-native plants, or as a fully finished dry room under a waterproof drainage system. The right solution depends on your deck's clearance height, your drainage situation, and what you actually want the space to do.
Seattle's climate adds dimensions that out-of-state landscaping guides don't address. The roof effect of a solid deck blocks rainfall from the soil directly beneath, creating zones that are often drier than the surrounding yard — counterintuitive in a city that gets 38 inches of rain annually. At the same time, concentrated runoff dumps at the deck perimeter, alternating between artificially dry conditions and flooding in the same small area. The persistent shade, clay-heavy soils common in King County, and PNW pest and moss conditions all shape what works and what doesn't in this specific environment.
This guide covers the full range of options: drainage solutions from gravel to professional under-deck systems, landscaping choices that genuinely survive Seattle's under-deck conditions, pest prevention specific to PNW construction, storage optimization for the dry space under your deck, and realistic cost ranges for each approach. We've built hundreds of elevated decks in King County — this is what we've actually seen work.
Why Under-Deck Space Matters in Seattle's Climate
In a city with Seattle's rainfall pattern, any covered outdoor space is valuable. Seattle's rain doesn't come in intense summer storms the way it does in the South or Midwest — it comes as persistent, low-intensity drizzle for seven months straight. What that means practically: the space under an elevated deck stays dry year-round (if drainage is handled correctly), and that's genuinely rare real estate on a PNW lot.
A 16x20 foot elevated deck produces 320 square feet of covered outdoor space beneath it. In Seattle's construction market, where finishing a bonus room runs $100–$200 per square foot and ADU addition costs have pushed toward $250,000, 320 square feet of dry, covered space for storage, a workshop, or an outdoor room is not trivial. The question is what it takes to make that space usable, and whether the investment makes sense for your situation.
The two failure modes that waste this opportunity:
Ignoring the drainage. Without drainage management, under-deck space collects concentrated runoff at the perimeter, stays persistently damp from moisture rising from the soil, and becomes a breeding ground for moss, mold, pests, and eventually structural rot in the nearest deck framing. The space exists but isn't usable and actively accelerates deterioration of the deck structure.
Over-optimistic planting without site preparation. Homeowners trying to landscape under-deck space without addressing drainage and soil conditions first consistently fail. Plants struggle or die because the "dry" zone is too dry to support the plants they've chosen, the surrounding perimeter is too wet, and the soil is compacted clay with poor structure. No plant selection solves a drainage and soil prep problem.
Getting the under-deck zone right starts with drainage, not plants.
Drainage First: Getting Water Away From Your Foundation
The priority in any under-deck project is protecting the house foundation and the deck's structural framing from water damage. This is a structural consideration before it's a landscaping or aesthetic consideration.
Under an elevated deck in Seattle, water arrives from two sources:
Perimeter runoff. Rain falls on the deck surface, runs to the edges, and drops vertically at the deck perimeter. On a 16x20 deck without gutters or a drainage system, this concentrates approximately 320 square feet of precipitation into four narrow perimeter strips. That concentration produces erosion, saturates soil at the foundation, and can contribute to hydrostatic pressure against foundation walls over time.
Groundwater and moisture vapor. Even under the roof effect of a solid deck, moisture rises from the ground. In Seattle's high-water-table conditions — much of the Eastside and North Seattle has seasonal high water tables that rise significantly in winter — vapor migration under a deck can keep framing consistently damp and accelerate rot.
The foundation drainage solution applies regardless of what you plan to do with the under-deck space:
Gravel and drainage board against the foundation. Against the house foundation wall under the deck, a 12-inch-wide trench filled with washed drain rock and a perforated drain pipe connected to a drywell or daylight outlet provides a release valve for perimeter runoff and groundwater. This is construction-grade drainage that prevents water from sitting against the foundation wall.
Slope the grade away from the foundation. If the existing grade under your deck slopes toward the house, it's directing every drop of perimeter runoff toward your foundation. Re-grading with 1–2 inches of drop per foot for the first 6 feet away from the foundation costs $300–$800 and may be the most important single investment you make in this space.
Vapor barrier on bare soil. A 6-mil polyethylene vapor barrier laid over the bare soil under the deck, overlapped at seams and weighted at the edges, significantly reduces moisture vapor migration into the framing above. This is a standard recommendation for crawl spaces and applies equally to under-deck framing. Cost: $150–$400 installed on a standard under-deck footprint.
Important
Under-Deck Drainage Systems: Turning Wet Into Dry
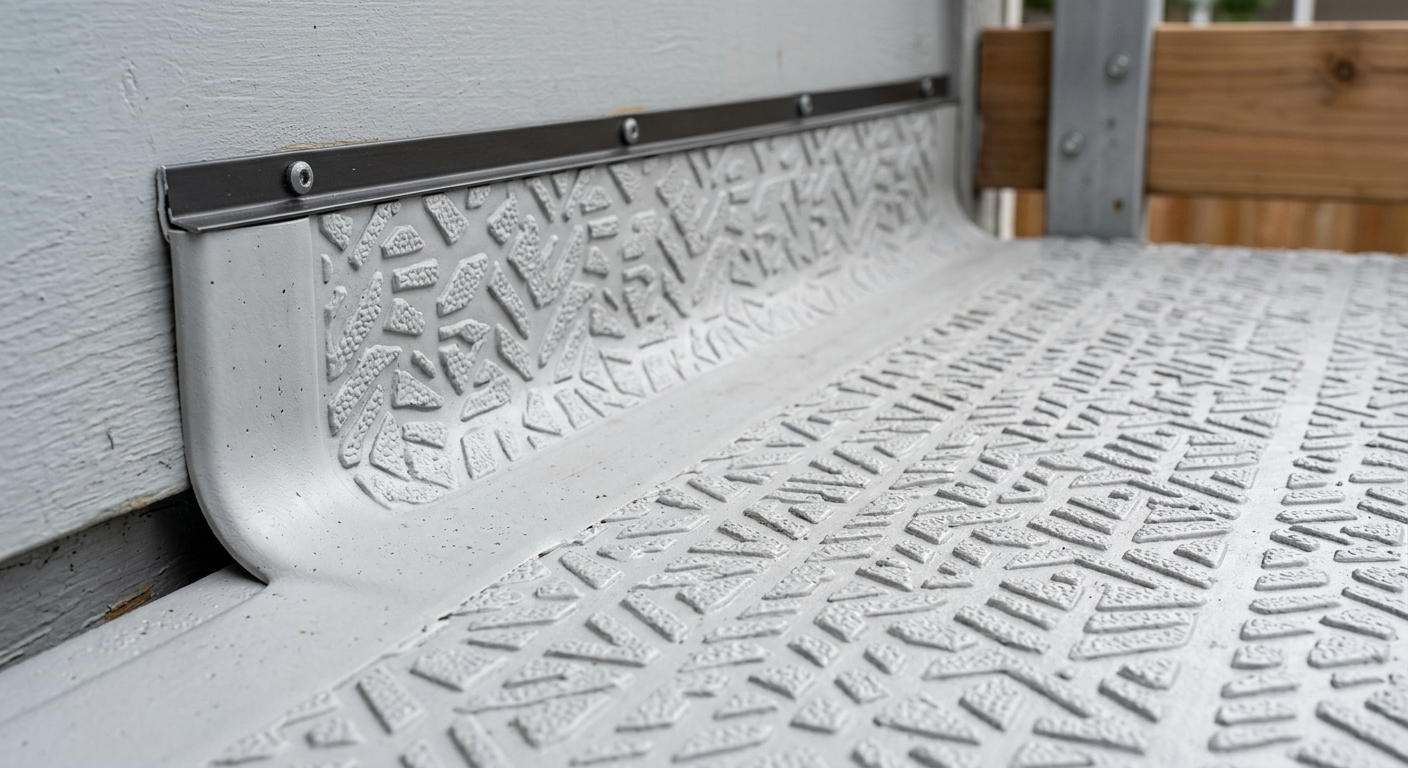
If your goal is genuinely usable under-deck space — storage, an outdoor room, a covered seating area — the investment in a professional under-deck drainage system is what makes it possible. These systems intercept runoff at the deck level, before it falls into the under-deck space, and route it to a gutter and downspout.
Three main system types are used on Seattle projects:
Aluminum Channel Ceiling Systems
The premium option and the one that produces the cleanest under-deck space. Aluminum panels are installed between the deck joists from below, creating a finished ceiling that looks clean from underneath. An integrated gutter along one edge collects all the water that drips through the deck boards (which is significant in Seattle's rain volume) and routes it to a downspout.
Installed cost: $15–$25 per square foot, depending on panel profile, gutter configuration, and site access. For a 200 sqft under-deck zone, budget $3,000–$5,000 for the drainage system alone.
What you get: A finished, dry ceiling that transforms the space below into something genuinely usable. The aluminum panels can be painted or left as is. They're washable, durable, and virtually maintenance-free in PNW conditions. The space below stays dry even in Seattle's heaviest rain events.
Brands available: DekDrain, aluminum channel systems from specialty deck contractors, and custom fabrications. The key specification is the gutter capacity — Seattle's rain intensity during atmospheric river events can be significant, and undersized gutters overflow into the space they're supposed to protect.
Flexible Drainage Mat Systems
A mid-range option where a flexible membrane or drainage mat is stretched between joists from below. Systems like Trex RainEscape, TimberTech DrySpace, and similar products redirect water from between the deck boards to a central gutter or perimeter collection point.
Installed cost: $8–$15 per square foot installed for a standard residential project.
Pros: Lower cost than aluminum channel systems. Can be installed as a DIY project on accessible under-deck framing. Works well for partial coverage where you want dry space below one section of a deck.
Cons: Less finished appearance than aluminum channel systems. Requires adequate clearance below the joists for installation. Prone to sagging if gutter connections aren't maintained. Less durable long-term than aluminum.
[TimberTech DrySpace](https://www.timbertech.com/) and similar products from Trex are the most commonly available systems in King County.
French Drain at Perimeter
For decks where the primary concern is perimeter runoff rather than mid-deck drip-through, a French drain (perforated pipe in gravel trench) installed at the drip edge of the deck collects concentrated perimeter runoff before it saturates the soil and routes it to daylight or a drywell.
Installed cost: $600–$1,500 for a standard residential deck perimeter, depending on length and outlet options.
Best for: Situations where the deck boards shed water adequately and the problem is concentrated perimeter runoff, not mid-deck leakage.
Aluminum channel systems cost more upfront but produce the most usable under-deck space. French drains are appropriate when perimeter runoff, not mid-deck leakage, is the primary drainage problem.
| Category | Value |
|---|---|
| Aluminum channel ceiling | $4,000 |
| Flex drainage mat system | $2,200 |
| French drain (perimeter only) | $1,000 |
| Vapor barrier + gravel | $600 |
Landscaping Options for Shaded Under-Deck Spaces in Seattle
Once drainage is managed, the under-deck zone can be landscaped. Seattle's mild climate — rarely below 20°F in winter, rarely above 85°F in summer — actually supports some exceptional shade plants. The PNW is one of the best places in North America for shade garden design.
The constraints to design around:
- Deep shade (most under-deck zones get zero direct sun)
- Low moisture from the roof effect (unless you have an under-deck drainage system that intercepts water before it reaches the soil, the ground under the deck may be drier than it looks)
- Compacted clay soil typical of King County yards
- Low clearance height limiting plant size in some situations
Plants That Genuinely Work Under Seattle Decks
Western Sword Fern (Polystichum munitum) — The single most reliable choice for under-deck planting in Seattle, full stop. Native to PNW forests, this is the fern you see growing in every Douglas fir and western red cedar stand in King County. It's adapted to exactly these conditions: deep shade, variable soil moisture, clay soil, and temperature fluctuations across a Seattle winter. Once established after 6–12 months, it's genuinely drought-tolerant and requires zero supplemental watering in most Seattle yard conditions. Grows to 3–4 feet in an arching mound that fills in beautifully under deck clearances of 4+ feet. No maintenance beyond occasional old-frond removal in spring. Widely available at local nurseries at $8–$15 per plant.
Hostas — Every hosta variety handles shade, and in Seattle's mild climate many are semi-evergreen. For under-deck conditions, the key is matching variety to clearance: low-clearance under-deck zones need compact hostas (Halcyon, Patriot, Blue Mouse Ears), while decks with 5+ feet of clearance can accommodate statement varieties like 'Empress Wu' (spreads to 4 feet wide) or 'Sum and Substance' (chartreuse gold, similar spread). Hostas need supplemental irrigation under a deck — they can't rely on rainfall being blocked by the deck surface. A simple drip line serves them well. Deer-resistant and slug-tolerant relative to many other shade perennials.
Astilbe — One of the few flowering perennials that performs in full shade. Produces feathery plumes in June through August in shades of pink, red, white, and purple depending on variety. Requires supplemental water under a deck (unlike sword ferns, astilbe is not drought-tolerant). Worth the irrigation for the seasonal color in an otherwise predominantly foliage-based planting zone. 'Fanal' (red, 24 inches) and 'Ellie' (white, 20 inches) are reliable performers in Seattle's climate.
Japanese Forest Grass (Hakonechloa macra) — Ornamental grass that genuinely thrives without sun. 'All Gold' variety produces bright chartreuse foliage that appears to glow in shade — exceptional under a deck with low clearance. Grows 12–18 inches tall, spreads slowly, and handles Seattle winters without any protection needed. One of the few plants that actually looks better in partial shade than in full sun. Pairs beautifully with hostas for a two-layer planting.
Ajuga (Bugleweed) — Dense, low-growing ground cover (4–6 inches) that spreads aggressively to fill the under-deck perimeter where the deck meets the yard. Semi-evergreen in Seattle. Purple flower spikes in spring add seasonal interest. Handles foot traffic at the edges where family members reach under the deck for stored items. Easy to establish and essentially maintenance-free once it fills in.
Pachysandra terminalis — Fast-spreading evergreen ground cover that handles full shade and dry conditions once established. Creates a clean, uniform carpet under decks with good clearance. Less visually interesting than sword ferns or hostas but very low maintenance once established. Best for large under-deck zones where coverage is the priority and planting variety is secondary.
Epimedium (Barrenwort) — Underused gem for Seattle under-deck planting. Once established, epimedium is one of the most drought-tolerant shade perennials available. Semi-evergreen, spreads slowly to form a dense mat, produces delicate flowers in spring. Handles the variable moisture conditions under a deck better than most perennials.
Plants That Die Under Seattle Decks
Lavender, rosemary, most salvias — these need 6+ hours of direct sun and Mediterranean drainage. Under a Seattle deck, they collapse from shade and root rot within one season. No amount of soil amendment fixes a sun requirement.
Roses — require minimum 6 hours direct sun for bloom and disease resistance. Under a deck, they become leggy, produce no flowers, develop black spot within a season, and eventually die. Not a borderline case.
Most vegetables — every vegetable crop requires direct sun. Tomatoes, squash, beans, kale, herbs (except mint) — none of them work under a deck. The under-deck zone is not a vegetable garden option.
Impatiens — technically a shade annual, but require consistent moisture that the dry zone under a deck doesn't provide without a drip system. If you install a drip system, impatiens work in the transition zone where some light reaches. In the true under-deck core, even impatiens struggle.
Soil Preparation for Under-Deck Planting
Under-deck soil in Seattle is almost always compacted clay with poor structure. Before planting anything:
- Till or fork the existing soil to 8–10 inches depth to break up compaction
- Incorporate 3–4 inches of compost — not spread on top, but worked into the existing soil
- Install drip irrigation for any plants that need supplemental water (hostas, astilbe)
- Add 2–3 inches of bark mulch on top to retain moisture, regulate soil temperature, and suppress weeds
Avoid rock or gravel mulch under a deck. It heats the soil in summer, doesn't improve moisture retention, and makes future planting changes difficult. Bark mulch is correct for PNW conditions.
Hardscape Options: When Planting Isn't the Answer
If your deck clearance is under 4 feet, if access is awkward, or if you want the under-deck space to function primarily for storage rather than aesthetics, hardscape options outperform planting:
Crushed Gravel with Weed Barrier
The most cost-effective and maintenance-free option. A quality woven weed fabric installed over the prepared soil, covered with 2–3 inches of pea gravel or crushed granite, creates a permeable, clean surface that suppresses weeds and handles drainage effectively.
Installed cost: $600–$1,500 for a standard under-deck zone (150–300 sqft), depending on site access and gravel type.
Maintenance: Essentially zero. Occasional weed pulling where seeds land on top of the gravel. No watering, no fertilizing, no seasonal care.
Best for: Utility-focused under-deck zones where the space is primarily for storage access and cleanup, not aesthetics.
Concrete Pavers
If clearance allows (5+ feet minimum for comfortable use) and the under-deck zone will function as an outdoor room or storage space with regular access, concrete pavers create a durable, clean surface. Requires adequate clearance for installation and use, and typically benefits from an under-deck drainage system above to keep the paver surface dry.
Installed cost: $2,500–$6,000 for a standard under-deck zone with pavers, base prep, and drainage above, depending on paver spec.
Best for: Higher-clearance under-deck zones intended for regular use as outdoor storage, a covered outdoor room, or a workshop.
Poured Concrete Slab
For enclosed under-deck storage rooms or workshop spaces, a poured concrete slab provides the most functional floor surface. Typically requires permits if the area is being enclosed.
Installed cost: $1,200–$2,500 for a concrete slab in a standard under-deck zone.
Creating a Dry Storage Room Under Your Deck
If your deck has 6+ feet of clearance and the footprint is large enough (100+ sqft), enclosing the space as a dry storage room significantly expands your home's functional storage capacity. In Seattle, where garages are often consumed by vehicles and ADU construction has pushed storage options toward premium space, an under-deck storage room can provide meaningful functional value.
Basic elements of an under-deck storage enclosure:
Walls: Pressure-treated framing with horizontal or vertical board siding or T1-11 panel. Must be at finished grade level with appropriate foundation and water management.
Door: A standard exterior-grade door with weatherstripping provides secure, weatherproof access. A wider door (36-inch minimum) makes moving stored items much easier.
Ventilation: The storage room needs at least one vent to prevent moisture buildup — a louvered vent or a small exhaust fan.
Lighting: A switch-controlled light (or motion-sensor LED) makes the space genuinely usable. Requires an electrical connection from the house.
Floor: Concrete slab, pavers, or compacted gravel with a vapor barrier, depending on use.
Note
Cost for a complete under-deck storage enclosure: $4,500–$12,000 depending on size, finish quality, electrical, and drainage above. This is a significant investment, but it's also adding climate-protected storage capacity that would cost $15,000–$30,000 to build as a standalone shed or garage addition.
Enclosed storage rooms with full drainage systems represent the highest-value use of under-deck space in Seattle's market, though the investment is only appropriate for high-clearance decks with large footprints.
| Category | Value |
|---|---|
| Gravel hardscape | $1,100 |
| Landscaping (plants + soil) | $3,000 |
| Drainage mat system only | $2,200 |
| Aluminum channel ceiling | $4,000 |
| Full storage enclosure + drainage | $9,000 |
Pest Prevention: Raccoons, Rats, and Opossums Under Seattle Decks
The under-deck zone in Seattle isn't just a landscaping consideration — it's a pest habitat risk. Raccoons, Norway rats, opossums, and occasionally skunks actively seek elevated deck spaces for shelter and denning, particularly in densely developed neighborhoods where natural habitat is limited.
The consequences of under-deck pest activity go beyond nuisance: rats gnaw wiring and damage structural framing; raccoons are aggressive when cornered; denning animals leave waste that accumulates and attracts secondary pests. In Seattle's urban neighborhoods — Capitol Hill, Fremont, Ballard, Beacon Hill — these are not hypothetical concerns.
Hardware Cloth Skirt: The Most Effective Prevention
The most effective pest prevention measure is a hardware cloth skirt installed at the deck perimeter during construction, or retrofitted on an existing deck. Hardware cloth (also called welded wire mesh) at 1/4-inch mesh is small enough to exclude rats and mice; 1/2-inch mesh excludes raccoons and opossums but allows smaller rodents through.
Installation: The hardware cloth is attached to the outer rim joist of the deck framing, drops vertically to grade, and is buried 6–8 inches below grade and bent outward in an L-shape to prevent burrowing. This L-shaped underground barrier is the critical element — raccoons and rats are persistent diggers and will defeat a barrier that simply stops at grade.
Cost: $400–$1,200 installed, depending on deck perimeter length and soil conditions. Significantly less expensive than addressing a nesting problem after the fact.
On existing decks: Hardware cloth can be retrofitted on an existing deck. The material is bent to match the existing skirting profile or attached as a perimeter skirt below any existing decorative skirting.
Skirting and Lattice
Decorative lattice skirting is commonly installed on elevated decks for aesthetics, but standard garden lattice is not an effective pest barrier — raccoons tear through it, and rats fit through the 1.5-inch openings. If you're using decorative skirting, it should be a secondary layer over hardware cloth, not a replacement for it.
Metal lattice or solid board skirting (like composite fascia board at grade level) with hardware cloth reinforcement at the base provides both aesthetics and effective pest exclusion.
Other Pest Prevention Measures
- Keep the under-deck zone free of food attractants: bird feeders, compost bins, or accessible garbage containers near the deck perimeter attract rats and raccoons.
- If you're using the under-deck space for storage, avoid storing pet food, birdseed, or organic material that rodents will seek out.
- Address any existing pest activity before installing drainage systems or storage — enclose the under-deck space with an active animal presence and you've created a perfect enclosed den.
Maintenance Considerations for Under-Deck Systems
Whatever you install under your deck requires some maintenance. Here's what each option realistically demands:
Gravel hardscape: Annual check for weed establishment, occasional raking to redistribute displaced gravel. Essentially no real maintenance.
Landscaped plantings: Sword ferns need old-frond removal in spring (about 30 minutes per year). Hostas need drip system checks seasonally. Mulch needs refreshing every 2–3 years. Annual walk-through to identify any dead plants and replace.
Drainage mat systems (RainEscape, DrySpace): Annual inspection of gutter attachment points and downspout connections. Cleaning accumulated debris from the mat surface. Check for sagging sections that indicate gutter connection issues.
Aluminum channel systems: Annual cleaning (brush or low-pressure wash) of the panel surface. Check gutter drainage for any blockage.
Enclosed storage rooms: Seasonal inspection of door weatherstripping, annual check of ventilation, monitoring for any moisture signs that indicate drainage above isn't performing correctly.
The Weather Service forecast for Seattle (SEW) provides seasonal precipitation outlooks that are useful for timing maintenance activities — drainage inspection after major winter rain events, landscaping care at the appropriate spring window.
Building Permits for Under-Deck Projects in King County
Most under-deck projects don't require permits — basic landscaping, gravel installation, and drainage mat systems are typically exempt. However, certain improvements do trigger permit requirements:
Requires a permit:
- Enclosed storage rooms with walls and door attached to the house structure
- Electrical additions (new circuits, outlets, or lighting wiring)
- Concrete slab pours in most jurisdictions
- Any structural additions to the deck framing to support an enclosure
Typically does not require a permit:
- Drainage mat installation
- Gravel or paver installation not attached to the house
- Landscaping and irrigation
- Hardware cloth pest barriers
When in doubt, check with Seattle SDCI for City of Seattle projects or King County permits for unincorporated county projects. An unpermitted enclosed room that later requires disclosure at sale is a problem worth avoiding at the cost of a few phone calls now.
Integrating Under-Deck Improvements With New Deck Construction
The best time to implement under-deck improvements is during new deck construction — before the decking boards are fastened, when every element of the framing is accessible, and when drainage systems, pest barriers, and vapor barriers can be installed without the access constraints of a finished deck above.
What to Specify During Construction
When we're building a new elevated deck, we can integrate under-deck improvements at a fraction of the retrofit cost. Here's what to discuss at the planning stage:
Vapor barrier on soil. A 6-mil polyethylene sheet laid over the ground before framing is complete — before footings are backfilled and before the deck surface blocks access — is a $150–$300 material and labor cost during construction. Retrofitting a vapor barrier under a finished deck costs $400–$800 because all the access constraints of working under a built structure add time.
Hardware cloth skirt rough-in. Installing the hardware cloth attachment rails on the outer rim joist during framing takes 30 minutes when the structure is open. Retrofitting them after the deck is complete — and after skirting or lattice has been installed — is a longer, more involved process.
Drainage slope for foundation perimeter. Before footing backfill happens, the grade within the under-deck footprint can be prepared correctly. This is the right time to establish a positive slope away from the foundation, before any of that grade is disturbed and compacted by construction foot traffic.
Drainage mat rough-in. Drainage mat systems like Trex RainEscape or TimberTech DrySpace install between joists and are threaded through before decking goes down. Retrofitting these systems to a finished deck requires removing decking boards to access the joist bays — a significant disruption to a completed surface. Installing during construction takes roughly the same time as retrofit but without the surface removal cost.
Conduit for future electrical. If you might ever want lighting or an outlet in the under-deck space, a PVC conduit from the house electrical panel to the under-deck zone can be installed during construction for $100–$200 in materials. Fishing conduit after construction can cost $400–$800 depending on access.
Timing Landscaping After Construction
Landscaping is the one element that's better handled after construction is complete. Construction activity disturbs soil, compacts grades, and sometimes damages plants installed prematurely. Our standard recommendation: let any disturbed soil settle through one wet season before planting the under-deck zone. This reveals any drainage problems (ponding, erosion at perimeter) before plants go in — and it's far easier to address a drainage problem in bare soil than after planting.
Under-Deck Moisture and Deck Frame Health: The Direct Connection
What happens in the under-deck zone directly affects the longevity of the deck's structural framing. This isn't secondary — it's the reason professional deck builders care about under-deck drainage even when clients initially see it as just a landscaping question.
How Under-Deck Moisture Reaches Deck Framing
Water that pools under a deck doesn't just affect the ground. It evaporates upward as moisture vapor, keeping the relative humidity in the under-deck zone high. Framing members in this zone — joists, beams, posts, and especially the post bases and bottom of posts — are continuously exposed to that elevated moisture level.
In Seattle's climate, where ambient humidity is already high from October through April, adding concentrated under-deck moisture to that baseline creates conditions that accelerate decay in pressure-treated lumber even at ground-contact treatment levels. The treatment level slows decay; it doesn't eliminate it under sustained moisture exposure. Under-deck drainage and vapor barriers are therefore structural maintenance decisions, not just aesthetic ones.
What Sustained Under-Deck Moisture Produces
Without drainage management and a vapor barrier:
Year 1–3: Post bases begin showing mineral deposits (efflorescence) as moisture cycles through concrete. Surface rust may appear on galvanized hardware at post bases.
Year 5–10: Ground-contact rated lumber near the soil surface begins degrading. The slowest-decaying elements are the posts; the fastest are blocking pieces and ledger bottom edge if there are drainage problems at the ledger.
Year 10–15: Post base hardware corrosion progresses to the point where post-base connections are compromised. This is the most common structural failure mode on older Seattle decks built without adequate drainage management.
Year 15+: Structural repairs become necessary — post replacement, beam-end repair, or ledger rebuilding depending on which elements received the most sustained moisture.
With a vapor barrier, perimeter drainage, and adequate air circulation:
The same timeline above advances roughly 50–75% slower. Correct drainage doesn't eliminate moisture entirely in Seattle's climate, but it changes "chronic wet" to "intermittently damp" — a difference that meaningfully extends structural service life.
The Most Cost-Effective Structural Protection
Vapor barrier + perimeter drain rock + hardware cloth skirt for airflow: approximately $800–$1,800 installed. This is the under-deck baseline that protects the deck structure and creates a manageable environment for everything else.
For comparison: post replacement on an existing deck runs $1,200–$2,500 per post (dig out old concrete, install new helical or poured footing, install new post, reconnect framing). On a four-post deck, deferred under-deck drainage results in $4,800–$10,000 in structural repairs over 15 years that $1,500 in drainage work would have largely prevented.
We assess every under-deck drainage situation during deck inspections and new deck consultations. It's a question of structural health, not just appearances.
Frequently Asked Questions
Why is the soil under my deck so dry if Seattle gets so much rain?
What is the most reliable plant for under-deck landscaping in Seattle?
How much does an under-deck drainage system cost in Seattle?
Do I need a permit to enclose the space under my deck?
How do I keep raccoons and rats from nesting under my deck?
Can I use the space under my deck for storage if I don't have a full drainage system?
What's the cost difference between DIY and professional under-deck landscaping?
Will astilbe survive under my deck without irrigation?
How do I deal with moss under my deck?
Can I add electrical lighting to my under-deck space?
What's the best flooring for an under-deck storage room?
How do I prevent mold and rot in the under-deck framing?
Planning Your Under-Deck Project: What to Do First
The most common mistake in under-deck projects is jumping to the interesting part — the plants, the storage room, the drainage system — without first addressing the foundation drainage situation. Here's the right sequence:
Step 1: Assess the current drainage situation. Stand under the deck during or immediately after a rainstorm and observe where water is going. Where does it concentrate? Does any of it pool near the foundation? Is there active erosion at the perimeter drip edges?
Step 2: Address foundation drainage. If you see moisture issues near the foundation, install perimeter drain rock and if necessary, a French drain outlet before doing anything else.
Step 3: Decide what the space should do. Storage, landscaping, outdoor room, or some combination? This decision drives everything downstream — drainage system type, flooring, pest barrier needs, and permit requirements.
Step 4: Install the appropriate drainage system. If you're creating a dry storage or outdoor room, an aluminum channel ceiling system or drainage mat is the right investment. If the goal is purely landscaping, a French drain at the perimeter plus a vapor barrier on the soil is typically sufficient.
Step 5: Install pest barriers. Hardware cloth skirt should go in before you do anything that makes the space more attractive to wildlife — storage food attractants, planting beds, or an enclosed room.
Step 6: Install flooring and storage systems, OR prepare soil and plant. In that order.
The Realtor research on outdoor improvements consistently shows that functional outdoor spaces — including covered storage and landscaped under-deck zones — contribute to home value and buyer appeal. In Seattle's market, where outdoor living space is premium and year-round usability is the standard expectation, a well-executed under-deck zone is a genuine asset.
For help planning the full outdoor living space around your deck — what goes under it, what goes around it, and how drainage and landscaping integrate with the deck structure — we're happy to assess your site and discuss the options. Call us at (425) 675-6259 or request a free consultation. If your deck needs structural work before the under-deck zone makes sense to develop, our deck building services cover the full range of new construction and additions across King County.
Planning a deck in the Seattle area?
Get an onsite design review and a clear, itemized quote from a licensed local builder.
Request a Free Quote