
Membrane Decking in Seattle: When to Use It, What It Costs, and Which Systems Hold Up
Seattle's weather is the most misunderstood variable in deck planning. The city doesn't get more annual rainfall than many East Coast cities — it gets roughly 38 inches, less than New York or Atlanta — but the way that rain arrives is what makes Pacific Northwest conditions distinct. Seattle rain is persistent, low-intensity, and concentrated in an October-through-April stretch that keeps surfaces wet for seven months straight. For a conventional composite deck over open ground, that's manageable. For a deck built directly over a garage, a finished basement, a bonus room, or an ADU rooftop, those seven months of persistent moisture find every weakness in the structure below.
Membrane decking is the solution to a specific problem: what do you put on a deck surface when the space directly beneath it cannot tolerate water infiltration? It's a question that comes up constantly in Seattle's dense urban neighborhoods — where homeowners are maximizing ADU potential on tight lots, where hillside properties have finished walkout basements directly below the deck, and where new construction increasingly puts garages under deck-level additions. When the wrong answer to that question gets installed — a conventional composite deck without proper waterproofing — the damage isn't visible until it's expensive.
We've corrected enough failed membrane installations and improper composite decks-over-living-space projects to know what goes wrong. Most failures trace to three points: inadequate substrate slope, cold-glued seams instead of heat-welded seams, and ledger flashing details that don't meet Seattle's amended IRC requirements. This guide covers how to get all three right — and everything else you need to know about membrane decking in King County.
When Membrane Decking Is the Right Answer — and When It Isn't
The decision to specify membrane decking versus conventional decking is driven by one question: what's directly below the deck surface?
Membrane decking is required when:
The deck sits directly over a garage — attached or detached — where water infiltration through board gaps would drip onto vehicles, stored equipment, or the garage ceiling structure. In Seattle's climate, an improperly waterproofed deck-over-garage produces rot in the garage framing within 5–10 years even before visible damage appears inside.
The deck is on top of an ADU or accessory dwelling unit addition — increasingly common in Seattle neighborhoods like Ballard, Fremont, the Central District, and Columbia City, where homeowners are adding backyard ADUs and building deck-level platforms over the new structure. The ADU's ceiling is the deck's floor substrate, and it must be completely waterproofed.
The deck sits above finished living space in a multi-story home — a second-floor balcony or a deck off a primary bedroom suite where the living room, office, or bedroom below cannot tolerate moisture infiltration.
The deck is a true rooftop installation — a flat-roof extension converted to outdoor living, increasingly seen in Seattle's urban core as homeowners maximize square footage on smaller lots.
Membrane decking is typically not required when:
The deck is elevated over open ground, an open crawl space, or an unconditioned storage area where moisture dripping below is acceptable.
The deck sits on grade level or near-grade level without enclosed space beneath.
The project is a standard attached deck over a landscaped backyard.
In those cases, composite decking or PVC decking performs better than membrane and at lower cost. Membrane systems shine in their specific application; they're not a universal upgrade.
Note
How Vinyl Membrane Systems Actually Work
Understanding the installation sequence is essential to evaluating whether a contractor is doing the work correctly. A membrane system's performance is inseparable from its substrate preparation and detailing.
Substrate Requirements
Membrane decking is installed over a continuous plywood substrate — not over framing joists with gaps between. The substrate is typically 3/4-inch tongue-and-groove plywood (T&G) rated for exterior exposure. The T&G edges interlock to eliminate substrate gaps that would create voids beneath the membrane.
The critical requirement: the substrate must slope a minimum of 1/8 inch per foot toward the drain point. This slope is built into the framing — the joists are shimmed or the ledger height is set to create it — not compensated for with tapered insulation on top of flat framing. If the framing is built flat and the slope is "added later," the drainage is unreliable and water pools.
On decks over garages, the slope direction typically runs toward the outer edge of the deck, where a gutter or drain scupper directs water away from the structure. On rooftop ADU decks, the slope runs toward an interior drain assembly that penetrates the membrane and connects to the building's drainage system.
Ledger Flashing
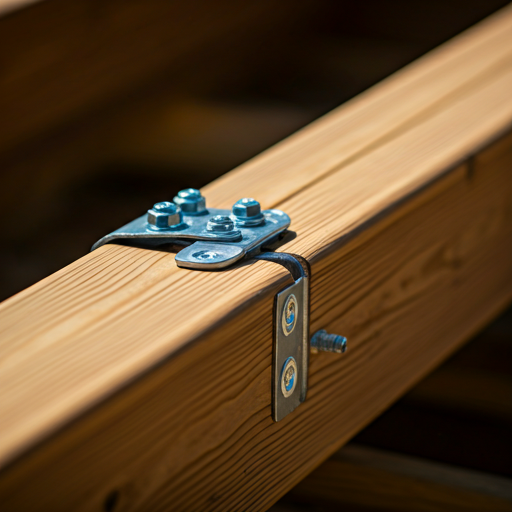
The ledger — the structural member that connects the deck frame to the house — is the single most common membrane failure point in Seattle. Water that works behind the ledger doesn't announce itself immediately. It saturates the rim joist and the wall framing behind it, causes rot that progresses invisibly for years, and eventually presents as a soft ledger connection that fails under load.
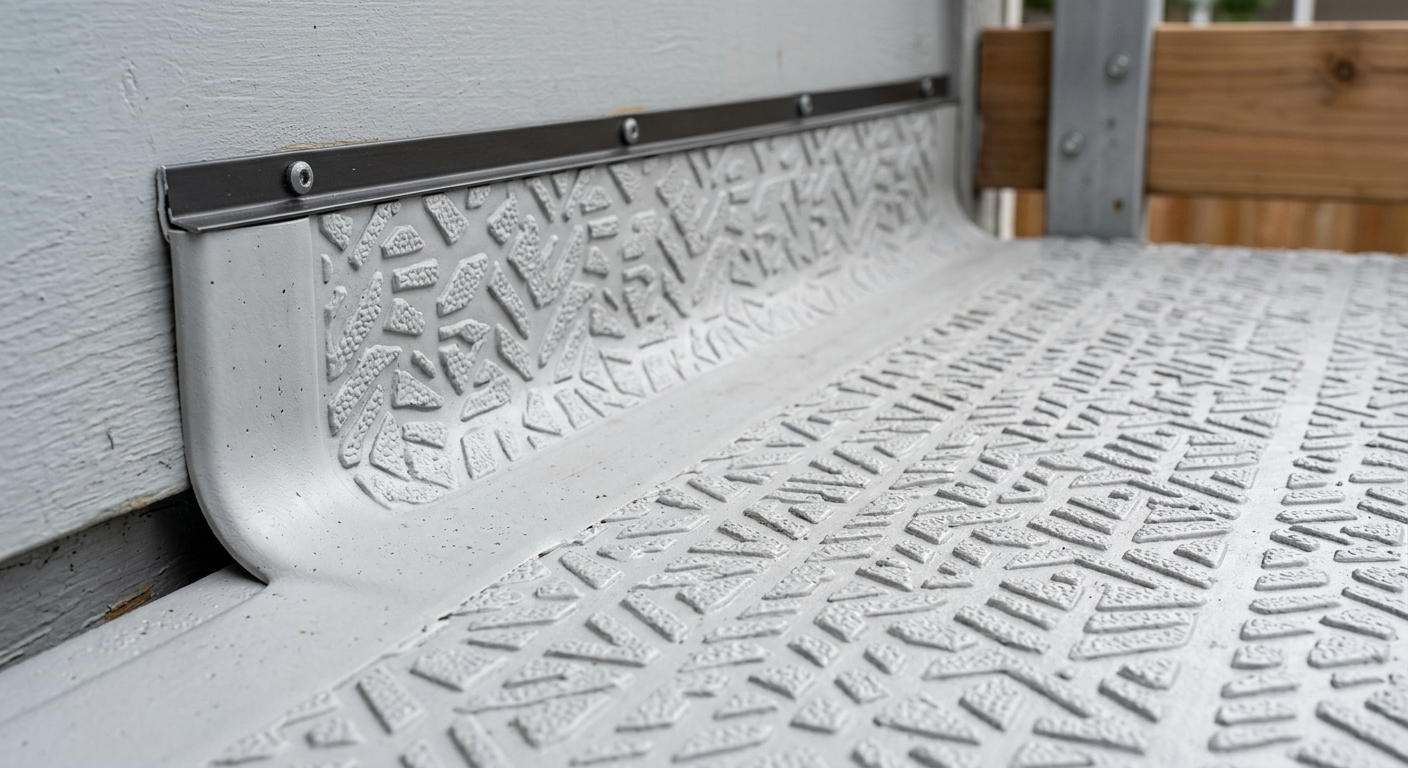
Seattle's adopted IRC has specific ledger flashing requirements that are more stringent than the base IRC provisions. Flashing must carry up the wall behind the ledger and overlap any existing housewrap or building paper. Membrane material is typically used to flash the ledger on membrane deck projects — a continuous waterproofing transition from the deck surface, up the ledger face, and behind the siding.
If a contractor tells you that ledger flashing on a membrane deck is the same as ledger flashing on a standard deck, they are wrong. The membrane must terminate correctly at the ledger in a way that prevents water from finding the gap between the deck surface and the house.
Membrane Installation Sequence
Vinyl membrane is manufactured in rolls — typically 6, 8, or 10 feet wide — and cut to fit the deck's dimensions. The installation proceeds in sequence:
Sheet layout planning: Sheets are oriented so seams run parallel to the primary drainage direction (perpendicular to the slope) wherever possible. This minimizes water pooling at seams.
Sheet adhesion: Most vinyl membrane systems use a contact adhesive applied to both the substrate and the back of the membrane sheet. The sheet is rolled out and pressed firmly from the center outward to eliminate bubbles and ensure full contact.
Seam welding: All seams — where one sheet meets the next — are heat-welded using a hot-air welder. The welder heats both membrane surfaces simultaneously until they fuse into a continuous bond. A properly welded seam is stronger than the membrane itself and completely waterproof.
This is the step where inadequate work is most identifiable: cold seams — where sheets are simply overlapped and glued — look identical to welded seams immediately after installation. They fail in Seattle's freeze-thaw cycles within 3–5 years as the glue bond degrades.
Important
Edge Terminations and Drains
Every membrane edge — wall terminations, outer deck edges, penetrations for drains and post sleeves — requires detailed finishing. This is where inexperienced installers cut corners, because the work is time-consuming and out of sight once the deck is complete.
Wall terminations: The membrane runs up the wall a minimum of 6 inches behind the siding or cladding. A termination bar (a metal strip with weep holes) anchors the membrane to the wall and provides a drainage exit point. Without this, water can migrate behind the membrane termination and find the wall framing.
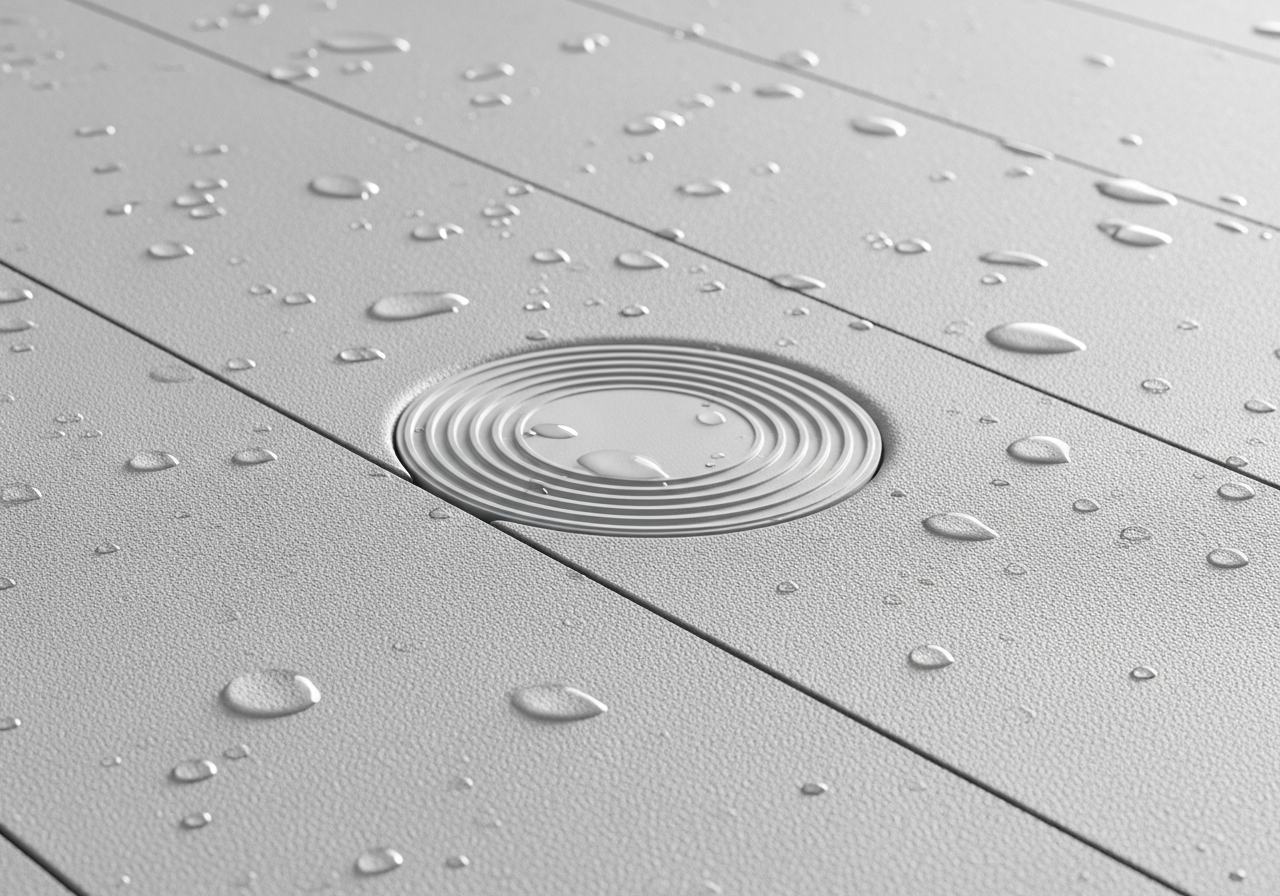
Drain penetrations: Every deck drain requires a drain collar that the membrane wraps into and bonds to, creating a waterproof transition from membrane to drain body. A drain that isn't properly collared is a leak point on every rain event.
Post sleeve penetrations: Where a railing post penetrates the membrane surface, the penetration requires a flexible sleeve that bonds to the membrane and prevents water from running down the post into the substrate below.
The Four Major Membrane Systems Available in Seattle
The Seattle and King County market is well-served by four primary vinyl membrane brands, all distributed and installed locally. Here's how they compare:
| Brand | Warranty | Fire Rating | Installed Cost (2026) | Seam Method | Local Network |
|---|---|---|---|---|---|
| Duradek | 10–15 yr | Class A | $13–$19/sq ft | Heat-weld | Extensive — widest WA installer base |
| Dec-Tec | 20 yr | Class A + C | $14–$21/sq ft | Heat-weld | Strong PNW presence |
| DekSmart | 15 yr | Class A | $12–$18/sq ft | Heat-weld | Good regional distribution |
| Econodek | 10 yr | Class C | $9–$13/sq ft | Heat-weld | Budget option; fewer finishes |
Duradek has the deepest history in the Seattle market — it has been distributed through Washington State dealers since the 1990s and has the widest local installer training network. The installer network matters because warranty claims require certified installer involvement; a product installed by an uncertified contractor may void the warranty.
Dec-Tec carries the longest product warranty at 20 years and offers both Class A and Class C fire ratings depending on the substrate and installation method. Its textured surface profile is durable on high-traffic residential decks. For rooftop ADU applications where traffic is heavier than a typical residential deck, Dec-Tec's durability profile is worth the slight premium.
DekSmart has strong UV resistance performance — relevant even in Seattle's overcast climate for south-facing deck surfaces that see more direct sun — and an appealing color range for Eastside properties where HOA aesthetic requirements are specific.
Econodek is the entry-level option for budget-constrained projects where a 10-year system is acceptable. It uses Class C fire rating, which is appropriate for most residential applications but may not satisfy some commercial or multi-family requirements.
| Category | Value |
|---|---|
| Dec-Tec (premium) | $/sqft18 |
| Duradek (standard) | $/sqft16 |
| DekSmart | $/sqft15 |
| Econodek | $/sqft11 |
What Membrane Decking Costs in King County
Membrane decking is priced differently from conventional decking because the cost structure is different: the membrane material, the substrate prep, the seam welding, and the edge detailing all add labor and material cost that don't exist in a standard composite deck install.
Project Cost Ranges (2026)
For a residential membrane deck project in King County, installed cost runs $55–$80 per square foot for a complete project — framing, plywood substrate, slope correction if needed, membrane, all detailing, and standard deck railing. This is a complete project cost, not materials only.
Breaking that down:
| Component | Cost Per Square Foot |
|---|---|
| Framing and substrate (if new) | $18–$28 |
| Slope shimming or joist adjustment | $3–$8 (if needed) |
| Membrane material | $8–$14 |
| Membrane labor (installation + welding) | $12–$18 |
| Edge detailing and drains | $4–$8 |
| Railing system (cable or aluminum) | $10–$20 |
For specific project sizes in King County:
200 sqft deck over garage: $11,000–$16,000 for a complete project with new substrate, membrane, standard railing. Add $2,000–$4,000 if existing substrate needs replacement.
400 sqft second-story balcony: $22,000–$32,000 complete, including ledger re-flashing if the existing flashing is inadequate.
ADU rooftop deck (flat roof conversion): $28,000–$48,000 for a 400–600 sqft installation with drainage design, interior drain assembly, and railing.
Key insight
Membrane vs. Under-Deck Drainage: Cost Comparison
Under-deck drainage channels — aluminum trough systems installed beneath a conventional composite deck — are sometimes offered as an alternative to membrane. Here's an honest comparison:
| Factor | Membrane System | Under-Deck Drainage |
|---|---|---|
| Installed cost | $55–$80/sqft total | $40–$65/sqft total |
| Waterproofing quality | Complete — no moisture reaches structure | Partial — joists still get wet |
| Structural protection | Full | Limited — rot risk remains over time |
| Maintenance | Annual wash | Gutter cleaning required |
| Appropriate for: | Living space below | Dry storage or unconditioned patio |
For decks over conditioned living space or finished garages, under-deck drainage is not the right solution. It manages water rather than stopping it, and the joists, ledger, and rim joist of the deck structure continue receiving moisture on every rain event. In Seattle's climate, that's a rot progression question of when, not if.
For decks over unconditioned storage areas, patio spaces, or situations where some moisture below is acceptable, an under-deck system is a reasonable lower-cost option.
Permits and Inspections for Membrane Decks in Seattle
Membrane deck projects require permits in virtually all cases — they're either attached to the building, over 18 inches above grade, or both. In Seattle, SDCI (Seattle Department of Construction and Inspections) requires a permit for any deck with a walking surface more than 18 inches above grade and for any structural modification to an existing deck.
For rooftop ADU decks and second-floor balconies, permits are required regardless of height because the work involves structural changes to the building and waterproofing systems that affect the building envelope.
What Inspectors Check on Membrane Deck Projects
Framing inspection: Joist sizing, ledger connection, and verification that the substrate slope meets minimum 1/8 inch per foot. This inspection happens before plywood is installed.
Substrate inspection: Some inspectors require a substrate inspection before membrane application to verify plywood grade, T&G installation, and slope. Not all jurisdictions require this; ask your contractor whether the local jurisdiction requires it for your project.
Membrane installation inspection: In Seattle and most King County cities, a final inspection after membrane installation verifies seam quality, edge terminations, drain connections, and ledger flashing continuity. This is where cold-seam installations typically get caught.
Final inspection: Railing height, stair dimensions (if applicable), and any electrical or gas connections for kitchen features.
Permit processing for membrane deck projects in Seattle runs 4–8 weeks for complete submittals. Bellevue and Sammamish run 3–6 weeks during spring peak. Submit permit applications before ordering materials — lead times on custom deck components can compete with permit timelines.
We pull all required permits on every project and include permit fees in our written quotes. Homeowners never need to navigate permit offices directly.
Drainage Design: The Detail That Determines Long-Term Performance
Drainage design is where membrane deck performance is determined long before the first rain. A correctly drained membrane deck directs every drop of water to a defined exit point without ponding, without pooling at edges, and without directing water toward the building's foundation.
Slope Design
The minimum slope of 1/8 inch per foot is a code floor, not a performance target. In practice, 1/4 inch per foot provides faster drainage and significantly reduces standing water duration on the surface. The additional slope is nearly imperceptible to occupants and dramatically improves the deck's cleanliness and the membrane's service life.
On a 16-foot-deep deck with 1/4-inch-per-foot slope, the total elevation change from high point to drain is 4 inches. Built into the framing before substrate installation, this is an invisible improvement.
Drain Types and Placement
Perimeter scuppers: Rectangular openings at the low edge of the deck that allow water to run off through a controlled exit point, typically into a gutter or downspout. Simple and effective for rectangular decks with consistent slope in one direction.
Interior drain assemblies: Used on rooftop decks where perimeter drainage isn't possible. The drain assembly penetrates the membrane, connects through the framing to the building's stormwater or drain system, and requires careful flashing coordination with the membrane installation.
Linear drains: Channel drains installed at the deck's low point that collect water across the full width rather than at a single point. Preferred on larger decks where a single drain would require very steep slopes to function properly.
Drain placement and sizing must be designed in conjunction with the framing and substrate design — not added as an afterthought after the deck is framed. We specify drain location and type during the design phase, before permit submission.
What Happens When Drainage Design Fails
Poor drainage design produces standing water on the membrane surface. Prolonged standing water:
- Degrades the membrane surface faster through UV exposure (even Seattle's reduced UV is cumulative)
- Creates slip hazard — standing water on a membrane surface is treacherous
- Allows debris accumulation and organic growth
- In winter, freezes into ice patches that damage membrane seams when traffic moves across them
We see inadequately sloped membrane decks on a regular basis in Seattle — usually contracted by builders who didn't specialize in membrane work and applied standard deck framing practices to a system that requires different framing geometry.
Maintenance and Lifespan in PNW Conditions
One of membrane decking's genuine advantages in Seattle is low maintenance requirement. Unlike cedar (which requires annual sealing), composite (which requires periodic cleaning to prevent algae), or stone tile (which requires grout maintenance), vinyl membrane needs almost nothing to maintain its waterproofing performance.
Annual Maintenance
An annual cleaning with a mild soap solution and a soft-bristle brush is sufficient to remove the algae and organic material that accumulates on Seattle's shaded north-facing decks. Rinse thoroughly with a garden hose.
Avoid pressure washers above 1,500 PSI — they can lift seam edges on systems older than 10 years and force water under perimeter terminations. If you use a pressure washer, keep the nozzle angle shallow and keep distance from seams and edges.
What to inspect annually:
- All visible seams — any lifted edge requires professional re-welding before the next rain season
- Drain assemblies — clear any debris blocking the drain body
- Perimeter terminations — confirm the termination bar is secure and weep holes are clear
- Any punctures or tears — catch these immediately before they enlarge
What Causes Premature Failure
In our experience with membrane decks across King County, premature failure traces to three causes more than any others:
Neglected punctures. A cigarette burn, a sharp furniture leg, or a dropped tool can puncture membrane. A 1-inch puncture costs $150–$300 to repair professionally. Left for two Seattle winters, water works under the membrane, lifts the surrounding sheet from the substrate, and turns a $200 repair into a $1,500–$3,000 section replacement.
BBQ grill contact. The bottom of a gas grill on a membrane deck, even with an ember mat beneath it, generates enough heat to degrade the vinyl surface over time. Use a purpose-built grill pad rated for use on vinyl membrane — available from membrane distributors — or keep the grill positioned to avoid direct contact with the membrane surface.
Deferred seam maintenance. Seams that have partially lifted — visible as a slight ridge when you run your hand across the seam — need professional re-welding before the next wet season. A seam that's 80% bonded fails completely in a freeze-thaw cycle and admits water to the full length of that seam.
Practical Lifespan
Correctly installed quality membrane systems (Duradek, Dec-Tec) in PNW conditions have practical lifespans of 20–30 years. Seattle's climate is actually favorable for membrane longevity: lower UV intensity than southern markets extends the vinyl's service life significantly. The primary aging mechanism in our climate is freeze-thaw cycling, not UV degradation.
At year 15–20, the membrane surface may show cosmetic wear — slight color fading, texture smoothing in high-traffic areas — without any loss of waterproofing performance. At year 25–30, professional assessment is appropriate to determine whether re-coating or full replacement is warranted.
Comparing Membrane Decking to PVC Decking
A common question we hear: "What's the difference between membrane decking and PVC decking?" The question makes sense — both are vinyl-based, both are waterproof, both perform well in PNW conditions. The difference is fundamental to the application.
Vinyl membrane decking: A continuous sheet system installed over a plywood substrate. No gaps. No exposed framing. Complete waterproofing of the substrate and structure below. The surface itself is the membrane — there is no separate waterproofing layer.
PVC decking boards (like AZEK/TimberTech): Individual boards installed over a framed deck structure with small gaps between boards for drainage. The boards themselves are waterproof — they won't absorb moisture, won't rot, won't support mold growth. But the space between the boards is open, and water runs through those gaps to the framing below.
PVC decking boards are an excellent choice for standard elevated deck applications where the framing below can get wet without consequence. They are not a substitute for membrane decking when the space below the deck requires waterproofing.
| Feature | Vinyl Membrane | PVC Decking Boards |
|---|---|---|
| Continuous waterproofing | Yes — wall to wall | No — gaps between boards |
| Application: over living space | Yes — required | No — not appropriate |
| Application: standard elevated deck | Not typical | Yes — excellent |
| Surface texture / aesthetics | Vinyl sheet texture | Wood-plank appearance |
| Installed cost | $55–$80/sqft complete | $40–$70/sqft complete |
| Maintenance | Annual rinse | Annual rinse |
Seattle-Specific Considerations: Why PNW Climate Shapes Membrane Spec
The National Decking and Railing Association (NADRA) provides general guidance on membrane decking installation, but Seattle's specific climate requires local adjustments to those guidelines.
Freeze-thaw frequency. Seattle temperatures cross the 32°F threshold an average of 50–80 nights per year. That's 50–80 freeze-thaw cycles annually — each one putting slight expansion and contraction stress on membrane seams and edge terminations. Quality welded seams handle this without issue; adhesive seams do not.
Sustained low-grade moisture. Unlike East Coast cities that alternate between dry and rainy periods, Seattle's October-April season is consistently wet. Membrane systems on the East Coast may spend days between rain events with surfaces fully dried. Seattle membrane decks may be continuously damp for weeks. This sustained moisture exposure is what distinguishes high-performance systems from adequate ones.
Cloud cover and UV. Seattle averages fewer than 150 clear days per year, which is dramatically lower UV exposure than the national average. This extends the service life of vinyl membrane significantly — UV degradation, which is the primary failure mechanism for vinyl products in southern and high-altitude markets, is reduced at this latitude.
Organic growth. Seattle's combination of moisture, moderate temperatures, and shade creates ideal conditions for moss, algae, and mildew on outdoor surfaces. Vinyl membrane resists these organisms better than wood or concrete, but north-facing shaded surfaces benefit from annual cleaning to remove organic buildup before it penetrates seams or compromises surface texture.
Membrane Decking on ADU Rooftops: Seattle's Growing Application
The most rapidly growing application for membrane decking in Seattle is ADU (accessory dwelling unit) rooftop decks. As the city has relaxed ADU regulations and homeowners have moved aggressively to add backyard ADUs on their lots, rooftop deck installations over ADU flat-roof structures have become one of the most common membrane decking applications in the market.
An ADU rooftop deck has specific requirements that differ from a deck-over-garage installation:
Structural Loading on ADU Rooftops
An ADU's flat roof wasn't necessarily designed to function as a deck. The structural engineer who designed the ADU (if there was one) may have specified roof loading for maintenance access only — 30 lbs/sqft — rather than deck occupancy loading at 40–50 lbs/sqft. Before installing any deck on an ADU rooftop, the roof structure must be assessed by a licensed structural engineer.
If the roof structure needs reinforcement, it's almost always less expensive to reinforce it during the ADU construction than after. We regularly coordinate with ADU builders to specify the deck simultaneously with the ADU's structure.
Waterproofing Continuity
An ADU rooftop deck is simultaneously the roof of the occupied dwelling below. The membrane is both the deck's walking surface and the ADU's primary roof waterproofing. This dual function means any failure in the membrane system — an unsealed seam, a compromised drain detail, a puncture — results in both a deck problem and a roof leak into the ADU below.
For ADU rooftop applications, we specify the Dec-Tec or Duradek system with two additional requirements:
- All seams run parallel to the primary drainage direction (minimizes water on seams)
- A secondary drainage layer (drainage mat) between the membrane and substrate provides a safety release path for any moisture that penetrates the primary system
ADU Rooftop Drain Design
ADU rooftops in Seattle require reliable internal drainage — the membrane can't simply drain off the edge, because that would direct water against the ADU's exterior walls. Interior drains that penetrate the membrane and route through the structure to the building's stormwater system are required.
The drain design for an ADU rooftop involves:
- Minimum 2 drains on any deck over 200 sqft
- Drain covers that won't be blocked by furniture or debris
- Overflow scuppers at the perimeter as a secondary drainage path if primary drains are obstructed
For Seattle ADU rooftop decks, the drain system design is part of the structural engineering package and must be reviewed in the permit application.
Seattle ADU Deck Permit Process
ADU rooftop decks require permits from Seattle SDCI that address both the structural deck and the waterproofing of the ADU's roof simultaneously. This is typically handled as a single permit application covering the full scope of the ADU roof/deck conversion. Processing time for ADU rooftop deck permits in Seattle runs 5–10 weeks due to the combined structural and waterproofing review.
We have significant experience with ADU rooftop deck permitting in Seattle and manage the full application process — structural drawings, membrane specifications, drain design, and coordination with the ADU builder if applicable.
Membrane Decking on Second-Story Balconies and Multi-Story Homes
The second most common Seattle membrane application: second-floor balconies that sit directly over the first-floor living space, covered patio, or finished storage area. These balconies — common on craftsman-influenced homes throughout North Seattle and Eastside neighborhoods — are often the first point of water infiltration as the home ages and original waterproofing fails.
Signs a Balcony Needs Membrane Work
Interior ceiling staining below the balcony: Yellowish water stains on the ceiling of the room below the balcony are the clearest sign that the balcony's waterproofing has failed. At this stage, some structural damage is likely already present in the rim joist and framing around the balcony perimeter.
Soft spots on the balcony surface: If the balcony surface deflects noticeably underfoot — particularly near the house wall or at the perimeter — the substrate beneath the existing surface has deteriorated. This typically means rotted plywood that needs replacement before any new surface goes down.
Visible rust staining on the balcony surface: Rust-colored streaks on the existing surface indicate that the metal fasteners holding the substrate together are oxidizing — a sign of persistent moisture in the substrate.
Interior wall damage below the balcony railing: Water infiltration at the ledger travels down the interior wall, typically appearing as paint bubbling or peeling on the interior wall directly below the balcony perimeter.
The Balcony Membrane Replacement Process
For a second-story balcony with failed waterproofing:
- Remove existing surface: Whether tile, original membrane, or decking boards
- Assess and replace substrate: Soft or rotted plywood is replaced entirely — you cannot install membrane over deteriorated substrate
- Assess ledger and rim joist: Critical step. The ledger and adjacent framing are often rotted when balcony waterproofing has failed. Rotted framing members are sistered or replaced
- Correct drainage slope: If the existing substrate wasn't sloped adequately, new framing creates the required slope before new plywood substrate goes down
- Install membrane with heat-welded seams: Full membrane installation with complete ledger flashing, heat-welded seams, and new drain components
- Railing reinstallation: Railing posts are reinstalled through membrane sleeves, and connection holes are sealed
This scope — full substrate replacement plus membrane on a typical 150-200 sqft second-story balcony — runs $8,000–$15,000 in King County in 2026. The cost is higher than a membrane installation on sound substrate because of the substrate and framing repair component.
Seattle-Specific Code Requirements for Membrane Deck Systems
Seattle's adopted building code includes specific provisions for membrane deck systems that go beyond the base IRC. These aren't well-publicized, but they matter for permit approval:
IRC Section R507.3.3 (Deck Surface Water): Deck surfaces over enclosed spaces must slope to a drain at minimum 1/8 inch per foot and must be designed to prevent water infiltration to the space below. Seattle has adopted this requirement and enforces it.
Seattle Amendments to IRC Section R507: Seattle's local amendments add specific flashing requirements for decks attached to buildings, including requirements for membrane continuation behind the ledger and up the wall. These amendments are more prescriptive than the base IRC and reflect the code evolution from actual deck failure experience in King County's wet climate.
WAC 51-51 (Washington State Building Code): Washington State's building code amendments apply statewide and include specific provisions for waterproofing systems on decks over conditioned or occupied space.
We design all membrane deck systems to meet Seattle's amended code requirements, not just the base IRC. The inspection process for Seattle permits verifies compliance with these local amendments specifically.
Working With Us on Membrane Projects
The Seattle Decking Company installs Duradek and Dec-Tec vinyl membrane systems on residential projects throughout King County. Every membrane project includes heat-welded seams — there are no exceptions — and complete ledger flashing to Seattle's current IRC amendments. We pull all permits and schedule all inspections.
Our membrane deck projects include the full scope: framing assessment or new framing where needed, substrate installation with correct slope, membrane installation with heat-welded seams, drain design and installation, edge detailing, and railing installation.
FAQ
Frequently Asked Questions
What is membrane decking and when do I need it?
How much does membrane decking cost in Seattle?
What's the difference between Duradek and Dec-Tec?
Are heat-welded seams really necessary?
How long does membrane decking last in Seattle?
Do I need a permit for membrane decking in Seattle?
Can membrane decking be installed over an existing deck?
What is the minimum slope required for membrane decking?
Can I use a gas grill on a membrane deck?
What maintenance does membrane decking require?
Is membrane decking better than under-deck drainage channels?
Does membrane decking look different from composite decking?
Ready to Start Your Membrane Deck Project?
Membrane decking done right protects the structure below for 20–30 years and requires almost nothing to maintain. Membrane decking done wrong — with cold seams, inadequate slope, or missed ledger flashing — fails within a few Seattle winters and leaves you with structural damage that costs significantly more to fix than the original installation.
We've built membrane deck systems throughout King County for over 15 years. Every project uses heat-welded seams, correct slope design, complete ledger flashing, and permitted inspection. We pull all permits and include permit fees in our written quotes.
If you have a deck over a garage, ADU, or living space in Seattle, Bellevue, Kirkland, Bothell, Sammamish, or anywhere in King County, contact us at (425) 675-6259 or request a free estimate online. We'll assess your specific situation and tell you honestly whether membrane is the right solution — and if it is, exactly what it will cost.
Our address: 22722 29th Drive SE, Bothell, WA 98021.
Planning a deck in the Seattle area?
Get an onsite design review and a clear, itemized quote from a licensed local builder.
Request a Free Quote