
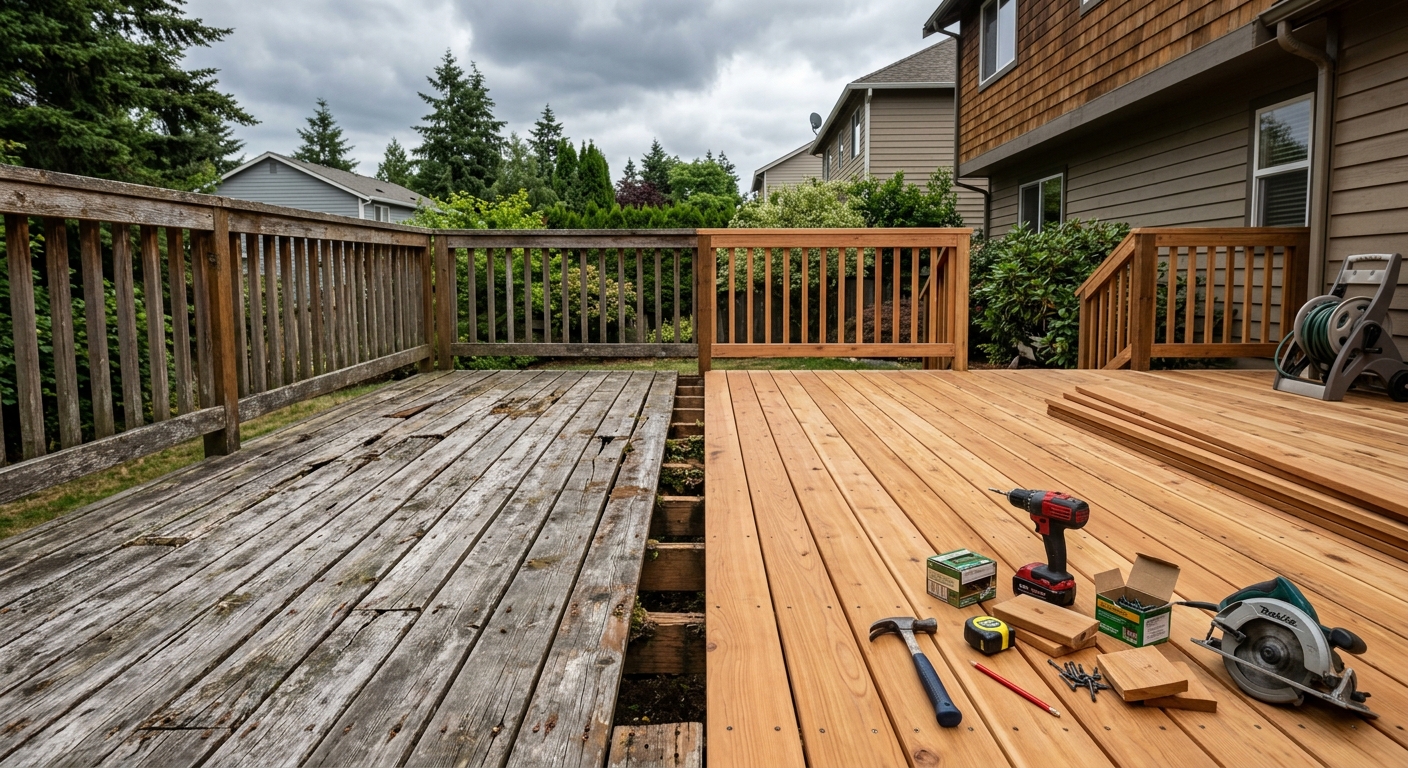
Multi-Level Deck Design in Seattle: What to Expect on a Hillside Lot
Seattle's topography doesn't apologize for itself. The city and its surrounding communities were shaped by glacial retreat — ridgelines, ravines, hillside bluffs, and irregular terrain that produces some of the most visually compelling residential properties in the Pacific Northwest and some of the most structurally demanding deck projects a builder will encounter. Flat backyards in King County are the exception, not the norm. And for homeowners on sloped lots who want to reclaim their outdoor space, a single-level deck solves the problem halfway.
A single-level deck on a lot with 12 feet of grade change either sits at door height — which means 10 feet of posts on the downhill side and a massive, shadowy void below — or it sits at grade on the low end, which means you're looking at a slope from the house down to the platform and losing the connection to interior living space. Neither is satisfying. Multi-level deck design exists specifically to solve this problem: you follow the terrain, not fight it, and the result is more total outdoor living area distributed across levels that each serve a distinct function.
We've built multi-level decks throughout King County for 15 years — on Queen Anne hillsides, Issaquah foothills, Mercer Island ridge lots, Bellevue's Somerset and Newport Hills, and the steep West Seattle bluffs above Puget Sound. The structural complexity varies by site, the costs vary with elevation change and scope, and the permitting requirements are almost always more involved than a single-level build. This guide covers what a multi-level deck in Seattle actually involves: design principles, structural requirements, cost ranges, permit process, and material decisions that hold up in PNW conditions.
Why Multi-Level Works on Seattle Lots
The physics of multi-level deck design are straightforward: instead of building one large platform that extends out from the house at a fixed elevation, you build two or three interconnected platforms at different elevations, stepping down the grade rather than bridging it entirely with structure. The result is a deck with lower maximum post heights, more stable ground contact at multiple footing locations, and a visual relationship with the landscape that a single elevated platform never achieves.
The functional logic is equally clear. On a property where the backyard drops 15 feet from the back door to the lower fence line, a multi-level design assigns a purpose to each level based on its proximity to the house and its relationship to the view:
Upper level (at or near door height): Dining and outdoor living. The direct connection to the kitchen and living room makes this the primary entertaining level. Covered with a pergola in many Seattle projects to extend the season through the shoulder months.
Mid level: Fire pit or lounge seating area. Slightly removed from the primary living space, which creates a sense of destination — you "go out" to the mid level rather than just stepping onto the deck. Lower railing requirements on the downhill face if the grade drops gradually.
Lower level: Play space, garden access, or utility area. This level can sit close enough to grade that its structure is simple — shorter posts, lighter framing, no engineering review required.
The stair connections between levels are design elements, not afterthoughts. Wide tread depth, intermediate landings on taller stair runs, and consistent railing profiles across all flights create visual continuity. Stairs that read as a design element are a different project from stairs that look like a construction site detail.
Seattle's rainfall pattern also works in favor of multi-level design. Each platform has a defined perimeter with controlled drainage — water runs off each level at its edges rather than pooling on a large single expanse. Drainage is more predictable and the structure dries faster between rain events.
What Drives Multi-Level Deck Costs in King County
Multi-level deck projects in Seattle cost more per square foot than single-level builds of the same total area for structural reasons. Each additional level adds footings, framing, railing, and stair connection. The elevation change between levels determines how much structural complexity accumulates.
Cost Ranges for 2026 King County Projects
| Project Type | Total Area | Estimated Range |
|---|---|---|
| Two-level composite, modest grade (3–6 ft drop) | 400–600 sqft | $38,000–$65,000 |
| Two-level composite, significant drop (8–14 ft) | 400–600 sqft | $55,000–$90,000 |
| Two-level PVC, view lot, cable railing | 400–600 sqft | $65,000–$105,000 |
| Three-level composite + pergola, steep hillside | 600–900 sqft | $80,000–$145,000+ |
| Two-level + outdoor kitchen integration | 500–700 sqft | $70,000–$130,000 |
| Upper cedar / lower composite, modest grade | 400–500 sqft | $45,000–$75,000 |
Seattle labor runs 15–25% above national averages due to wage rates, permitting costs, and site conditions. Factor this premium into any national cost calculator you're using.
The Key Cost Drivers on Multi-Level Hillside Builds
Footing type and count. On modest grade changes, standard poured concrete footings at 18–24 inches in diameter and 3–4 feet deep are appropriate — typically $300–$600 per footing. On steep hillside lots with King County's clay-heavy soils, helical pier footings ($800–$2,000 per location) resist lateral loading and soil heave better than standard poured concrete. A mid-size three-level project on a steep Issaquah or Queen Anne lot may require 10–14 footing locations.
Structural engineering. Washington State building code requires stamped structural drawings from a licensed engineer when deck posts exceed 8 feet in height or when framing conditions fall outside IRC prescriptive tables. On a two-level build where the upper section has 10-foot posts on the downhill face, engineering is required. Engineering drawings typically add $2,500–$5,500 to the project.
ECA geotechnical review. Properties on slopes steeper than 15%, near landslide-prone zones, or adjacent to riparian buffers are flagged as Environmentally Critical Areas (ECAs) by Seattle and King County. ECA properties require geotechnical documentation — a soils report from a licensed geotechnical engineer — before permits are issued. This adds $2,500–$6,000 and 2–4 weeks to the permit timeline. Most Queen Anne, Magnolia, and Bellevue hillside properties fall into or near ECA territory.
Stair runs. Each stair flight between levels adds $1,800–$4,500 to the project cost depending on rise, tread material, and whether the stair requires independent footings. On a three-level build, two stair flights add $3,600–$9,000.
Railing scope. Every level's exposed perimeter requires code-compliant railing. For a 600-square-foot two-level deck with 80 linear feet of total railing, the choice between aluminum balusters ($35–$55/LF), cable ($120–$200/LF), or frameless glass ($250–$400/LF) creates a $2,800–$32,000 range on that line item alone.
Crane access. On lots where a framing truck can't get close to the build area — deep urban lots in Fremont, Ballard, or Capitol Hill, or steep ravine properties without truck access — materials may require crane delivery. Crane time runs $800–$2,500 per day.
| Category | Value |
|---|---|
| Helical pier footings (10 locations) | $15,000 |
| Structural engineering | $4,000 |
| ECA geotechnical report | $4,500 |
| Stair runs (2 flights) | $6,500 |
| Cable railing (80 LF) | $12,800 |
| Pergola addition | $22,000 |
| Crane access (2 days) | $3,200 |
Structural Requirements for Seattle's Hillside Soils
Multi-level decks expose Seattle's soil variability more than any other project type because they require multiple footing locations distributed across terrain that may change character significantly over 30–40 horizontal feet.
Understanding King County Soil Conditions
Glacial till: The primary soil type on Seattle's hillsides — compact, mixed-particle material deposited by glacial movement. Till generally provides good bearing capacity and is preferred for footing design. Most of the Bellevue Plateau and upper Queen Anne sit primarily on till.
Clay-heavy deposits: Common in lower-elevation hillside zones and in the valley fills between ridges. Clay swells when wet and shrinks when dry, producing seasonal movement that can displace conventional footings over years. Helical piers that penetrate through the clay to stable bearing below are the correct response.
Fill soils: Common on properties graded for newer development — particularly in Sammamish, Issaquah Highlands, and some Renton Highlands areas. Fill soil bearing capacity varies dramatically and requires specific assessment before footing design can be completed.
Bedrock: Close to the surface on portions of Mercer Island and some Capitol Hill properties. Excellent bearing capacity but requires drilling or specialized anchor hardware rather than conventional footing excavation.
We require a pre-design site assessment on any multi-level project with significant grade change — not because we bill for it, but because designing a footing layout for soils we haven't assessed is guesswork. On elevated, multi-level projects where structural failure means a person falls with the structure, guesswork is not acceptable.
Post Height and Lateral Bracing
The IRC prescriptive tables for deck construction cover posts up to 8 feet tall. Above that height, the post enters engineering territory — the combined vertical and lateral loads exceed what the prescriptive tables were designed to address.
On an elevated upper deck section with 12-foot posts on the downhill face, those posts experience:
- Vertical dead load: The weight of framing, decking, and any furniture or equipment on the deck
- Vertical live load: The design occupancy load (40 lbs/sqft for residential decks in Washington)
- Lateral load: Wind, seismic force, and horizontal forces from occupants leaning against railings
- Buckling tendency: A 12-foot post under combined vertical and lateral load has a significantly different buckling risk than a 4-foot post carrying the same vertical load
The engineer's job is to calculate these combined forces and specify a post size, beam-to-post connection, and lateral bracing scheme — diagonal knee bracing, moment-frame connections, or cross-bracing between adjacent posts — that resists all of them with appropriate safety factors.
We work with licensed structural engineers on every elevated multi-level project. Their drawings go into the permit package, and the inspector verifies compliance at the framing inspection.
Important
Permit Requirements for Multi-Level Decks in Seattle
Multi-level decks in Seattle almost universally require permits. The walking surface of the upper level on any hillside build is above the 18-inch threshold that triggers Seattle SDCI permit requirements (30-inch threshold in unincorporated King County). The only scenario where a multi-level deck doesn't require a permit is if both levels are near-grade and the highest point is under the relevant threshold — which is rare on hillside lots.
What the Permit Application Requires
A complete permit application for a multi-level elevated deck in Seattle typically includes:
Site plan: Shows the property footprint, deck position, setbacks from property lines on all sides, and distance from any regulated trees. Seattle requires minimum 5-foot side yard setback and 20-foot front yard setback for structures over 18 inches above grade.
Structural drawings: Engineer-stamped plans showing all framing members (size, species, and span), footing locations and details, post-to-beam connections, ledger attachment details with flashing, and lateral bracing. Required for any elevated deck with posts over 8 feet.
Elevation drawings: Shows the deck's profile from each side — confirms railing height, stair geometry, and relationship to the existing house.
Geotechnical report: Required on ECA-flagged properties. Documents soil bearing capacity and makes footing recommendations. The permit application won't advance without this on ECA sites.
Material specification: What decking product, what railing system, what hardware. Some jurisdictions require this as a separate document; others accept it embedded in the structural drawings.
Processing Timeline by Jurisdiction
| Jurisdiction | Standard Review | ECA/Complex | Notes |
|---|---|---|---|
| Seattle SDCI | 4–8 weeks | 8–14 weeks | Most North Seattle and West Seattle hillside lots |
| City of Bellevue | 3–6 weeks | 6–10 weeks | Clyde Hill, Factoria, Somerset, Newport Hills |
| City of Kirkland | 3–5 weeks | 5–8 weeks | Juanita, Bridle Trails area |
| City of Issaquah | 3–5 weeks | 5–9 weeks | Issaquah Highlands, Talus |
| Unincorporated King County | 4–7 weeks | 7–12 weeks | Less common for residential |
| City of Sammamish | 3–5 weeks | 5–8 weeks | Plateau communities |
We pull all permits and manage the complete permitting process. Homeowners never need to navigate DCI or King County offices directly — we prepare and submit the application, respond to plan reviewer comments, and schedule all required inspections.
Tip
Design Principles: Making Multi-Level Work Functionally
A multi-level deck that looks good in a rendering but doesn't function well as a living space is a design failure. Here's how we approach the design decisions that determine daily usability.
Zoning Functions by Level
Each level should have a defined primary function before design begins. The temptation is to plan each level as a "seating area" generically — resist it. Defined functions drive specific design decisions:
A dining level needs: adequate square footage for a 6–8 person table (minimum 12 × 12 feet clear), proximity to the kitchen (direct door connection preferred), and overhead coverage for Seattle's shoulder months. It doesn't need a fire feature — fire and dining are typically incompatible adjacencies.
A lounge or fire pit level needs: a comfortable seating radius around the fire feature (minimum 12-foot diameter for a built-in fire bowl), lower ambient light that preserves the fire atmosphere at night, and a visual relationship to the view if the property has one. It doesn't need to be the widest level — contained spaces work better for fire features than large open platforms.
An entertainment or play level at the bottom of the grade needs to connect to the yard. Stairs that land at grade and flow into the landscaping rather than stepping down to a blank concrete landing are a significant usability improvement.
Stair Design as Integrated Architecture
Stairs between levels are where many multi-level decks succeed or fail visually. The code minimum — 10-inch treads, 7.75-inch maximum rise — produces functional but visually heavy stairs when combined with standard pressure-treated stringers and basic treads. Our approach:
Wider treads: 11–12 inch treads read as more generous and are more comfortable to descend. The additional material cost is minimal; the visual improvement is significant.
Open riser design (where appropriate): Open risers (no kick plate between treads) reduce visual mass and allow light to pass through, which matters particularly on shaded Seattle lots where under-deck spaces already tend to be dark.
Consistent railing language: The stair railing should use the same profile, same post spacing, and same cap and rail dimensions as the deck-level railing. Stairs where the railing switches from cable to balusters mid-connection look like an afterthought.
Intermediate landings: On stair runs with more than 12 feet of vertical rise (approximately 18 risers), an intermediate landing is required by code. Position it at a natural viewing point rather than at the structural minimum.
Level-to-Level Visual Connection
The sightline from the upper level to the lower level, and from both levels to the yard and beyond, determines much of the deck's spatial experience. Design the deck's plan so that the upper level's framing doesn't block the view from the lower level — this typically means locating the upper-level perimeter beam as high as possible and minimizing the structural depth of the upper-level framing visible from below.
On view properties in Queen Anne, Bellevue, and Mercer Island, the view from both levels matters. Cable or glass railing on view-facing perimeters of both levels preserves sightlines from both seating positions.
Material Choices for Multi-Level Seattle Decks
Material selection on a multi-level deck is more consequential than on a single-level build because there's more surface area, more railing runs, more stair treads — and consistency across all of it matters visually.
Decking Boards: Capped Composite Is the Correct Specification
For Seattle hillside lots, fully capped composite decking is the right material choice for several reasons that compound on multi-level builds:
Moisture persistence. Shaded hillside lots in Seattle — common on north-facing slopes in Queen Anne, Fremont, and much of North Seattle — receive less direct sun than south-facing suburban lots. Less sun means slower drying after rain and sustained surface moisture. Cedar requires resealing every 12–18 months on these lots or moss and mold arrive early. Capped composite — with a four-sided polymer shell and no exposed wood fiber — requires only an annual rinse.
Consistent aging across levels. On a multi-level deck, the upper and lower levels have different sun exposure — the upper level may receive direct afternoon sun while the lower level is shaded by the upper level's structure. With cedar, these different exposure conditions produce different aging rates (different gray color, different moss development) across the two levels within a few years. With capped composite, the material weathers uniformly regardless of sun exposure.
Structural compatibility. Capped composite decking is span-rated for the same 16-inch on-center joist spacing as cedar, meaning the structural framing design doesn't change between material selections.
Our recommended products for multi-level Seattle builds:
- Trex Transcend — 30-year fade and stain warranty, rich wood-grain appearance, wide color range
- TimberTech Legacy — 30-year capped composite, good dimensional stability in PNW moisture cycling
- Fiberon Symmetry — mid-tier premium product with solid PNW track record
We do not spec uncapped composite products. The exposed wood fiber core absorbs Seattle moisture through cut ends and fastener points, develops mold on the underside, and begins structural degradation within 5–10 years in King County conditions.
Railing: Match Function to Level
On a multi-level build, different railing systems on different levels can be appropriate when the functions differ — but they need to share design language to look intentional rather than mismatched.
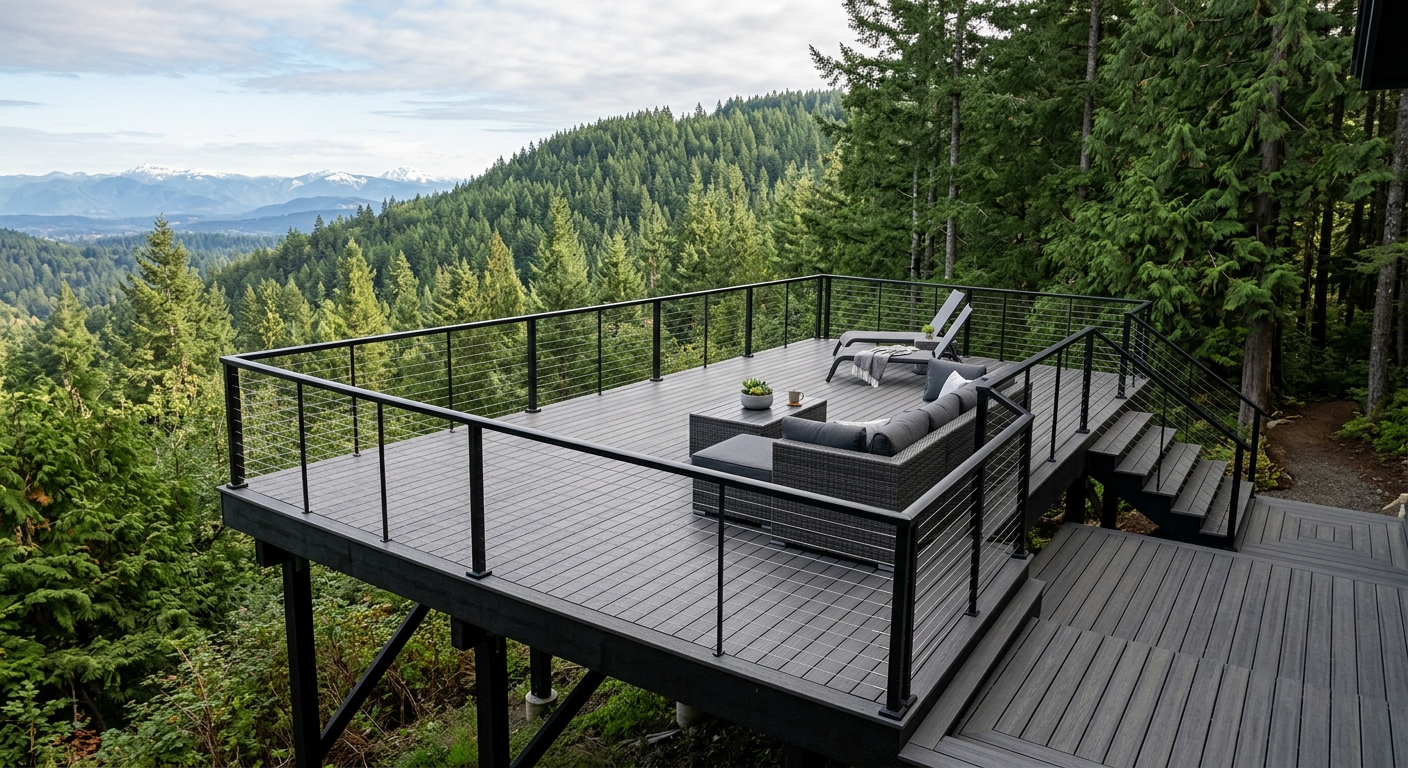
Cable railing on view-facing levels: Preserves sightlines on upper-level dining areas and mid-level lounge areas where the view is part of the experience. $120–$200 per linear foot installed.
Aluminum powder-coat balusters on utility levels: Lower-cost, visually appropriate on levels that face the yard rather than a view. $35–$55 per linear foot installed.
Consistent post profile: Use the same post dimension and finish across all railing systems. A 4×4 aluminum post in black powder-coat can anchor both cable runs and baluster panels with a consistent visual language.
Under-Deck Space Utilization
On elevated multi-level builds, the space below the upper-level deck is potentially usable. Three options:
Open soffit with exposed framing: The simplest and least expensive option. Water runs off through board gaps or a drainage system below. Typically used for covered patio or storage.
Under-deck drainage system with finished ceiling: Aluminum trough channels installed below the decking boards collect and divert water to a gutter, creating a weather-protected space below. The finished ceiling can be tongue-and-groove cedar or composite panel. Adds $4,000–$9,000 depending on size.
Membrane decking on upper level: If the space below needs to be truly dry — a finished storage room, a workshop, or a covered outdoor kitchen — membrane decking on the upper-level surface waterproofs the space below completely. See our membrane decking guide for details.
Integrating Multi-Level Decks With Seattle Landscaping
A multi-level deck on a hillside lot exists in a dialogue with the terrain below it. The landscaping decisions — what goes under and around each level — determine whether the deck looks embedded in the landscape or sitting on top of it.
Plantings at the base of lower-level posts soften the structural legs and create a visual foundation for the deck. Choose plants that tolerate the shade cast by the deck structure: hostas, ferns, astilbe, and hydrangeas all perform well in Seattle's partial-shade conditions.
Grade restoration between levels is often overlooked in deck specifications. The disturbed soil between footing excavations should be graded and seeded or planted before the project is considered complete. Erosion on a steep hillside lot during Seattle's wet season can undermine footings if the soil isn't stabilized.
Steps to grade from the lower level connect the deck system to the yard. A single-step or two-step landing at the bottom of the stair run that spreads weight across a larger area (rather than concentrating foot traffic on a single tread landing directly on soil) prevents wear patterns.
Retaining wall integration: On lots with very steep grade, integrating a landscape retaining wall with the deck design can eliminate significant grade change below the lower level, creating a flat usable yard rather than a steep slope below the deck. We coordinate with landscape contractors on these projects regularly.
Designing for Year-Round Use: Seattle's Multi-Level Deck and Cover Integration
Multi-level decks in Seattle that serve as genuine outdoor living space — not just summer platforms — typically incorporate covered sections, integrated lighting, and drainage design that handles the PNW's wet season without creating problems.
Why Cover the Upper Level
The upper level of a multi-level deck is the primary living zone — the space directly connected to the kitchen or living room that functions as an outdoor dining room. In Seattle's climate, this level is usable May through September without any rain protection. With a cover — pergola, polycarbonate panel roof, or louvered aluminum system — it extends to March through November, roughly doubling the practical use season.
The cover options most appropriate for Seattle multi-level builds:
Cedar pergola with polycarbonate panels: The most common choice for budget-conscious builds. Cedar structure with translucent polycarbonate panels over the dining section. Blocks rain, admits filtered light. Cost for a 12x16 section: $14,000–$22,000 installed.
Motorized louvered aluminum pergola: The premium option. Opens for sun, closes waterproof when rain arrives. Extends the usable season maximally. Cost for a kitchen-size covered section: $18,000–$38,000 installed.
Solid roof extension: For the most weather protection, a shed roof tied into the home's existing roofline over the upper level. More architectural, more permanent, and requires structural engineering and building permit as part of the deck scope. Cost: $22,000–$45,000.
Lighting Integration on Multi-Level Builds
Multi-level decks offer unique lighting opportunities that single-level builds don't have — you can light from below (uplighting the underside of the upper level to illuminate the lower level and landscaping), from above (fixtures on the pergola or overhead), and at grade (step lighting, post lighting, perimeter fixtures).
The lighting hierarchy we recommend on multi-level Seattle builds:
Upper level: Task lighting for dining (overhead fixture or pergola-mounted strip lighting), ambient under-railing strips, post-cap fixtures on the outward-facing railing posts.
Stair runs: Recessed LED riser lights on every stair face — the single highest-impact safety and aesthetic lighting detail on a multi-level build. Non-negotiable for usability in Seattle's dark winter months.
Lower level: Perimeter under-railing strips, landscape accent fixtures at the base of the lower-level structure. The lower level is typically more ambient/lounge-oriented, so the lighting is warmer and lower-intensity than the upper dining level.
All lighting conduit runs through the framing during construction. An LED lighting retrofit to a finished deck with hidden fasteners requires opening the decking surface — a $2,000–$4,000 disruption to avoid by planning during construction.
Under-Deck Space Utilization on Elevated Sections
On two-level and three-level builds where the upper level is elevated 6–10 feet above the lower level or yard, the space beneath the upper deck structure is often underutilized — a common missed opportunity.
Covered storage: The simplest and lowest-cost option. The under-deck space is left open with the structure visible, creating a naturally covered area for garden equipment, furniture covers, or firewood storage. The deck structure's underside is treated lumber or structural composite that doesn't require finishing. This option adds $0–$1,500 to the project cost.
Under-deck drainage system with finished ceiling: An aluminum trough drainage system (Trex RainEscape, Zipcode or similar) installed between the joists collects water draining through the decking board gaps and channels it to a downspout at the deck's perimeter. The result: a dry space beneath the upper deck that can function as a covered patio, workshop, or outdoor room. A finished ceiling — tongue-and-groove cedar, aluminum soffit, or composite panel — makes the space presentable. This option adds $5,000–$12,000 to the project cost.
Membrane decking on the upper level: For a fully dry, usable space below the upper level, membrane decking on the upper level's surface waterproofs everything below completely. No water reaches the under-deck space. Combined with walls and a finish ceiling, the space can function as conditioned storage or a workshop. See our membrane decking guide for full details.
Geotechnical Investigation: When It's Required and What to Expect
On multi-level decks in Seattle's hillside neighborhoods, geotechnical investigation — a soils report from a licensed geotechnical engineer — is sometimes required by the permit authority and always worth commissioning on complex builds.
When Geotech Is Required
Seattle DCI requires geotechnical documentation on permit applications for properties designated as Environmentally Critical Areas (ECAs). The ECA designation applies to:
- Properties on slopes greater than 15%
- Properties within 50 feet of a steep slope crest
- Properties within known landslide hazard zones
- Properties within 25 feet of a wetland or stream
Many North Seattle and Eastside hillside properties fall within ECA designations. Check the City of Seattle's critical areas viewer or the King County GIS portal before assuming your property doesn't require geotech.
What a Geotech Report Covers
A residential geotechnical report for a deck project typically includes:
- Site reconnaissance: The geotechnical engineer walks the property and assesses visible soil conditions, slope gradient, and any evidence of ground movement
- Test borings or hand auger holes: Soil samples from multiple locations to identify soil type, consistency, and bearing capacity at depth
- Laboratory testing: Soil grain size analysis and moisture content testing on collected samples
- Bearing capacity recommendation: The PSF (pounds per square foot) value the soil can reliably bear at the footing design depth
- Footing type recommendation: Whether conventional poured concrete footings or helical piers are appropriate given the soil conditions
- Setback recommendations: Minimum horizontal distance from slope crests for footing placement
For deck projects, a residential geotechnical report costs $2,500–$6,000 from established King County geotechnical firms, and takes 3–6 weeks from commissioning to report delivery during the spring building season. Commissioning the geotech report early — before the deck design is finalized — allows the footing design to be developed concurrently with the structural drawings rather than sequentially after.
Using the Geotech Report in Design
The geotech report's bearing capacity recommendation and footing type guidance directly shapes the structural engineer's footing design. If the report recommends helical piers at a specific bearing depth, the structural engineer designs the pier layout and sizing accordingly. If the report identifies an area of the lot with inadequate bearing capacity (often the case in fill zones), the footing layout is revised to avoid that area.
We coordinate the geotech and structural engineering processes on every elevated multi-level project that requires both. The homeowner receives a single project design that integrates geotech and structural engineering findings — not separate documents that have to be manually reconciled.
FAQ
Frequently Asked Questions
How much does a multi-level deck cost in Seattle?
Do multi-level decks require engineering in Washington State?
What is an ECA and how does it affect my deck project?
What is the best decking material for a shaded Seattle hillside lot?
How long does a multi-level deck permit take in Seattle?
Can I add a pergola to the upper level of a multi-level deck?
What kind of footings does a multi-level hillside deck need?
Is cable railing required to preserve a view from a multi-level deck?
How do I use the space under the upper level of a multi-level deck?
What stair design works best between deck levels?
Real Project Examples: Multi-Level Deck Builds in King County
Issaquah Highlands Two-Level Composite Build
Site: Issaquah Highlands neighborhood — fill soil from development grading, moderate grade change (8 feet from house to lower yard), mature fir trees on the property line.
Design: Upper level at door height (220 sqft) for dining, lower level at mid-grade (280 sqft) for lounge/fire feature. Single stair flight connecting the two levels on the interior face. Lower level steps down to grade via a short landing.
Materials: Trex Transcend in Gravel Path throughout both levels, black powder-coat aluminum railing with cable infill on the view-facing (west) perimeter of the upper level, standard aluminum balusters on the lower level and non-view perimeters.
Structural: Geotech report commissioned (fill soil required it). Standard poured concrete footings specified by the geotechnical engineer at 42-inch depth to reach stable bearing below the fill layer. No engineering required on the upper-level framing as post heights were 6 feet maximum.
Permit: City of Issaquah, 4-week review. No ECA flag.
Cost: $58,000 complete including permits, landscaping restoration, and stair lighting.
Queen Anne View Deck — Three-Level Hillside Build
Site: Queen Anne south slope — 22-foot grade change over 30 feet of yard depth, glacial till soils with some clay layers at 3–4 feet, ECA-flagged steep slope.
Design: Upper level (180 sqft) at door height — dining and pergola-covered outdoor room. Mid-level (240 sqft) — cable railing facing the Elliott Bay view, lounge seating zone. Lower level (160 sqft) near grade — fire pit area, steps to yard.
Materials: TimberTech Legacy in Weathered Teak throughout, cable railing on all outward-facing perimeters (all view-facing), aluminum balusters on the two interior stair sides.
Structural: ECA geotechnical report required — commissioned at design phase, 4-week delivery. Report specified helical piers at 10 locations. Engineer specified a moment-frame connection at the upper level's highest post (14 feet to grade below). Stamped engineering drawings included in permit package.
Permit: Seattle SDCI, ECA review, 9-week total. Geotech commissioning ran concurrent with design; no timeline impact.
Additional: Cedar pergola with polycarbonate panels over upper dining level, LED stair lighting on both stair runs, under-rail strip lighting on all three levels.
Cost: $104,000 complete including engineering, geotech, permits, pergola, and all lighting.
Bellevue Two-Level Cable Railing Composite
Site: Newport Hills Bellevue — modest grade change (6 feet over 25 feet), standard glacial till soils, no ECA flag.
Design: Upper level (320 sqft) at door height with cable railing on all perimeters, lower level (200 sqft) following grade, connected by wide stair run with intermediate landing.
Materials: Fiberon Symmetry in Ashwood throughout both levels, cable railing in brushed stainless. Wide (12-inch) stair treads using matching decking boards, open risers.
Structural: Standard poured concrete footings, no engineering required (maximum post height 7 feet), standard IRC prescriptive framing.
Permit: City of Bellevue, 3-week review.
Cost: $67,000 complete with permits and demo of previous wood deck.
Integrating Fire Features on Multi-Level Decks
Fire features — built-in gas fire bowls, propane fire pits, and wood-burning fire features — are among the most frequently requested additions to multi-level Seattle decks. They're also the features most commonly located incorrectly. Here's how we integrate fire features on multi-level builds.
Location on the Level Plan
A gas fire bowl on the upper (dining) level of a multi-level deck creates conflict: smoke from the fire blows toward the dining area, the sound of the fire feature competes with conversation at the dining table, and the heat radius from the fire restricts the dining furniture arrangement.
The better location: the mid or lower level, positioned as the focal point of that level's function. A fire bowl on the mid-level lounge area creates a natural gathering destination — you move from dinner on the upper level down to fire and conversation on the mid-level. The two levels serve distinct purposes and the fire feature isn't competing with the dining function.
Structural Requirements for Fire Features
Gas fire bowls (Warming Trends, Hearth Products Controls): Typically 50,000–120,000 BTU burners set in decorative stone, glass, or metal bowls. Weight: 80–400 lbs depending on material. Connect to the outdoor gas line — requires a separate gas permit and licensed gas fitter. On a multi-level deck, the gas line routes through the framing and emerges at the fire feature location with a shutoff valve accessible without reaching under the feature.
Built-in concrete or stone fire tables: These are the heaviest fire feature option — a concrete fire table with stone surround can weigh 600–1,200 lbs. Structural reinforcement beneath the feature is required, and the location must be planned in the framing design. Moving a 1,000-lb fire table after installation is not practical.
Wood-burning fire pits: In Seattle, wood-burning fire pits on elevated decks face both structural challenges (ash management, heat management at the deck surface below) and code restrictions. Several King County cities restrict wood-burning fire features in outdoor structures. Gas fire features are the standard specification on King County decks.
Clearance Requirements
Fire features on composite decking require clearance from the deck surface: typically 12–18 inches of height between the burner element and the decking below, with a stone, tile, or metal hearth pad between the fire feature and the composite surface. We specify this clearance and surface protection on every fire feature integration — composite decking surfaces can be damaged by sustained radiant heat without adequate protection.
Your Multi-Level Project Starts With a Site Visit
Multi-level deck design is site-specific in a way that makes general planning difficult without seeing the property. Grade change, soil conditions, tree proximity, view corridors, setbacks, and existing structure condition all shape what's possible and what it costs. The estimate you get from a site visit is a project specification. The number you get from a national calculator is a guess.
The Seattle Decking Company builds multi-level decks throughout King County — Seattle, Bellevue, Kirkland, Mercer Island, Issaquah, Sammamish, Renton, Bothell, and all surrounding communities. We manage the complete process: site assessment, structural engineering coordination, permit management, and construction with a 3-year labor warranty.
Call us at (425) 675-6259 or request a free estimate online. We'll walk your property, assess the structural and permit conditions, and give you a line-item proposal before you commit to anything.
Planning a deck in the Seattle area?
Get an onsite design review and a clear, itemized quote from a licensed local builder.
Request a Free Quote