
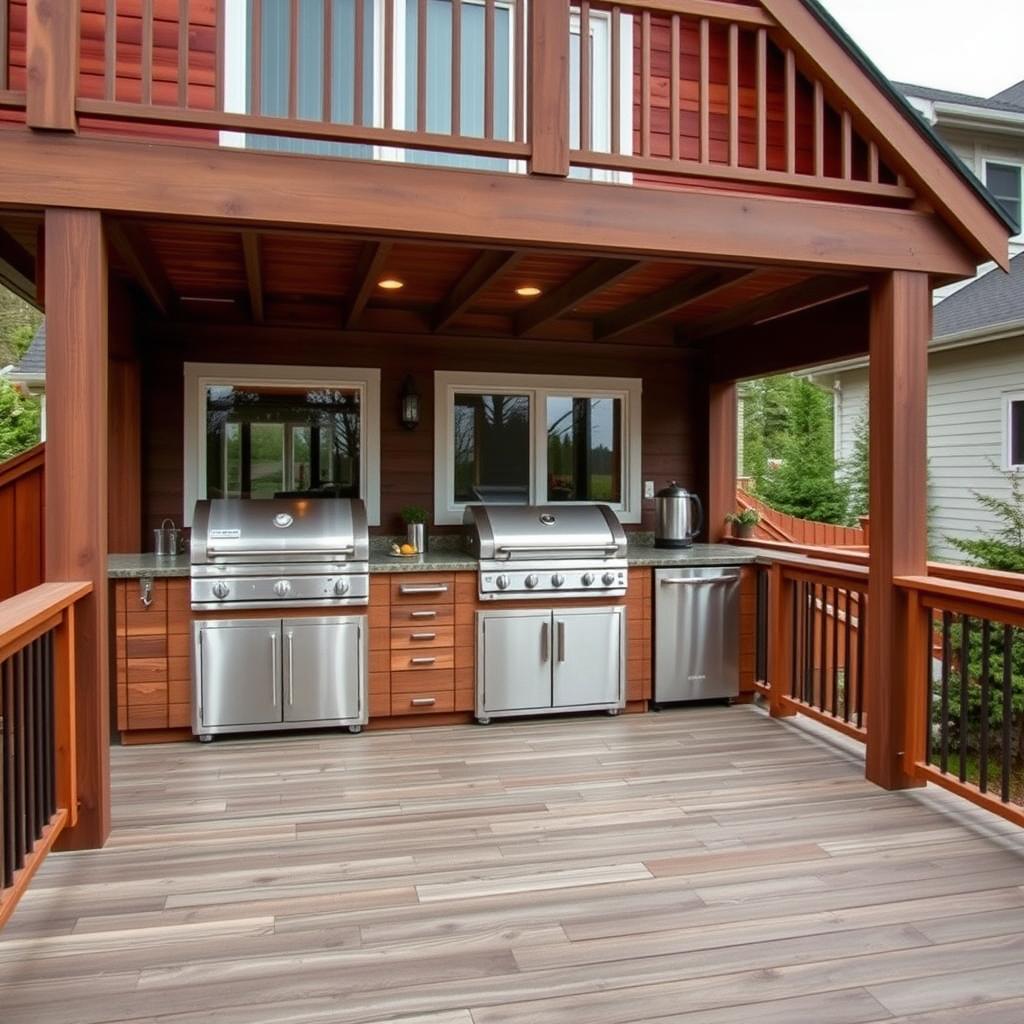
How to Add an Outdoor Kitchen to Your Seattle Deck: Costs, Permits, and What to Plan First
An outdoor kitchen on a Seattle deck is not an impulse addition. It's a multi-trade, permitted project that touches your deck's structural system, your home's gas line, your electrical panel, and potentially your roofline. Done right — planned early, properly sequenced, built with materials that handle the PNW's 38 inches of annual rain — it's one of the highest-impact outdoor living investments available to King County homeowners. Done wrong, or added as an afterthought to a deck that wasn't designed to carry it, it's a $15,000–$40,000 problem that reveals itself slowly through deflecting joists, rotting cabinet bases, and code violations that surface during a home sale.
We've built dozens of integrated outdoor kitchens on decks across King County — from Bellevue Eastside properties with full Wolf grill setups to Capitol Hill townhome decks with compact built-in stations, to covered Sammamish outdoor rooms designed for year-round use under louvered aluminum pergolas. The consistent finding: the projects that go well are the ones where the kitchen was planned before the deck was framed. The ones that require the most expensive fixes are retrofits on decks that were never designed to carry the structural load or route the gas and electrical properly.
Seattle's outdoor kitchen market has matured significantly. In 2026, you're not looking at a niche product category — you're looking at established aluminum-framed cabinet systems from Trex Outdoor Kitchens, Caliber, and Danver, a full range of PNW-appropriate appliances from brands that actually engineer for outdoor conditions, and a contractor market that has developed real expertise in the integration. What that market hasn't fully settled on is honest communication about what the project actually costs, what permits are required, and what materials fail in King County's wet climate. That's what this guide covers.
Why Seattle Homeowners Are Building Outdoor Kitchens Despite the Rain
The objection we hear most often: "Seattle gets too much rain to justify a full outdoor kitchen." The data doesn't support that. Seattle averages 38 inches of annual rainfall, but the distribution is heavily concentrated — almost 90% of that precipitation falls between October and April. From May through September, Seattle averages 3.3 inches of rain total across five months, with summer temperatures averaging 72°F and over 200 sunny days per year.
The calculation changes further when you add a covered structure. A pergola with polycarbonate panels or a motorized louvered aluminum roof converts your outdoor kitchen from a summer amenity to a three-season destination. Under cover, Seattle's spring and fall drizzle doesn't reach your prep counter or your grill. The outdoor kitchen usable season extends from May through September (uncovered) to roughly March through November (covered). That's a meaningful difference in how the investment performs year after year.
In King County — where the median home value reached $889,000 in 2025 and household incomes in Sammamish and Bellevue frequently exceed $200,000 — the incremental cost of an outdoor kitchen on a deck investment already at $40,000–$65,000 changes the character of the outdoor space entirely. A deck that hosts is more valuable than a deck that sits there. For homeowners who entertain regularly, the outdoor kitchen pays for itself in hosting experience within the first few seasons.
The National Association of Realtors' remodeling impact data consistently shows that outdoor living improvements recover 60–80% of their cost in resale value — and outdoor kitchens in premium markets like Seattle's Eastside suburbs recover at the higher end of that range.
The Structural Reality: Why Kitchen Planning Can't Come After Framing
What an Outdoor Kitchen Actually Weighs
A standard residential deck is engineered to a 40–50 pounds per square foot (PSF) live load. That handles furniture, crowd loading, and a freestanding gas grill. It is not sized for a built-in outdoor kitchen.
Here's where the weight accumulates on a typical 10-foot kitchen island:
| Component | Weight |
|---|---|
| Granite countertop (15 sqft at 18 lbs/sqft) | 270 lbs |
| Built-in grill (stainless, mid-range) | 180–250 lbs |
| Side burner | 40–80 lbs |
| Aluminum cabinet base (10 linear feet) | 300–450 lbs |
| Outdoor refrigerator (24") | 150–220 lbs |
| Accessories, lighting, hardware | 50–100 lbs |
| Total (approximate) | 990–1,200 lbs |
A 10-foot island containing these components places 990–1,200 pounds on roughly 20–30 square feet of deck framing — the footprint of the island plus the operational zone. That works out to 40–60 PSF before any human traffic enters the kitchen area. The structural requirement is clear: the joists under the kitchen zone need to be sized for a load substantially higher than standard deck design.
The Retrofit Cost Penalty
If you decide to add an outdoor kitchen to a deck that was already built as a standard residential structure, the reinforcement scope involves:
- Removing decking over the kitchen footprint
- Sistering joists at 12-inch spacing in the island zone
- Adding mid-span blocking
- In some cases, adding a post and footing below the kitchen zone to reduce beam span
That retrofit work — done on a completed deck — costs $3,500–$7,500 in King County in 2026, plus the cost of re-installing decking over the reinforced area. If the existing decking is composite with hidden fasteners, reinstallation requires matching board runs and hidden fastener access, which is costly.
The same reinforcement specified at framing — before the decking is installed — costs $800–$2,500 in added framing materials and labor. The savings from planning the kitchen at the start of the project are $2,000–$5,000 on the structural side alone. Add the cost of routing gas and electrical during initial construction versus cutting through finished framing, and the planning-early advantage increases further.
Important
What Seattle's Climate Does to Outdoor Kitchen Materials
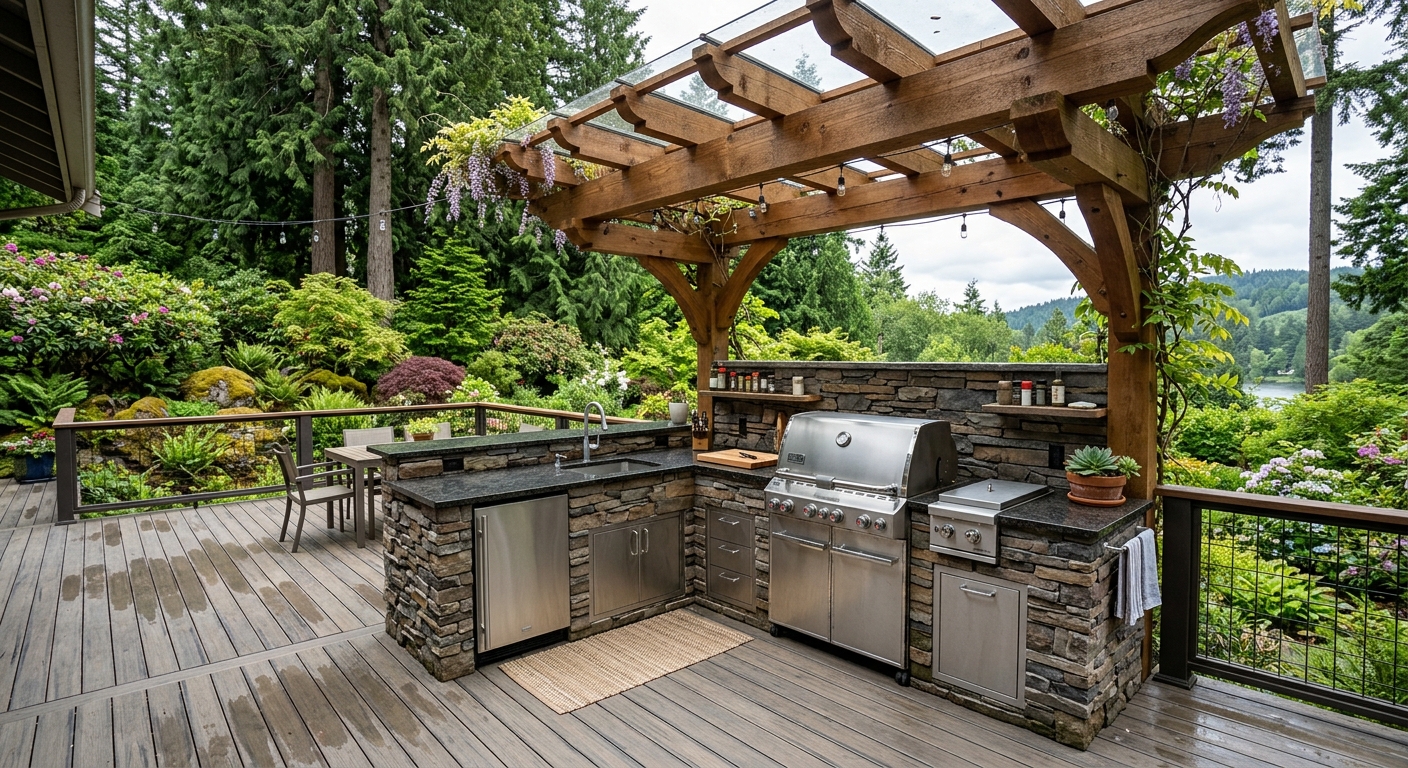
King County's climate — 38 inches of annual rain, sustained humidity averaging 78%, and 20–30 freeze nights per winter — creates a specific material environment that national outdoor kitchen guides don't fully address.
Cabinet Base Systems
Do not use wood-framed cabinet bases for an outdoor kitchen in Seattle. Cedar, even treated cedar, traps moisture at joints, develops mold internally within 5–8 years in King County conditions, and eventually rots from the inside out. The structural integrity of the cabinet system depends on the base; a rotted base is a safety issue for a 200-pound grill mounted above it.
The correct specifications for Seattle outdoor kitchen cabinets:
- Aluminum-framed systems (Trex Outdoor Kitchens, Caliber Outdoors, Danver) are the standard recommendation. Powder-coated aluminum doesn't rust, doesn't absorb moisture, and doesn't support mold growth. The structural integrity of aluminum framing is unaffected by 20 years of King County wet-dry cycling.
- Stainless steel cabinet systems are the premium tier — fully marine-grade systems from Lynx or similar are appropriate for high-end builds but cost significantly more than aluminum.
- Masonry bases (concrete block with stucco or tile finish) are a durable option for permanent kitchen installations that don't need to be moved. They're also the heaviest option — requires more aggressive structural reinforcement underneath.
Countertop Selection
Granite: Performs well outdoors in Seattle when properly sealed every 2–3 years. Granite is dense and resists water absorption when maintained, but unsealed granite in Seattle's climate can develop micro-fracturing at the pore level as absorbed moisture freezes in winter. Specify penetrating stone sealer applied at installation and on a 2–3 year cycle. Standard edge profiles (eased, beveled) work well; waterfall edges create seam exposure that needs special sealing attention.
Concrete countertops: An excellent choice for Seattle outdoor kitchens. Concrete is non-porous when properly sealed, handles freeze-thaw well with proper mix design, and can be cast in any shape with integral drains and trivets. Concrete countertops for outdoor applications should specify a penetrating sealer (not topcoat) reapplied annually. The integral drain design is particularly useful for Seattle's rain — a small drain channel at the back of the counter allows rain runoff to exit cleanly rather than pooling.
Porcelain tile: Extremely durable if installed correctly. The failure point in Seattle outdoor kitchens is the grout joint — standard indoor-rated grout absorbs water, freezes, and deteriorates. Specify epoxy grout or outdoor-rated urethane grout for any tile work in a Seattle outdoor kitchen. Properly grouted porcelain tile is essentially impervious to King County conditions.
What to avoid: Natural stone with high porosity (limestone, travertine) requires more intensive sealing maintenance than granite and is more vulnerable to freeze-thaw damage. Wood countertops are inappropriate for outdoor kitchens in Seattle — constant moisture exposure causes warping and cracking within 2–3 seasons.
Appliance Selection for PNW Conditions
Not all outdoor appliances are rated for sustained outdoor exposure in wet climates. King County's conditions — 150+ days with measurable precipitation per year, extended periods of near-continuous drizzle — are harder on appliances than desert or hot-humid climates because moisture lingers rather than evaporating quickly.
Grills: Specify marine-grade 316L stainless steel for the cooking box, burners, and grates. Standard 304 stainless works in drier climates but develops surface oxidation and welds at seams within 5–8 years in Seattle conditions. Napoleon, Lynx, and Weber's built-in summit lines offer 316L options. Bull and BeefEater are mid-price grills with solid PNW performance records.
Refrigerators: Outdoor-rated refrigerators are categorized as "marine" or "outdoor" — the distinction matters. True outdoor-rated units (True Outdoor, Perlick, Marvel) are built to operate across a wider temperature range and have sealed electrical systems. Standard residential refrigerators placed outdoors void their warranties and typically fail within 3–5 seasons in King County. Specify a unit rated for outdoor use with a minimum operating temperature at or below 35°F.
Sinks: Any sink in a Seattle outdoor kitchen must have a drain that routes water off the deck — typically through the framing to a gravel infiltration bed or tied into the home's stormwater system. The connection point must be waterproofed where it passes through the deck framing. A drain that terminates against the deck substructure creates a persistent moisture point that accelerates rot in any wood framing nearby.
Note
Covered Structure: Why It's Required for a Seattle Outdoor Kitchen
An uncovered outdoor kitchen in Seattle has a limited service window. Without rain protection, the kitchen is comfortable from mid-May through September — five months. During spring and fall, Seattle's persistent drizzle makes open-air cooking unpleasant and leaves standing water on countertops and grill surfaces between uses.
The appropriate covered structure options for Seattle outdoor kitchens:
Cedar Pergola with Polycarbonate Roof
A cedar pergola with twin-wall polycarbonate panels is the mid-tier rain cover solution. Polycarbonate transmits 80–90% of visible light while fully shedding rain, so the kitchen space feels open and bright even when covered. Polycarbonate panel systems are lighter than a solid roof structure and cost less to construct. The tradeoff: polycarbonate panels transmit noise (rain sounds on polycarbonate are loud) and have a finite lifespan — expect 15–20 years before UV degradation requires panel replacement.
Cost for a cedar pergola with polycarbonate panels over a standard outdoor kitchen zone (12x16 to 16x20): $12,000–$22,000 installed.
Louvered Aluminum Pergola System
The premium solution for Seattle outdoor kitchens. Motorized aluminum louvered pergolas (Struxure, Renson, Louvretec) have adjustable louvers that open for light and air on dry days, close fully to shed rain when it arrives. The louvers are operated by remote control or app. When closed, the louver system is weathertight — no rain reaches the kitchen below.
This is the solution that genuinely makes a Seattle outdoor kitchen usable March through November. The louvers close automatically when rain sensors trigger. The kitchen stays dry, the grill is protected, and the countertops don't accumulate water between uses.
Cost for a motorized louvered aluminum pergola over an outdoor kitchen zone: $18,000–$38,000 installed, depending on size and integration.
Solid Roof Extension
For the maximum protection — and the closest experience to an indoor kitchen — a solid roof extension from the house over the deck kitchen zone provides full weather cover with no moving parts. This typically involves extending the home's existing roofline or adding a separate covered structure on the same footprint. Solid roof structures require structural engineering for the support system and often require additional city review beyond a standard deck permit.
Cost for a solid roof extension over an outdoor kitchen: $25,000–$50,000+, depending on how it integrates with the existing home structure.
Tip
Permits Required for Seattle Outdoor Kitchens
An outdoor kitchen in King County is not a permit-exempt addition. Here's the breakdown of what triggers what:
Building Permit
Required in Seattle and all King County cities when:
- Structural framing modifications are made to the deck (joist doubling, added footings, beam modifications)
- The outdoor kitchen structure is attached to the home's structure
- The covered pergola or roof structure is attached to the house
For projects where the outdoor kitchen is being added to a deck simultaneously (not a retrofit), the deck building permit covers the structural work. For retrofit kitchens, a separate building permit for the structural modifications is required.
Seattle SDCI: Submit online at Seattle SDCI permits portal. Processing time: 4–8 weeks for standard review.
Gas Permit
Required any time a gas line is extended or a new gas appliance is connected — no exceptions. Washington State requires that gas line work be performed by a licensed plumber or gas fitter. The permit is pulled by the plumber and inspected after rough-in and again after final connection.
The gas line extension from your home's existing supply to the outdoor kitchen typically involves:
- Penetrating the house's rim joist or foundation
- Running a properly sized gas line (BTU calculation for all appliances running simultaneously)
- Installing a dedicated shutoff valve accessible at the kitchen
- Pressure testing and inspector approval
Gas extension cost in King County: $600–$1,800 depending on distance from existing supply and number of appliance connections.
Electrical Permit
Required for any new electrical circuits serving outdoor kitchen appliances. GFCI protection is required for all outdoor circuits within 6 feet of water — which means the entire outdoor kitchen. If you're adding a refrigerator, lighting, or any powered appliance, dedicated GFCI-protected circuits are required.
Typical electrical scope for an outdoor kitchen:
- One 20A GFCI circuit for refrigerator
- One 20A GFCI circuit for countertop outlets
- One 15A circuit for lighting
- (For high-BTU appliances or pizza ovens) dedicated 30A or 50A circuits as required
Electrical scope cost in King County: $1,200–$2,800 depending on distance from panel and circuit count.
For a complete guide to what triggers permits in each King County city, see our deck permit guide.
| Category | Value |
|---|---|
| Structural reinforcement | $1,800 |
| Cabinet base (aluminum) | $7,000 |
| Built-in grill (316 stainless) | $4,500 |
| Countertop (granite, 25 sqft) | $3,200 |
| Outdoor refrigerator | $1,400 |
| Gas line extension | $1,200 |
| Electrical (3 circuits) | $1,800 |
| Covered pergola (basic) | $14,000 |
Full Cost Breakdown: Seattle Outdoor Kitchen Projects in 2026
Seattle's construction labor market runs 20–30% above national averages. Outdoor kitchens involve multiple trades — deck framing, gas plumbing, electrical — each billing at local Seattle rates. Here's a realistic component-level cost breakdown for King County in 2026:
| Component | Basic Setup | Mid-Range | Full Premium |
|---|---|---|---|
| Structural reinforcement | $800 | $2,000 | $4,500 |
| Aluminum cabinet base (8–12 LF) | $4,000 | $7,000 | $12,000 |
| Built-in grill (316 stainless) | $2,500 | $4,500 | $8,000 |
| Side burner or power burner | — | $800 | $1,500 |
| Outdoor refrigerator | — | $1,400 | $2,500 |
| Bar sink + faucet | — | $800 | $1,800 |
| Countertop (installed) | $1,500 | $3,200 | $6,000 |
| Gas line extension + permit | $700 | $1,200 | $1,800 |
| Electrical (GFCI circuits) | $900 | $1,800 | $3,000 |
| Covered structure (pergola/roof) | $10,000 | $18,000 | $38,000 |
| Lighting + accessories | $500 | $1,500 | $4,000 |
| Permits (building + gas + electrical) | $1,200 | $1,800 | $2,500 |
| Total installed | $22,000 | $44,000 | $85,000+ |
A "basic setup" means: structural reinforcement for a single grill station, aluminum cabinet base, mid-grade built-in grill, concrete countertop, gas connection, two GFCI circuits, and a basic cedar pergola with polycarbonate panels. It doesn't include a refrigerator, sink, pizza oven, or premium cover system.
A "full premium" setup means: custom masonry base, Wolf or Lynx grill suite, pizza oven, full bar with sink and dishwasher, custom stonework countertops, motorized louvered pergola, outdoor lighting system, and dedicated electrical panel subpanel.
Most Seattle outdoor kitchen projects — the ones that include a mid-grade grill, refrigerator, 10 linear feet of counter, and a covered pergola — land in the $35,000–$55,000 range.
The Grease + Composite Problem: What You Need to Know
Built-in grills on composite decks create a specific risk that deserves direct attention. Composite decking — even fully capped, premium products — can be damaged by prolonged exposure to grease drip and radiant heat from a grill without adequate protection.
The three risks:
- Grease drip: Cooking grease that drips onto composite decking and isn't cleaned promptly can stain permanently and, on lower-quality products, degrade the polymer surface. The fix: specify a grease collection tray in the grill cabinet base, inspect and clean after every heavy use session, and place a small section of tile or stone pavers under the grill opening if the grill has no integral grease management.
- Radiant heat: The bottom of a built-in grill cabinet doesn't get hot enough to damage composite decking during normal operation, but the grill's front opening during cooking radiates heat that can soften the composite surface directly in front of the grill over time. A tile or stone hearth pad in front of the grill opening protects the composite surface and is standard specification in our outdoor kitchen builds.
- Ventilation: A built-in grill installed in a covered space without adequate air movement builds up heat beneath the pergola or roof. Grill ventilation isn't just about smoke — it's about managing combustion air supply and heat exhaust. Our covered outdoor kitchen designs specify a minimum of 1 foot of open air on at least two sides of the covered space and, for enclosed three-sided structures, powered ventilation above the grill zone.
Key insight
Outdoor Kitchen Design: Traffic Flow and Zone Planning
An outdoor kitchen that's well-designed integrates with the deck's circulation system so the kitchen, dining area, and living zone flow naturally. Common design failures we see in existing Seattle outdoor kitchens:
The kitchen that blocks everything: A kitchen island placed perpendicular to the house wall with no clear circulation path around it forces guests to pass through the cooking zone to reach the dining area. The standard fix: orient the kitchen so the cooking surface faces the dining zone, not another wall, and leave at minimum 42 inches of clear path on both sides of the kitchen.
The kitchen without landing zones: A built-in grill needs counter space on both sides — at minimum 12 inches to the left, 18 inches to the right — for setting platters, resting tools, and managing food during cooking. Kitchens where the grill is flanked immediately by refrigerator doors or cabinet ends have no working space and frustrate the cook.
The kitchen without a clear view line: If you're grilling, you want to see your guests. Position the grill so the cook faces the dining and living areas, not the wall of the house. The social geometry of outdoor cooking is different from indoor cooking — the outdoor kitchen works best when the cook isn't separated from the party.
Zone planning for a 10–16 foot kitchen:
- Cold zone (left, near refrigerator): food prep counter, refrigerator, sink
- Hot zone (center or right): built-in grill, side burner, warming drawer
- Storage zone: below counter drawers and doors for tools, covers, and supplies
- Bar zone (optional, end of island): ice chest or beverage refrigerator, glassware storage
Project Examples: Seattle Outdoor Kitchen Builds
Eastside (Bellevue) Covered Deck with Full Kitchen
400-square-foot composite deck (Trex Transcend in Lava Rock) with integrated 16x20 covered outdoor room under a Struxure motorized louvered pergola. Kitchen: 14 linear feet of Danver stainless cabinet base, Napoleon Prestige Pro 665 built-in grill, TEC infrared side burner, 24-inch Perlick outdoor refrigerator, undermount sink with hot/cold, granite countertops with integral drain channel. Gas line extended from house meter, dedicated subpanel with 3 GFCI circuits. Permits: Bellevue building permit, gas permit, electrical permit. Total project: $87,000.
Capitol Hill Townhome Deck Kitchen
180-square-foot PVC deck (AZEK Harvest) on a Capitol Hill townhome rooftop deck. Space constraints drove the design: compact 8-foot Napoleon Rogue SE 625 built-in station with 10 inches of prep counter on each side, under-counter Perlick 15" refrigerator, concrete countertop. Cover: steel-frame pergola with polycarbonate panels. Gas and electrical by licensed Seattle subs. Permits: Seattle SDCI building permit (structural for kitchen reinforcement), gas permit, electrical permit. Total project: $34,500.
Sammamish Outdoor Kitchen Replacement
Replacement of a failing 7-year-old outdoor kitchen (wood-framed cabinet base had rotted internally). Existing grill salvaged. New scope: aluminum-framed Caliber cabinet system, 12 linear feet, new porcelain tile countertops with epoxy grout, gas reconnection, two new GFCI circuits, cover structure (existed, cedar pergola with polycarbonate added). Permits: Sammamish building permit for structural cabinet base, gas permit. Total project (kitchen only, deck not replaced): $24,000.
For more on the full deck + outdoor kitchen package, see our outdoor living services page.
Frequently Asked Questions: Outdoor Kitchens on Seattle Decks
Frequently Asked Questions
Do I need a permit for an outdoor kitchen in Seattle?
Can I add an outdoor kitchen to my existing composite deck?
What's the minimum covered structure I need over a Seattle outdoor kitchen?
Can I use wood cabinet bases for my outdoor kitchen?
What grill brands hold up best in Seattle's wet climate?
How much does an outdoor kitchen cost in Seattle in 2026?
Do I need a plumber to run gas to my outdoor kitchen?
How long does an outdoor kitchen project take from start to finish in Seattle?
Can I put a pizza oven in a Seattle outdoor kitchen?
What countertop is best for a Seattle outdoor kitchen?
What's the best way to protect composite decking under a grill?
Will an outdoor kitchen add value to my Seattle home for resale?
Appliance Selection Deep Dive: What Holds Up in PNW Conditions
Choosing appliances for a Seattle outdoor kitchen is different from choosing for a covered patio in Phoenix or Houston. Here's the category-by-category guidance based on 15 years of building in King County's wet climate.
Built-In Grills: The 316L Requirement
The most important appliance specification for a Seattle outdoor kitchen is grill material grade. Standard "outdoor" grills sold at big box stores and through many appliance dealers use 304 stainless steel — which is adequate for dry or hot-humid climates where surfaces dry quickly between rain events. In King County's sustained moisture environment, 304 stainless develops surface rusting at weld seams and fastener points within 5–8 years of outdoor exposure.
316L stainless (sometimes called marine-grade) adds 2–3% molybdenum to the chromium-nickel alloy, which dramatically improves resistance to the chloride-related corrosion mechanism that degrades 304 stainless in persistent wet conditions. For King County outdoor kitchens, 316L is the minimum specification on any component with outdoor surface exposure.
Brands offering 316L built-in grill options:
- Napoleon Prestige Pro Series — 316L cooking box and burner covers; available in 500, 665, and 825 models
- Lynx Professional — full marine-grade construction; more expensive but exceptional longevity
- TEC Cherokee and Sterling series — infrared burner design reduces grease flare-up; 316L construction
For the majority of King County homeowners — not building a full $80,000 outdoor kitchen, but wanting a good mid-range grill — the Napoleon Prestige Pro 500 or 665 hits the performance and PNW durability target at $3,500–$5,000 for the appliance.
Outdoor Refrigerators: Outdoor-Rated vs. "Outdoor-Style"
The outdoor appliance market has a labeling problem: products marketed as "outdoor" refrigerators range from genuine outdoor-rated units with sealed electrical systems and wide operating temperature ranges, to standard indoor refrigerators in stainless exteriors that will fail when exposed to King County's temperature and moisture swings.
What to look for on a refrigerator specification sheet:
- Operating temperature range: Must extend down to 35°F or below. Standard residential refrigerators are designed to operate in 60–90°F ambient temperature. In a Seattle outdoor kitchen, ambient temperature can drop to 35–40°F on October and November mornings — within the unit's operating range for a good outdoor unit, outside it for a standard residential model.
- Sealed electrical: The compressor compartment and electrical connections should be sealed against moisture intrusion.
- Stainless grade: Same as grills — look for 316L or marine-grade stainless on any component exposed to outdoor air.
Recommended brands: Perlick (made in the USA; 15", 20", and 24" models; genuine outdoor-rated), True Outdoor (commercial heritage; longest compressor warranty in the category), Marvel Outdoor (slightly lower price point; solid PNW track record).
Pizza Ovens: Weight and Ventilation First
Wood-fired and gas pizza ovens are increasingly common requests on Seattle outdoor kitchen projects. The structural and ventilation requirements specific to pizza ovens need to be planned before any other kitchen element.
Wood-fired ovens (Forno Bravo, Mugnaini, Wood Stone) range from 600 to over 2,000 lbs depending on size. A typical residential wood-fired oven for a 12-16 inch pizza is 800–1,200 lbs. This load requires its own footing directly beneath it — not just doubled joists, but a concrete column or steel post transferring load directly to the ground. Plan for $1,500–$4,000 in additional structural cost for a wood-fired oven support system.
Gas pizza ovens (Alfa Forni gas models, Ooni Karu Pro, commercial-grade units from Wood Stone) range from 80–400 lbs and connect to the outdoor kitchen gas line. These are structurally manageable within the kitchen island framing with appropriate reinforcement. Gas pizza ovens require a separate BTU calculation — a typical high-output gas pizza oven uses 40,000–80,000 BTU/hour, which must be added to the grill and burner load when sizing the gas supply line.
Ventilation under any cover: Any oven — wood or gas — operating under a covered pergola or solid roof requires active combustion air supply and smoke/exhaust egress. A louvered pergola with louvers partially open (30%+) provides natural ventilation for most cooking sessions. A solid roof cover requires a mechanical exhaust hood rated for the oven's output — typically 400–1,200 CFM for residential pizza ovens. This is not optional and is part of our standard design scope for any covered kitchen with an oven.
Integrating an Outdoor Kitchen With a New Deck: The Optimal Build Sequence
When an outdoor kitchen is being designed simultaneously with a new deck — the ideal scenario — the construction sequence matters as much as the material specifications. Here's how we manage the sequence on integrated new builds:
1. Kitchen zone structural plan (before framing): Identify the kitchen footprint in the deck's structural drawings. Specify doubled or tripled joists at 12-inch spacing beneath the island zone. If a wood-fired oven is included, design the dedicated footing during site preparation.
2. Rough-in gas stub (during framing, before decking): The licensed gas fitter installs gas line from the house supply, routes through the framing, and installs a capped stub at the kitchen zone. The stub is pressure-tested before decking goes down. If the kitchen isn't being finished immediately, the stub is capped and will be opened when the kitchen is ready.
3. Electrical conduit run (during framing, before decking): The licensed electrician installs liquid-tight conduit from the main panel to the kitchen zone, with junction boxes positioned for each circuit. Conduit is pulled through the framing before decking boards are nailed down — infinitely easier than trying to route through finished framing.
4. Covered structure framing (concurrent with deck framing): The pergola or covered structure posts and beam system is integrated with the deck framing. Posts bear on footings that were designed into the original foundation plan. Electrical conduit for the pergola lighting system routes through the posts during this phase.
5. Decking installation: After all rough-in is complete, decking boards go down. No penetrations need to be cut; all service penetrations were designed in.
6. Kitchen cabinet installation: With the rough framing complete, the aluminum cabinet system is positioned, leveled, and fastened. Gas and electrical connections are made to the rough-in stubs.
7. Countertop fabrication and installation: Fabricators template from the installed cabinet base. Countertop lead time (typically 2–4 weeks for granite; 3–5 weeks for custom concrete) runs concurrently with other project phases.
8. Appliance installation: Grill, refrigerator, and accessories are installed after countertop is in place. Final gas and electrical connections are made. Permits are closed with final inspections.
This sequence eliminates the costly disruptions that occur when the kitchen is retrofitted — no decking needs to be removed, no conduit is surface-mounted, no gas line routes through finished wall cavities.
Maintenance Schedule for a Seattle Outdoor Kitchen
A well-specified outdoor kitchen in Seattle requires modest but consistent maintenance. Here's the annual schedule we recommend:
| Season | Task |
|---|---|
| Spring (April) | Deep clean grill interior; inspect grates and burners; apply stone sealer to countertop; check gas connections |
| Spring (April) | Inspect stainless for any surface oxidation; treat with stainless cleaner and protectant |
| Summer (ongoing) | Clean grill grates after every use; wipe down countertops; empty grease tray monthly |
| Fall (October) | Close gas supply valve to outdoor kitchen for winter; cover grill; inspect cabinet base for any fastener rust |
| Winter (November–March) | Refrigerator: leave running if storing beverages; drain water supply line if sink equipped; confirm louver system is operating correctly |
| Annual | Reseal concrete countertops (annually) or granite (every 2–3 years); inspect gas connection fittings for any signs of wear |
The most common maintenance oversight: leaving the grill uncovered through King County's wet season without running the grill periodically to burn off moisture accumulation. Even a covered kitchen benefits from running the grill at high heat for 20 minutes monthly through the winter to prevent rust formation on the grates and burner tubes.
Ready to Build Your Seattle Outdoor Kitchen?
We plan and build outdoor kitchen integrations throughout King County — new builds designed kitchen-first, and retrofits to existing decks with proper structural assessment. We coordinate the permitting across building, gas, and electrical, and work with licensed plumbers and electricians on every project.
If you're in the design stage for a new deck and know you want an outdoor kitchen eventually, tell us at the first consultation. We'll design the structural and utility rough-ins for the kitchen during the original deck build — which is the single most cost-effective way to set up a high-performance outdoor kitchen in Seattle's climate.
Call (425) 675-6259 or request a free estimate online. We schedule consultations within 5–7 business days throughout King County. Our address: 22722 29th Drive SE, Bothell, WA 98021.
Planning a deck in the Seattle area?
Get an onsite design review and a clear, itemized quote from a licensed local builder.
Request a Free Quote