
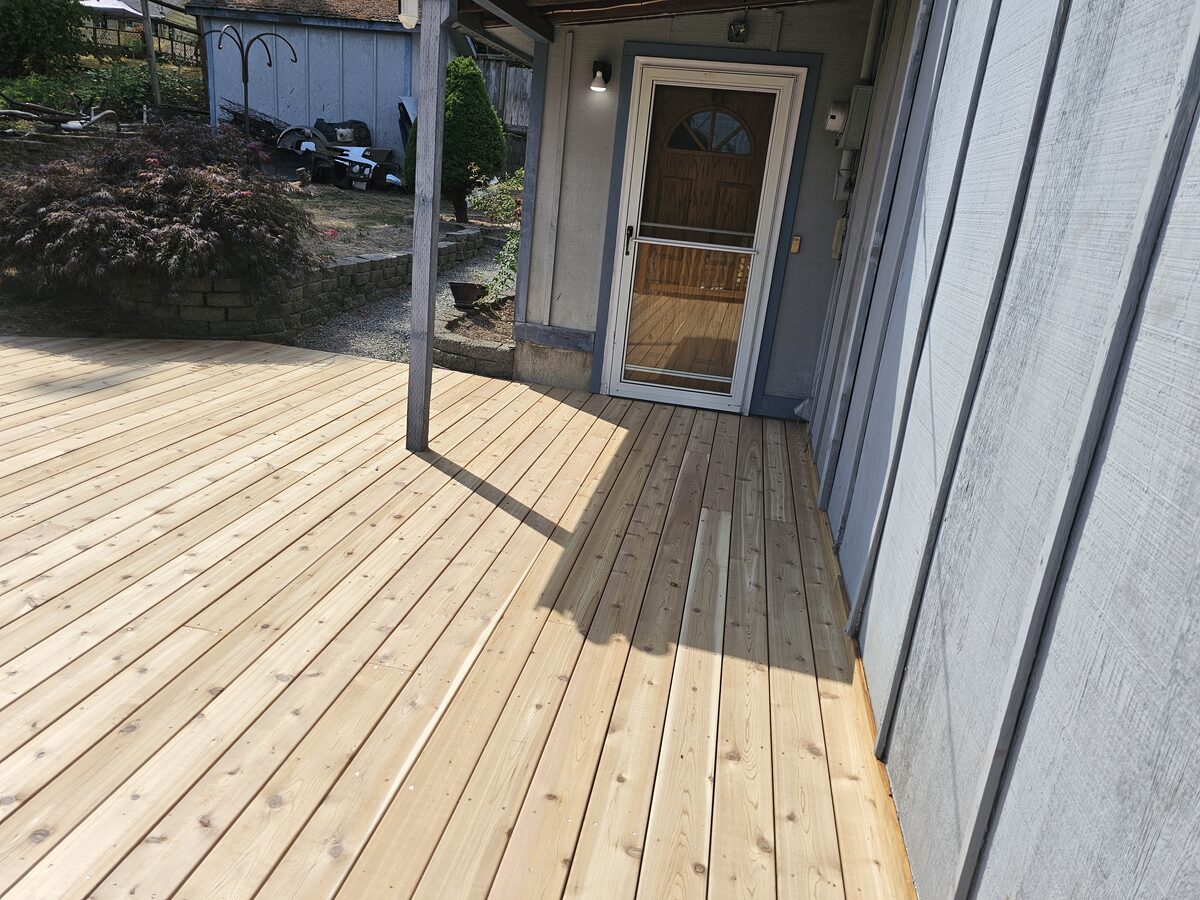
Building a deck in the Seattle metro area is one of the most rewarding home improvement projects you can undertake — but it comes with a permitting process that trips up homeowners and even some contractors every single year. King County is home to dozens of incorporated cities, each with its own building department, fee schedule, and interpretation of the Washington State Building Code. Add in unincorporated King County land, HOA approval requirements, and Seattle's own SDCI one-stop permit system, and you have a landscape that feels more like a maze than a process. The good news: once you understand how the pieces fit together, navigating a King County deck permit is entirely manageable — and skipping it is almost never worth the risk.
The stakes are real. A 2024 survey by the Washington Association of Building Officials found that unpermitted decks account for a disproportionate share of structural failures statewide. More practically, an unpermitted deck can kill a home sale, void your homeowner's insurance claim, and require you to tear down and rebuild at your own expense. In a region where deck season runs roughly eight months out of the year and outdoor living is a core part of PNW culture, protecting that investment with the right paperwork is simply part of the job. At The Seattle Decking Company, we pull permits on every project we build — and we've guided hundreds of Eastside and Seattle homeowners through the process.
This guide covers everything: which jurisdictions require permits and which trigger exemptions, the full fee schedules for Seattle, Bellevue, Kirkland, Redmond, Sammamish, Renton, and unincorporated King County, exactly what goes on your structural drawings, what plan reviewers actually look for, HOA timing strategy, the inspection sequence, what to do if you get a correction letter, how to retroactively permit an existing deck, and a detailed FAQ. By the end, you will know exactly what to expect — and when to call us instead.
Do You Actually Need a Permit? Jurisdiction-by-Jurisdiction Rules
The first question homeowners ask is whether their specific project requires a permit at all. The answer depends entirely on where your property sits — not just "King County" but whether you are in the city of Seattle, an incorporated suburb, or unincorporated King County land administered by the King County Department of Local Services Permitting Division.
Unincorporated King County
In unincorporated King County, a building permit is required for any deck attached to a structure, any freestanding deck over 200 square feet, and any deck elevated more than 30 inches above grade. The King County permit portal provides a decision tree to confirm whether your project triggers a permit, but the practical answer for most residential decks is yes.
City of Seattle (SDCI)
Seattle's SDCI Decks page specifies that most decks need at minimum a Subject-to-Field-Inspection (SFI) permit. Full Design Review is required if any of the following apply:
- The deck will be more than 8 feet above the ground
- Any beam spans 14 feet or longer
- The deck is a roof deck (over habitable space)
- The site is in an Environmentally Critical Area (ECA) — shorelines, steep slopes, wetlands
- The decking surface is solid (impervious) material exceeding thresholds
- Total deck area exceeds 750 square feet
For most standard attached decks under 750 sq ft at normal grade, Seattle's SFI permit is the path — no plan review, permit issued at the counter or online within days.
Bellevue
Bellevue's Development Services Department requires a building permit for any deck attached to the primary structure and any freestanding deck over 200 sq ft or over 30 inches off grade. Bellevue uses its own eBuild online portal and has its own fee multipliers applied to project valuation.
Kirkland
Kirkland requires permits for attached decks of any size and freestanding decks over 200 sq ft. The city recently migrated to an online submittal system and now offers digital plan review for straightforward residential decks.
Redmond
Redmond's Building Division follows the same 200 sq ft / 30-inch rule for freestanding decks and requires permits for all attached decks. Redmond is known for relatively efficient review turnarounds for residential projects, typically 3–4 weeks for standard decks.
Sammamish
Sammamish follows King County codes for many residential applications but operates its own permit counter. Attached decks always require permits; the city has strict impervious surface coverage limits that can affect deck size approvals, particularly in newer subdivisions.
Renton
Renton's Community and Economic Development Department handles building permits. Renton requires permits for any deck over 200 sq ft or over 30 inches off grade, and like most KC jurisdictions, all attached decks regardless of size. Renton's online permit portal accepts electronic submittals.
Note
King County Deck Permit Fee Schedules (2025)
Permit fees vary significantly by jurisdiction. Understanding the fee structure upfront prevents budget surprises. The table below reflects 2025 fee data from each jurisdiction's published schedule. Note that King County unincorporated fees increased 49% effective January 1, 2025.
Fee Comparison Table by Jurisdiction
| Jurisdiction | Base/Flat Deck Fee | How Fee Is Calculated | Notes |
|---|---|---|---|
| Unincorporated King County | $676 (decks ≤500 sq ft) | Flat fee for standard residential deck | +49% from 2024; larger decks: % of valuation |
| City of Seattle (SDCI) | Variable, % of project value | Formula: base fee + multiplier × valuation | SFI permits faster/cheaper than Design Review |
| Bellevue | % of project value | Own multiplier table; similar to Seattle | Minimum fee applies regardless of valuation |
| Kirkland | % of project value | Based on ICC building valuation data | Technology surcharge added |
| Redmond | % of project value | ICC valuation table + plan review fee | Separate inspection fees |
| Sammamish | % of project value | Similar to KC unincorporated structure | May require stormwater review |
| Renton | % of project value | Own fee schedule; SEPA may add cost | Critical Areas review extra if applicable |
Seattle SDCI Fee Structure in Detail
Seattle calculates permit fees using a percentage of the project's declared valuation, which is based on the ICC (International Code Council) Building Valuation Data table updated annually. For a typical attached residential deck:
- Project valuation: Determined by square footage × ICC unit cost (typically $25–$45/sq ft for deck construction)
- Permit fee: Base fee ($190–$250) plus a percentage of valuation above a threshold (roughly 1–3% of total project cost)
- Plan review fee: 65% of the building permit fee for Design Review projects
- State surcharge: Required by state law, currently $6.50 per permit
For a $30,000 deck project in Seattle, expect total permit fees in the $600–$1,100 range depending on permit type.
King County Unincorporated Fee Detail
The 2025 King County fee guide (published by the King County Permitting Division) breaks out deck permits as follows:
- Deck/porch ≤500 sq ft: $676 flat
- Additions to existing deck ≤500 sq ft: $676 flat
- Decks >500 sq ft: Calculated as percentage of project valuation
- Pre-application conference (optional): $200–$400/hour
- After-hours inspection: Premium rate surcharge
Tip
Approximate permit fees only — excludes contractor time and drawing preparation costs. Seattle reflects SFI permit; Design Review adds 40–60% more.
| Category | Value |
|---|---|
| Unincorporated KC | $676 |
| Seattle (SFI) | $550 |
| Seattle (Design Review) | $950 |
| Bellevue | $720 |
| Kirkland | $680 |
| Redmond | $640 |
| Sammamish | $700 |
| Renton | $660 |
Structural Drawing Requirements: What Goes on Each Sheet
Whether you are applying in Seattle, Bellevue, or unincorporated King County, your permit application requires a drawing package. The level of detail required depends on whether you need an SFI permit or a full Design Review permit, but even SFI applications benefit from thorough drawings — reviewers and inspectors use them throughout the process.
Required Drawing Sheets for a Standard Attached Deck
Sheet 1: Site Plan
The site plan shows your property from above and must include:
- Property lines with dimensions (scaled, typically 1"=20')
- Location of the existing house on the lot
- Proposed deck footprint with dimensions
- Distance from deck to all property lines (setback dimensions)
- North arrow and scale bar
- Any easements, critical areas buffers, or right-of-way
- Driveway, garage, detached structures
- For unincorporated KC: impervious surface calculation (existing + proposed)
Sheet 2: Floor Plan / Framing Plan
The framing plan is a top-down view of the deck structure and must show:
- Overall deck dimensions
- Footing locations (labeled F1, F2, etc.) with center-to-center spacing
- Beam layout (labeled B1, B2, etc.) with size callouts (e.g., 4×10 LVL)
- Joist layout: size, spacing (typically 12" or 16" o.c.), span
- Ledger location and connection note
- Post locations corresponding to footing centers
- Rim joist and blocking
- Stair location and width
- Landing dimensions if applicable
- Deck board direction (perpendicular or diagonal — affects joist sizing)
Sheet 3: Elevation Views
Two or more elevation drawings (typically front and side) showing:
- Finished grade line
- Deck height above grade at multiple points
- Post heights from top of footing to underside of beam
- Beam depth
- Railing height (minimum 36" for decks under 30" off grade; 42" for 30"+ off grade)
- Stair riser heights and tread depths (7-3/4" max riser; 10" min tread)
- Guard/rail intermediate baluster spacing (max 4" clear)
Sheet 4: Section Details
Cross-section cuts through the deck showing:
- Footing diameter, depth (below frost line — 18" minimum in King County), and concrete specification
- Post base hardware (Simpson ABA, ABU, or equivalent)
- Post-to-beam connection hardware
- Beam-to-post connection
- Joist hanger specification at rim/ledger (Simpson LUS, IUS, etc.)
- Ledger-to-rim joist/band board connection with lag schedule
- Decking fastening method
Sheet 5: Ledger Connection Detail
This is often a separate detail sheet because ledger connection is the most scrutinized element of any attached deck. It must show:
- Ledger size (typically 2×10 or 2×12 to match joists)
- Flashing detail (Z-flashing, waterproofing membrane, or standoff)
- Fastener schedule: lag screw or bolt diameter, length, and spacing in a table format
- Fastener row spacing and edge distances
- Whether the ledger attaches to rim joist, band joist, or concrete foundation
Sheet 6: Footing and Post Schedule
A table correlating each footing to its tributary area, column load, footing diameter, and depth. This is where plan reviewers focus most of their structural attention.
Key insight
When a Stamped Engineer's Drawing Is Required
For most standard residential decks in King County, SDCI's guidance notes that a licensed professional's stamp is not required — anyone with drafting skills can prepare the drawings. However, a Washington State licensed engineer's stamp IS required when:
- The deck is more than 8 feet above grade (Seattle) or more than 12 feet above grade (most other KC jurisdictions)
- The deck is a roof deck over habitable space
- The deck uses non-standard framing members or spans that exceed prescriptive limits in IRC Table R507
- The site has unusual soil conditions (fill, steep slope, high water table)
- The jurisdiction's plan reviewer requires it based on project complexity
What Plan Reviewers Actually Check
Understanding the reviewer's checklist helps you submit a complete package on the first attempt, which is the single best way to shorten your permit timeline.
Footing Tributary Area Calculations
Every footing supports a portion of the deck's total load. Plan reviewers verify that the footing size and depth are adequate for the tributary area it serves. Here's the calculation logic they apply:
- Tributary area per footing: Half the span to the next footing in each direction × half the span in the perpendicular direction
- Design load: 40 psf live load + 10–15 psf dead load = 50–55 psf total
- Column load: Tributary area (sq ft) × design load (psf) = pounds
- Footing size: Must be sufficient to distribute that load to soil without exceeding soil bearing capacity (typically assumed at 1,500–2,000 psf for undisturbed native soil in Western Washington)
A common error: homeowners (and some contractors) use a 12" round footing for every post regardless of load, then wonder why they get a correction requesting 16" or 18" footings under the highest-load interior posts.
Ledger Fastener Schedule
The ledger connects your deck to the house. In seismically active Western Washington, this connection must be engineered to resist both gravity (downward) loads and seismic (lateral) forces. Reviewers verify:
- Lag screw or through-bolt diameter (typically 1/2" minimum)
- Lag screw length (must achieve minimum embedment into framing — typically 2.5" into solid lumber)
- Fastener spacing per IRC Table R507.9.1.3(1) based on joist span and ledger connection
- Edge and end distances from fastener to ledger edge
- Flashing method — no flashing detail is an automatic correction
Setback Compliance
Every jurisdiction has minimum setbacks from property lines that apply to decks. Setbacks vary by:
- Zone (residential single-family vs. multi-family)
- Whether the deck is attached or detached
- Whether the deck is at grade (covered differently than elevated decks)
- Whether the property is near a critical area (shoreline, wetland, steep slope)
Reviewers cross-check your site plan dimensions against the zoning code setbacks for your specific parcel. In unincorporated King County, setbacks for a standard R-4 or R-6 residential zone are typically 5 feet from side property lines and 10–20 feet from rear lines, but always verify for your specific parcel.
Impervious Surface Limits
Many KC jurisdictions limit total impervious surface on residential lots to a percentage of the lot area (commonly 40–55% in suburban zones). If your lot is already at or near the limit, your deck permit may require a stormwater review or trigger mitigation requirements. Solid-surface decks (concrete, tile, membrane) are always counted as impervious. Open-grid decking over permeable ground is sometimes excluded — ask your jurisdiction.
Important
HOA Approval: Do It First, Not After
One of the most common — and costly — sequencing mistakes we see is homeowners who get their building permit approved and then discover their HOA denies the design. The right sequence is always: HOA approval first, then permit application.
Why Sequence Matters
Building permits are issued by the government and are based on code compliance. HOA covenants are private contracts and may impose restrictions beyond code — specific materials, colors, railing styles, deck heights, setbacks from fence lines, deck stain or finish requirements. An HOA can deny your deck even if the county or city approved the permit.
If you spend $1,200 on stamped drawings and permit fees and then your HOA requires a redesign, you may need revised drawings and a permit amendment — more time and money.
HOA Approval Timeline
Most HOA Architectural Review Committees (ARCs) operate on 30–60 day review cycles with monthly or bi-monthly meetings. Submit your plans (typically a simplified site plan, elevation sketch, and material samples) as early as possible. Some HOAs require:
- Written description of materials and colors
- Manufacturer specifications for composite decking
- Sample board or color chip
- Neighbor notification (rare but exists in some CC&Rs)
Get HOA approval in writing (email confirmation or formal approval letter) before you invest in final permit drawings. Once HOA approves, finalize your drawings to match the approved design, then submit to the building department.
Tip
Permit Timelines by Jurisdiction
Permit timeline is often the most frustrating part of the process. Here is a realistic guide based on current (2025–2026) conditions across King County jurisdictions.
Permit Timeline Chart
Times reflect first-review turnaround for complete submittals. Incomplete applications restart the clock. Express/over-the-counter review available in some jurisdictions for SFI permits.
| Category | Value |
|---|---|
| Seattle (SFI) | days5 |
| Seattle (Design Review) | days35 |
| Unincorporated KC | days30 |
| Bellevue | days25 |
| Kirkland | days20 |
| Redmond | days18 |
| Sammamish | days28 |
| Renton | days22 |
Seattle SDCI One-Stop Permit Guide
Seattle's SDCI operates a one-stop permit center where you can submit, pay, and in some cases receive your SFI permit on the same visit. For SFI permits:
- Submit application online via SDCI's permit portal or in person
- Pay permit fee online or at counter
- SFI permit issued typically within 1–5 business days
- Schedule inspections as work progresses
For Design Review permits, SDCI's intake team assigns a plan reviewer and the formal review clock starts. First review is typically 20–35 business days. If corrections are required, you respond, and a second review takes an additional 10–20 business days. Seattle offers an Early Design Guidance meeting (pre-application) that can resolve major issues before you submit, saving a review cycle.
Impact on Project Scheduling
Permit timeline directly affects your project start date. Here's how we sequence projects at The Seattle Decking Company:
| Phase | Duration | Notes |
|---|---|---|
| Design + HOA prep | 1–2 weeks | Design, drawings, HOA package |
| HOA review | 4–8 weeks | Simultaneous with drawing finalization |
| Drawing finalization | 1 week | After HOA approval confirmed |
| Permit submittal + review | 3–6 weeks | Jurisdiction-dependent |
| Correction response (if needed) | 1–2 weeks | Often avoidable with complete first submittal |
| Material lead time | 2–6 weeks | Composite decking: 2–3 weeks; custom products: 4–6 |
| Construction | 1–3 weeks | Standard attached deck; larger projects longer |
Total realistic timeline from initial design consultation to completed deck: 12–20 weeks for most King County projects. Plan accordingly if you have a specific outdoor event or summer deadline.
Correction Letters: What They Look Like and How to Respond
If your permit submittal has deficiencies, you will receive a correction letter (sometimes called a "plan review comment" letter). Here are the types of corrections we see most often and how to resolve them.
Common Correction Letter Examples
Correction Example 1 — Footing Size:
"Footing F3 serves a tributary area of approximately 64 sq ft. At 55 psf design load, the column load is 3,520 lbs. The specified 12" round footing at 1,500 psf soil bearing capacity provides 1,178 lbs of resistance, which is insufficient. Please revise to a minimum 18" round footing or provide soils report supporting higher bearing capacity."
Response: Revise footing schedule on the framing plan and section detail. Confirm all interior footings with high tributary areas. Resubmit revised sheets with revision cloud markup.
Correction Example 2 — Ledger Fastener Schedule:
"Ledger fastener schedule is not provided. Per IRC R507.9.1.3, the fastener schedule must specify lag screw diameter, length, and spacing based on joist span. Please provide a fastener table referencing IRC Table R507.9.1.3(1) or equivalent engineering."
Response: Add a fastener schedule table to the ledger detail sheet. Typical: 1/2" diameter × 3" lag screws at 12" o.c. in two staggered rows for 10-foot joist spans. Reference IRC table.
Correction Example 3 — Setback:
"The proposed deck as shown appears to encroach into the required 5-foot side yard setback. The east property line dimension shown is 4'-6". Please revise the deck footprint or provide a current survey confirming the property line location."
Response: Either revise the deck layout to comply with setback, or provide a boundary survey confirming actual property line location if you believe the site plan measurement is accurate.
Correction Example 4 — Flashing:
"No flashing detail is provided at the ledger-to-house connection. Flashing is required per IRC R507.2.3 to prevent water infiltration. Please provide a detail showing the flashing type, lap, and integration with house water-resistive barrier."
Response: Add a ledger flashing detail showing Z-flashing, self-adhered membrane, or deck-to-wall gap with appropriate caulking. Most common solution: self-adhered flashing membrane (Vycor, FlexWrap) under ledger and over sheathing.
How to Respond to Correction Letters
- Read every comment carefully — corrections are numbered; address each one individually
- Create revised drawing sheets with revision clouds around all changes
- Include a response letter that lists each comment number and states exactly what was changed
- Resubmit online or in person; flag it as a revision to permit #[your number]
- Revised review typically takes 10–20 business days (faster than initial review in most jurisdictions)
Note
The Inspection Process: What Each Inspection Involves
Once your permit is issued and construction begins, you will need inspections at specific milestones. Skipping an inspection or covering work before it is inspected creates serious problems. Here's what each inspection covers.
Footing Inspection (Before Concrete Pour)
The inspector visits before you pour concrete and checks:
- Hole depth (minimum 18" below finished grade in King County; frost depth)
- Hole diameter matches approved drawings
- Soil condition at bottom of hole (no loose, disturbed, or organic material)
- Sonotube or form placement if used
- Post-base anchor bolt placement and depth (if anchors are cast in place)
- Call for inspection at least 24–48 hours in advance; most jurisdictions require next-day scheduling
What can fail: Insufficient depth (common in clay soils where digging is hard), disturbed soil at hole bottom, or wrong diameter.
Framing Inspection (Before Decking Installed)
The inspector visits after all framing is complete but before decking boards are installed. They check:
- Post sizes and heights match approved drawings
- Post-to-beam connections (hardware type and fastening)
- Beam size and span
- Joist size, spacing, and span
- Joist hangers — type, size, and number of nails/screws (this is checked fastener by fastener on larger decks)
- Rim joist and blocking
- Ledger size, fastener pattern, and flashing
- Stair carriage cuts and attachment
- Guard post attachment method and embedment
What can fail: Missing joist hanger nails (inspectors count them), wrong hanger type, ledger fasteners not matching approved schedule, missing flashing.
Decking / Final Inspection
After decking is installed, railings are up, and stairs are complete. Inspector checks:
- Decking fastening pattern and spacing
- Railing height (36" or 42" depending on deck height)
- Baluster spacing (max 4" clear — inspectors bring a 4" ball to test)
- Stair rail requirements (graspable profile, return ends)
- Riser height consistency (max 3/8" variation)
- Tread depth minimum (10" including nosing)
- Landing size at top and bottom of stairs
- Guard post rigidity (will apply lateral load to test)
What can fail: Baluster spacing over 4" (common), railing height below minimum, stair riser inconsistency, wobbly guard posts.
Scheduling Inspections
All King County jurisdictions and incorporated cities offer online inspection scheduling. Most require 24–48 business hours notice. Inspectors typically arrive within a 2–4 hour window. If you miss the window, you can reschedule without penalty for a first missed appointment, but repeated missed appointments may incur fees.
The Appeal Process if Your Permit Is Denied
Permit denial for a residential deck is rare but it happens — usually due to critical area encroachment, impervious surface limits, or nonconforming lot situations. Here's what to do.
Step 1: Request Clarification
Before formally appealing, request a meeting with the plan reviewer to understand exactly why the permit was denied. Often, a design modification resolves the issue without a formal appeal. Ask: "What changes to the project would allow approval?"
Step 2: Administrative Appeal
If you believe the denial was based on an incorrect application of code, you can file an administrative appeal with the jurisdiction's hearing examiner. In King County, this is the Office of the Hearing Examiner. Typical process:
- File written appeal within 14 days of denial
- Pay appeal fee ($200–$500 depending on jurisdiction)
- Hearing scheduled (typically 30–60 days out)
- Submit written brief and supporting documentation
- Hearing examiner issues decision (binding on the building department)
Step 3: Superior Court Appeal
If the hearing examiner upholds the denial and you believe there is a legal error, you can appeal to King County Superior Court. This is rare for residential deck permits and typically only pursued for complex situations involving critical areas or significant property value impacts.
Practical Alternative: Variance or Modification
If the denial stems from setback or dimensional issues, a variance may be available. A variance allows you to build closer to a property line or in an area otherwise restricted, if you can demonstrate hardship and that the variance won't harm neighbors. Variance applications have their own fee ($800–$2,000+) and timeline (60–120 days) but are a legitimate path for sites with unusual constraints.
Retroactive Permitting for Unpermitted Existing Decks
If you have an existing deck that was built without a permit — very common in King County, especially on homes built or remodeled in the 1990s and early 2000s — you can retroactively permit it. This is sometimes called an "as-built" or "legalization" permit.
When Retroactive Permitting Is Required
- You are selling your home and the buyer's inspector or agent identifies the unpermitted deck
- You want to refinance and the lender's appraiser flags it
- You are adding onto the unpermitted deck (triggering a permit for the addition)
- Your HOA or neighbor complains and the building department investigates
- You discover it yourself and want to protect your liability exposure
The Retroactive Permitting Process
Step 1: As-Built Drawings
You need drawings that show the deck exactly as it was built — not how it should have been built. Measure everything: footing sizes, depths (if accessible), post sizes, beam sizes, joist sizes and spacing, ledger connection, railing heights and baluster spacing.
Step 2: Structural Assessment
If the deck was built before current code or to uncertain standards, many jurisdictions require a structural engineer to assess it and provide a letter or stamp confirming it meets current code or specifying required corrections. Engineer fee: typically $500–$1,500.
Step 3: Application Submission
Submit to the same building department as a new permit, but note "as-built" on the application. Fees may include a penalty multiplier — typically 1.5× to 2× the standard permit fee for unpermitted work discovered after the fact.
Step 4: Corrections and Modifications
If the as-built deck doesn't meet current code, you will receive correction requirements. Common issues on older decks: undersized ledger fasteners, missing post-base hardware, non-compliant railing baluster spacing, improper stair risers. You may need to make physical corrections to the deck before final inspection.
Step 5: Inspection
Inspectors will visit the deck. They cannot verify what they cannot see (covered footings, buried post bases), which is why the structural engineer's letter is valuable for older decks.
Important
DIY Permit vs. Contractor-Managed Permit
One decision homeowners face is whether to pull the permit themselves or have their contractor manage it. Both approaches are valid, but they have real tradeoffs.
DIY Permit: Pros and Cons
Pros:
- You are the permit holder and have direct communication with the building department
- No markup on permit fees (some contractors charge 10–20% overhead on permit costs)
- Full visibility into the permitting process and timeline
- Useful learning experience if you plan to manage the project yourself
Cons:
- You bear full responsibility for code compliance, even if a contractor does the work
- Drawing preparation requires technical knowledge or hiring a designer separately
- You must schedule all inspections and be present (or arrange access)
- Errors in drawings that cause corrections extend your timeline at your cost
- If the contractor makes a non-conforming change in the field, you as permit holder must resolve it
Contractor-Managed Permit: Pros and Cons
Pros:
- Experienced contractors know what reviewers want to see — fewer corrections
- Contractor manages inspection scheduling and is present for all inspections
- Contractor's license and bond are on the line — strong incentive to do it right
- Streamlined communication; you don't have to navigate building department processes
- Corrections and revisions handled internally without burdening the homeowner
- Warranty and liability remain with the contractor as permit holder
Cons:
- Some contractors charge permit fees as a pass-through with overhead added
- You rely on the contractor's timeline management
- Less direct visibility unless you proactively ask for updates
Our recommendation: For any deck where you are also hiring a contractor for construction, have the contractor manage the permit. The integrated responsibility — contractor is liable for both the permit and the work — creates the right incentive structure. For a genuine DIY project where you are doing all the work yourself, pulling your own permit is appropriate and gives you valuable hands-on knowledge of what code requires.
At The Seattle Decking Company, we manage the entire permit process as part of every project. We prepare the drawings, submit the application, respond to corrections, schedule inspections, and handle the final sign-off. You don't have to navigate the building department at all.
Frequently Asked Questions
Frequently Asked Questions
Do I need a permit to replace the decking boards on my existing deck?
How long is a King County deck permit valid once issued?
Can my neighbor report my unpermitted deck?
What is the difference between an SFI permit and a Design Review permit in Seattle?
What setbacks apply to my deck in King County?
Do I need a permit for a freestanding pergola over my deck?
Can I submit my deck permit application online?
How do I find a licensed contractor who knows the permit process?
What happens if I build without a permit and then sell my house?
What is the fee increase timeline I should know about for King County?
How does my deck permit affect my homeowner's insurance?
Can The Seattle Decking Company handle the entire permit process for me?
Choosing the Right Deck Builder for a Permitted Project
Pulling a permit is just the beginning. The quality of your deck — and your permit experience — depends heavily on choosing a contractor who builds permit-ready projects from the start. A contractor who cuts corners in the field creates problems at inspection that cascade into delays, required corrections, and sometimes mandatory demolition and reconstruction of non-compliant work.
When evaluating contractors, ask specifically:
- Do you prepare the permit drawings, or do I need to hire a designer separately? Experienced deck builders handle drawings in-house or have established relationships with designers.
- Have you permitted decks in [my jurisdiction] before? Each building department has quirks; local experience matters.
- Who manages inspection scheduling and attends inspections? The answer should be the contractor, not you.
- Can you show me a recent permitted project in my city? References from homeowners in your jurisdiction are more valuable than generic portfolios.
Our guide to questions to ask a deck builder walks through the full vetting process, and our how to read a deck quote article explains what line items to look for in a bid — including how permit costs should be presented.
For material selection decisions that affect what goes on your permit drawings, explore our comparisons of composite vs cedar decking in Seattle, Trex vs Fiberon vs TimberTech, and our overview of the best decking materials for Seattle in 2026. Material choice affects framing (composite often requires 12" joist spacing vs. 16" for cedar), which affects your drawings and thus your permit package.
If cost is a primary consideration alongside permitting, our Seattle deck cost guide for 2025 breaks down realistic project budgets by deck type, size, and material. You can also explore deck financing options in Seattle if you want to spread the project cost over time.
Key insight
Your Next Step
Getting a deck permit in King County does not have to be stressful. With the right drawings, a complete submittal, and the right contractor managing the process, most residential deck permits in this region move from application to approval in 3–6 weeks — and the inspections that follow ensure your finished deck is exactly what you paid for.
The Seattle Decking Company has permitted and built hundreds of decks across King County — in Seattle, Bellevue, Kirkland, Redmond, Sammamish, Renton, and unincorporated areas. We know the building departments, the reviewers' preferences, and the fastest paths to permit approval in each jurisdiction. We handle every permit we build, and we stand behind our work through the final inspection and beyond.
Ready to get started? Call us at (425) 675-6259 or visit our contact page to schedule a free design consultation. Tell us your address and your vision, and we'll tell you exactly what the permitting process looks like for your project — and how quickly we can get you building.
The Seattle Decking Company — 22722 29th Drive SE, Bothell, WA 98021 — (425) 675-6259 — [theseattledeckingcompany.com](https://theseattledeckingcompany.com)
Related resources: [Deck Cost Guide Seattle 2025](/blog/deck-cost-seattle-2025) | [Composite vs Cedar Decking Seattle](/blog/composite-vs-cedar-decking-seattle) | [Deck Railing Options Seattle](/blog/deck-railing-options-seattle) | [How to Find a Deck Builder in Seattle](/blog/how-to-find-deck-builder-seattle) | [Deck Financing Seattle](/blog/deck-financing-seattle)
Planning a deck in the Seattle area?
Get an onsite design review and a clear, itemized quote from a licensed local builder.
Request a Free Quote