
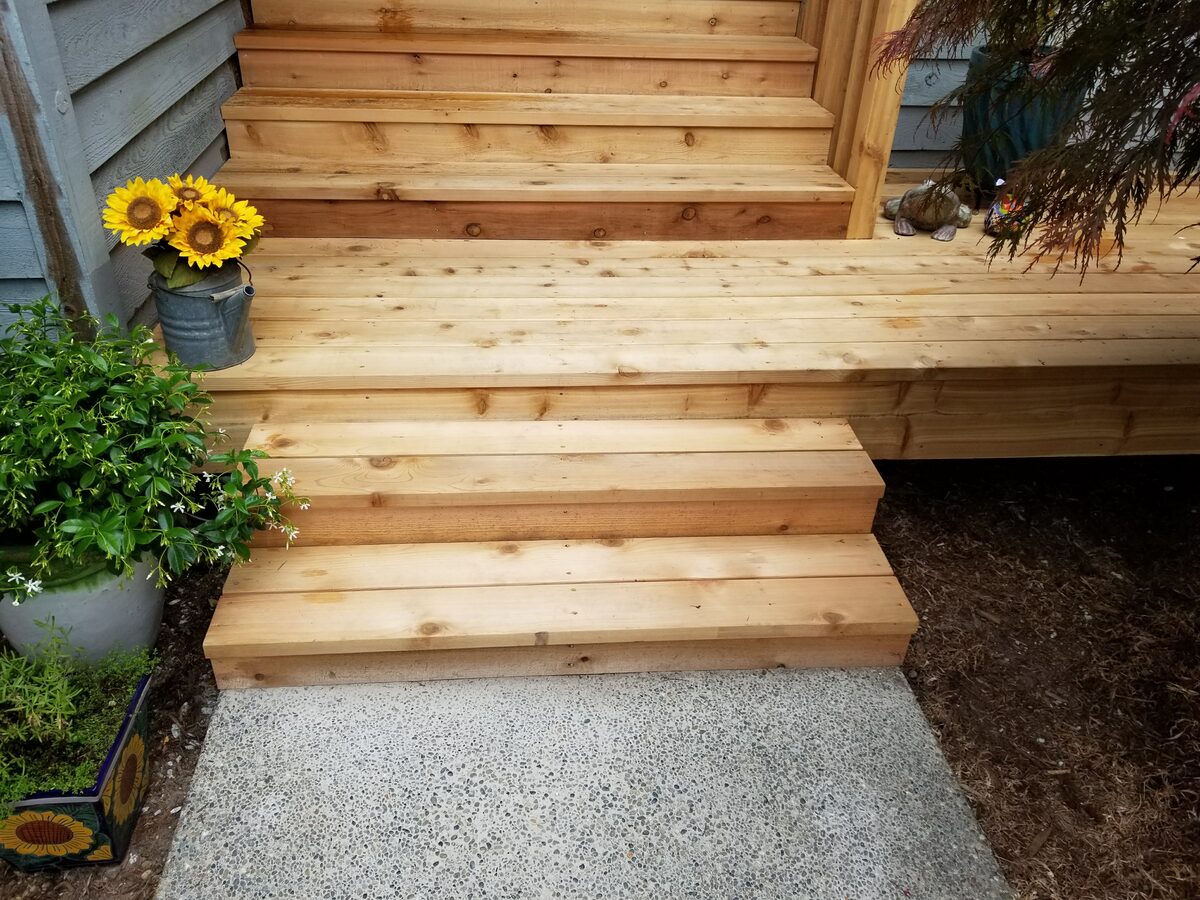
Every October, the same thing happens across King County. The summer fog lifts one last time, the weekend warriors pack away their grills, and then — almost without warning — the rain returns. Not the dramatic thunderstorms of the Midwest or the seasonal hurricanes of the Southeast. Seattle's version is quieter and far more relentless: a continuous gray drizzle that sets in around the first week of October and doesn't fully lift until late June. NOAA precipitation data for Seattle-Tacoma International Airport confirms what every Westside homeowner already knows — roughly 70 percent of Seattle's annual 39.3 inches of rainfall lands between October and March. That means your deck faces six consecutive months of saturation, moss proliferation, freeze-thaw cycling, and debris accumulation starting the moment you stop paying attention to it.
That condensed wet season is why fall deck prep in Seattle matters more than it does anywhere else in the country. In Phoenix, you stain your deck whenever. In Miami, you rinse off salt spray year-round. But here, you have a narrow window — roughly mid-August through late September — when temperatures stay above 50°F at night, humidity drops enough for coatings to cure properly, and the rain hasn't yet arrived to undo all your work. Miss that window and you're looking at a full winter of unchecked moisture infiltration, accelerating decay, and hardware corrosion. Miss a few windows in a row and what was a maintenance project becomes a deck repair or full replacement job — a very different conversation with a very different price tag.
Over nearly two decades building and repairing decks across Seattle, Bellevue, Kirkland, Bothell, and the surrounding King County communities, we've seen what happens when homeowners treat fall prep as optional. We've also seen what a well-maintained deck looks like after 20 years of Pacific Northwest winters. The difference almost always comes down to a consistent checklist completed by late September. Here are the eight steps that make that difference.
Why Seattle's Rainy Season Makes Fall Prep Non-Negotiable
Most home maintenance advice is written for a national audience, which means it applies to a hypothetical homeowner in a hypothetical climate. Seattle homeowners know better. Our conditions are specific, and the consequences of ignoring them are specific too.
The Wet Season Is Genuinely Continuous
According to King County's own precipitation monitoring data at SeaTac, the water year runs October 1 through September 30 — and that's not a bureaucratic accident. It reflects the meteorological reality that October 1 is approximately when the rain switches on in the Pacific Northwest. Unlike climates with discrete rainy and dry seasons that alternate every few months, Seattle homeowners deal with a roughly 200-day wet season. A deck that goes into October without proper preparation doesn't get a break or a dry week to recover — it just accumulates moisture damage continuously until Memorial Day.
That continuous saturation is the key threat. Wood decking absorbs water, swells, then partially dries and contracts, then absorbs again. Each cycle opens grain slightly wider, lets in a little more water, and degrades the cell structure of the wood incrementally. Over a single winter without proper sealing, a cedar deck board can gray significantly and develop fine checking (surface cracks along the grain). Over three or four winters, those checks deepen, moss colonizes the textured surface, and the board begins to lose structural integrity. What looked like a staining job becomes a board-replacement job — or worse, a substructure repair once moisture has wicked down through the gaps into joists and rim boards.
The Cost of Doing Nothing
Let's put real numbers on this. Professional deck staining in Seattle runs approximately $800 to $1,800 for a typical 300–400 square foot deck, depending on condition, prep work required, and product type. A full deck repair — replacing rotted boards, sistering joists, addressing corroded hardware — runs $15 to $50 per square foot for the damaged area, with structural work often triggering permit requirements and inspection fees on top. A full deck replacement in Seattle currently averages $80 to $180 per square foot installed for composite materials. The math isn't subtle: a $1,200 staining and maintenance visit every two years is one of the most cost-effective home maintenance investments you can make.
Key insight
The Contractor Calendar Problem
There's also a practical timing issue that catches many King County homeowners off guard: deck contractors are significantly busier in summer than fall, but the fall booking rush happens faster than you'd expect. By mid-September, most reputable deck builders and maintenance crews in the greater Seattle area are already booked two to four weeks out. If you decide on October 5th that you need your deck stained, you've already lost the window — temperatures will be dropping below the minimum cure temperature for most deck coatings within weeks. Completing your inspection and scheduling any professional work by Labor Day gives you the best combination of contractor availability, pricing, and remaining cure window.
Step 1: Complete a Full Structural Inspection Before Anything Else
No amount of cleaning or staining will fix structural problems. Before you pick up a pressure washer or a stain brush, spend 30–60 minutes doing a systematic inspection of your entire deck structure. Catching issues in September means you can address them before contractor busy season; catching them in November means weathering winter with known problems and scrambling to find a contractor in February.
What to Check at the Structural Level
Start at the ledger board — the horizontal member that attaches your deck to your house. This is the most critical connection on an attached deck, and it's also one of the most common failure points. Look for separation between the ledger and the house rim joist, any flashing that's pulling away, gaps where water can wick between the ledger and siding, and any discoloration or soft spots in the wood. Press your thumb firmly into the wood in several places — a solid ledger feels hard; a compromised ledger feels soft or spongy.
Work your way outward to the rim joist and main beams. These structural members are often close to grade or in areas of low airflow, making them prime candidates for moisture damage. Probe any areas that look discolored or where wood grain appears unusually raised. Check where posts meet the beams and where beams meet posts — these connection points can trap debris and moisture.
Move to the joists. Look for any that appear bowed, cracked, split, or discolored differently from their neighbors. Check the joist hangers — the metal brackets that connect joists to the ledger and rim joist — for surface rust or orange staining in the wood around them, which indicates the hardware is corroding and potentially compromising the connection.
Decking Boards and Surface Assessment
Walking your deck boards systematically, look for: boards that flex or bounce noticeably underfoot (often indicating joist issues below, not just board wear), boards with significant checking or cracking along the grain, boards where end grain is visibly gray and soft, and boards with active moss or lichen growth that has penetrated the surface. A simple pocket knife test works well — press the blade tip into a suspicious area. If it sinks more than 1/4 inch without significant resistance, the wood has begun to decay.
Check NADRA's Deck Safety Checklist for a complete inspection framework — the organization provides free consumer resources specifically designed to help homeowners identify structural issues.
Railings and Stairs
Test every railing post by gripping it firmly and pushing in multiple directions. Any movement at the base is a problem — either the post base hardware is loose, corroded, or the wood around the fasteners has degraded. Grab the top rail and push down and outward. A properly built railing should resist 200 pounds of lateral force per code. Stairs: test each tread, check stringers for cracking or splitting, verify that handrails are secure and meet the 34–38 inch height requirement.
Important
Document everything you find — photos are helpful — and create a list of items that need professional attention before winter sets in. Items that are structural concerns should be addressed before you invest in cosmetic work like staining.
Step 2: Deep Clean the Entire Deck Surface
A proper fall cleaning isn't a quick sweep and rinse. It's a deliberate process that removes biological growth, embedded debris, and surface residue so that any protective coatings you apply can bond directly to the material rather than to a layer of algae, dirt, or failed previous stain. Skipping or rushing this step is the most common reason DIY staining jobs fail within a season.
Cleaning by Material Type
Cedar and pressure-treated wood: Begin by removing all furniture, planters, and anything else sitting on the deck surface. Sweep thoroughly. For a cedar deck, the Western Red Cedar Lumber Association (Real Cedar) recommends cleaning with a diluted oxygen bleach solution (sodium percarbonate, not chlorine bleach) for mildew and discoloration. Mix according to package directions, apply with a stiff-bristle brush, let dwell for 10–15 minutes, then rinse thoroughly. Never use a zero-degree or 15-degree pressure washer tip on cedar — the concentrated stream will raise the grain, damage wood fibers, and create a rough, splintered surface that's harder to stain and more hospitable to moss. Use a 40-degree fan tip at 600–800 PSI maximum, held at least 12 inches from the surface.
Composite decking: Trex, TimberTech, and Fiberon composite products are more forgiving than wood but still require proper fall cleaning. Trex's official care guidelines recommend soap-and-water cleaning or pressure washing at 1,500–3,100 PSI with a fan nozzle held at least 8 inches from the surface. The critical fall task for composite decks is thorough cleaning between boards — leaf tannins and organic debris packed between composite boards through the summer will stain the board edges and sides through the winter if not removed. Use a plastic putty knife or a specialized deck-board cleaning tool to clear these channels.
PVC decking: Pure PVC decking like AZEK/TimberTech's PVC line is highly resistant to moisture but still requires cleaning to prevent algae and mold from establishing on the surface. Mild soap and water or a composite deck cleaner works well. Avoid petroleum-based cleaners or solvents, which can damage the surface.
Targeted Moss and Algae Treatment
Fall is the time to address existing moss and algae aggressively, before the wet season gives it another six months of ideal growing conditions. For active moss growth on wood decking, a sodium percarbonate cleaner applied with a scrub brush will kill existing growth. For more established moss colonies, a product containing quaternary ammonium compounds (like Wet and Forget or similar) applied and allowed to dwell gives better penetration into established root systems. After treating, use a stiff-bristle brush — not a wire brush, which can embed metal fragments that later rust — to remove the dead moss.
On composite and PVC decking, algae tends to form as a slippery film rather than raised moss colonies. A composite deck cleaner with mildewcide applied before winter can prevent this film from establishing and becoming a slip hazard through the wet months.
Tip
Step 3: Re-Stain Cedar Decking — The Last Window Before Winter
If your cedar or pressure-treated wood deck needs re-staining, fall is your final opportunity until late spring. This is the step that carries the most urgency from a scheduling standpoint, because deck stains require specific application conditions that the Pacific Northwest stops providing in October.
Application Requirements That Seattle's Fall Limits
Most penetrating deck stains and solid-body stains require:
- Air temperatures above 50°F during application and for 24–48 hours after
- Wood surface temperatures above 50°F
- No rain forecast for 24–48 hours after application
- Low humidity (below 85% relative humidity)
In Seattle, all four of these conditions can be reliably met through mid to late September. By mid-October, you're frequently below minimum temperatures at night and rain probability makes a 48-hour dry window increasingly difficult to find. By November, applying most deck stains in Seattle is essentially impossible without tent-and-heat setups that are impractical for residential decks.
Choosing the Right Product for Your Cedar Deck
The Real Cedar lumber association outlines three main finishing approaches for western red cedar:
Penetrating semi-transparent stains are the preferred option for most cedar decks that still have good wood structure. They penetrate the wood fibers rather than sitting on the surface, which means they won't peel (they simply wear away gradually), and they allow the wood's natural grain to show through. Products from Armstrong Clark, Defy, and TWP (Total Wood Preservative) are well-regarded in Pacific Northwest deck maintenance circles. Expect to re-apply every 2–3 years on a horizontal deck surface in Seattle's climate.
Semi-solid stains provide more UV protection and color consistency than semi-transparent stains, with slightly more surface build. A good choice for older cedar with more weathering and checking.
Solid-body stains and paints are generally not recommended for horizontal decking surfaces — they build a film on top of the wood that traps moisture, peels from the underside outward, and requires full stripping before recoating. If a previous owner applied solid stain to your cedar deck, your staining contractor will need to strip it before applying a penetrating product.
Professional vs. DIY Staining
For most homeowners, professional deck staining in Seattle is worth the cost for a complete fall re-application. Professional crews bring commercial-grade sprayers, pump-up applicators, and back-brushing tools that produce more even penetration and coverage than brush-only application on a typical 300–400 square foot deck. They also know product brands and dilution rates appropriate for specific wood conditions. The cost of $800–$1,800 for a professionally stained mid-size deck is modest compared to what neglecting re-staining costs over time.
That said, DIY staining is entirely feasible for homeowners who are comfortable with surface prep and have 2–3 full days available. The biggest DIY mistakes we see: inadequate surface prep (applying stain over green wood or incompletely cleaned surfaces), applying too much product in one coat rather than two thin coats, and failing to back-brush sprayed product into the grain.
Approximate professional costs for fall deck maintenance tasks on a 300–400 sq ft cedar deck in King County.
| Category | Value |
|---|---|
| Full inspection (professional) | $250 |
| Deep clean + moss treatment | $400 |
| Re-stain cedar (professional) | $1,300 |
| Hardware replacement (corroded) | $600 |
| Minor board replacement (2-3 boards) | $750 |
| Zinc strip installation | $200 |
Note
Step 4: Inspect, Tighten, and Replace Hardware
Every fastener, bracket, post base, joist hanger, lag bolt, and deck screw on your deck is a potential failure point — and nowhere do hardware problems accelerate faster than in the Pacific Northwest's consistently wet environment. Fall hardware inspection takes an hour and catches problems while repair is still straightforward.
The Problem with Old Galvanized Hardware
If your deck was built before 2004, it may contain hardware that doesn't meet current corrosion-resistance standards. The International Residential Code (IRC) now requires hot-dipped galvanized (HDG) fasteners or stainless steel for most deck applications, but prior to around 2004, electro-galvanized (EG) fasteners — which have a much thinner zinc coating — were common. EG fasteners in Seattle's climate typically show significant corrosion within 8–15 years. The telltale signs: orange rust streaks running down from nail and screw heads, orange-stained wood around hardware, and fasteners that have swelled due to corrosion and lifted the surrounding wood.
Once corrosion progresses to the point of producing iron oxide (rust), the fastener is expanding as it corrodes, which creates internal stress in the surrounding wood — essentially cracking it from the inside. This problem is particularly acute in post bases, joist hangers, and ledger bolts, where the hardware is both load-bearing and in a position that traps water.
What Good Hardware Looks Like
Modern deck hardware should be either 316-grade stainless steel (preferred for highest corrosion resistance, especially near salt air in coastal neighborhoods) or ASTM A153-compliant hot-dipped galvanized. For fasteners driven into pressure-treated lumber (ACQ or CA treated), stainless steel is strongly preferred — the copper compounds in modern pressure-treated wood corrode galvanized hardware significantly faster than untreated wood does.
During your fall inspection, use a screwdriver to test every visible screw — if it turns with minimal resistance or simply spins, it's lost its grip and needs replacement. Check lag bolts at ledger connections by looking for any gap between the washer and wood, which may indicate the bolt has worked loose. Tighten any loose fasteners; replace any that are corroded, stripped, or broken.
Stainless vs. Galvanized: A Quick Reference
| Fastener Type | Corrosion Resistance | Best Application | Typical Lifespan (Seattle) |
|---|---|---|---|
| 316 Stainless Steel | Excellent | All applications, especially near coast | 30+ years |
| 304 Stainless Steel | Very Good | Interior deck areas away from coast | 20–30 years |
| Hot-Dipped Galvanized (ASTM A153) | Good | General deck framing, PT lumber connections | 15–25 years |
| Electro-Galvanized | Poor | Not recommended for exterior deck use | 5–10 years |
| Uncoated steel | Very Poor | Never use exterior | 2–5 years |
Important
Step 5: Clear All Drainage Channels and Between-Board Gaps
This step sounds minor. It isn't. Drainage management on a Seattle deck is the difference between a deck that dries out between rain events and one that stays continuously wet from October through April.
How Standing Water and Trapped Debris Destroy Decks
Water wants to drain off your deck. When it can't — because leaves, pine needles, dirt, and organic debris have packed the gaps between boards, filled the channels at the perimeter, and blocked the areas around post bases — it pools and sits. Pooling water on wood decking means continuous moisture exposure against wood that was never designed to be waterlogged. The surface finish degrades faster, the end grain at board joints wicks water aggressively, and moss and algae colonize the perpetually damp surface.
Trapped debris between boards creates an even more concentrated problem: the organic material holds moisture against the sides of the boards, which are typically less protected by finish than the top surface. Over a wet season with packed board gaps, wood rot can begin on the board sides and work inward even on otherwise well-maintained decks.
How to Clear Drainage Channels
For standard deck boards with 1/8- to 1/4-inch gaps, a flat-blade screwdriver, a specialized deck gap-cleaning tool, or even a stiff putty knife works well for clearing packed debris. Work systematically from one end of the deck to the other, clearing each gap fully. On older decks where boards have swelled and gaps have narrowed significantly (or closed completely), consider having a contractor cut the gaps back to proper dimension — or plan that board replacement is likely in the near future anyway.
Check the deck perimeter carefully — the rim joist often has a flashing detail or a cap board that can collect debris at the junction with the decking surface. Clear these areas completely. Also check where the deck meets the house: this junction typically has a gap above the ledger board where debris accumulates and where water can pool against siding and flashing.
Post Base Areas and Low Spots
Post bases that are close to grade are particularly vulnerable to debris accumulation. Check each post base, clear any leaf accumulation, and verify that water can drain freely away from the base. If any post bases are in areas where water pools rather than drains, consider having a contractor install additional drainage or raise the base if the post has settling clearance.
On composite decking, clearing between-board gaps is especially important because the tannins from wet leaves will stain the sides of composite boards — a discoloration that's nearly impossible to remove once it has set through a winter.
Tip
Step 6: Install Zinc Strips to Prevent Moss Regrowth All Winter
Cleaning existing moss is satisfying but temporary. Without treatment to prevent regrowth, your freshly cleaned deck will begin hosting new moss colonies within weeks once the October rains return — and by spring you'll be back to square one. Zinc strips are the most effective passive prevention strategy for Seattle decks.
How Zinc Strips Work
The chemistry is straightforward. Zinc is toxic to moss, algae, lichen, and most simple plant life at the concentrations that naturally leach from zinc metal when water contacts it. When rain hits a zinc strip installed at the top edge of your deck — along the top of the railings, along the house edge, or in strips across the deck surface — it picks up trace amounts of zinc ions and carries them across the deck surface as it flows toward the drains. That zinc-infused water inhibits moss germination and establishment across a zone approximately 15 feet downslope from each strip.
For Seattle decks, zinc strips installed along the upslope edge of the deck and along the railing cap provide continuous passive protection through the entire wet season without any repeat chemical applications. The strips typically remain effective for five or more years before the zinc is sufficiently depleted to require replacement.
Installation Approach for Decks
Unlike roof applications where zinc strips are installed at the ridge, deck zinc strips work best when installed at the high point of any drainage slope — typically the house edge of the deck. Use stainless steel roofing nails or screws (never galvanized — the zinc on the strip will accelerate galvanic corrosion with a different metal fastener) to secure 2–3 inch zinc strips along the top of the house-side rim board or along the inside edge of the railing cap board closest to the house. For wider decks, an additional strip midway across provides better coverage.
This installation is simple enough for a DIY project — zinc strips are available at most hardware stores and roofing suppliers in the Pacific Northwest, typically running $1.50–$3.00 per linear foot installed. For a 20-foot-wide deck, budget $30–$60 in materials plus an hour of labor.
Zinc Strips vs. Chemical Treatments
| Approach | Cost | Frequency | Application | Effectiveness |
|---|---|---|---|---|
| Zinc strips | $30–$60 materials | Replace every 5 years | Install once, passive | Excellent preventive |
| Zinc sulfate spray | $15–$30/treatment | 1–2x per season | Active treatment | Good preventive |
| Sodium percarbonate | $20–$40/treatment | After growth appears | Kills existing moss | Good curative |
| Quaternary ammonium (Wet & Forget) | $25–$50/treatment | 1x per season | Preventive + curative | Good preventive |
| Power washing only | Labor cost | Each season | Removes growth | Does not prevent regrowth |
Key insight
Step 7: Trim All Vegetation Touching or Overhanging the Deck
This step is underestimated by almost every homeowner we've worked with. Vegetation touching your deck is one of the primary drivers of moss growth, accelerated wood weathering, and moisture damage — and it's completely preventable with a pruning saw and an afternoon.
Why Vegetation Contact Is a Problem
Plants touching your deck surface act as wicks, continuously drawing moisture from the soil and depositing it on your deck surface. A vine, shrub, or tree branch in contact with cedar or composite decking keeps that contact point consistently damp — even on dry summer days. That persistent moisture is exactly what moss and algae need to establish, and it creates ideal conditions for wood rot in cedar or for mold establishment on composite surfaces.
Beyond direct moisture transfer, overhanging branches drop leaves, needles, seed pods, and debris continuously. A Douglas fir overhanging your deck will deposit needles into board gaps year-round. A big-leaf maple — ubiquitous in King County neighborhoods like Laurelhurst, Madison Park, and Bellevue's Somerset neighborhood — can deposit enormous quantities of large leaves in October and November, and those leaves hold moisture and tannins against your deck surface for months if not removed promptly.
What to Cut Back
Before winter, trim back or remove:
- Any plant material touching the deck surface directly. This includes groundcover growing up through the gaps, shrubs whose branches contact the rim board or decking, and vines of any kind. Ivy and wisteria are particularly problematic — they can insert roots between deck boards and into structural members.
- Branches overhanging the deck within 6–8 feet of the surface. These drop debris, drip condensation and rain after storms, and shade the deck surface — promoting moss. The goal isn't to denude your yard; it's to ensure your deck can dry out within a reasonable time after a rain event.
- Climbing roses and ornamental shrubs adjacent to railings. These tend to grow into railing posts and panels, trap moisture at the base of posts, and deposit organic material against the deck surface.
For large trees with significant overhanging limbs, consult a certified arborist. Removing large limbs from Douglas fir, western red cedar, or big-leaf maple requires proper technique to avoid damage to the deck below, and some limb removal near power lines requires a licensed crew.
Ground Clearance Around Posts
While you're working in this area, check the ground clearance around every deck post. Posts should have a minimum of 1–2 inches of airspace between the bottom of the post and grade. Posts that are close to or buried in soil will wick moisture and decay from the bottom up regardless of what species or treatment the wood is. If any posts have settled into the soil, raising the deck or sister-posting may be warranted — a conversation for your fall inspection contractor visit.
Step 8: Store or Cover Furniture, and Schedule Any Needed Repairs Now
The last two fall tasks are operational: protect the investments you've made in outdoor furnishings and lock in contractor time before the busy-season premium kicks in.
Furniture Storage and Covering Strategies
Outdoor furniture left on a Seattle deck through the wet season accelerates two different problems. First, furniture legs and bases sitting on deck boards prevent those boards from drying normally after rain events — the footprint of each furniture leg becomes a persistently damp spot that's a moss and mold incubator. Second, furniture itself degrades significantly when left out through a Pacific Northwest winter: cushions develop mildew, aluminum furniture develops oxidation, and wood furniture (teak, eucalyptus, cedar) grays and checks faster than when stored.
The simple solution: move cushions and fabric items inside or into watertight storage bins by October 1. For furniture frames, either bring them into a garage or covered storage, or use purpose-built outdoor furniture covers that allow some airflow while preventing water accumulation on cushion seams and joints. Ensure covers are secured so they don't trap moisture underneath — a loose cover that billows in the wind can actually funnel rain underneath and make the problem worse.
For built-in planters or large pots on the deck, partially drain any saucers (standing water in saucers keeps the contact point on the deck constantly wet), and consider moving heavy pots entirely if your deck is older and their weight placement could become a concern.
Schedule Repairs Before Contractor Busy Season
Here's the practical reality of the Seattle deck repair market: contractors are significantly easier to schedule and often charge less during October and November than they do in May and June. If your fall inspection revealed issues that need professional attention — rotted boards, corroded hardware, loose ledger connections, post base problems — scheduling that work in October means you'll have access to contractor time within 2–3 weeks, rather than the 4–8 week wait that's typical in peak season. It also means the repairs get done before six months of wet weather make the problems worse.
For structural concerns identified in your fall inspection, get at least two quotes. Ask the right questions when vetting contractors — verify Washington L&I contractor registration at secure.lni.wa.gov/verify, check that they carry general liability and workers' comp, and confirm that any structural repairs will be permitted if required by the scope of work.
Note
Minor cosmetic repairs — replacing one or two boards, tightening hardware, cleaning — don't require permits. Structural repairs involving the ledger connection, posts, or beams typically do require permits in Seattle and most King County jurisdictions. Your contractor can advise on permit requirements for the specific scope; our guide to deck permits in King County also covers the basics.
The Complete Fall Prep Timeline for Seattle
| Task | DIY or Pro | September Timing |
|---|---|---|
| Full structural inspection | DIY or Pro | Week 1–2 of September |
| Deep clean + moss removal | DIY | Week 2–3 of September |
| Vegetation trimming | DIY | Week 2–3 of September |
| Zinc strip installation | DIY | Week 3 of September |
| Cedar re-staining | Pro recommended | Week 3–4 of September (last window) |
| Hardware inspection + replacement | DIY/Pro | Week 3 of September |
| Drainage channel clearing | DIY | Week 4 of September |
| Furniture storage + covering | DIY | Late September / October 1 |
| Schedule needed repairs | Pro | Book by mid-September for October availability |
Material-Specific Fall Prep: What Your Deck Actually Needs
The eight steps above apply to all decks, but the specific products, techniques, and priorities vary significantly by material type. Here's a quick reference by material.
Cedar Decking
Cedar is the traditional Pacific Northwest deck material, and it's genuinely beautiful and sustainable. Western red cedar has natural oils and tannins that provide some inherent resistance to rot and insects — but "some inherent resistance" is not the same as "maintenance-free." In Seattle's climate, an unprotected cedar deck will begin to gray within a single summer and will develop surface checking within the first wet season if not sealed.
Fall priorities for cedar: deep clean, re-stain if it's been 2+ years or the previous stain has failed (water beading test — pour water on the deck; if it soaks in rather than beading, the finish has failed), and address any hardware corrosion aggressively. Cedar is also the material most benefited by zinc strip installation — its textured grain surface after weathering is particularly hospitable to moss.
For reference, the deck staining vs. composite comparison covers the long-term maintenance math between the two options in detail.
Composite Decking
Composite decking — Trex, TimberTech, Fiberon, and similar products — requires significantly less maintenance than cedar, but "less maintenance" is not "no maintenance." Fall priorities for composite: thorough cleaning (especially between boards), removal of all organic debris, and inspection of fasteners and hardware for corrosion.
Composite decking does not need staining or sealing. It does not need moss treatment in the same way cedar does — while algae can form on the surface, it's much less likely to establish the aggressive root system that moss builds on rougher wood surfaces. That said, shaded composite decks in neighborhoods like Ravenna, Wedgwood, or the tree-heavy parts of Kirkland can develop surface algae quickly; a mildewcide cleaner applied in fall and again in late winter handles this effectively.
The composite vs. cedar comparison covers this in more detail if you're considering a material change.
PVC Decking
Pure PVC decking is the lowest-maintenance material option for Seattle — it doesn't absorb water, doesn't support biological growth as readily as wood or wood-composite products, and doesn't require staining or sealing. Fall prep is primarily cleaning, hardware inspection, and furniture management. AZEK and TimberTech's PVC lines are designed specifically for high-moisture environments and perform exceptionally well through Pacific Northwest winters.
Membrane Decking
Waterproof vinyl membrane decking — common on rooftop decks and decks above living space in Seattle — requires fall inspection of the membrane seams, perimeter flashing, drains, and any penetrations (posts, railings, vents). The entire point of membrane decking is to keep water out of the structure below, so any breach in the membrane is a priority repair. Fall inspection should verify that all seams are intact, no bubbling or delamination has occurred, and drains are clear and functional before winter rain arrives.
Your Fall Prep Checklist at a Glance
Use this summary checklist to track your completion through September:
- [ ] Structural inspection — ledger, beams, joists, posts, railings, stairs
- [ ] Hardware check — test all screws, inspect post bases and joist hangers, replace corroded fasteners
- [ ] Deep clean — oxygen bleach treatment for wood, composite deck cleaner for composite/PVC
- [ ] Moss and algae removal — scrub existing growth, apply treatment
- [ ] Re-stain cedar — water bead test first; apply penetrating stain if needed, back-brush in
- [ ] Clear drainage channels — between all board gaps, perimeter, post base areas
- [ ] Zinc strips installed — along house edge, any mid-deck coverage strips
- [ ] Vegetation trimmed — nothing touching deck, overhanging branches cut back
- [ ] Furniture stored or covered — cushions inside, frames stored or covered, pots managed
- [ ] Repairs scheduled — any structural or significant cosmetic issues booked with a contractor
Get Professional Help Before the Window Closes
Fall deck prep in Seattle rewards homeowners who start in September and penalizes those who wait until October. If you're looking at a deck that needs staining, has structural concerns, has corroded hardware, or has been through a few winters without professional attention, now is the time to call.
The Seattle Decking Company serves homeowners throughout King County — Seattle, Bellevue, Kirkland, Redmond, Bothell, Kenmore, Shoreline, and surrounding communities. We offer full fall maintenance services including inspection, deep cleaning, moss treatment, zinc strip installation, cedar staining, hardware replacement, and board repair. We can also assess whether your deck's condition warrants a larger restoration or replacement project and give you an honest answer about timing and cost.
Call us at (425) 675-6259 to schedule your fall deck inspection and maintenance visit, or reach out through our contact page. Our schedule fills quickly in September — we recommend calling by early September to secure a late-September appointment before the staining window closes. You can also get a sense of what professional service costs by reviewing our Seattle deck cost guide or our deck repair service page.
Don't let another Seattle winter take years off your deck. One afternoon of prep work in September — or one call to schedule professional service — makes a measurable difference in how your deck comes out of winter and how long it lasts before major investment is required.
Frequently Asked Questions
When is the last safe date to stain a cedar deck in Seattle?
Do composite decks need fall maintenance too?
How do zinc strips prevent moss on a deck?
What's the difference between hot-dipped galvanized and stainless steel deck fasteners — and which should I use?
Can I stain my deck myself, or should I hire a professional?
How much does fall deck maintenance cost in Seattle?
What causes the orange staining I see around nails and screws on my deck?
When should I call a deck contractor instead of doing fall prep myself?
My deck has moss every year no matter what I do. Is there a permanent solution?
Does Seattle require permits for deck repair work?
How long does a cedar deck last in Seattle with proper maintenance?
Is fall a good time to replace a deck instead of maintain it?
Planning a deck in the Seattle area?
Get an onsite design review and a clear, itemized quote from a licensed local builder.
Request a Free Quote