
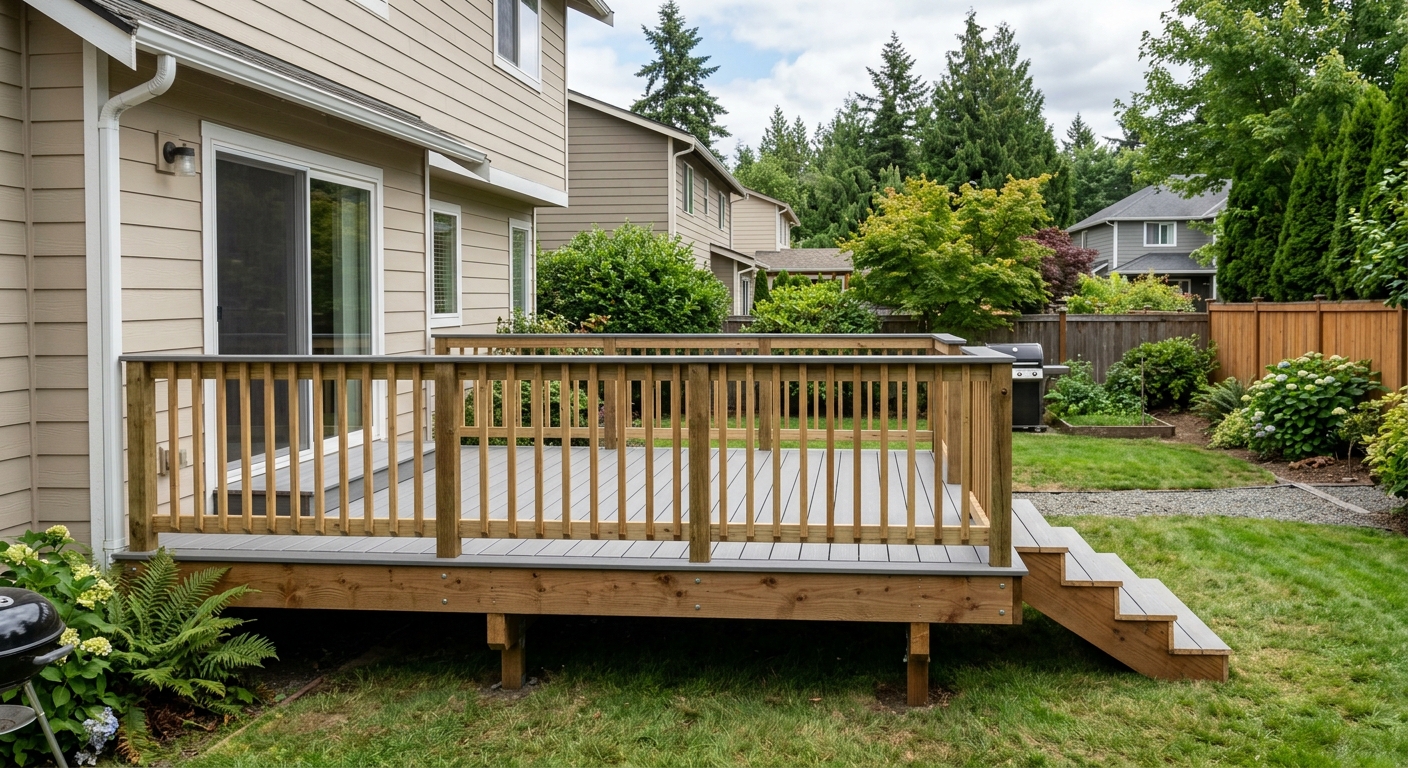
Seattle homeowners have rewritten what "backyard" means. Across King County — from the narrow urban lots of Capitol Hill and Columbia City to the sweeping hillside parcels in Bellevue's west hills — we're watching backyards transform into year-round outdoor rooms that function as genuine extensions of the home's living space. Not seasonal furniture on concrete. Not a neglected PT deck that's only comfortable in July. Full outdoor rooms with a defined floor, a weather-managing overhead structure, intentional lighting, and a heat source that makes October evenings comfortable enough to actually use.
We've been building these spaces in King County for over 15 years, and the transformation in what homeowners are asking for is dramatic. Five years ago, the conversation started with "deck or patio?" Today it starts with "how do we design this so we're actually out there nine months a year?" The question has shifted from material to experience — and that shift changes everything about how we approach outdoor design.
The good news: Seattle's climate, which looks like a liability, is actually an asset for outdoor living when you design around it correctly. The ambient temperature is comfortable for outdoor use 10 months a year. The light in spring and fall is exceptional. The challenge is rain management, and the solutions — covered structures, louvered roofs, strategic layout — are well-established and increasingly affordable. Homeowners who get the design right use their outdoor space from February through November. Those who skip the overhead structure use it from June through August.
The Three-Layer Framework: How We Design Every Outdoor Room
Interior designers understand that a room needs defined boundaries to feel comfortable and intentional. The same principle applies to exterior space. An open concrete patio with a table sitting in the middle feels exposed, unfinished, and cold — even on a nice day. The same footprint with a pergola overhead, low garden beds along two sides, built-in bench seating at the far end, and string lights above the dining table becomes a destination. The materials didn't change the character of the space; the three-layer framework did.
We use this framework as the starting point for every outdoor living project in King County, regardless of size, budget, or lot type:
Layer 1 — The Floor Plan (Zones and Movement)
A well-designed outdoor room separates functions and defines how people move between them. The dining zone needs enough room for the table, chairs pushed back fully, and traffic flow around the perimeter — typically a minimum 12×14 footprint for a six-person table set, 14×16 for eight. The lounge zone needs room for a sofa conversation set plus a coffee table and the ability to pull chairs closer during conversation — typically 12×12 minimum. The cooking zone needs clearance for the grill, a prep counter, and comfortable traffic flow when someone is actively cooking — never adjacent to the path between dining and interior.
The transitions between zones matter as much as the zones themselves. A level change — two to three steps — between dining and lounge creates visual separation and marks the transition clearly. A material shift — composite decking transitioning to natural stone pavers at the fire pit area — communicates that you're moving from one zone to another without a physical barrier. These micro-design decisions are what separate an outdoor room from a large square of deck surface.
Layer 2 — The Overhead Plane (Rain Management and Enclosure)
Seattle's climate demands that the overhead plane be addressed — not as an optional luxury but as a functional design decision that determines how many months the space is genuinely usable. An outdoor room with no overhead structure is usable roughly five months a year in King County. A louvered motorized pergola — the most versatile covered option — extends that to 10–11 months. A fixed polycarbonate roof, at significantly lower cost, gets you to 9 months.
The overhead plane doesn't have to cover the entire space. In fact, one of the most effective Seattle outdoor room designs uses a covered zone (typically dining, where you want to be comfortable in rain) and an open zone (lounge or fire pit, where you want clear sky above in summer). This hybrid approach maximizes year-round usability in the covered zone while preserving the open-air feeling that makes summer evenings worth staying outside for.
The structural decision — attached vs. freestanding, louvered vs. fixed, aluminum vs. cedar — depends on budget, aesthetic, and site-specific requirements. But the decision to have some overhead cover over at least the primary use zone is almost always the right call for Seattle. See our detailed coverage guide at /blog/pergolas-covered-decks-seattle for the full cost and option breakdown.
Layer 3 — The Vertical Layer (Enclosure Without Walls)
The third layer is the most commonly missed, and it's what distinguishes an outdoor room from an outdoor platform. Enclosure creates the psychological sense of "room" without physical walls. It can be achieved through multiple strategies:
- Built-in bench seating along two sides of a conversation area, creating a defined perimeter
- Cable or glass railing that establishes a clear boundary while preserving views
- Cedar privacy screens — horizontal slat panels attached to the railing frame — that block specific sightlines without blocking light
- Planting beds at the deck perimeter that create a soft boundary at grade level
- Overhead string lights that create a virtual ceiling and define the room boundary visually after dark
The vertical layer doesn't require significant budget. A $2,000 cedar privacy screen on a single fence-side exposure can transform an exposed deck into a room. The return on that investment — in actual use and in perceived quality of the space — is disproportionate to the cost.
| Category | Value |
|---|---|
| Open concrete patio | months4 |
| Open wood/composite deck | months5 |
| Deck + open pergola | months6 |
| Deck + polycarbonate roof | months9 |
| Deck + louvered pergola | months11 |
| Full outdoor room (all 3 layers) | months11 |
Small Urban Backyards: Capitol Hill, First Hill, Columbia City, West Seattle
The most challenging and rewarding outdoor living projects we work on in King County are the small urban lots — parcels 25 to 40 feet wide with 30 to 50 feet of usable backyard depth after setbacks. The challenge isn't square footage. It's creating a space that feels genuinely functional and room-like at small scale, rather than a strip of outdoor area too small to commit to.
The specific neighborhoods we work in most: Capitol Hill, First Hill, Central District, Columbia City, Columbia Heights, West Seattle (Admiral and Morgan Junction), Beacon Hill, and Rainier Valley. Each has slightly different character — the craftsman bungalows of Columbia City give way to the foursquares of First Hill — but the lot constraints are similar.
Multi-Level Decking: The Primary Strategy
The most effective tool for maximizing a small urban lot is vertical. A main deck off the living level, connected by wide steps (42 to 48 inches) to a lower landing at or near grade, doubles usable outdoor area without requiring a larger footprint. The two levels create natural functional separation: dining and primary gathering above, secondary lounge or fire pit area below. The steps themselves become supplemental seating in summer when everyone wants to spread out.
The level change also introduces visual interest that a flat single-level deck lacks. On a small lot, visual complexity is a feature — it makes the space feel designed and intentional rather than squeezed. A well-executed multi-level design on a 28-foot-wide Capitol Hill lot can feel as spacious as a flat 400-square-foot deck on paper, because every zone is clearly defined and purposeful.
Structural note: Seattle's sloped lots often create multi-level naturally — the main deck is at door height, and the yard drops 3 to 5 feet across the backyard depth. This grade change, which might seem like a complication, is actually an asset for this design approach. We work with the topography rather than flattening it.
Built-In Elements: Every Piece Does Double Duty
On a small urban deck, furniture creates clutter. Built-in elements do two jobs at once and make the space feel designed from the inside out.
Built-in bench seating along two sides of a fire feature replaces the cluster of moveable chairs that never quite works on a tight deck. A U-shaped bench seats six to eight people comfortably, anchors the conversation zone, and — critically — its base provides concealed storage for cushions, throw blankets, and outdoor accessories. On a 12×16 deck, a built-in bench eliminates three to five pieces of outdoor furniture that would otherwise make the space feel cluttered.
Built-in planter boxes at the railing perimeter create a privacy screen and visual boundary while adding greenery that softens the hard-surface character of an urban deck. Cascading plants — ferns, ornamental grasses, climbing roses — grow into privacy screens over two to three seasons without requiring fence height variances.
Integrated step lighting in stair risers turns functional steps into a design element and makes the level-change navigation safe in the evening without adding a lighting fixture that takes up space.
Material Selection at Small Scale
On a small urban deck, material selection has outsized visual impact. A tight 14×18 foot deck in dark composite with horizontal cable railing reads as intentionally designed and contemporary. The same footprint in weathered cedar with wood balusters reads as an afterthought or a rental renovation. We consistently recommend capped composite for urban lots where design impact per square foot matters.
Trex Transcend in dark tones — Spiced Rum, Havana Gold — provides a rich contrast to the gray of Seattle's sky and integrates with the dark exterior trim common on Capitol Hill craftsmans. TimberTech Legacy in warm neutrals — Tigerwood, Antique Palm — works well with the lighter stucco and painted-wood exteriors of West Seattle and Admiral District colonials.
Key insight
Privacy as a Design Element
Urban lots are adjacently constrained — a neighbor's kitchen window overlooking your deck, a shared fence line 8 feet away. Privacy isn't a luxury in these situations; it's a functional requirement for actually using the space.
The most effective privacy solutions we implement on small urban decks:
Cedar privacy screens — horizontal slat panels attached to railing posts, typically 6 to 8 feet tall — block specific sightlines while allowing air flow and avoiding the visual weight of a solid fence. Cedar weathers naturally, doesn't require painting, and complements both contemporary and traditional Pacific Northwest home exteriors.
Cable railing with privacy planters — cable railing at standard height (36 to 42 inches) plus a planter box at railing height, filled with ornamental grasses or ferns, creates 5 to 6 feet of effective visual screen at lower cost than a full privacy panel.
Strategic overhead cover placement — a covered pergola positioned on the neighbor-facing side of the deck creates effective privacy by drawing your visual attention inward (to the covered zone) rather than outward (toward the adjacent property). The structure itself becomes the privacy boundary.
Eastside Suburban Designs: Kirkland, Bellevue, Redmond, Sammamish
Eastside lots present different design challenges than urban lots. The lots are larger — 60 to 80 feet of usable backyard depth is common in Kirkland and Redmond; 80 to 120 feet is not unusual in Sammamish. The challenge isn't constraint; it's coherence. A large backyard without a clear design framework becomes scattered — a deck here, a patio there, a fire pit in the corner — and the sum feels less useful than its parts.
The Organizing Principle: One Strong Structure, Radiating Zones
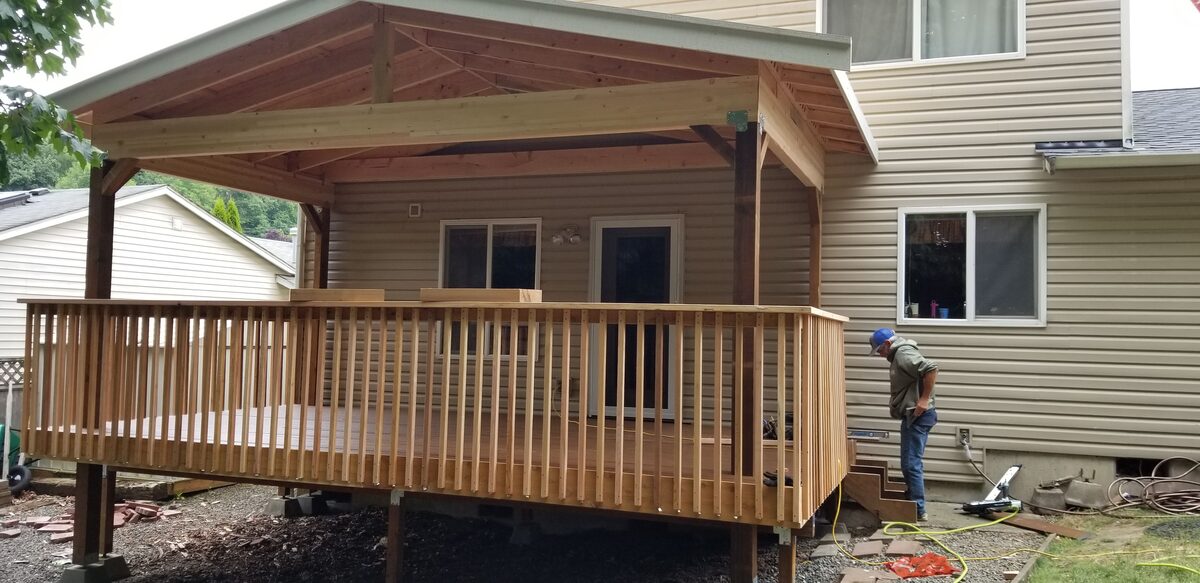
The most successful Eastside outdoor rooms we design start with one primary structure that anchors the design — typically a large covered deck, 400 to 700 square feet, positioned off the main living level. Everything else radiates from that anchor: a fire pit area 12 to 15 feet away, an outdoor kitchen zone, a pathway to the lawn, a secondary uncovered lounge or children's play area.
The primary structure needs to be large enough to feel like a primary living space — not a transitional zone. On an Eastside lot, this usually means a minimum 16×24 foot deck (384 square feet) with a covered dining zone (minimum 16×16) and an adjacent uncovered lounge zone. Structures smaller than this feel undersized relative to the lot and encourage the furniture-cluttered deck aesthetic we're trying to avoid.
Outdoor Kitchens: The Eastside Priority
Eastside homeowners invest in outdoor kitchens at a higher rate than Seattle city homeowners — larger lots with more setback clearance, higher home values supporting the investment, and a demographic that has more frequently been to high-end resort outdoor living environments. A built-in grill station with counter space, a small refrigerator, and a sink changes behavior: cooking moves permanently outside in summer, which means the outdoor space is used daily rather than occasionally.
Cost for a mid-grade built-in outdoor kitchen in King County: $8,000–$20,000 depending on appliance selection (grill, side burner, refrigerator, wine cooler), countertop material (granite, concrete, or bluestone), and gas line routing from the house. A pergola directly over the outdoor kitchen — which protects appliances and makes cooking comfortable during the persistent Seattle drizzle — adds $5,000–$15,000 depending on size and style.
The return on investment is stronger than most homeowners expect. An Eastside kitchen addition paired with a quality covered deck is among the strongest-returning combinations in the King County real estate market, where buyers specifically look for functional outdoor living and are willing to pay for it.
Tip
Cable Railing for View Lots
Kirkland's west-facing lots, Bellevue's hilltop properties, and Mercer Island's nearly all-water-view parcels share one design priority: preserving sightlines. Glass or cable railing — horizontal stainless cables with steel or aluminum posts — is the right choice when the view is a primary asset of the property.
Cable railing on a view lot isn't a luxury add-on; it's a functional requirement for the space to deliver its primary value. A composite baluster railing on a Kirkland lot with a Lake Washington view is the equivalent of putting a frosted window over a picture window. We specify cable railing on every view lot as a default recommendation, and we've never had a client regret it.
Cost premium: cable railing runs $150–$250 per linear foot installed in King County versus $55–$95 for composite balusters. On a 100-linear-foot railing run, that's $7,500–$15,500 in premium. On a lot with a meaningful water or mountain view, that premium is trivial relative to the value the view contributes to the property. See our deck railing options guide for the full comparison.
| Category | Value |
|---|---|
| Composite deck only (500 sqft) | $42,000 |
| Deck + open cedar pergola | $52,000 |
| Deck + polycarbonate roof pergola | $62,000 |
| Deck + louvered pergola | $75,000 |
| Full outdoor room + outdoor kitchen | $95,000 |
Sammamish Plateau: Addressing the Wind
Sammamish sits higher than most of the Eastside and experiences consistent southwest winds, particularly in spring and fall. This affects outdoor living design in two ways: first, open pergolas and shade sails are vulnerable to wind damage at Sammamish exposures; second, comfortable outdoor sitting temperature is typically 3 to 5 degrees colder at Sammamish than at equivalent Bellevue or Kirkland elevations.
For Sammamish projects, we recommend: louvered or solid-roof covered structures over open pergolas (wind resistance is significantly higher), gas or electric radiant heaters mounted to the covered structure ceiling, and sightline-matched screen panels on the prevailing wind exposure (typically southwest). These adjustments extend comfortable use by 4 to 6 weeks in spring and fall compared to open structures.
Hillside Lots: The Opportunity Hidden in the Topography
Seattle's hillside lots — West Seattle bluffs, Queen Anne's south slope, Bellevue's hillside neighborhoods west of I-405, and the steep Issaquah escarpment — look complicated on paper. The grade change of 8 to 20 feet from the house to the bottom of the lot creates structural challenges and permit implications that simpler flat lots don't have.
But hillside lots, designed correctly, produce the most dramatic outdoor rooms in King County. The elevation gives you views. The grade differential creates natural level separation that multi-level design uses as an asset. The elevated position makes the space feel private without requiring privacy screens.
Elevated Deck Design on Hillside Lots
An elevated deck on a hillside lot — sometimes called a "walking out" deck because it walks out from the upper-level living space at a height that puts it 8 to 16 feet above the grade at its far edge — requires structural engineering that flat lots don't. Posts of 10 to 16 feet in concrete footings, diagonal bracing for lateral load, and in some cases moment frames or knee bracing for seismic resistance (Seattle is Seismic Design Category D2) add cost that isn't present on low-elevation decks.
The structural cost adds roughly $4,000–$8,000 to a 400-square-foot elevated deck versus the same-size low-elevation deck. The experiential return is worth significantly more than that on a true hillside lot with views — you're creating a primary outdoor room that captures a view asset the interior of the home may not even have.
Note
Cantilevered and Suspended Designs
For extreme hillside situations — lots that drop 15 to 20 feet within the first 20 feet of backyard — cantilevered or cable-suspended deck systems are occasionally the right structural approach. A cantilevered deck extends from a structural wall connection point without posts, allowing the deck to "float" over a steep hillside. Cable-suspended systems hang the deck from above-grade structure.
Both approaches are engineering-intensive and cost significantly more than post-supported elevated decks — typically $70,000–$150,000+ for a 300–400 square foot cantilevered or suspended structure. They're the right call only when the lot configuration genuinely prevents conventional post placement. We've built several of these in Bellevue's west hills and on Queen Anne's south-facing lots, and they create outdoor rooms with no visual ground connection — pure sky and view above, steep hillside below.
Taking Advantage of Under-Deck Space
An elevated deck 8 to 12 feet above grade creates a covered storage and utility space beneath. On hillside lots, this space — weather-protected by the deck above — can be converted into a protected below-deck storage room, a workshop, or a covered lower patio accessible from the grade level. Perimeter lattice, cedar skirting, or metal panel cladding closes the space visually and provides security.
Trex Rainescape or similar under-deck drainage systems channel water that passes through the board gaps into perimeter gutters and downspouts, converting the under-deck space from a drip zone to a covered utility area. Cost for a 400-square-foot under-deck drainage system: $3,500–$6,500 installed. For hillside homeowners who need protected storage, the value is clear.
Fire Features: The Single Add That Changes Everything
Of all the elements we build into Seattle outdoor rooms, the one that homeowners most consistently say transformed how they actually use the space is the gas fire feature. Not the composite decking, not the cable railing, not the overhead structure — the fire. It's what makes a comfortable 55-degree October evening actually comfortable instead of merely tolerable. It's what keeps people outside after dinner instead of retreating to the couch the moment the sun drops below the fence.
Gas Fire Pits vs. Gas Fireplaces
The choice between a built-in gas fire pit (flat, table-height, often circular or rectangular, visible flame at conversation-height level) and a gas fireplace (vertical structure with a view panel, wall-mounted or freestanding, often with a surround) is primarily a function of how you use the outdoor space.
Gas fire pits work in open-area conversation zones — the lounge area on a large Eastside deck, the lower landing on a multi-level urban design. They seat everyone around a central focal point, work with low seating arrangements, and create a campfire-social feel that's very well suited to Seattle's Pacific Northwest character.
Gas fireplaces work better on smaller linear decks where a pit wouldn't fit, in covered outdoor rooms where vertical wall space is available, and in situations where the fire feature doubles as a privacy screen (a fireplace against the property fence line creates both a focal point and a visual block).
Gas Line Requirements
Both fire feature types require a dedicated gas line from the house meter. In Seattle and King County, gas line extension for outdoor fire features typically runs $800–$2,500 depending on the distance from the meter, the need to route through walls or below grade, and the BTU capacity of the feature. We coordinate gas line work with licensed plumbers on every project — it's included in our project management, not left to the homeowner to coordinate separately.
Important
Wood-Burning vs. Gas
Wood fires are restricted in King County by Puget Sound Clean Air Agency (PSCAA) regulations on burn-restriction days — which are issued based on air quality index and are most common November through February, exactly the shoulder-season evenings when a fire would be most useful. Gas fire features operate without burn restrictions, offer instant ignition and extinguishing, and don't require wood storage or ash cleanup. For Seattle outdoor living design, gas is the practical choice for year-round use.
Landscape Lighting: Turning a Daytime Deck Into an Evening Destination
A well-designed outdoor room without lighting is a daytime space only. In Seattle, where evenings in fall and winter get dark by 4:30 PM, lighting is what converts an outdoor investment into a year-round evening destination.
Effective outdoor lighting is layered — no single fixture type accomplishes all the functions of a well-lit outdoor room. The layer system we use:
Layer 1: Ambient (Post Cap and Overhead)
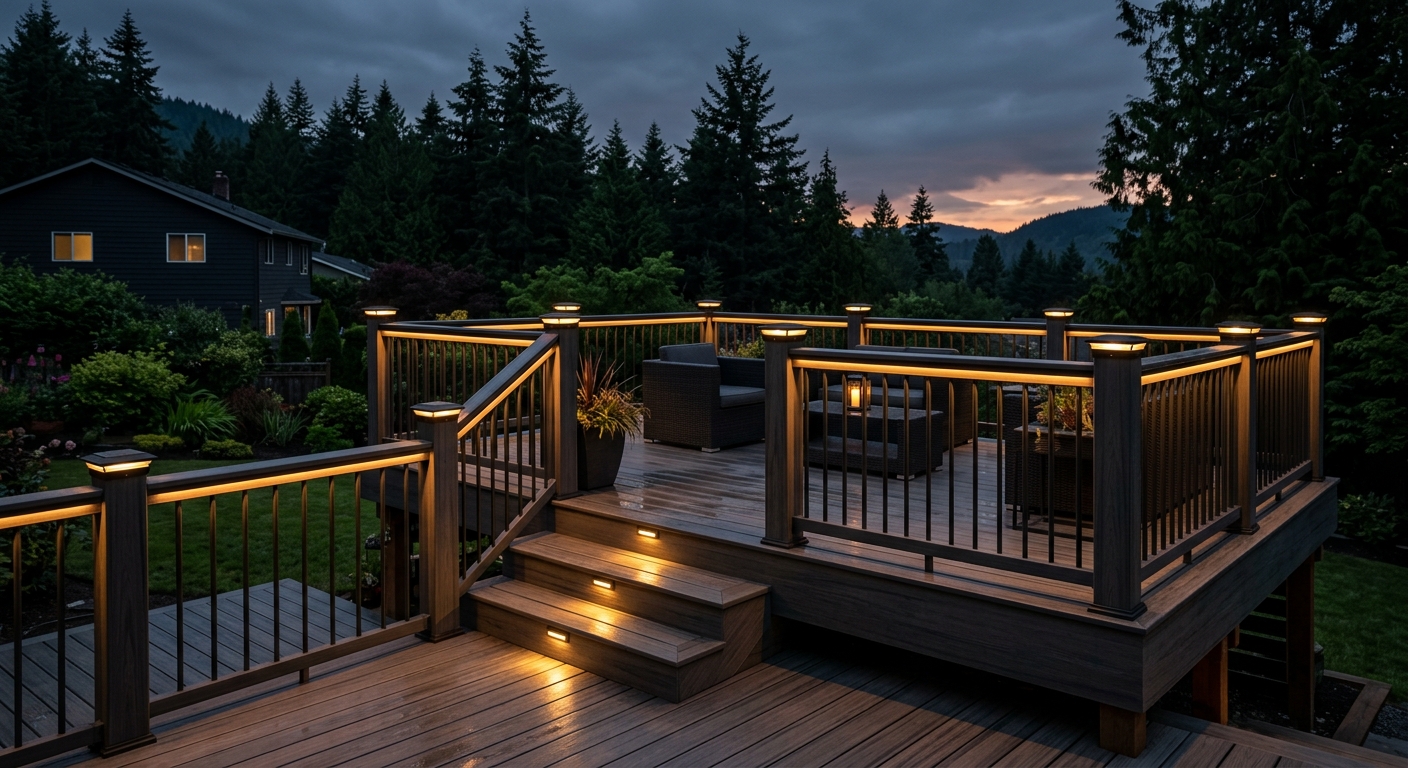
Post cap lights — LED fixtures that replace the decorative caps on railing posts — provide soft ambient light at the perimeter of the space. They define the boundary of the outdoor room, provide enough light to see comfortably, and create a warm glow visible from inside the house that draws people outdoors. Cost: $40–$150 per post cap depending on fixture quality and integration style.
String lights overhead — strung between pergola beams or from existing fence or tree anchor points — create a diffuse ambient layer that adds warmth and festivity to the space at very low cost. Quality outdoor string lights ($0.50–$1.00/linear foot) on a timer create the feel of outdoor dining that homeowners consistently love. Low-cost; high-impact.
Layer 2: Accent (Under-Rail and Step Risers)
Under-rail lighting — LED strip lights mounted to the underside of the cap rail, casting light downward onto the deck surface — provides functional floor-level light and an attractive floating-rail visual effect at night. Inexpensive to install during construction (cable routing is easy when rails are being installed), difficult to add later.
Step riser lights — recessed LED strips in stair risers that illuminate each step from below — serve both safety and aesthetic functions. They make the multi-level transition safe at night and create a designed architectural effect. Cost: $100–$200 per step, installed.
Layer 3: Task (Cooking Zone and Feature Lighting)
The cooking zone needs adequate task lighting — 50 FC minimum at the cooking surface. An overhead fixture or two focused LED downlights in the covered pergola ceiling provides this. Outdoor kitchen surfaces often include integrated LED strip lighting under the upper cabinet (if applicable) for prep area illumination.
Fire feature spotlighting — a directional uplight focused on the fireplace surround or a downlight above the fire pit — ensures the fire feature is visible as a focal point from the dining area and creates dramatic shadow play on textured surround materials.
Tip
Real Project Examples: Design, Cost, and Outcome
Project 1: Capitol Hill Multi-Level Urban Deck
Site: 28-foot-wide urban lot, craftsman bungalow, existing PT deck 15 years old and failing, 4-foot grade change from the house to the back fence.
Design: Removed the existing PT structure. Built a new main composite deck (14×18, 252 sqft) at living level using Trex Transcend Spiced Rum, with cable railing on two sides and cedar privacy screen on the north exposure. Wide stairs (48") to a lower landing (10×14, 140 sqft) at grade level, surfaced in the same composite. Built-in L-shaped bench at the lower level around a concrete gas fire bowl. Post cap lighting throughout. String lights overhead between house and fence anchor points.
Total project cost: $54,000 (composite decking, multi-level frame, cable railing, built-in bench, fire feature, gas line, post cap and step lighting)
Outcome: The homeowners now use the lower level for morning coffee from March through November. Summer dinners happen upstairs at the table, then everyone moves to the lower level by the fire for the rest of the evening. They have not used the interior living room more than twice in the last six months for similar social occasions.
Project 2: Kirkland View Lot with Outdoor Kitchen
Site: 65-foot-wide Kirkland lot, 15 feet of backyard depth before a steep drop, southeast-facing with clear Cascade views.
Design: 600-square-foot main deck (20×30) at door height, with 12 feet of grade at the far edge. Frame engineered for elevated loading. TimberTech Legacy Tigerwood decking. Cable railing on all three exposed sides to preserve views. 16×20 louvered pergola over the dining zone (Struxure system, motorized, with integrated overhead heaters). Built-in outdoor kitchen station with 48" premium grill, 24" refrigerator, and concrete counter. Gas line from meter, 45 feet. Post cap lighting, integrated LED in pergola louvers, task lighting over kitchen.
Total project cost: $118,000 (deck, pergola, outdoor kitchen, cable railing, gas line, lighting)
Refinance appraisal increase: $80,000 above pre-project appraisal
Outcome: Used 11 months per year. Closed the louvered roof during both windstorms in the winter — system performed as expected. Outdoor kitchen has moved 80% of summer cooking outside permanently.
Project 3: Sammamish Plateau Full Outdoor Room
Site: 80-foot-wide Sammamish lot, relatively flat, existing concrete patio failing at the edges, homeowners planning to retire in place.
Design: Demo'd existing concrete. Built 500-square-foot composite deck (Fiberon Symmetry in Ipe tone), framed for aging-in-place with no level change at door threshold and 36-inch pathway widths throughout. 16×20 polycarbonate-roofed cedar pergola over primary dining zone (solid roof for Sammamish wind exposure). Linear gas fireplace against the east fence, with natural stone surround. Concrete pad for secondary seating area adjacent, with permeable pavers.
Total project cost: $72,000
Outcome: Used through November. The polycarbonate roof has handled two major wind events without damage. The gas fireplace makes October and November evenings consistently comfortable. Homeowners estimate they use the space 3–4 evenings per week from April through October.
Permits and Planning: What Seattle Homeowners Need to Know
Every element of an outdoor room that involves structure above grade requires permit consideration in Seattle and King County. The process isn't complicated when you work with a contractor who manages it, but understanding the framework helps homeowners plan accurately.
Decks: Any deck with a surface more than 18 inches above grade requires a permit in Seattle, filed through the Seattle Department of Construction and Inspections (SDCI). In unincorporated King County, the threshold is the same but filed through King County DPER. Permit fees for a standard residential deck in Seattle run $800–$2,500 depending on project valuation. Processing time: 4–8 weeks during peak season.
Covered structures: Any pergola or covered structure attached to the house requires a permit regardless of size — the connection to the house structure triggers permit review. Freestanding structures over 200 square feet also require permits in most King County jurisdictions. Permit processing for covered structures often requires structural calculations (for attached systems) or an engineered plan set — we include this in our project documentation.
Gas lines and electrical: Gas line extensions and any new electrical circuits on an outdoor project require separate permits and inspections. We coordinate all sub-permit work with licensed subcontractors and ensure all permits receive final sign-off before project closeout.
See our complete King County deck permit guide for the full breakdown of permit requirements, timelines, and fees by jurisdiction.
Budgeting Your Outdoor Living Project: What Seattle Prices Look Like
Seattle and King County labor markets run 25–40% above national averages for exterior construction. These are realistic 2026 ranges for the outdoor living work we complete in King County:
| Project Scope | Estimated Range | Notes |
|---|---|---|
| Basic composite deck, 300 sqft | $24,000–$38,000 | Mid-grade composite, standard railing |
| Composite deck + open pergola, 400 sqft | $38,000–$55,000 | Cedar pergola, no roof panel |
| Deck + polycarbonate roof, 400 sqft | $45,000–$68,000 | Cedar structure, quality panels |
| Deck + louvered pergola, 400 sqft | $62,000–$90,000 | Aluminum louvered system |
| Full outdoor room with outdoor kitchen | $85,000–$130,000 | All elements, mid-grade materials |
| Hillside elevated deck, 400 sqft | $50,000–$80,000 | Engineering required above 8' |
| Multi-level urban deck, 350 sqft | $42,000–$65,000 | Two-level with cable railing |
These ranges reflect project totals including all permits, structural work, decking materials, railing, overhead structure, and basic lighting. Outdoor kitchen appliances, premium fire features, and smart lighting systems are additional.
For the full cost breakdown by project type, see our Seattle deck cost guide. For a comparison of materials — composite, PVC, and cedar — see composite vs cedar decking Seattle.
Note
Choosing a Contractor for Outdoor Living Design in Seattle
Outdoor living projects involve multiple trades — deck framing, covered structure, electrical, gas, landscape — and the coordination between them is where DIY-friendly projects get complicated fast. A covered pergola that doesn't account for the electrical rough-in during framing requires expensive finish work to add lighting after the fact. A gas fire feature installed before the deck framing is complete means a gas line running in the wrong location relative to the final fire pit position.
We design outdoor living projects as integrated systems, not separate line items from separate contractors. Our process:
- Free on-site consultation — we visit, measure, photograph, discuss priorities and budget. No design fee.
- Design proposal — we produce a design concept with dimensions, material selections, and a detailed line-item quote.
- Permit application — we file all permits before scheduling construction.
- Coordination — electrical and gas sub-work is coordinated in sequence with our framing schedule, not handed off to you to manage.
- Project closeout — all permits receive final inspection sign-off. We walk the project with you.
We're licensed in Washington State — verify contractor license status at WA Labor & Industries before signing with any outdoor living contractor. Carry general liability ($1M minimum) and are bonded. We'll provide proof of insurance at the first consultation.
Frequently Asked Questions About Seattle Outdoor Living Design
Frequently Asked Questions
How long will it take to build a full outdoor living space in Seattle?
What's the minimum budget for a quality outdoor living space in Seattle?
Do I need a permit for a pergola in Seattle?
What material should I use for a Seattle outdoor living deck?
How do we handle hillside lots in Seattle for outdoor living?
Is a gas fire feature worth it in Seattle?
What is the best outdoor living design for a small Seattle backyard?
How much does an outdoor kitchen add to an outdoor living project?
Can I use outdoor lighting on a covered pergola?
What's the ROI on outdoor living additions in Seattle?
How do I choose between a louvered pergola and a polycarbonate roof?
Ready to Design Your Seattle Outdoor Room?
The Seattle Decking Company has been building outdoor living spaces across King County for over 15 years. We've designed and built projects from 200-square-foot urban decks in Capitol Hill to 800-square-foot full outdoor rooms in Sammamish, and everything in between.
Our process starts with a free on-site consultation — no design fee, no commitment. We'll assess your space, walk through the design options that fit your lot and lifestyle, and produce a detailed line-item quote with full permit management included.
Call us at (425) 675-6259 or contact us online to schedule your consultation. View completed projects on our outdoor living page and see material options at our composite decking page.
We build year-round and schedule consultations throughout King County — typically within 5–7 business days.
Planning a deck in the Seattle area?
Get an onsite design review and a clear, itemized quote from a licensed local builder.
Request a Free Quote