
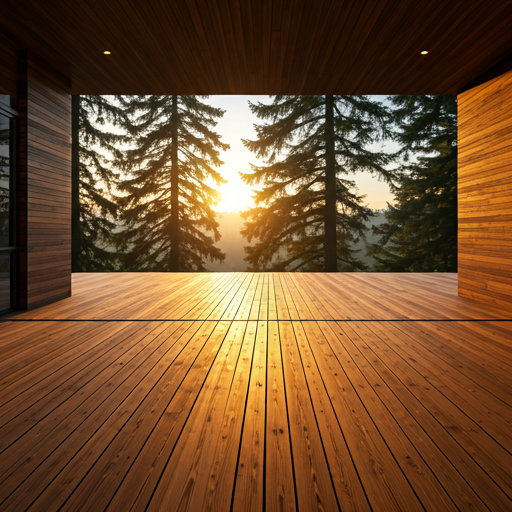
Seattle gets roughly 37 inches of rain per year — not a record-setter by global standards, but what makes the Pacific Northwest genuinely brutal for wood is the relentlessness of it. Weeks of persistent drizzle, morning fog that never quite burns off, soil that stays saturated from November through April. A deck built anywhere else in the country using standard practices will last decades. That same deck in Bothell, Kirkland, or Shoreline can begin showing serious rot within five to seven years if it was built without accounting for our specific climate. We have seen it hundreds of times: a homeowner calls us about staining or a loose board, and what we find underneath is a ledger board that has soaked through, joists that crumble when you push a screwdriver into them, and post bases that have been wicking moisture up into the posts for years. The deck is not just cosmetically compromised — it is structurally dangerous.
What is particularly frustrating is that none of this decay was inevitable. The failures we see again and again trace back to the same handful of installation mistakes — details that cost very little to do correctly the first time but cost thousands of dollars to fix after the fact. According to data from Got Rot, a Seattle-area wood repair specialist, the average deck rot repair in Washington State runs between $1,500 and $3,500, and that is for localized damage. When the rot has spread to the ledger, the rim joist, and the posts — which it often has by the time a homeowner notices — full deck replacement costs in Seattle range from $44 to $88 per square foot for pressure-treated wood and $80 to $180 per square foot for composite, according to Olympic Decks' 2026 cost guide. The prevention details that could have avoided all of that cost maybe $400 to $800 extra on a new build. This article is about those details.
We are going to walk through the five specific mistakes that cause Seattle decks to rot early — and exactly what to do instead. These are not abstract best practices. They are the actual installation methods we use on every deck we build, because in this climate, anything less is building a problem for your customer.
Why Seattle's Climate Is Uniquely Hard on Deck Wood
Before we get into the specific mistakes, it is worth understanding why the Pacific Northwest in general — and the greater Seattle metro specifically — is harder on decks than almost anywhere else in the continental United States. This context explains why details that might be optional in Phoenix or Atlanta are absolutely mandatory here.
The Moisture Cycle That Destroys Wood
The destruction of wood by decay fungi requires four things: moisture, oxygen, warmth, and a food source (the wood itself). You can control only one of those variables reliably in an outdoor structure: moisture. In Seattle, our climate makes moisture control exceptionally difficult for several reasons that compound each other.
First, we have sustained wet periods rather than brief storms. In much of the country, rain falls hard and then surfaces dry out within hours. In Seattle from October through May, surfaces stay damp for days or weeks at a stretch. Decking boards, joists, and ledgers cycle slowly between wet and slightly-less-wet rather than ever drying out completely. Decay fungi thrive in wood with moisture content above 19 percent — in Seattle winters, untreated or improperly detailed deck wood can stay above that threshold for months at a time.
Second, our temperatures are mild. Decay fungi go dormant below about 35°F and die above 110°F. Seattle's famous mild winters — rarely below freezing for extended periods — mean fungi can remain active most of the year. Areas that freeze hard in winter actually get a biological reset that kills active fungal colonies. We do not get that benefit.
Third, the species most commonly used in Pacific Northwest decks — western red cedar — is naturally resistant to decay but only in its heartwood. The sapwood (the outer growth rings, which make up a significant portion of dimensional lumber from second-growth forests) has almost no natural decay resistance. And all wood, regardless of species, is highly vulnerable at end-grain cuts.
Fourth, the combination of our acidic rainfall (pH typically 5.5–6.5) and the tannins in cedar and Douglas fir accelerates corrosion of standard galvanized hardware. Corroded hardware packs moisture against wood, creates crevices where debris collects, and loses its structural holding capacity — all of which accelerates rot.
What the Seattle Building Department Knows About Deck Rot
The Seattle Department of Construction and Inspections requires that decks use treated wood or naturally decay-resistant species for all members in contact with or close to the ground or concrete. This is a code minimum, not a best practice — and code minimums alone are not sufficient to build a deck that will last 25–30 years in Seattle without significant rot intervention. The mistakes we outline below are all technically code-compliant in many jurisdictions. They are still mistakes.
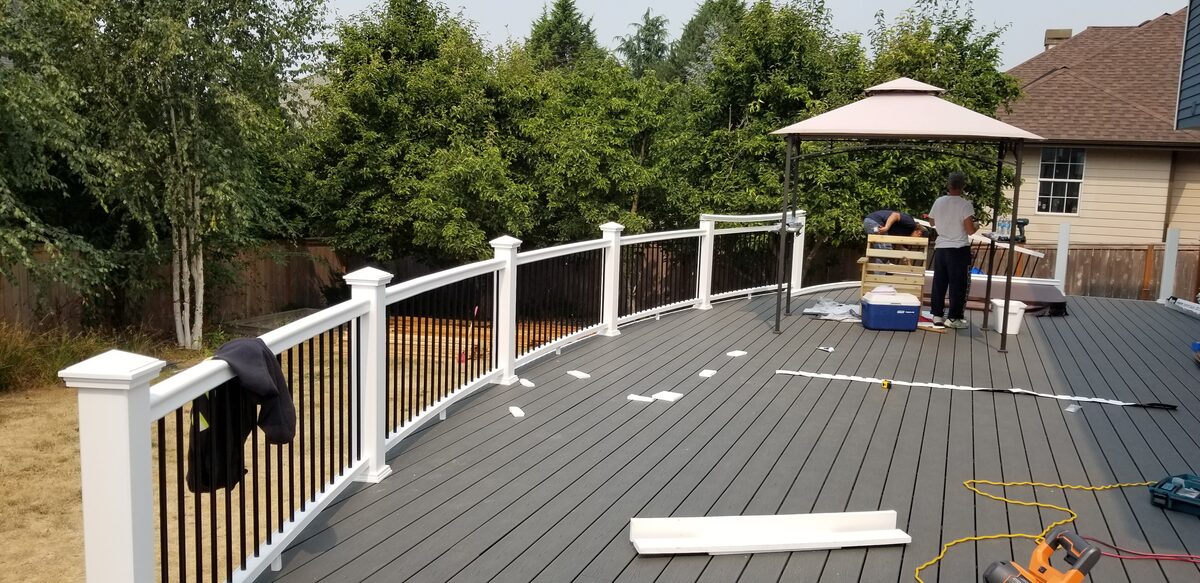
Mistake #1 — Poor Ledger Flashing (The Most Dangerous Failure)
If you could only fix one thing about how decks are built in Seattle, it should be ledger flashing. The ledger board is the piece of dimensional lumber bolted horizontally to your house's rim joist that carries one end of every deck joist. When water gets behind that ledger — and it always tries to — it has nowhere to go. It soaks into the house's rim joist, the floor sheathing, the sill plate, the bottom of the exterior wall framing. By the time you see evidence of the problem on the deck itself, the house may have $15,000 to $40,000 in structural water damage behind the siding.
Why Ledger Failures Are So Common
The ledger failure is common because it requires multiple flashing components installed in a specific sequence, and cutting any corner creates a path for water. A single piece of adhesive flashing tape behind the ledger — which is how many budget decks are built — is not adequate. The tape can adhere imperfectly to the sheathing, lap joints can open over time with seasonal expansion and contraction, and the tape does nothing to address water that runs down the siding and gets behind the ledger from the top or sides.
We have seen ledgers on decks that were only six years old where the rim joist behind the ledger had turned completely to punky rot — the wood crumbled at a touch. The exterior of the deck looked fine. The homeowner had no idea.
The Correct Ledger Flashing System
A properly flashed ledger in Seattle requires three components working together:
Full-width self-adhered membrane. Before the ledger goes on, the entire area of sheathing where the ledger will sit — plus at least 3 inches above and 6 inches below the planned ledger location — should be covered with a high-quality self-adhered waterproofing membrane. We use products like Henry Blueskin VP100, Grace Vycor Plus, or ZIP System flashing tape. The membrane extends behind the siding above, creating a continuous drainage plane. Any fastener penetrations through the ledger and into the house framing should be sealed.
Step flashing at the top. Where the ledger meets the house siding, properly installed step flashing creates an overlapping shingle-like system that directs water down the face of the ledger rather than behind it. Each step piece is integrated with the house wrap or weather-resistive barrier behind the siding.
Kickout flashing at the ends. Where the ledger meets the corner of the house, kickout flashing directs water that runs down the wall out away from the ledger rather than behind it. This is a frequently omitted detail that creates a concentration of water damage at the most vulnerable point of the ledger connection.
The ledger should also be held off the house wall with standoff bolts or spacers where possible, or at minimum the back face of the ledger should be protected by the membrane system so that if water contacts the back of the ledger, it can drain down and out rather than being held in sustained contact with the house structure.
Important
Cost of Getting This Right
Proper ledger flashing system on a typical 12x16 deck: $150–$300 in materials, 2–3 hours of additional labor. Cost of replacing a rotted ledger, sistering or replacing damaged rim joists, addressing house framing damage, and repairing siding: $5,000–$15,000 depending on how deep the damage goes. The math is not complicated.
For more on what proper deck construction costs in Seattle, see our Seattle deck cost guide.
Mistake #2 — Bare Joists With No Top Protection
Pressure-treated lumber is not inherently moisture-proof. The pressure treatment — most commonly ACQ (Alkaline Copper Quaternary) or CA (Copper Azole) in modern decks — protects against fungal decay and insect damage, but only to a degree. And critically, the treatment is more concentrated at the surface of the lumber than in the interior. When you run a saw through pressure-treated wood, the fresh-cut face has significantly less chemical protection than the mill-surfaced face.
How Joists Absorb Moisture From Above
On a deck with open gaps between the decking boards — which is to say, almost every deck — rainwater runs between the boards and directly onto the top of every joist below. That water sits in the small crevice created where the decking board bears on the joist, in exactly the shape designed to trap and hold moisture against the wood. If the deck has any debris accumulation — leaves, pine needles, dirt — that debris holds moisture against the joist top indefinitely.
Over years, the constant wet-dry cycling at the top of each joist causes checking (surface cracking), which creates more places for water to penetrate deeper into the wood. The decay fungi that move into the checked wood then propagate along the joist, and within 8–12 years in Seattle conditions, what looked like perfectly adequate pressure-treated framing is structurally compromised.
The same issue applies to the top face of beams, which carry even more load and are even more expensive to replace.
The Solution: Joist Tape
Trex Protect butyl joist tape is a self-adhesive butyl rubber tape specifically designed to cover the top face of joists and beams before decking is installed. It is available in widths that match common lumber dimensions (1-5/8 inch for joists, wider versions for beams) and comes in 50-foot rolls. The butyl formulation will not crack, harden, or dry out the way asphalt-based alternatives do, and it is backed by a 25-year warranty.
The application is straightforward: before any decking goes down, you roll the tape along the top of every joist and beam from end to end, pressing firmly to ensure adhesion. The tape creates a waterproof membrane on the most moisture-exposed surface of the framing and also acts as a buffer between the pressure-treated wood's copper chemistry and the galvanized metal of the joist hangers — which helps prevent accelerated corrosion at those connection points.
At roughly $1–$2 per linear foot of joist coverage, the cost to tape the framing on a typical 16x20 deck is $200–$400. This is one of the most cost-effective rot prevention details available for wood-framed decks.
Alternative approaches include Hardwood Wraps (a thin polyethylene material that wraps the joist on multiple faces) and ZIP System Tape applied to the joist tops and sides. For decks where we are using ZIP System for the ledger and rim joist detailing, extending the ZIP tape to the joists creates a consistent, well-integrated moisture management system.
Tip
Protecting Rim Joists Too
The rim joist — the outermost joist that closes off the ends of the joist system — is perhaps the most moisture-exposed framing member on a deck. It faces outward, catches rain directly, and has end-grain exposure on both its own ends and where the field joists butt into it. Rim joists should receive joist tape on the top face AND a waterproofing membrane or quality exterior paint/primer on the face if it will be exposed.
Mistake #3 — Specifying Uncapped Composite Decking
This mistake is widespread and costly precisely because it is invisible at the time of purchase. Walk into most lumber yards or big-box stores and look at composite decking displays. The uncapped product looks identical to the capped product. The color options are similar. The board profile may be the same. The price is lower — sometimes 20–30% less per linear foot. And in a dry climate, the performance difference might be negligible for many years.
In Seattle, the difference is decisive.
Capped vs. Uncapped: What the Terms Mean
Composite decking is made from a blend of wood fiber and plastic binders. In uncapped (or "first-generation") composite, that core material is exposed on all four sides. The wood fiber in the core is hygroscopic — it absorbs moisture. In our climate, an uncapped composite board will absorb water, swell and contract seasonally, and begin to support surface mold growth within three to five years. We have replaced uncapped composite decks in the Seattle area that were installed less than four years ago and already had heavy black mold colonization on the surface and checked, deteriorating boards.
Capped composite adds a protective polymer shell — usually polyethylene or polypropylene — over at least three sides of the board (top and both edges), and in the best products, all four sides. That cap is impermeable to moisture. It prevents the wood fiber core from ever getting wet. The result is a board that will not absorb water, will not mold, and will not check or deteriorate from moisture cycling.
The Brands and Product Lines That Matter
Knowing that you need capped composite is half the battle; knowing which product lines within major brands are capped is the other half. Here is the breakdown for the most common brands we encounter:
Trex: Transcend, Select, and Enhance Naturals lines are capped. The original Trex "Enhance Basics" line is an uncapped product. If someone quotes you "Trex" without specifying the line, ask which one.
Fiberon: Good Life, Horizon, and ProTect Advantage lines are capped on three or four sides depending on the product.
TimberTech: AZEK (all-PVC, no wood fiber), Harvest Collection, and Legacy Collection are capped. TimberTech's Legacy series uses a PVC cap shell. See our comparison of Trex vs. Fiberon vs. TimberTech in Seattle for a more detailed breakdown.
Always request the specification sheet. A reputable contractor will provide the spec sheet for any composite product they quote. The spec sheet will list cap configuration, moisture absorption rate (ASTM D1037 test), and mold/mildew resistance. If a contractor cannot or will not provide the spec sheet, that is a red flag.
Key insight
The Cost Reality
The upcharge for capped vs. uncapped composite typically runs $1.50–$3.00 per linear foot. On a 16x20 deck requiring roughly 500 linear feet of decking, that is a $750–$1,500 difference in material cost. The cost to replace a failed uncapped composite deck — including labor, disposal of the old material, and new materials — typically runs $12,000–$25,000. The decision to save $1,500 upfront can cost $20,000 five years later.
For a full comparison of Seattle-appropriate composite decking options including our recommendations by budget and use case, see our composite decking page.
Mistake #4 — Unsealed Cedar End-Grain
If you are building with cedar — and western red cedar remains one of the most beautiful and appropriate natural decking choices for the Pacific Northwest — there is one installation detail that separates decks that age gracefully from decks that begin deteriorating almost immediately. That detail is end-grain sealing.
The Physics of End-Grain Absorption
Wood is structured like a bundle of straws running along the length of the log. At any cross-section cut — a board end, a notch cut, a bird's mouth cut in a post — you are exposing the open ends of thousands of those straws. Moisture moves through wood primarily along those longitudinal channels, meaning end-grain absorbs water dramatically faster than face grain or edge grain.
Research on wood moisture absorption consistently shows that end-grain absorbs moisture at rates 100 times higher or more than face grain — some studies put the differential even higher for species like cedar. In practical terms, this means that the freshly cut end of a cedar deck board, if left unsealed, becomes a continuous moisture pump for the wood surrounding it. Moisture wicks in at the end, migrates along the grain into the board, and creates the exact conditions decay fungi need.
This issue is particularly acute in Seattle because field cuts are common. When a cedar deck board needs to be cut to length on site — which is most boards — the freshly cut end is fully exposed to our wet climate. Boards that were kiln-dried and stable from the mill now have fresh open end-grain on one or both ends.
The Solution: Immediate End-Grain Sealing
The fix is straightforward and inexpensive: seal every field cut immediately — within minutes ideally, before any moisture has a chance to penetrate — with a dedicated end-grain sealer.
The two products we recommend most consistently are:
Anchorseal 2 (manufactured by UC Coatings): A water-based emulsion wax specifically designed for end-grain sealing. Apply with a brush immediately after cutting. Dries to a flexible, water-repellent film that slows moisture exchange at the cut face. A quart covers hundreds of cuts and costs $15–$20.
Tenco End Grain Sealer: A penetrating oil-based sealer that works by filling the cellular structure at the end-grain face with oil that resists water. Good for situations where the aesthetic of the end-grain is visible (like a fascia board end or a post top).
The protocol on our job sites is simple: the cut happens, and the sealing happens within the same minute. Boards do not sit overnight with unsealed ends. When a board is cut and then set aside for installation the following day, the unsealed end has been exposed to dew, possibly rain, and nighttime humidity — all of which have begun their work.
Note
Post Tops Are Critical
One of the most overlooked end-grain exposure points on a deck is the top of the posts. A 6x6 post standing vertically has its top face fully exposed to rain — and that top face is end-grain. Without a post cap or end-grain sealer, the post top becomes a moisture entry point that drives decay down through the post's interior. We cap every post top with a post cap that sheds water, AND we seal the end-grain with Anchorseal 2 before the cap goes on. Two layers of protection for a detail that fails frequently.
See our discussion of cedar decking in Seattle for more on selecting and maintaining natural wood decks in the Pacific Northwest.
Mistake #5 — Wood Posts in Direct Contact With Concrete
Walk around almost any older deck in the greater Seattle area and look at the base of the posts. Odds are strong that you will find one of two situations: either the post sits directly on a concrete pier with no separation, or the post is embedded in concrete — a practice that is now recognized as nearly guaranteeing post rot within 10–15 years in wet climates.
Why Post-to-Concrete Contact Is So Destructive
Concrete is porous and holds moisture. Even when the surface looks dry, the interior of a concrete pier or footing retains significant moisture. When a wood post sits directly on concrete, capillary action wicks that moisture continuously up into the end-grain of the post. The post-concrete interface is also a natural debris trap — leaves, dirt, and organic material accumulate there, hold more moisture, and create a perfect rot incubator.
The situation is even worse for posts embedded in concrete. These posts have end-grain contact with the concrete on all four sides at the base, moisture is trapped with no drainage pathway, and the beginning of decay in the embedded section is completely invisible — you cannot see it happening until the post fails catastrophically.
We have seen embedded posts on decks that looked structurally fine from the surface, where probing at the concrete grade line revealed that 6 inches of the post bottom had completely rotted away. The post was being held in place only by the concrete surrounding the rot cavity — effectively a structural failure waiting for a load event.
The Simpson Strong-Tie ABU Solution
The Simpson Strong-Tie ABU Series Adjustable Post Base solves this problem cleanly. The ABU is designed to bolt to an existing concrete pier (using anchor bolts set during the pour, or retrofitted with epoxy anchors) and to cradle the base of a wood post 1 inch above the concrete surface. That 1-inch standoff — the built-in standoff in the ABU design — means the post end-grain never touches the concrete. Water that contacts the base of the post can drain away freely rather than being wicked into the wood.
The ABU is available in sizes for 4x4, 6x6, and 8x8 posts, made from 12-gauge steel with Simpson's ZMAX coating (G185 galvanized) for corrosion resistance. In our experience, the ZMAX-coated ABU performs well in the Seattle climate, though for maximum longevity in very exposed coastal or high-humidity situations, the stainless steel version is worth the upcharge.
Installation is straightforward: set the post in the ABU cradle, fasten with the specified nails or Strong-Drive SD screws, and align before the concrete anchor epoxy cures if you are retrofitting. The post is elevated, supported on all four sides, and free-draining at the base.
The cost premium for using ABU post bases versus direct embedding is modest — the bases themselves run $15–$35 each depending on size, plus the anchor hardware. On a deck with 6 posts, that is $90–$210 in additional hardware. The cost of post replacement when direct-contact rot occurs — excavating the footing, cutting out the old post, sistering new framing, reinstalling the decking above — typically runs $500–$1,200 per post, and rarely is just one post affected.
Tip
The Hardware Problem Nobody Talks About: Galvanized Fasteners and Cedar Tannins
Even a perfectly built deck with correct flashing, joist tape, capped composite, sealed end-grain, and elevated post bases can develop accelerated corrosion issues if the wrong hardware is specified. This is not discussed enough, and it is especially relevant in Seattle.
Why Standard Galvanized Hardware Fails Prematurely Here
Standard galvanized hardware — the joist hangers, structural screws, carriage bolts, and post bases that hold your deck together — uses a zinc coating to resist corrosion. In mild environments, galvanized hardware performs adequately for many years. In the Pacific Northwest, two factors accelerate its failure:
Acidic rainfall. Seattle's rainfall has a pH of roughly 5.5–6.5, significantly more acidic than neutral water. Acid accelerates the oxidation of zinc, eating through the protective coating faster than in neutral-pH environments.
Cedar tannins. Western red cedar contains high concentrations of tannins — the same compounds that give the wood its natural rot resistance. Those tannins are water-soluble and leach out in rain, running down the wood and contacting any hardware attached to it. Tannins are acidic and chemically aggressive toward zinc coatings. When tannin-laden runoff contacts standard galvanized hardware repeatedly over years, the hardware corrodes significantly faster than its rating would suggest.
The result is joist hangers and structural connectors that show significant orange rust corrosion within 5–10 years, pitting that traps more moisture and debris, and eventually loss of structural integrity in the connections that hold the deck frame together.
The Solution: Stainless Steel or ZMAX Hardware
For cedar decks in Seattle, we specify stainless steel hardware (316 marine-grade stainless for highest corrosion resistance, 304 stainless as a minimum) at all structural connections. Stainless is immune to the tannin-acidic rain combination that destroys standard galvanized hardware.
For pressure-treated wood (ACQ or CA-treated), the copper compounds in the treatment are themselves corrosive to zinc — a fact that the treatment chemical industry has been clear about for years. ACQ and CA pressure-treated wood should be used with hot-dipped galvanized hardware rated G185 or above (Simpson's ZMAX finish meets this standard), or stainless steel. Standard electroplated or "bright" galvanized hardware, which is commonly sold and commonly used, corrodes rapidly in contact with ACQ-treated wood and should never be used in structural applications.
The cost difference between standard galvanized and stainless structural hardware on a typical deck is $300–$600. The cost of hardware failure — which can compromise structural connections and require partial disassembly of the deck frame to access and replace — is multiples of that.
Getting the Drainage Slope Right
One final detail that affects rot prevention on every deck is the slope of the deck surface itself. Decks should slope slightly away from the house — 1/8 inch per foot is the standard recommendation — to ensure water drains off the surface efficiently rather than pooling against the ledger wall or in low spots on the deck.
This sounds obvious, but it is frequently overlooked. Joists installed perfectly level create a flat deck. A flat deck collects water in any low spot, against the ledger end, around post bases, and in the debris that accumulates in corners. That standing water is not draining — it is soaking.
On composite decks, the drainage slope also matters because composite manufacturers typically require a minimum gap between decking boards for drainage, and boards installed on a flat surface trap more debris between them than boards with positive slope.
Achieving the drainage slope is done by slightly tipping the ledger or using tapered shims at the ledger connection so the entire joist system pitches 1/8 inch per foot away from the house. On a 12-foot-deep deck, that is 1.5 inches of drop from ledger to rim joist — enough to be effective, not enough to be noticeable underfoot.
What These Details Cost vs. What Rot Costs
The financial case for correct installation details is overwhelming. Let us put specific numbers to it.
Prevention costs are one-time additions to new construction. Repair costs are Seattle-area averages for addressing rot damage to each component. Sources: Olympic Decks 2026 cost data, Got Rot Washington repair estimates.
| Category | Value |
|---|---|
| Ledger Flashing (prevention) | $250 |
| Ledger Rot Repair | $8,000 |
| Joist Tape (prevention) | $300 |
| Joist Replacement | $4,500 |
| Post Bases ABU (prevention) | $150 |
| Post Rot Replacement | $3,500 |
| Stainless Hardware (prevention) | $450 |
| Hardware Failure Repair | $2,200 |
| Capped vs Uncapped Composite (prevention) | $1,200 |
| Uncapped Composite Replacement | $18,000 |
The pattern is consistent: every prevention detail costs between $150 and $1,200 extra on a new build. Every repair to the same component — after rot has set in — costs between $2,200 and $18,000. The ratio runs from roughly 10:1 to 15:1 in favor of prevention. This is not a close call.
Expected Lifespan With vs. Without Correct Details
The lifespan difference between a deck built with correct rot prevention details and one built without them is dramatic in Seattle's climate:
| Component | Without Correct Details | With Correct Details |
|---|---|---|
| Ledger board | 8–12 years before water damage | 30+ years |
| Pressure-treated joists | 10–15 years before significant checking/rot | 25–30 years |
| Cedar decking | 5–10 years before surface degradation | 15–25 years with maintenance |
| Capped composite | N/A (not applicable) | 25–30 years |
| Uncapped composite | 3–5 years before mold/checking | N/A |
| Wood posts (embedded) | 8–12 years before base rot | N/A (do not embed) |
| Wood posts (elevated with ABU) | N/A | 25–30 years |
| Galvanized hardware in cedar | 8–15 years before significant corrosion | N/A |
| Stainless hardware in cedar | N/A | 30+ years |
For homeowners making the build-vs-maintain-vs-replace decision, our deck repair page walks through the assessment process in detail.
How to Evaluate a Deck Builder on Rot Prevention
Knowing these five mistakes gives you a significant advantage when interviewing contractors and reviewing quotes. Here are the specific questions to ask — and what the answers should sound like.
Ask about ledger flashing. A contractor who says "we use flashing tape" is describing a minimum, not a system. You want to hear: "full-width self-adhered membrane behind the ledger, step flashing at the top, and kickout flashing at the wall terminations." See our guide on how to find a deck builder in Seattle for more on vetting process.
Ask whether they use joist tape. A contractor who has not heard of joist tape, or who says "the pressure treatment is enough," is not building to Seattle-appropriate standards. You want to hear a specific product name — Trex Protect, Siga Fentrim, or similar — and a description of where it gets applied.
Ask for the composite decking spec sheet. If they quote "Trex" or "composite decking" without specifying the product line, ask which line and ask for the manufacturer's spec sheet showing cap configuration and moisture absorption test results.
Ask how they handle end-grain cuts. For cedar decks, the answer should reference a specific end-grain sealer and a protocol for sealing within minutes of cutting. For pressure-treated decks, the answer should reference copper naphthenate field treatment.
Ask what post bases they use. For any wood post, the answer should be a named standoff post base — Simpson ABU or equivalent. "We set the posts in concrete" is the answer that costs you $3,500 per post in about 12 years.
Ask what hardware they specify. For cedar decks, the answer should be stainless steel at structural connections. For pressure-treated decks, the answer should be hot-dipped galvanized G185 (ZMAX) minimum.
Reviewing a deck quote? Our guide on how to read a deck quote explains exactly what line items to look for and what their absence might mean.
Note
Cedar vs. Composite in the Context of Rot Prevention
A question we hear frequently: given all the rot risk factors above, should Seattle homeowners just choose composite and skip the wood maintenance conversation entirely?
The answer is nuanced. Composite decking — specifically capped composite from a reputable manufacturer — essentially eliminates the surface rot concern. The boards themselves will not decay. But the framing beneath composite decking is still typically pressure-treated wood, and all the joist tape, ledger flashing, post base, and hardware details above still apply fully. You can have a pristine Trex Transcend surface over a rotted substructure.
Cedar, done correctly with the details above, is genuinely beautiful and can last 20–25 years with proper maintenance including periodic staining. Composite, done correctly, requires much less ongoing maintenance and can last 25–30 years without re-staining. The cost difference between quality cedar and quality capped composite has narrowed significantly in recent years.
Our full comparison of composite vs. cedar decking in Seattle — including cost-per-year-of-life calculations at current Seattle pricing — goes deep on this decision.
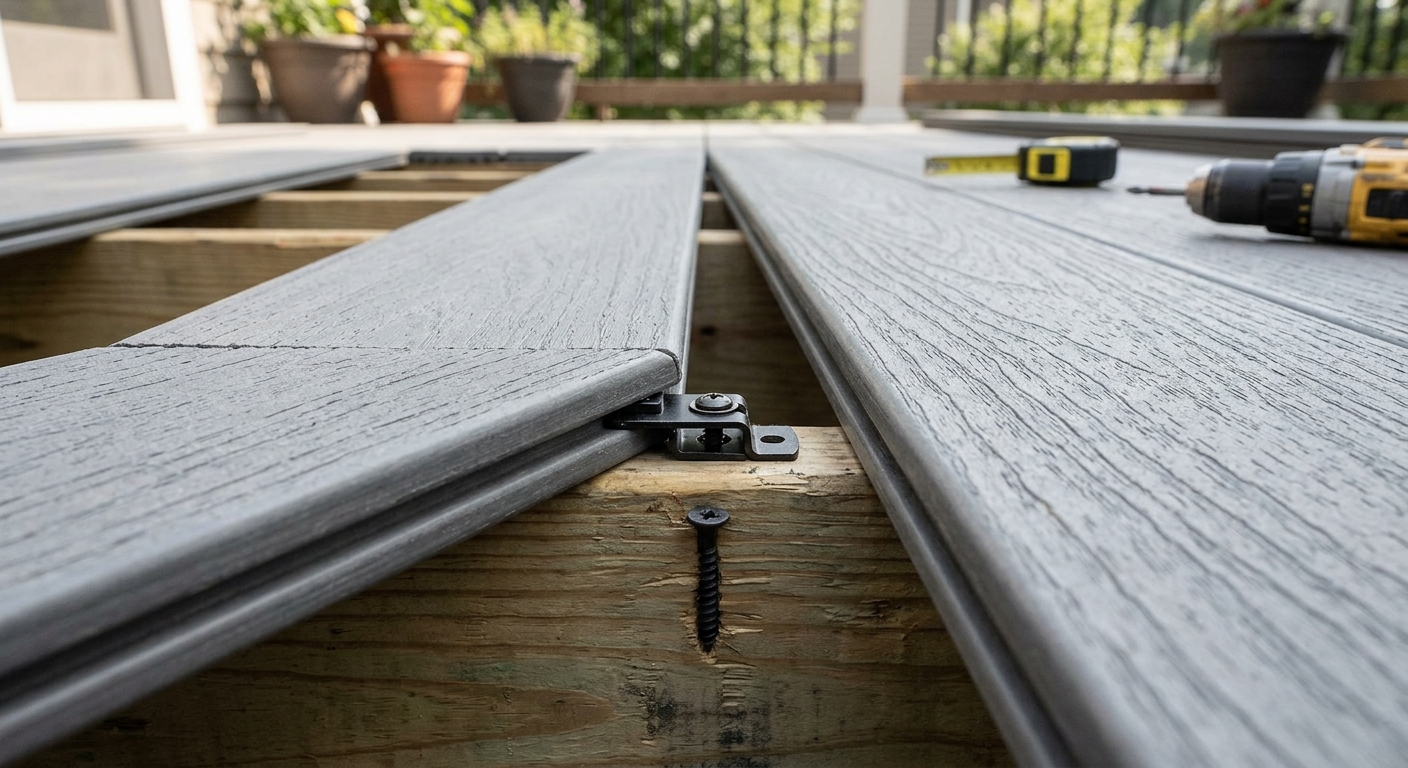
The Real Cost of Doing This Right — And Wrong
We want to close the technical section with a direct financial summary, because we hear "it costs too much" as a response to these details regularly. Here is the math on a typical 16x20 deck (320 square feet) in the greater Seattle area.
The five prevention details we have described add approximately $1,350–$2,250 to the cost of a new deck build:
| Prevention Detail | Approximate Cost |
|---|---|
| Proper ledger flashing system (materials + labor) | $200–$350 |
| Joist tape — all joists and beams | $250–$400 |
| Capped vs. uncapped composite upcharge | $600–$1,000 |
| End-grain sealer for all field cuts | $30–$60 |
| Simpson ABU post bases (6 posts) | $120–$210 |
| Stainless vs. galvanized hardware | $150–$230 |
| Total prevention premium | $1,350–$2,250 |
Contrast this with the cost of repairing the same deck after rot has taken hold — a scenario we see play out routinely:
| Repair Item | Approximate Seattle Cost |
|---|---|
| Ledger and rim joist replacement (with house damage) | $6,000–$15,000 |
| Joist replacement (full frame) | $3,500–$7,000 |
| Composite decking replacement (uncapped to capped) | $12,000–$22,000 |
| Post replacement (per post, including footing work) | $600–$1,500 |
| Hardware replacement throughout frame | $1,500–$3,000 |
| Total repair cost | $23,600–$48,500 |
The prevention premium is roughly 2–4% of a typical Seattle deck build cost. The repair scenario represents near-total replacement costs. There is no version of this math where skipping the prevention details makes financial sense.
For homeowners working through the full cost picture of a new build, our Seattle deck cost guide for 2025 breaks down pricing by material, size, and feature set. If you are weighing financing options, our deck financing guide covers options available to Washington homeowners.
FAQ
Frequently Asked Questions
How do I know if my deck ledger is already rotted?
Is pressure-treated wood rot-proof?
How can I tell if my composite decking is capped or uncapped?
What is the right slope for a deck surface in Seattle?
Can I retrofit better rot prevention on an existing deck?
How often should I inspect my deck for rot signs?
Does cedar decking require more maintenance than composite to prevent rot?
What does galvanized hardware failure look like and is it dangerous?
Are there deck materials that are completely rot-proof?
How do I find a Seattle deck contractor who actually builds to these standards?
Does Seattle building code require these rot prevention details?
Talk to a Seattle Deck Builder Who Gets It Right the First Time
The five mistakes in this article — poor ledger flashing, bare joists, uncapped composite, unsealed end-grain, and wood-to-concrete post contact — are entirely preventable. They cost almost nothing extra to address correctly on a new build, and they are the difference between a deck that lasts 25–30 years in Seattle's climate and one that needs major structural intervention within a decade.
At The Seattle Decking Company, we build with every one of these details on every project. Full-width self-adhered membrane at the ledger. Trex Protect butyl joist tape on every joist and beam. Capped composite specified by product line with documentation. End-grain sealed on every field cut. Simpson ABU post bases on every post. Stainless or ZMAX hardware throughout. These are not upsells — they are how decks are built correctly in the Pacific Northwest.
We serve homeowners throughout Bothell, Kirkland, Redmond, Bellevue, Shoreline, Edmonds, and the broader Seattle metro area. If you have an existing deck that you suspect may have rot issues, we can assess it. If you are planning a new build, we can walk you through every material and detail decision before you commit to anything.
Call us at (425) 675-6259 to schedule a consultation, or reach out through our contact page to tell us about your project. We are located at 22722 29th Drive SE, Bothell, WA 98021, and we are happy to come to your property for an on-site evaluation.
For more research before your call, see our guides on finding the right deck builder in Seattle, understanding your deck quote, and the best decking materials for Seattle in 2026.
Planning a deck in the Seattle area?
Get an onsite design review and a clear, itemized quote from a licensed local builder.
Request a Free Quote