Seattle gives homeowners a narrow window to prepare their decks for winter, and most people miss it. By the time the sustained rains arrive in November, any soft spots, compromised flashing, or rusted hardware you ignored in October will sit underwater — or close to it — for the next five to six months without a single dry day to slow the damage. The National Weather Service data for SeaTac confirms what locals already know: Seattle averages around 38 inches of rain per year, with the bulk concentrated between November and March. During those months, average monthly rainfall routinely exceeds 5 inches, and the deck surface that felt merely questionable in September will feel genuinely unsafe by February.
What makes Seattle's climate uniquely punishing for decks is not the volume of rain — plenty of U.S. cities receive more precipitation annually — but the unbroken duration. A deck board that develops a deep crack in, say, Austin, Texas will dry out between storms. That crack can still worsen, but slowly. In Seattle, the same crack stays wet from November through April. Water penetrates, wood fibers swell and compress through repeated freeze-thaw cycles (yes, we do get freezing temps — the Snoqualmie Pass snowpack starts affecting Eastside temperatures as early as late November), fungal spores germinate and spread, and by spring what was a surface repair has become a structural one. The cost difference between catching rot in October versus discovering it in April is not marginal — it often means the difference between a few hundred dollars of board replacement and a full ledger rebuild at $2,000 to $6,000 or more.
This guide gives you a specific, practical 10-point inspection process tuned to Seattle and the surrounding King County and Snohomish County areas. We cover what to look for, what it costs to fix, which items you can handle yourself, and when it is time to call a professional before the rains lock in.
Why October Is the Critical Month for Seattle Deck Inspections
Most home maintenance advice treats deck inspection as a spring task — something you do when the weather warms up and you want to start using the deck again. In most of the country, that timing works fine. In Seattle, it leads to a compounding maintenance problem that costs homeowners real money.
The Seattle Rainy Season Is Not Like Other "Rainy" Climates
The distinction matters: Seattle does not have a rainy season in the way Florida does, with heavy afternoon thunderstorms followed by sunshine. Seattle has a gray, continuous, low-intensity wet period where the deck surface may never fully dry out for weeks at a stretch. SDCI's guidance on deck maintenance notes that decks must be maintained in a sound and sanitary condition capable of withstanding normal loads — but "normal loads" in Seattle includes the sustained moisture weight and freeze-thaw cycling that other climates simply do not impose.
When you inspect in October, you are looking at a deck that has had all summer to dry out and reveal its true condition. Surface boards will have dried to show real cracks rather than swelling-disguised ones. Post bases will show rust streaks clearly against dry concrete. Flashing gaps will be visible rather than hidden behind wet debris. This is your best diagnostic window all year.
What Happens When You Wait Until Spring
If you skip the fall inspection and address problems in spring, you are doing several things that cost you more money:
Rot advances through winter. A joist end showing early rot in October may be structurally compromised by April. The repair shifts from sistering a few joists ($400–$800) to replacing an entire beam system ($1,500–$4,000).
Hardware corrosion accelerates. Zinc-plated fasteners that looked "a little rusty" in October will have advanced corrosion by April, meaning more fasteners to replace and more risk that deck boards shifted or lifted over winter.
Moss and algae establish root systems. Treating moss in October, before winter amplifies growth, requires one application of sodium percarbonate or zinc sulfate solution. Treating in spring means dealing with established root penetration into wood fiber — which requires more aggressive treatment and may mean replacing discolored boards.
Spring scheduling is harder. Every deck contractor in the greater Seattle metro area — from Bellevue to Bothell to Burien — is booked solid starting in March. Work you could have scheduled in November for a reasonable price and quick turnaround becomes a 6-to-8-week wait by May.
Key insight
Building Permits and Inspection Records Matter Too
One item most homeowners overlook during a fall inspection is permit history. If your deck was built or significantly modified without a permit, or if required inspections were never called and passed, you may have structural deficiencies baked in from the start that no amount of maintenance will fix. Seattle SDCI requires a construction permit for any deck more than 18 inches above grade. King County has similar requirements for unincorporated areas. You can call the permit office (or check online permit portals) to verify your address has a closed permit with all inspections passed. If it does not, that is a separate conversation — but one worth having before problems compound.
The 10-Point Seattle Deck Inspection Checklist
Walk through this checklist methodically on a dry day in October. Bring a flashlight, a flat-blade screwdriver, a notepad, and a partner if possible. Some of these checks require getting under the deck or reaching into tight spaces.
1. Ledger and Flashing
The ledger is the board that connects your deck to your house framing. It is the single highest-risk location on any attached deck in Seattle. Water that infiltrates behind the ledger penetrates directly into your house's band joist, rim joist, and potentially floor framing — all of which are typically not pressure-treated lumber and have no defense against sustained moisture.
What to look for: Stand back and look at the junction between your deck's rim board and the house siding. There should be a metal or membrane flashing visible that laps over the top of the ledger and tucks behind the siding above. If you can see a visible gap — any gap — between the flashing and the siding, water is getting in. Slide a business card along the junction: if it passes freely, that gap is wide enough to channel water directly to your house framing.
Also look at the house wall surface directly above and adjacent to the ledger. Water staining, efflorescence on brick, paint bubbling, or soft siding material are all signs that water has been entering. Check the base of the ledger itself for dark discoloration, which indicates rot.
Washington State note: Per WAC 51-51-0507 and IRC Section R507, ledger flashing must be corrosion-resistant metal at least 0.019 inches thick or approved nonmetallic material, configured to direct water away from the structure. Flashing must extend at least 2 inches above the ledger and include a downturned drip edge. Many older Seattle decks were built before these standards were codified or enforced.
Cost to address: Reflashing a ledger without replacing the ledger board runs $300–$800 depending on access and flashing material. If the ledger itself has rot, ledger replacement typically runs $800–$2,500. If the house framing behind the ledger is compromised, costs escalate to $3,000–$8,000+ including carpentry and possible siding repair.
DIY or contractor: Reflashing is a job most experienced DIYers can do. Ledger replacement and any house framing repair requires a licensed contractor.
2. Post Bases
Post bases are the metal connectors at the base of each vertical support post where the post meets concrete footings, a deck frame, or a beam. They are designed to hold the post in position while keeping wood off concrete — but they are also one of the first places you will see signs of structural deterioration.
What to look for: Rust streaks running down the face of the concrete or wood below each post base. Rust indicates the galvanized or stainless coating has failed and the connector is actively corroding. Wood discoloration at the base of the post itself — dark brown or black staining at the cut end — indicates moisture has been wicking into end grain. Any wobble when you push firmly on the post horizontally is a serious flag: post bases should be rigid and non-negotiable.
Cost to address: Replacing a corroded post base runs $150–$400 per post including labor, assuming the post itself and the footing are sound. If the post has rot at its base, post replacement costs $300–$900 per post depending on height and load. If footings have heaved or cracked, concrete work adds $500–$1,500 per footing.
DIY or contractor: Post base hardware replacement with no structural involvement is a reasonable DIY job. Any post replacement or footing work requires a contractor and potentially a permit.
3. Joist Condition
Joists are the horizontal structural members that span between the beam and the ledger (or beam to beam), supporting the deck boards you walk on. They are typically hidden from view, which is why they often develop problems that go undetected until failure.
What to look for: On any deck where you have access underneath, use your flashlight to examine joist ends at the ledger and at the outer beam. These end-grain locations are where rot begins. Take your flat-blade screwdriver and probe the wood firmly at the joist ends, the top edge (where water pools against the deck boards), and any location where you see discoloration or a softened appearance. Healthy pressure-treated or cedar lumber will resist the screwdriver firmly. Rot feels different — the wood compresses or the screwdriver penetrates with surprising ease.
On decks where you cannot access the underside, probe accessible joists from above through gaps between deck boards where possible.
Cost to address: Sistering (adding a new joist alongside a damaged one) runs $200–$500 per joist for a contractor. Full joist replacement in place costs $300–$700 per joist. If multiple joists are compromised, a full joist bay replacement becomes more cost-effective: $1,500–$4,000 for a typical 12x16 deck.
DIY or contractor: Sistering a single joist is a DIY possibility for someone with framing experience. Anything involving ledger attachment, beam connections, or multiple members requires a contractor.
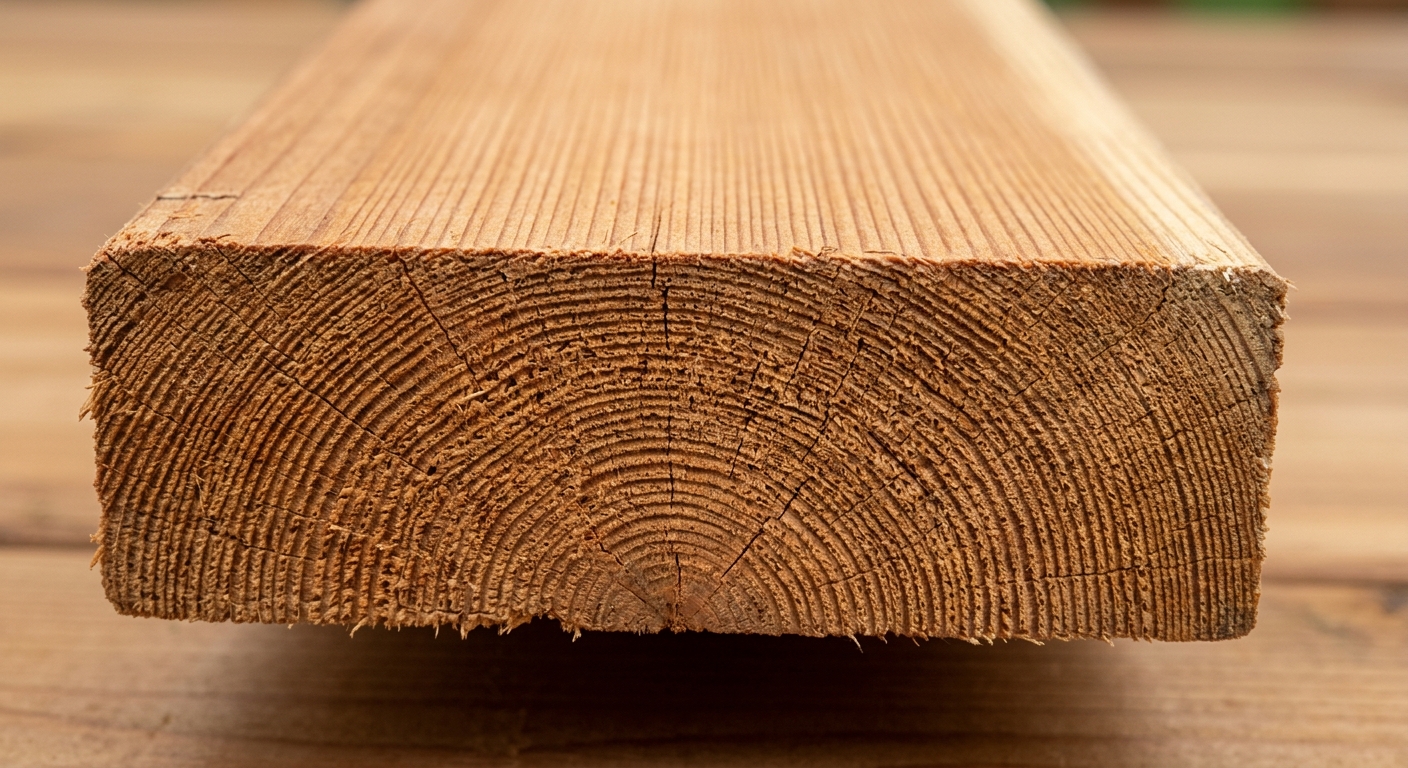
4. Surface Board Condition
Deck boards are the most visible part of the deck and the most commonly replaced, but surface board inspection goes beyond just looking for visual damage.
What to look for: Walk the entire deck surface slowly, feeling for soft spots with each step. A soft or spongy feel underfoot indicates rot in the board, possibly extending down into the joist below. Look for checking (longitudinal cracks along the grain) and cracking, which creates channels for water to penetrate into the wood faster. Look for boards that have cupped (edges higher than center), which pool water rather than shedding it. Check for loose boards, boards with popped fasteners, and boards with significant splitting at their ends near fastener locations.
Tip
Cost to address: Individual board replacement runs $15–$40 per linear foot for cedar, $25–$55 per linear foot for composite, including labor. Full deck resurfacing (replacing all boards on a sound frame) runs $20–$50 per square foot in the Seattle market, per Olympic Decks' 2026 cost guide.
DIY or contractor: Replacing individual boards is a manageable DIY project for someone comfortable with a circular saw and drill. Full resurfacing is typically contractor territory due to the volume of precision cuts and fastening required.
5. Railing Stability
Deck railings exist for one reason: to prevent falls. A railing that fails when someone leans on it at a deck party is not a maintenance problem — it is a liability and safety emergency. Under Seattle's wet conditions, railing post bases are among the fastest-deteriorating structural connections on any deck.
What to look for: Push hard on each railing section — harder than you think you should. Put your full body weight into it laterally and test the post bases, the connection between the post and the deck frame, and the connection between the rail and the posts. A railing on a deck 30 inches or more above grade should not move. Any movement at all is a code deficiency and a safety hazard.
Per SDCI's residential inspection requirements, guardrails on landings, decks, or platforms 30 inches or more above grade must not be missing, loose, or broken.
Cost to address: Reinforcing loose railing post connections runs $100–$300 per post. Replacing a deteriorated railing section runs $200–$600 per section. Full railing replacement in Seattle ranges from $51–$307 per linear foot depending on material, per Angi cost data for the Seattle market.
DIY or contractor: Tightening hardware and adding blocking at post bases is a DIY possibility. Full post replacement typically requires a contractor if the post penetrates through the deck frame.
6. Stair Railing Graspability
This one gets its own checklist item because it is both a code requirement and a commonly overlooked deficiency. Stair railings — the rail you grab while going up and down deck stairs — have specific requirements that differ from deck guardrails.
What to look for: Measure the height: stair handrails must be between 34 and 38 inches above the stair nosing (the leading edge of the tread). The rail must be graspable — a 2x4 lying flat does not qualify; a round or oval profile, or a shaped rail with defined top and bottom edges, is required. The rail must be continuous from the top riser to the bottom riser with no gaps. It must terminate in a return that prevents clothing from snagging.
Many older Seattle decks have 2x4 top rails on their stairs that do not meet graspability requirements. This is a common citation during home inspections, and it can affect home sales.
Cost to address: Adding a graspable handrail to an existing stair stringer system runs $200–$600 depending on stair length and material. Replacing non-compliant rails with code-compliant hardware runs $300–$900 for a typical 3-to-5 step deck stair.
DIY or contractor: Installing a continuous graspable rail on an existing stair system is a DIY-feasible project with off-the-shelf hardware available at home centers.
7. Hardware and Fasteners
Deck hardware — joist hangers, post caps, beam connectors, stair stringer hardware, and the fasteners holding boards to joists — is the connective tissue of your deck structure. Corrosion here is both a structural concern and an indicator of moisture exposure patterns.
What to look for: Look at every visible joist hanger, post cap, and structural connector. Active rust (orange-red streaking, pitting, or flaking) on galvanized connectors means the protective coating has failed. Check stair stringers especially — the metal angle clips or stringer hangers at the top and bottom of stairs corrode faster than any other hardware on most decks. Look for missing fasteners (empty holes in joist hangers), and for fasteners that have backed out of the wood surface.
On deck boards themselves, look for fastener heads that have raised above the surface (indicating wood movement has loosened them) or that have rusted and stained the surrounding wood.
Important
Cost to address: Replacing individual hardware connectors runs $50–$200 per connector including labor. Full hardware audit and replacement on a 200 sq ft deck runs $400–$1,200. Addressing all fasteners on a deck that has widespread backing-out or corrosion: $500–$2,000 depending on deck size and fastener type.
DIY or contractor: Replacing individual connectors is DIY-feasible with the right hardware (Simpson Strong-Tie is the standard; verify the correct replacement spec for your connector type). A full structural hardware audit is best done by a contractor who can assess load paths.
8. Drainage
Water that pools on a deck surface or against the house is water that accelerates every other problem on this checklist. Good drainage is a design feature, but it also requires maintenance to stay functional.
What to look for: Pour a bucket of water on the deck surface and watch what happens. Water should move visibly toward the outer edge of the deck — away from the house — and drain off the deck perimeter. If water pools at the ledger end of the deck or sits on the surface for more than a few minutes, you have a drainage problem. Check deck board spacing: boards should have a 1/8- to 1/4-inch gap between them to allow water to drain through. Boards that have swelled closed against each other trap water on the surface.
Look under the deck for evidence of standing water: mud deposits, algae on the ground, staining on footings. These indicate water is not dispersing properly below the deck either, which can saturate footings and undermine post stability over time.
Cost to address: Adjusting deck pitch is a structural change typically requiring full ledger-end adjustment — $800–$3,000 depending on scope. Clearing blocked drainage paths and re-gapping swelled boards: $200–$500. Installing under-deck drainage to manage water shed from above: $1,500–$4,000 for a typical Seattle deck.
DIY or contractor: Clearing debris and checking drainage is a DIY task. Adjusting structural pitch requires a contractor.
9. Moss and Algae Treatment
Seattle decks develop moss. This is not a question of if but when, and the northern-exposure sections of most decks will have visible moss growth by late October. Treating moss now — before it spends the wet season growing — is dramatically more effective than treating in spring.
What to look for: Green or black-green growth on deck board surfaces, especially in shaded areas, on board tops near railings that block sunlight, and in gaps between boards. Black staining (without fuzzy texture) is typically algae rather than moss — equally damaging to wood fiber, equally treatable.
Treatment approach: Two products work well on Seattle decks. Sodium percarbonate (oxygen bleach, sold as Deck Brightener or similar) is effective, relatively low-toxicity, and biodegrades in soil — important if you have plantings under or around the deck. Apply with a pump sprayer, let it dwell 15 minutes, scrub with a stiff brush, and rinse. Zinc sulfate solution (or zinc strips installed at the ridge) kills moss at the root and provides residual protection through winter.
Note
Cost to address: DIY moss treatment: $20–$60 in materials for a typical deck. Professional deck cleaning with moss treatment in Seattle runs $200–$600 for a 300 sq ft deck, per local contractor pricing. If moss has been allowed to establish for multiple seasons and has penetrated wood fiber, board replacement may be needed: add $15–$40 per linear foot.
DIY or contractor: Moss treatment is one of the most accessible DIY deck maintenance tasks. The only reason to hire out is if you have a two-story deck where access requires a ladder or the deck area is large.
10. Permit Records
This last checkpoint is administrative but important. If you purchased your home in the last 5 to 10 years and the deck was already there, you may not know whether it was built with a permit and whether required inspections were completed. If you are planning to sell, or if you are making structural repairs, this information matters.
What to check: Contact Seattle SDCI at (206) 684-8600 or use the Seattle Services Portal to look up permits for your address. For unincorporated King County addresses, check King County Permits. You want a closed building permit for the deck with all required inspections (footing, framing, final) showing as passed.
If your deck has an open permit (permit pulled but inspections never called) or no permit at all, this affects what repair work you can do without triggering a retroactive permit requirement. It also means you may have structural conditions — undersized footings, non-compliant ledger connections, inadequate post sizing — that look fine visually but do not meet the 60 psf live load requirement Washington State mandates.
Cost to address: Retroactive permitting for an existing deck in Seattle typically runs $500–$2,000 in permit fees depending on deck size and complexity. If structural upgrades are required to meet current code, add contractor costs on top. The alternative — leaving an unpermitted deck — creates liability exposure and can complicate home sales.
What Each Inspection Issue Costs to Address
The table below summarizes repair cost ranges based on current Seattle-market contractor pricing. Minor issues are those that can be addressed with targeted repair. Moderate issues typically require a contractor. Severe issues may approach the cost of partial or full deck replacement.
| Issue | Minor Repair | Moderate Repair | Severe / Structural |
|---|---|---|---|
| Ledger reflashing | $300–$800 | $800–$2,500 | $3,000–$8,000+ |
| Post base replacement | $150–$400/post | $300–$900/post | $500–$1,500+ (footing) |
| Joist sistering | $200–$500/joist | $1,500–$4,000 (section) | $4,000–$10,000+ (full) |
| Surface board replacement | $15–$40/LF cedar | $20–$50/SF (full resurface) | Deck replacement |
| Railing reinforcement | $100–$300/post | $200–$600/section | $51–$307/LF (full) |
| Stair handrail | $200–$600 | $300–$900 | — |
| Hardware replacement | $50–$200/connector | $400–$1,200 (full audit) | Included in structural |
| Drainage correction | $200–$500 | $800–$3,000 | $1,500–$4,000 |
| Moss/algae treatment | $20–$60 DIY | $200–$600 pro | Board replacement added |
| Retroactive permitting | $500–$2,000 (fees) | +structural upgrades | — |
Moderate repair cost ranges for common Seattle deck inspection findings. Source: Seattle contractor market data 2025–2026.
| Category | Value |
|---|---|
| Ledger Reflash | $1,650 |
| Post Base (per post) | $600 |
| Joist Sister (per joist) | $350 |
| Board Resurface (per SF) | $35 |
| Full Railing (per LF) | $180 |
| Stair Handrail | $550 |
| Hardware Audit | $800 |
| Drainage Fix | $1,900 |
| Moss Treatment (pro) | $400 |
| Retroactive Permit | $1,250 |
DIY Fixes vs. When to Call a Contractor
Not every deck issue needs a professional. Some things are genuinely within reach of a capable homeowner with basic tools. Others involve structural load paths, permit requirements, or safety stakes that make professional involvement the right call regardless of DIY skill level.
Reasonable DIY Tasks
Moss and algae treatment is the most accessible. You need a pump sprayer, sodium percarbonate or zinc sulfate, a stiff brush, and an hour of time. This is the highest-return fall maintenance task you can do yourself.
Surface board replacement (1–3 boards) is manageable if you have a circular saw, a drill, and some comfort with measuring and cutting. The main risk is underestimating the scope — once you pull one board, you may find rot in the joist below that changes the scope entirely.
Railing and stair handrail hardware tightening is DIY territory. Adding carriage bolts to a wobbly post base, installing a graspable handrail on an existing stringer — these are reasonable projects if you can identify the right hardware and are comfortable drilling through structural members.
Moss treatment and fall cleaning (see the section below on fall cleaning process) is fully DIY-accessible.
Tip
When to Call a Contractor
Ledger issues of any kind. The ledger connects your deck to your house framing. Resealing a minor gap yourself without understanding the full flashing system can actually make things worse by trapping water. A contractor who works on Seattle decks regularly has seen every ledger failure mode and knows how to flash properly for the PNW climate.
Post replacement. Any time a post needs to come out, you are temporarily de-loading a section of the deck frame. This requires temporary shoring, proper footing evaluation, and correct reinstallation of post hardware.
Joist rot beyond one or two members. If probing reveals rot in more than two adjacent joists, you likely have a systemic moisture problem — compromised drainage, inadequate flashing, or chronic pooling — that needs to be diagnosed and corrected, not just patched.
Any work near the structural connection to the house. The ledger, the adjacent beam spans, and the first bay of joists closest to the house are where structural failures on Seattle decks typically originate. This is not DIY territory.
Anything requiring a permit. Structural repairs in Seattle and King County often require permits, especially if the deck is elevated or attached to the house. If the work requires a permit, it requires a licensed contractor in most cases.
For help finding a qualified Seattle deck contractor, see our guide how to find a deck builder in Seattle and questions to ask a deck builder.
Schedule Now vs. Wait for Spring
The fall inspection will reveal a range of issues, and not everything needs to be addressed before November 1. Here is how to triage.
Fix Before the Rains (October Priority)
Ledger and flashing issues — Any gap, any water staining, any soft ledger wood. These will be significantly worse by spring if ignored, and the house framing damage they cause is expensive to repair.
Moss treatment — October treatment prevents 5–6 months of unchecked growth. Spring treatment addresses damage that already occurred.
Railing and stair safety issues — These are safety concerns that cannot wait. A loose railing in October will not get better over winter — it will get worse as wood moves through moisture cycling.
Drainage problems — Anything that directs water toward the house should be corrected before sustained rains. A proper drainage path pays dividends all winter.
Rot in progress — Any rot you can identify in October is better addressed now than after six months of additional moisture exposure. At minimum, apply a wood hardener and rot treatment product to slow the damage if you cannot schedule contractor work before November.
Can Wait for Spring (Spring Scheduling)
Surface cosmetics — Staining, brightening, and minor surface board cupping that is not causing structural issues. These are best done when you have warm, dry weather for proper product cure.
Cedar re-staining — See the section below on timing. This is a spring or early summer task, not a fall one.
New railing style upgrades — If railings are structurally sound but you want to upgrade from wood to cable or glass, that is an elective project that can be spring-scheduled without any loss.
Full deck resurfacing — Unless the current surface is actively dangerous, resurfacing with composite or new cedar boards is a spring project where the full material and labor cost can be properly quoted during the off-season.
Adding features — Built-ins, pergolas, lighting, outdoor kitchens — all spring and summer projects.
Note
Fall Deck Cleaning Process
A proper fall clean is not just aesthetic — it removes the organic material that feeds moss growth, exposes the deck surface for your inspection, and sets the deck up for winter in the best possible condition.
Step 1: Clear the Deck Surface
Remove all furniture, planters, and accessories. Move anything stored under the deck away from the structure so you can inspect post bases and joist ends. Sweep debris from between boards using a stiff deck brush and putty knife if needed to clear packed material.
Step 2: Rinse the Surface
Use a garden hose with a fan-spray nozzle to rinse the entire deck surface, working with the board grain from the house outward. If you have a pressure washer, use a fan tip at 1,000–1,500 PSI maximum on cedar — higher pressure damages wood fiber. Composite decking manufacturers typically recommend 1,500–3,000 PSI depending on the product. Never use a pinpoint nozzle on wood decking.
Step 3: Apply Moss/Algae Treatment
Mix sodium percarbonate per manufacturer instructions (typically 1 cup per gallon of water for deck applications). Apply with a pump sprayer to all affected surfaces and any shaded sections likely to harbor growth even if not yet visible. Let dwell 10–15 minutes, scrub with a stiff brush, rinse thoroughly. Allow the deck to dry for 24 hours before inspection.
Step 4: Inspect While Dry
Conduct your 10-point inspection on a fully dry deck surface. Wet wood can hide soft spots and makes it harder to see surface checking or cracks accurately.
Step 5: Seal or Protect If Appropriate
If the deck is cedar and the current stain or sealer is in reasonable condition (water still beads on the surface when you run your hose), fall is not the right time to re-stain — see the section below. If the deck is completely dry, the stain has failed (water soaks in immediately), and weather cooperates with a 3+ day dry window above 50°F, you can apply a penetrating oil-based stain in October, but this window is narrow in Seattle. Otherwise, clean and protect now, plan stain for spring.
The Cedar Re-Staining Window in Seattle
Cedar decks need to be re-stained or re-sealed periodically to maintain their moisture resistance. In Seattle, the timing of this work matters as much as the product you use, because oil-based stains and most water-based deck finishes require both a specific application temperature and a cure window of 48–72 hours without rain.
When Can You Stain in Seattle?
The ideal staining window in the Seattle metro is:
- Late May through early July — temperatures are consistently above 50°F, the spring rains have largely ended, and the summer heat has not yet arrived. This is prime staining weather.
- August through early September — also good, though summer heat requires avoiding direct sun during application to prevent lap marks.
- Late September through mid-October — possible in a good year with a reliable dry forecast. In Seattle, this window is narrow and unpredictable.
- October through April — generally not viable for stain application due to rain probability and temperature.
Preparing Cedar for Staining
Cedar that has been through multiple wet seasons without maintenance will need more than just a stain coat. A brightener (oxalic acid solution) opens the grain and neutralizes tannins and gray weathered surface, allowing the stain to penetrate evenly. Apply brightener, scrub, rinse, dry completely (72 hours minimum in Seattle weather), then stain.
For more on staining vs. switching to composite decking, see our article on deck staining vs composite decking in Seattle. If you are evaluating whether to re-stain aging cedar or replace the surface with composite decking, a fall inspection gives you the information you need to make that decision with accurate data on your existing structure's condition.
When to Consider Repair vs. Full Replacement
Your fall inspection may reveal issues that go beyond maintenance into the question of whether the deck is worth repairing. This is not always obvious, and it requires an honest cost comparison.
Signs the Deck Is Worth Repairing
- The ledger, primary beam, and footings are in sound condition
- Post rot, if present, is limited to one or two posts
- Joist damage is in isolated areas with clear cause (one persistent drainage problem, one area of failed flashing)
- The deck framing is less than 15 years old
- Surface boards are the primary issue and the frame underneath is solid
When the frame is good, deck repair — even substantial repair — is almost always more cost-effective than replacement. A deck repair that costs $2,000–$5,000 on a sound frame may extend the deck's life by 15–20 years.
Signs Full Replacement May Be More Cost-Effective
- Multiple posts with significant rot
- Ledger rot that has spread to house framing
- Widespread joist damage with systemic moisture problems
- Original deck is over 20–25 years old with original cedar framing
- Permit issues that would require bringing the entire structure to current code before repairs are approved
In these cases, get quotes for both full replacement and targeted repair and compare 10-year total cost of ownership, not just immediate cost. A $12,000 replacement that lasts 30 years with composite decking is often cheaper in the long run than $8,000 of repairs on a frame that will need the same work again in 7 years.
For current replacement cost data, see our deck cost Seattle 2025 guide, and if you are weighing materials for a new surface or replacement deck, our comparison of composite vs cedar decking in Seattle covers the full durability and cost picture.
FAQ
Frequently Asked Questions
When is the best time to inspect my deck in Seattle?
What is the most important thing to check on a Seattle deck?
How do I test for rot in deck joists?
How much does deck repair typically cost in Seattle?
Do Seattle deck railings have specific code requirements?
Should I treat moss on my Seattle deck in fall or spring?
How do I know if my Seattle deck was built with a permit?
What does Washington State's 60 psf live load requirement mean for my deck?
Can I re-stain my cedar deck in the fall in Seattle?
How much does a professional deck inspection cost in Seattle?
What are the signs that my deck needs full replacement rather than repair?
How do I find a qualified deck contractor for fall repairs in Seattle?
Schedule Your Fall Inspection Before the Rains Arrive
The 10-point checklist in this guide gives you a solid framework for assessing your own deck before winter. But there are limits to what a homeowner can evaluate without getting under the deck, probing structural members at connection points, or assessing whether a flashing condition is code-compliant. If your inspection raises structural questions — or if you simply want a professional second opinion before committing to a repair scope and budget — the right time to schedule that conversation is now, in October, not after six months of wet weather have had their way with a problem you already suspected.
At The Seattle Decking Company, we work exclusively with homeowners in the greater Seattle area — King County, Snohomish County, and the Eastside communities including Bothell, Kirkland, Redmond, Bellevue, and Issaquah. We have seen every version of what Seattle's rainy season does to a deck, and we know how to give you an honest assessment of whether repair makes sense, what it will actually cost, and whether waiting until spring is safe.
Call us at (425) 675-6259 or visit our contact page to schedule a fall deck inspection. We are located at 22722 29th Drive SE, Bothell, WA 98021, and we are taking October and November appointments now. Do not let the November rains make your decision for you.
For more information on deck materials, costs, and planning, explore these related resources:
- Deck cost guide for Seattle 2025
- Composite vs cedar decking in Seattle
- Deck permit guide for King County
- Deck railing options for Seattle homes
- Best decking materials for Seattle 2026
- Deck financing options in Seattle
Planning a deck in the Seattle area?
Get an onsite design review and a clear, itemized quote from a licensed local builder.
Request a Free Quote