
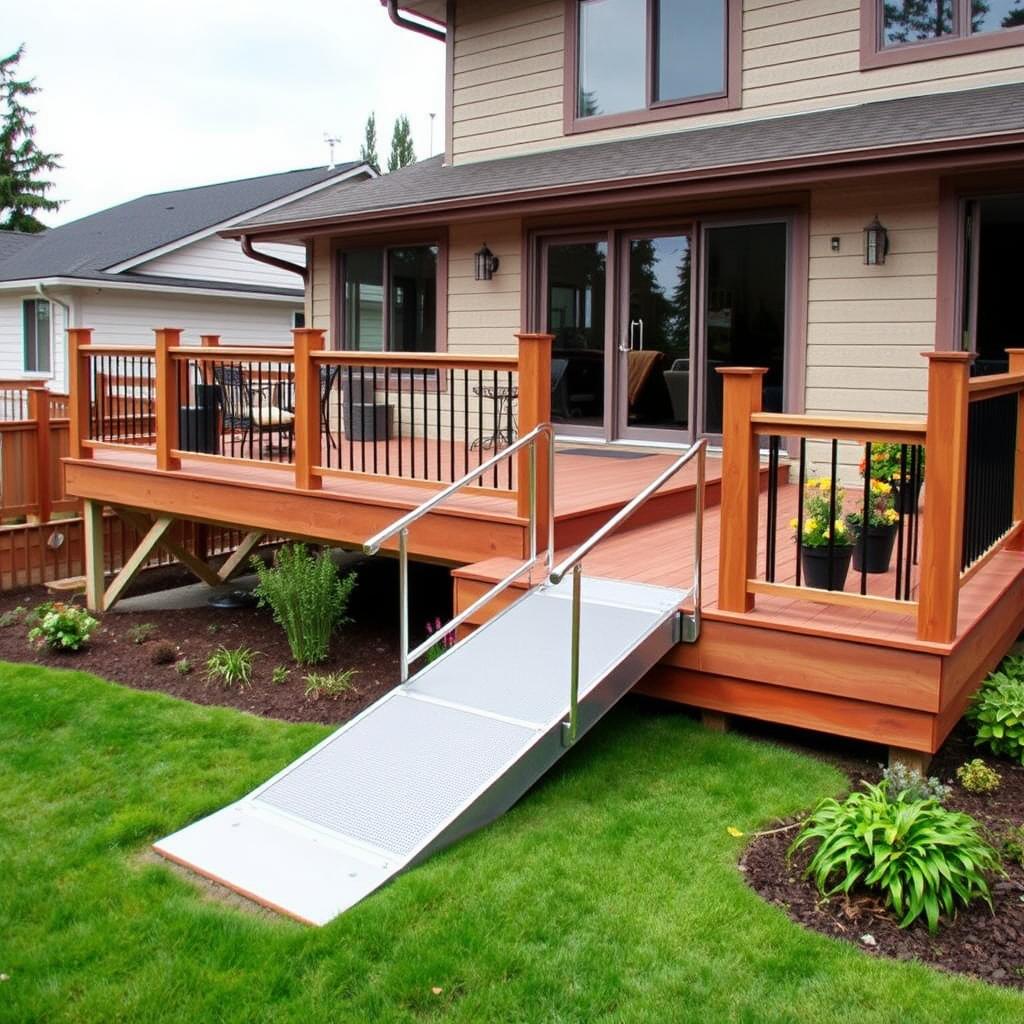
Most Seattle homeowners thinking about accessible deck design are thinking about it too late. They're calling us after a knee replacement, after a parent moves in who uses a walker, after someone in the household gets a diagnosis that changes how they move through the world. And when we show up to assess what a ramp addition to their existing deck would cost, the number that comes back — $4,100 to $5,800 for a single ramp, and often more like $6,400 extra compared to what it would have cost to build it right the first time — lands like a gut punch.
The Pacific Northwest throws its own complications into accessible design that you won't find in a generic ADA guide written for Arizona. Our decks face north and collect moss through eight months of drizzle. Door transitions between interior flooring and a deck surface are a tripping hazard that becomes genuinely dangerous for someone with balance issues. Composite decking that looks great in a showroom can turn into a skating rink at 45 degrees and wet — unless you're specifying the right texture profile. These are not theoretical problems. They're the specific issues we see on job sites across Bothell, Kirkland, Bellevue, Redmond, and the hill neighborhoods of Seattle proper where grade changes make ramp geometry a real engineering puzzle.
This article is what we wish every homeowner read before they poured their footings. If you're planning a new deck and there's any possibility — any at all — that you or someone in your household will want aging-in-place functionality in the next fifteen years, the decisions you make today will either save you money and heartache, or cost you both.
Why Seattle Homeowners Are Getting This Wrong (And What It Costs to Fix Later)
There's a gap between how homeowners think about accessible deck design and how builders who've actually done dozens of these projects think about it. Homeowners tend to think of accessibility as a feature — something you add when you need it, like a ceiling fan or a second outdoor outlet. Builders who've been called in to retrofit accessibility onto decks built three or five years ago know the reality: accessibility is a structural commitment that's far cheaper to make at the foundation pour than after the concrete has cured.
The data backs this up. Based on project work in the Seattle metro area and Federal Way, adding a wheelchair-accessible ramp to an existing deck runs $4,100 to $5,800 per ramp for a straightforward installation. But that number assumes the existing deck structure can accept the modification with minimal intervention. When it can't — when the existing joists are undersized, when the footings are in the wrong place, when the ledger board is at the wrong height for a compliant landing — the retrofit cost climbs. The documented premium for retrofitting accessibility features versus building them in from the start is approximately $6,400, and in our experience on challenging Seattle-area lots, it can exceed that significantly.
The Three Most Expensive Mistakes We See
Mistake One: Specifying the deck height without thinking about ramp length. A standard residential deck is often 18 to 30 inches above grade. At 24 inches of elevation, ADA ramp slope requirements — a maximum of 1:12, meaning 12 horizontal inches for every 1 inch of rise — produce a ramp that's a minimum of 24 feet long before you add the required landings. On a 7,000-square-foot Kirkland lot with a fence line 20 feet from the house, there's simply no room for that ramp in a straight run. The homeowner has to either change the deck height (which means reengineering the ledger board and potentially the interior door threshold), install a switchback ramp with intermediate landings, or investigate a platform lift. None of these conversations are easy after the concrete is in the ground.
Mistake Two: Door transitions designed for standard framing. The gap between interior flooring and the deck surface at the door threshold is one of the most overlooked hazards in residential outdoor design. For someone using a rollator walker or a wheelchair, a 2-inch threshold lip is a significant obstacle. A 4-inch drop — common when a standard door swings out onto a deck that's slightly below floor level — can cause a fall. The fix during construction is simple: you design the deck surface height to match interior finish floor height, or within half an inch, and you use a low-profile threshold. The fix after construction ranges from annoying (grinding and re-taping a composite deck surface) to expensive (raising the entire deck frame).
Mistake Three: Smooth decking surfaces. There's a composite decking profile that photographs beautifully — low sheen, smooth face, clean modern lines. It also gets dangerously slick in the rain. Seattle gets an average of 37 inches of precipitation annually, and in the Eastside suburbs and north Seattle neighborhoods, a deck surface can be wet more than 200 days a year. Textured composite profiles — the ones with a wire-brushed or embossed grain pattern — provide dramatically better traction in wet conditions. If you're designing for aging-in-place use, smooth composite decking should be off the table entirely.
Important
The broader point here is that accessible design requires integrated thinking from the very first conversation about deck placement, height, and material. It's not a feature that can be bolted on later without pain. And in Seattle's permit environment, changing the approved plans after a permit is issued means a revision submittal to King County's Department of Local Services or Seattle SDCI, which can add four to six weeks to your project timeline.
ADA Ramp Specs That Actually Apply to Residential Decks in Washington State
Here's where we have to be precise, because "ADA compliant" gets used loosely in the deck industry in ways that don't always match Washington State building code or the specific requirements of the U.S. Access Board's Chapter 4 guidance on ramps and curb ramps.
The Americans with Disabilities Act (ADA) was written primarily for public accommodations and commercial buildings. Residential decks are governed by the International Residential Code (IRC) as adopted by Washington State, not directly by ADA. But there's meaningful overlap, and for homeowners designing for genuine accessibility — particularly those planning accessory dwelling units (ADUs) or any space that might need to accommodate a range of mobility needs — designing to ADA standards is the right target. It's also increasingly what's required when decks are attached to ADUs, because ADU code in Seattle and King County is increasingly being aligned with accessibility expectations.
Ramp Slope: The 1:12 Rule and What It Means in Practice
The ADA maximum ramp slope is 1:12. That means for every 1 inch of vertical rise, you need 12 inches of horizontal run. This is the critical math that surprises homeowners:
- 6-inch deck height: 6-foot ramp run (minimum)
- 12-inch deck height: 12-foot ramp run (minimum)
- 18-inch deck height: 18-foot ramp run (minimum)
- 24-inch deck height: 24-foot ramp run (minimum)
- 30-inch deck height: 30-foot ramp run (minimum)
The ADA also limits the maximum rise for any single ramp run to 30 inches before a landing is required. So a deck at 36 inches of elevation requires at least a 36-foot total ramp run, broken up with an intermediate landing every 30 feet (or at the direction change for a switchback design).
These numbers are minimum horizontal runs. On a sloped Seattle lot — and a significant portion of King County is sloped — the grade beneath the ramp affects the calculation. If the ground drops away from the house as you move away from the deck, the ramp may need to be shorter. If the ground rises, you may need the ramp to start elevated or you may need to cut and fill.
Ramp Width Requirements
The ADA minimum clear width for ramps is 36 inches. In practice, for wheelchair use in a residential setting, 48 inches is a better target — it allows for a caregiver to walk alongside the wheelchair user, which is how most assisted mobility actually works. The upgrade from 36-inch to 48-inch ramp width costs approximately $400 to $600 per ramp in additional materials and framing labor. That's a reasonable premium for the real-world usability improvement.
The structural implications of width matter. A 48-inch ramp needs a center beam unless the structural members are appropriately sized. This is part of the structural specification conversation that we'll address in detail later in this article.
Handrail Requirements
Handrails are required on both sides of any ramp that has a rise exceeding 6 inches. The ADA specifies:
- Height: 34 to 38 inches above the ramp surface (measured vertically to the top of the gripping surface)
- Grip diameter: 1.25 to 2 inches for round sections; for non-circular sections, the perimeter must be 4 to 6.25 inches with a maximum cross-section of 2.25 inches
- Extensions: Handrails must extend 12 inches horizontally beyond the top of the ramp and extend at the ramp slope for 12 inches beyond the bottom, then either return to the post or the wall
- Graspability: The handrail must be graspable its full length — no decorative spindle designs that interrupt the continuous grip surface
For deck projects, this means the typical decorative railing that works beautifully on a standard deck is often not ADA-appropriate for a ramp. You need a separate, continuous-grip handrail element. This is usually a separate round or oval rail installed at compliant height, with the decorative railing infill below it (or eliminated on the ramp section altogether for a cleaner look).
Note
The Landing Geometry Problem
This is the most commonly under-specified element in accessible deck design, and it's where retrofits get expensive. The ADA requires:
- Landings at the top and bottom of every ramp run
- Minimum landing size: 60 x 60 inches (5 feet x 5 feet)
- At any change of direction, the landing must be large enough to allow a 60-inch turning radius
On a switchback ramp — the typical solution for steep-grade Seattle lots — the intermediate landing between the two ramp runs must be at least 60 x 60 inches. That landing has to be structurally supported, properly framed, and connected to both ramp sections. On a tight lot, this intermediate landing is often what forces a redesign, because the footprint expands quickly: two ramp runs of 12 to 18 feet each, plus an intermediate 5-foot landing, plus top and bottom landings, can total 40 to 50 linear feet of structure.
Landing Dimensions and Door Transitions: The Details Most Builders Skip
The landing at the top of a ramp isn't just a code requirement — it's the functional heart of an accessible deck entry. It's the place where someone in a wheelchair can pause, turn, operate the door latch, and move through the door without the ramp trying to pull them backward. Getting this geometry right is a detail that separates builders who've actually designed for wheelchair use from builders who've just read the code.
Top Landing Requirements and Door Clearances
The top landing must be at least 60 x 60 inches. But here's where the door clearance interaction matters: when a door swings outward onto the landing (as most exterior doors do), the maneuvering clearance requirements for wheelchair access mean the usable landing space must be clear of the door swing. In practical terms:
- For a door with a latch side approach, you need at least 18 inches of clear wall space on the latch side of the door (the side with the handle) and 60 inches of clear depth in front of the door
- For a door with a hinge side approach, you need 54 inches of clear depth in front of the door
This means the top landing of your ramp must be larger than the minimum 60 x 60 inches in most residential configurations. We typically design top landings at 6 x 6 feet (72 x 72 inches) as a minimum for a single door, and 6 x 8 feet for double doors or doors with sidelights.
The door itself is a separate conversation. A standard 32-inch door opening is the bare minimum for wheelchair passage — and it's uncomfortable. A 36-inch clear opening is what ADA specifies for new construction, and it's what we recommend for aging-in-place design. This may require replacing the existing door and potentially widening the rough opening — work that's far simpler during a deck remodel than as a standalone project.
Threshold Height: The Half-Inch Rule
The maximum threshold height for an accessible door is 0.5 inches. A standard door threshold is often 0.75 to 1.5 inches. This matters because the deck surface height relative to interior finish floor height determines whether you have a compliant threshold or not.
During deck design, we calculate the finish deck surface height and work backward to the framing to achieve a threshold height at or below 0.5 inches. This is one of the cases where composite decking's dimensional consistency is an advantage — it's predictable in thickness and doesn't expand and contract the way wood does, so the threshold height you design is the threshold height you get.
Interior Continuity: Why the Landing Matters to What's Inside
An often-overlooked aspect of accessible deck design is what happens on the interior side of the door. If the interior flooring immediately inside the door has a raised section — a floor transition strip, a change in flooring height between the entryway and the main floor — you've created a hazard that undermines the accessible threshold you carefully designed on the exterior.
For a complete aging-in-place approach, the conversation with the homeowner should include the interior transition zone. This is an interior remodel conversation that goes beyond decking, but it's a flag we raise because the aging-in-place investment doesn't deliver full value if someone trips on the interior side of the door they just accessed via an accessible ramp.
Tip
Non-Slip Surfaces for the PNW Climate: What Works When Everything Is Wet
Seattle's climate is the defining constraint for accessible deck surface selection. We average 37 inches of rain per year, with precipitation falling in some form on roughly 150 days annually. In north-facing yards — common in the hill neighborhoods of Seattle proper, and in Bellevue's and Kirkland's east-facing slopes — a deck surface can stay damp for weeks at a time without direct sun to dry it. Add moss, algae, and fir needle debris, and you have a surface that's actively trying to cause a fall.
For aging-in-place design, surface selection isn't a material preference — it's a safety specification.
What the Research Says About Composite Texture and Wet Traction
The wet-traction performance of composite decking varies significantly by product and profile. There are three broad categories:
Smooth-face composites — These photograph beautifully and are popular in contemporary deck design. In wet conditions, they perform poorly for aging-in-place applications. Some smooth composite products have a coefficient of friction in wet conditions that's comparable to polished concrete — not where you want to be for someone with balance limitations.
Embossed-grain composites — The majority of mainstream composite products (Trex Transcend, Fiberon Concordia, TimberTech Legacy) use an embossed wood-grain texture. Wet traction is meaningfully better than smooth profiles, but performance varies by how deep the embossing is. Shallower embossing fills with debris and loses its traction advantage over time.
Wire-brushed and deep-grain composites — Products like Trex's Transcend Lineage and certain AZEK profiles with deep wire-brushed textures perform best in wet conditions. The texture provides mechanical grip that persists even when the surface is wet and dirty. For accessible deck applications in the PNW, this is the category to specify.
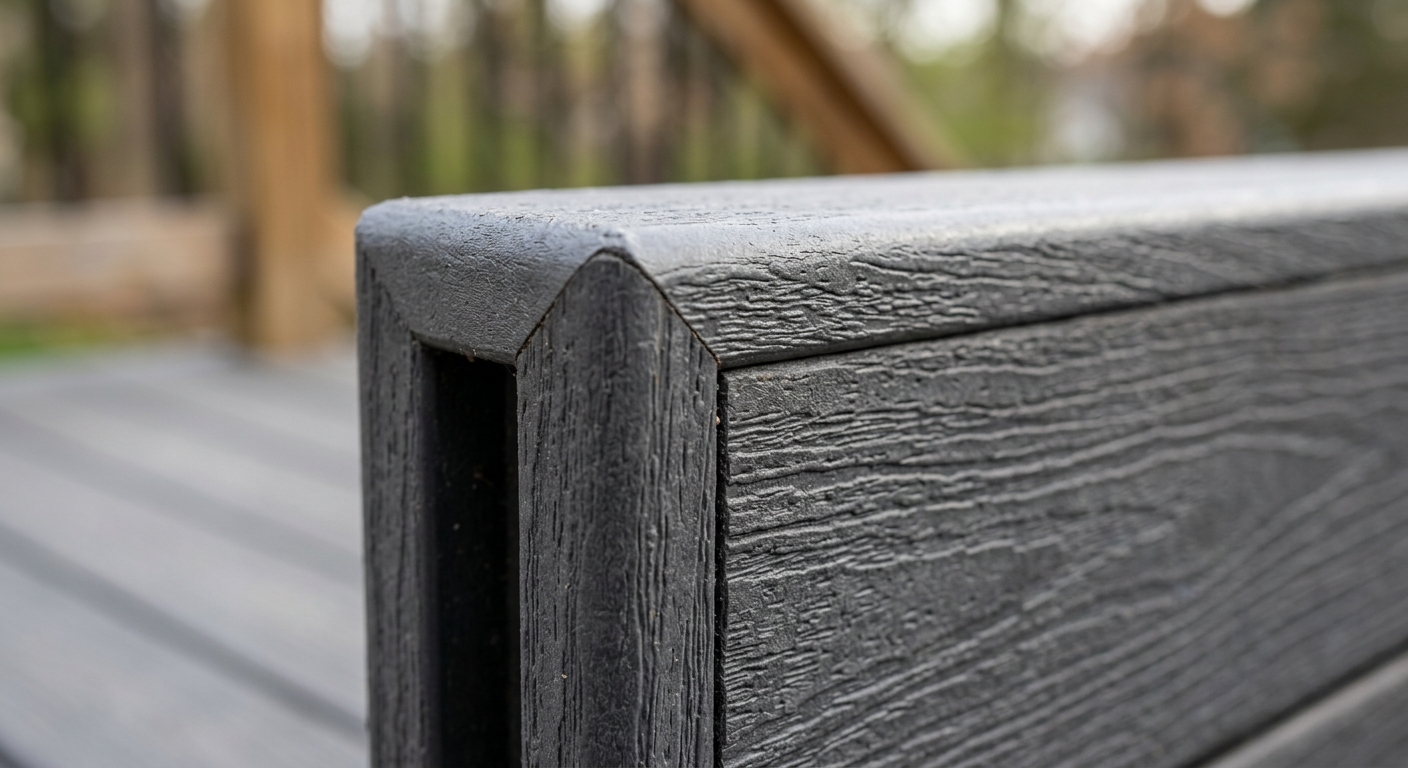
Deep-grain composite texture provides wet traction critical for accessible decks in Seattle's rainy climate
Fiberon and TimberTech both offer textured profiles in their upper product tiers that perform well for accessible applications. If you're comparing options, our detailed breakdown at /blog/trex-vs-fiberon-vs-timbertech-seattle covers the product-specific texture and maintenance characteristics relevant to Pacific Northwest conditions.
North-Facing Ramps: The Moss Problem
North-facing ramps in Seattle don't just get wet — they develop moss colonies. Moss on a ramp is among the most dangerous surfaces you can create for a mobility-limited user. It's nearly frictionless when wet and slightly compressible, which can throw off the weight distribution of someone using a walker or wheelchair.
The mitigation strategies:
Positioning for afternoon sun wherever possible. A ramp positioned on the south or west side of the house gets solar exposure that naturally inhibits moss growth. This isn't always possible — lot configuration, door location, and grade constraints often force ramp placement on the north or east elevation — but it should be explored in every design.
Open-gap composite decking on ramp surfaces. The standard 1/8-inch to 3/16-inch gap between composite boards allows water to drain rather than pond. On a ramp, this drainage is critical. Some homeowners ask about closed-deck surfaces (solid composite panels) for ramps to reduce the visual appearance of the gaps — we recommend against it for north-facing installations because standing water is a moss accelerant.
Annual cleaning protocol. Even with the best surface and positioning choices, accessible ramps in the PNW need an annual cleaning with a composite-safe moss inhibitor. This is part of the maintenance conversation that should happen at project completion. The details are covered in our composite deck maintenance guide for Seattle.
Anti-slip strips as a belt-and-suspenders measure. For ramp surfaces with north exposure, we often install aluminum anti-slip strips at 12-inch intervals across the width of the ramp. These are surface-applied after installation and can be replaced when worn. They're not a substitute for the right base surface, but they add a layer of redundancy that makes sense for high-risk applications.
Cedar for Accessible Decks: A Frank Assessment
We love cedar. It's beautiful, it's locally appropriate, it smells like the Pacific Northwest, and we've built hundreds of excellent cedar decks across King County. But for accessible ramps in Seattle, cedar is not the right primary surface choice, and we'll tell you why plainly:
Untreated cedar becomes slippery when wet. Sealed cedar is temporarily better but requires resealing every one to two years to maintain its traction properties — and a cedar deck that's past its sealing cycle is actively dangerous for mobility-limited users. The maintenance commitment for a sealed cedar ramp in a wet PNW climate is higher than most homeowners will realistically sustain.
If cedar is important to the aesthetic of the project (and it often is — our composite vs. cedar comparison for Seattle covers this in detail), we often specify composite for the ramp surface and railings while using cedar for the main deck platform where the maintenance commitment is more manageable and the consequence of a wet-surface slip is lower.
Relative wet traction performance by composite profile type. Higher is better for accessible deck applications in PNW conditions. Based on aggregate product testing and field experience.
| Category | Value |
|---|---|
| Smooth Composite | score35 |
| Standard Embossed Grain | score62 |
| Deep Wire-Brushed Composite | score88 |
| Anti-Slip Strips (aluminum) | score95 |
| Cedar (freshly sealed) | score55 |
| Cedar (unsealed/weathered) | score28 |
Grab Bar Blocking: The Invisible Upgrade Every Aging-in-Place Deck Needs
If there's a single accessible design upgrade with the highest ratio of benefit to cost, it's grab bar blocking. It costs almost nothing when installed during construction. It's expensive and disruptive to retrofit. And for someone transitioning from a standing position to seated, or recovering balance while navigating a slick threshold, a properly anchored grab bar at the door entry can be the difference between a near-miss and a fall that ends in an emergency room.
What Grab Bar Blocking Is and Why It Matters
Grab bars must be anchored to structural wood — not to drywall, not to OSB sheathing, and not to vinyl or composite siding. A grab bar anchored only to drywall will pull out under load, which is precisely when someone needs it most. The standard spec for grab bar blocking is:
- 3/4-inch solid plywood or solid blocking lumber installed horizontally in the wall framing, at the height where grab bars will be installed (typically 33 to 36 inches above finish floor for a horizontal bar, adjustable if the design includes angled bars)
- Blocking should span at least three stud bays — about 48 inches — to allow flexibility in final bar placement
- Blocking is installed before drywall and exterior cladding
The cost during construction: under $200 in materials, and roughly an hour of framing labor. The cost to retrofit after walls are closed: $800 to $1,500 or more, depending on wall assembly, exterior cladding type, and how many bars need backing.
Where to Install Grab Bar Blocking for Deck Access Points
For a deck with aging-in-place intent, we install grab bar blocking at minimum in these locations:
Both sides of the exterior door threshold. A horizontal bar at 33 to 36 inches on both the interior and exterior side of the door gives the user something to hold during the transition step. On the exterior side, this means blocking behind the exterior cladding — cedar siding, fiber cement, or whatever the house uses — not just behind drywall. This is a conversation that needs to happen with the general contractor or the siding contractor, not just the deck builder.
At the transition from ramp to landing. The top and bottom of the ramp are the highest-risk zones for balance events. A vertical grab bar or an angled bar at the ramp-to-landing transition helps users who are changing direction or shifting their weight from ramp to level surface.
Adjacent to any built-in seating. If the deck design includes built-in benches — which are common in Seattle deck designs and can be valuable for aging-in-place users who need to rest — blocking behind the wall adjacent to the bench allows a bar to be added later without opening the wall.
Key insight
Deck Post Grab Bar Anchoring: An Alternative to Wall Blocking
For covered decks where the roof structure includes posts near the door transition, those posts can serve as grab bar anchor points without any wall modification. A 6x6 post in good condition can accept through-bolted grab bar flanges with appropriate hardware. This is a useful retrofit option when wall blocking wasn't installed — but it's only available where post placement happens to align with user needs, which is often coincidental rather than designed.
For new construction, designing the post layout with grab bar anchor potential in mind is a low-cost enhancement that adds flexibility.
Structural Upgrades Required for Accessible Decks
Accessible deck design isn't just about surface materials and ramp geometry. The structural demands of a wheelchair-accessible ramp are meaningfully higher than those of a standard deck, and undersizing the structure creates both a code compliance problem and a genuine safety risk.
Joist Sizing and Spacing for Ramp Loads
Standard residential deck framing uses 2x8 joists on 16-inch centers for most span configurations. An accessible ramp has different load characteristics: the load is more concentrated (the weight of a wheelchair and occupant — potentially 300 to 400 pounds total — concentrated in a small footprint), and the dynamic loading from a manual wheelchair moving on a slope is higher than the static loading assumptions used for standard deck design.
For accessible ramps, the appropriate structural specification is:
- 2x10 joists on 12-inch centers (versus 2x8 on 16-inch for standard decks)
- Blocking between joists at third points of the span to resist lateral movement
- Decking fastened to every joist (no skipped fasteners), with screws rather than hidden fasteners on the ramp portion to ensure positive mechanical connection under dynamic load
The cost premium for 2x10 joists on 12-inch centers versus 2x8 on 16-inch is meaningful — roughly 40 to 60 percent more lumber volume — but on a ramp that's typically 3 to 4 feet wide and 12 to 24 feet long, the total additional material cost is usually $200 to $500. That's a small premium for appropriate structural performance.
Post and Footing Requirements at Handrail Anchor Points
The handrails on an accessible ramp receive significant lateral loading. When someone uses a handrail to arrest a slip or stabilize a descent, the force transferred to the post and footing is substantially higher than what a standard deck railing experiences from a lean or a wind load.
The appropriate spec for handrail anchor posts on accessible ramps:
- 6x6 posts at all handrail anchor points (versus 4x4 for standard deck railing posts)
- Posts embedded in concrete footings sized for lateral load — typically 12-inch diameter footings at 36-inch depth in King County's frost zone
- Post-to-beam connection hardware rated for lateral load, not just vertical (Simpson Strong-Tie post bases and caps have specific products rated for this application)
The 6x6 post requirement catches some builders off guard when they're estimating accessible ramp work. It's not just bigger lumber — it changes the hardware selection, potentially the beam sizing, and definitely the footing size. Retrofitting from 4x4 to 6x6 posts in an existing ramp structure means new footings, which means breaking up the concrete around the existing posts and repouring. That's the $6,400 retrofit premium showing up in real work.
Ledger Board Connections and Header Loads
For ramps that frame into the house ledger (the most common configuration for a top-of-ramp landing connected to the house), the ledger connection must be engineered to handle the additional load concentration. A standard deck ledger connection is designed for distributed load across its full length. A ramp landing loads the ledger at specific points — the beam bearing points — in a more concentrated way.
In most cases, the existing ledger for a standard deck will be adequate for an attached ramp landing, but this should be verified by the structural plan of record, not assumed. King County and Seattle SDCI both require engineered drawings for complex deck/ramp combinations; the structural engineer of record should explicitly review the ledger connection as part of the plan.
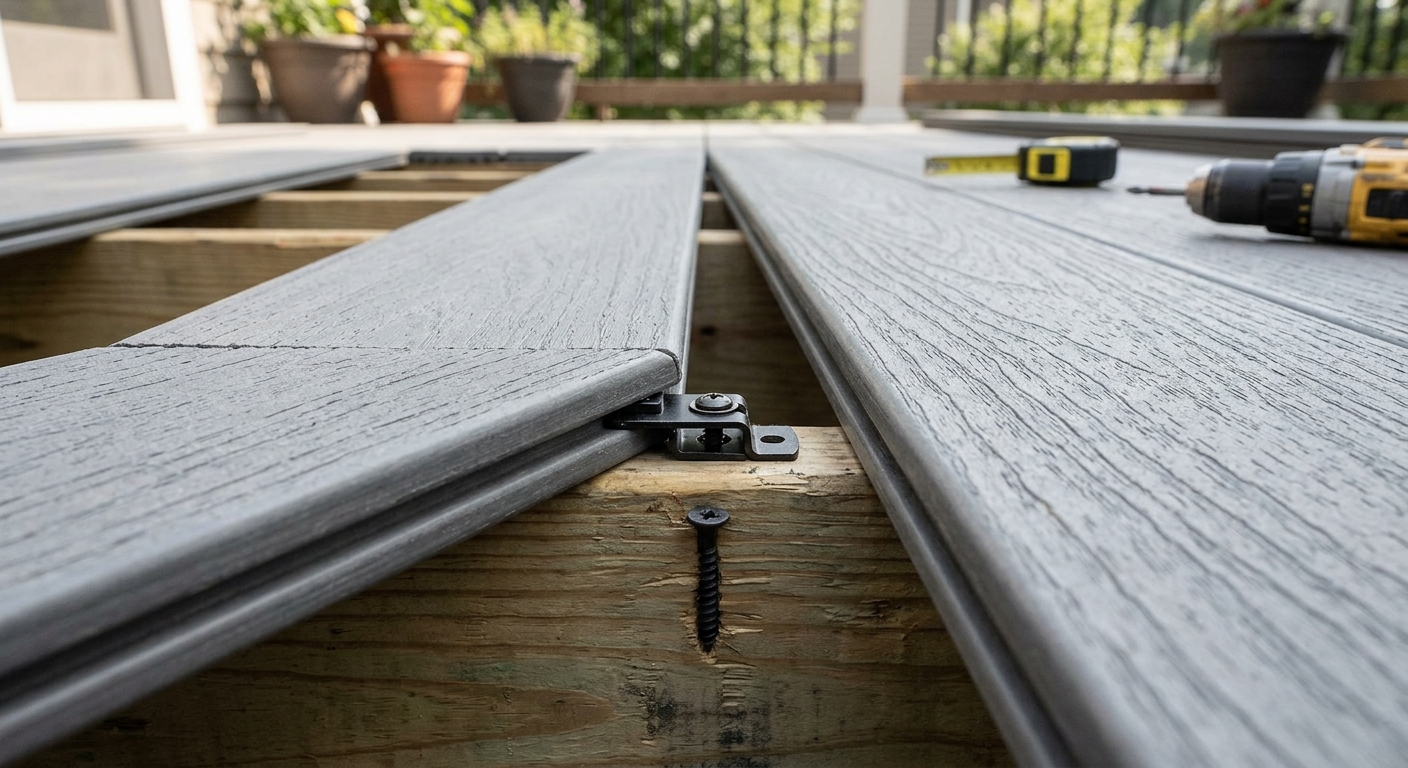
Proper composite fastener installation on accessible deck framing — hidden fasteners on the main deck, face screws on the ramp portion for positive load transfer
Foundation Considerations on Seattle's Variable Soils
King County sits on highly variable soils. Bellevue and the Eastside have significant areas of glacial till — dense, well-compacted material that can support substantial loads on relatively shallow footings. South Seattle, the Duwamish Valley, and portions of Shoreline and Kenmore have fill soils and alluvial deposits that require deeper footings or helical piers. The Highlands and Magnolia neighborhoods often have steep-slope considerations that require geotechnical review before any significant foundation work.
For accessible ramp footings, which are larger and deeper than standard deck footings, a soil test or geotechnical review is worth the investment — typically $500 to $1,500 for a residential report — when the site is on anything other than native glacial till. The alternative is designing for conservative assumptions that may oversize the footings (costing more in concrete) or discovering soil issues after the permit is issued and work has started.
For an overview of cost factors on Seattle deck projects including permit costs, see /blog/deck-cost-seattle-2025 and our detailed cost page at /deck-cost-seattle.
Platform Lifts vs. Switchback Ramps: Choosing the Right Solution for Your Grade Change
On Seattle-area lots with significant grade changes — and there are many, particularly in the Queen Anne, Capitol Hill, Madrona, and Leschi neighborhoods, and throughout the Eastside where hillside development is common — a straight ramp is often impossible. The footprint required for a compliant 1:12 ramp exceeds the available yard space. In these situations, the choice comes down to a switchback ramp design or a platform lift.
When a Switchback Ramp Works
A switchback ramp uses two or more ramp runs at 180 degrees to each other, connected by an intermediate landing. The advantage is that the overall linear footprint is reduced — instead of a 24-foot straight run, you might have two 12-foot runs in a U-shape, occupying roughly 12 feet of linear depth.
The disadvantage is the intermediate landing requirement. That 60 x 60-inch landing adds significant area to the overall structure, and the turn itself is difficult for electric wheelchair users and those with limited upper body strength. Manual wheelchair users who push themselves (rather than using power chairs) find switchback ramps demanding — the turn at the landing requires repositioning the chair, and the effort of the descent or ascent is higher than a straight run.
Switchback ramps also create a longer total path of travel, which matters for users with limited stamina. A user who can manage a 15-foot straight ramp may find a 12-foot-plus-turn-plus-12-foot switchback exhausting.
When switchback ramps are the right choice:
- The primary user is being assisted by a caregiver (caregiver pushes the chair, so the mechanical disadvantage of the turn is manageable)
- The grade change is moderate (18 to 30 inches) and the intermediate landing fits naturally into the site
- The architectural character of the project calls for an integrated structure rather than a mechanical device
- The budget doesn't allow for a lift (platform lifts run $3,000 to $8,000 installed, depending on height and features)
When a Platform Lift Is the Better Answer
Platform lifts are vertical or near-vertical mechanical lifts — not elevators — designed for residential use on decks and porches. They operate on 110V household current, have minimal footprint (typically 36 x 48 to 48 x 60 inches for the platform itself), and can accommodate elevation changes of 2 to 6 feet, which covers the majority of residential deck heights.
The advantages of platform lifts over long switchback ramps:
Footprint. A platform lift occupies roughly the same space as a landing. On a lot where a switchback ramp would consume 40 square feet of yard space, a lift takes 12 to 15 square feet.
User experience for power wheelchair users. Rolling onto a flat platform and pressing a button is significantly easier than navigating a slope, particularly for power chair users where slope management is a motor control challenge.
Aesthetic integration. A well-specified platform lift with a gate and safety rail can be integrated into a deck design without the visual dominance of a long ramp structure. For contemporary Seattle deck aesthetics — which tend toward clean lines and minimal mass — this matters.
Flexibility. A platform lift can be removed and relocated if the household's needs change. A switchback ramp structure is permanent.
The disadvantages are real, though: platform lifts require power, they require maintenance (annual inspection of the drive mechanism and safety sensors), they have moving parts that can fail, and they create a dependency on electricity that a passive ramp doesn't have. For users whose primary concern is independence without reliance on mechanical systems, the ramp is the more resilient solution.
Tip
The ADU and Accessible Deck Combination: A Permit Efficiency Play
For homeowners building an ADU (accessory dwelling unit) alongside a deck with accessible features, there's a permit efficiency worth knowing about: Seattle and King County allow — and in some cases require — deck and ADU plans to be submitted together as a single permit packet. Combining these submissions avoids a six-week sequential review delay (first the deck, then the ADU) and can reduce permit fees because certain review categories are assessed per-project rather than per-structure.
This is a coordination issue between the deck contractor, the ADU contractor or GC, and the permitting office. We've navigated this on several Bothell, Kenmore, and Shoreline ADU projects where the ADU included an accessible deck with a ramp. The coordination overhead is real, but the time savings are meaningful.
For more on the King County permit process for decks, see our detailed guide at /blog/deck-permit-king-county-guide.
Material Selection for Accessible Decks: What We Actually Specify
Accessible deck design narrows the material field meaningfully. Not every decking product, railing system, or surface material is appropriate for the performance demands of an accessible application in the Pacific Northwest. Here's what we specify and why.
Composite Decking: The Right Products for Accessible Applications
In the accessible deck category, composite decking dominates our specifications, and the reasoning is consistent: composite is dimensionally stable (no warping or cupping that creates surface irregularities and trip hazards), doesn't require seasonal maintenance that, if skipped, creates a hazard, and is available in textured profiles that maintain wet traction better than any natural wood option.
For accessible applications specifically, we favor:
Trex Transcend Lineage. The deep wire-brushed texture is the best in Trex's portfolio for wet traction. The 25-year fade/stain warranty covers the longest reasonable horizon for an aging-in-place design decision. Installed cost in Seattle runs $35 to $45 per square foot for the decking material and labor, within the broader $30 to $45 per square foot range for composite installation in this market. See /blog/best-decking-materials-seattle-2026 for a full comparison.
AZEK Vintage Collection. AZEK is PVC-based rather than wood-composite, which makes it the most moisture-resistant option in the category — relevant for Seattle's climate and particularly for north-facing ramp applications. The textured profiles in the Vintage line perform well in wet conditions. AZEK runs slightly higher in installed cost, typically $40 to $50 per square foot installed in Seattle.
Fiberon Paramount. Fiberon's all-PVC Paramount line is a strong alternative to AZEK at a slight cost savings. The texture profile is deep enough for good wet traction. Fiberon's product lineup has been updated significantly in recent years; the Paramount line specifically addresses the moisture performance issues that affected earlier Fiberon generations.
For the main deck platform (not the ramp), the material options open up somewhat — the textured composite requirement is less critical on a large flat surface that gets more sun and dries faster than a shaded ramp. But for continuity of maintenance and appearance, we usually specify the same product throughout.
Railing Systems for Accessible Applications
The railing selection for an accessible deck involves two separate considerations: the decorative infill panel (cable, glass, wood, aluminum) and the gripping rail at ADA height.
For the gripping rail on accessible ramps, the material options are aluminum and stainless steel. Both are appropriate; aluminum anodized to match the railing system is the most common specification. The grip diameter must be in the 1.25 to 2-inch range — most standard round aluminum rail profiles hit this specification. What doesn't work for a grab rail: square post tops, decorative finials that interrupt the continuous grip surface, or profiles too large in diameter (3-inch or 4-inch structural tubes are too large to grip effectively).
For decorative infill on the accessible ramp itself, we generally recommend cable railing rather than glass or horizontal rails. Cable railing is transparent, which allows a user on the ramp to see the landing approach and lets caregivers monitor the user from the deck level. It's also lighter in visual mass than glass, which reduces the closed-in feeling that some users find stressful on ramps.
Our cable railing guide for Seattle covers the specific cable tension requirements and post spacing that apply in King County — the tensioning requirements for cable on an inclined section are different from horizontal cable railing, and not all railing installers understand this.
For the main deck, the railing options are broader. See our deck railing options overview for a full comparison across cable, glass, aluminum balusters, and hybrid systems — with notes on which options work best for aging-in-place use where the railing serves as a balance support surface.
| Material | Wet Traction | Maintenance (PNW) | Cost Installed | ADA Ramp Suitability |
|---|---|---|---|---|
| Deep-texture composite (Trex/AZEK/Fiberon) | Excellent | Low (annual clean) | $35–$50/sq ft | Highly recommended |
| Standard embossed composite | Good | Low (annual clean) | $30–$45/sq ft | Acceptable with anti-slip strips |
| Smooth composite | Poor | Low | $28–$40/sq ft | Not recommended for ramps |
| Cedar (freshly sealed) | Moderate | High (reseal annually) | $18–$28/sq ft | Not recommended for ramps |
| Cedar (weathered) | Poor | High | $18–$28/sq ft | Avoid |
| Pressure-treated lumber | Poor (rough) | High | $15–$25/sq ft | Avoid for accessible applications |
How to Spec an Accessible Deck in Seattle: Permit Tips, Material Picks, and What to Ask Your Builder
Accessible deck design in Seattle is not a specialty niche — it's a set of specific design decisions that any competent deck builder should be capable of executing. But "capable of executing" and "has actually thought through the problem" are different things, and the questions you ask at the bidding stage will tell you quickly which category you're dealing with.
The Permit Process for Accessible Decks in King County and Seattle
King County's Department of Local Services handles permits for unincorporated King County, while the City of Seattle uses SDCI (Seattle Department of Construction and Inspections). Both have online permitting systems and require a complete structural plan for decks above 30 inches at any point.
For accessible decks with ramps, the permit submittal should include:
- Site plan showing the deck footprint, ramp footprint, and landing locations relative to property lines and the house
- Structural plan showing joist sizing and spacing, beam sizing, post sizes and locations, footing sizes and depths, and ledger connection details
- Elevation drawings showing ramp slope calculation, landing heights, and handrail heights
- Detail drawings for the ramp-to-landing connection, handrail gripping rail profile, and footing-to-post connection
For projects in Seattle city limits, the Seattle SDCI decks page has the specific checklist for required plan contents. For King County projects, the King County DLS permits page has the equivalent.
Permit fees for a deck with ramp in Seattle range from $250 to $1,000 depending on project valuation, with the permit fee calculated as a percentage of declared project value. For a $25,000 accessible deck and ramp project, expect permits in the $400 to $600 range. The plan review timeline is currently running six to eight weeks for residential deck projects in Seattle and four to six weeks in unincorporated King County — ask your contractor what the current timeline is when you're bidding, as these fluctuate.
Questions to Ask Builders When Bidding Accessible Deck Work
These questions quickly separate builders with real accessible design experience from those who are figuring it out on your project:
"Walk me through the ramp slope calculation for this site." A competent builder should immediately start talking about elevation from finish floor to grade, horizontal run available in the yard, and whether a straight run or switchback is required. If they look uncertain, that's information.
"What joist specification are you using for the ramp section, and why?" The correct answer is 2x10 on 12-inch centers with blocking. If they say 2x8 on 16-inch (standard deck spec) without explaining why the ramp has different requirements, push back.
"What composite profile are you specifying for the ramp surface, and can I see a wet sample?" The surface selection conversation should demonstrate knowledge of the traction difference between texture profiles. Asking for a wet sample is reasonable — any builder worth working with will have material samples.
"Where will you install grab bar blocking, and will you document it?" This should be a standard part of their accessible deck scope. If they've never heard of grab bar blocking, or treat it as an unusual request, that's a flag.
"How are you handling the door threshold height?" This forces a conversation about the relationship between deck surface height and interior finish floor. A builder who hasn't thought about threshold height hasn't fully designed the project.
The ROI Case for Accessible Design Investment
The National Association of REALTORS Remodeling Impact Report consistently shows that deck additions recover a significant portion of their cost at sale — frequently 60 to 70 percent of project cost returned in resale value, with outdoor living projects among the highest-recovery categories in remodeling. Accessible features, when properly integrated rather than retrofitted, don't detract from that recovery — in fact, as the buyer pool of aging homeowners grows, accessible design features increasingly add value rather than neutralizing it.
The North American Deck and Railing Association (NADRA) has documented the growing market for accessible deck design as a distinct category within residential deck construction, driven by aging Baby Boomer homeowners who want to age in place rather than transition to assisted living. Seattle's demographic profile — with a significant population of homeowners in their 50s and 60s who bought homes in the 1990s and early 2000s and have substantial equity — makes this a real and growing design category in our market.
The math is straightforward: the premium for building accessible from the start is a fraction of the retrofit cost. The $6,400 cost premium for retrofitting versus building accessible is documented from real project data in the Seattle/Federal Way area. The accessible-from-the-start premium — the additional cost of specifying larger joists, bigger posts, compliant landings, and grab bar blocking during initial construction — is typically $3,000 to $5,000 for a standard deck project. That's a $1,400 to $3,400 savings compared to retrofitting, before accounting for the design time, permit revision costs, and disruption of the retrofit scenario.
For homeowners with a time horizon of ten or fifteen years in the home, the math tilts even more clearly toward accessible design from the start.
Key insight
Putting It All Together: An Accessible Deck Spec Checklist
For homeowners and builders working through an accessible deck project in King County, here's the specification checklist we use internally:
Site and Layout
- Ramp slope calculated at 1:12 or less based on finish deck elevation
- Top landing minimum 60 x 72 inches (to accommodate door clearance)
- Bottom landing minimum 60 x 60 inches
- Intermediate landings (if switchback) minimum 60 x 60 inches
- Ramp positioned for maximum solar exposure (moss mitigation)
- Clear width minimum 48 inches (36 inches absolute minimum)
Structure
- 2x10 joists on 12-inch centers for ramp section
- Blocking at third-points of ramp joist span
- 6x6 posts at all handrail anchor points
- Footings sized for lateral load transfer at handrail posts
- Ledger connection reviewed for ramp load concentration
Surface and Materials
- Deep-textured composite decking specified for ramp (no smooth profiles)
- Face-screw fastening pattern on ramp (hidden fasteners on main deck)
- Anti-slip strips at 12-inch intervals for north-facing ramp sections
- Composite or aluminum railing components (no wood handrails on ramp)
Handrails and Grab Bars
- Continuous gripping rail at 34 to 38 inches height both sides of ramp
- Grip diameter 1.25 to 2 inches
- Handrail extensions at top and bottom as required
- Grab bar blocking installed at door threshold, both sides
- Blocking photographed before wall closure
Permits and Documentation
- Complete permit submittal with ramp slope calculations
- Structural plan including joist and post sizing for ramp
- As-built documentation including grab bar blocking locations
- Combined submittal with ADU plans where applicable
| Feature | Build-In Cost | Retrofit Cost | Savings |
|---|---|---|---|
| Accessible ramp (full) | $4,100–$5,800 | $10,500–$12,200 | $6,400+ |
| Grab bar blocking | $150–$200 | $800–$1,500 | $600–$1,300 |
| 6x6 handrail posts (vs 4x4) | $200–$400 | $1,500–$2,500 | $1,100–$2,100 |
| Widened door (36-inch) | $500–$900 | $1,200–$2,000 | $700–$1,100 |
| Compliant threshold height | $0 (design choice) | $300–$600 | $300–$600 |
| Total estimated savings | $9,100–$15,500 |
The pattern across all these line items is consistent: accessibility features designed in are dramatically cheaper than accessibility features retrofitted. The aggregate savings in the table above — $9,100 to $15,500 compared to retrofitting each element individually — is a compelling argument for the upfront investment in accessible design. For homeowners in their 50s who expect to be in their homes for another 20 to 30 years, this is financial planning as much as it is construction planning.
Aging-in-Place Deck Design: The Full Picture
Bringing together all the elements discussed in this article, an accessible deck built for aging-in-place use in Seattle is a specific, engineered product — not a standard deck with a ramp bolted on. The differences from a standard deck are:
- Site planning that accounts for ramp footprint, solar exposure, and grade
- Structural framing that's heavier and more heavily connected than standard deck framing
- Surface materials selected for wet traction rather than aesthetics alone
- Landing geometry that meets dimensional requirements for wheelchair maneuvering
- Handrail and grab bar systems that are continuous, graspable, and anchored to appropriate structure
- Door threshold design that eliminates transition hazards
- Permit documentation that demonstrates all of the above to the reviewing authority
The upfront investment in getting all of these right runs $3,000 to $5,000 more than a comparable non-accessible deck. The retrofit cost to add accessibility later runs $9,100 to $15,500 more than building accessible from the start. Seattle homeowners who are thinking clearly about their long-term use of their homes should find that math straightforward.
One final PNW-specific point: the aging-in-place deck in Seattle isn't just about surviving physically — it's about continuing to live in and enjoy the outdoor environment that Pacific Northwest homeowners invest so much to be near. A deck that a 75-year-old can safely access on their own is a deck that keeps them connected to the garden, the view of the Olympics or Cascades, the morning coffee in the fresh air that makes Seattle living what it is. That's not a marketing point. It's the reason the work matters.
If you're planning a deck in King County and want to make sure you get the accessible design right the first time, call The Seattle Decking Company at (425) 675-6259 or reach out through our contact page. We're at 22722 29th Drive SE, Bothell, WA 98021, and we serve the entire Eastside and greater Seattle area. We'll walk through the site geometry with you, calculate the ramp run, identify the grab bar blocking locations, and submit permit-ready plans to King County or Seattle SDCI. Getting it right now costs less than fixing it later — and we can show you the numbers to prove it.
Frequently Asked Questions
Does my residential deck ramp in Seattle have to meet ADA standards?
How long does a wheelchair-accessible ramp need to be for a standard Seattle deck?
What does an accessible deck ramp cost to add in the Seattle area?
What composite decking is best for an accessible deck ramp in Seattle?
What is grab bar blocking and do I need it on my deck?
Do I need a permit for an accessible deck ramp in King County?
Is a platform lift or a switchback ramp better for a steep Seattle lot?
Why does a deck ramp need bigger joists and posts than a standard deck?
How do I prevent moss on a north-facing accessible ramp in Seattle?
What door threshold height do I need for a wheelchair-accessible deck entry?
Can I combine my accessible deck permit with an ADU permit in Seattle?
How much does a complete accessible deck cost in Seattle?
Planning a deck in the Seattle area?
Get an onsite design review and a clear, itemized quote from a licensed local builder.
Request a Free Quote