
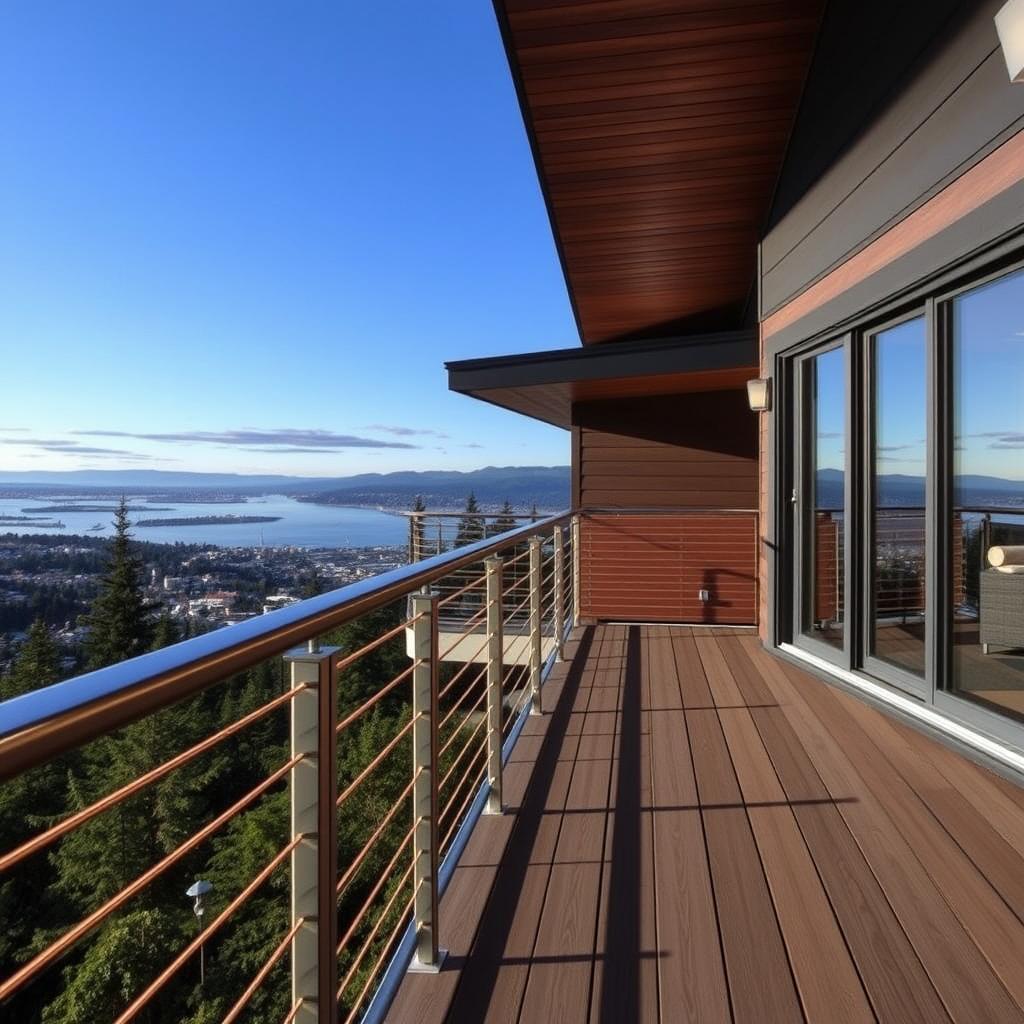
If you spend any time in Seattle's view corridors — the west-facing hillsides of Medina, the waterfront lots of Mercer Island, the bluff-top properties along Magnolia and Madison Park — you notice something almost immediately. The decks that open up to those views aren't blocked by wood balusters or iron spindles. They're framed in thin stainless steel cables, nearly invisible against the water and the Olympic Mountains in the distance. Cable railing has become the defining aesthetic choice for Pacific Northwest view decks, and for good reason: when you've paid Seattle prices for a lot with a Puget Sound sightline, the last thing you want is a fence blocking it.
But cable railing is not a simple upgrade. It carries real engineering requirements, specific material specifications driven by our marine climate, permit obligations through SDCI or King County's Department of Local Services, and costs that run 2 to 2.5 times what a basic wood railing system would. Homeowners in Bellevue, Kirkland, and Bothell who call us after getting a quote elsewhere are often surprised — not because cable railing is unreasonably expensive, but because they didn't know what they were buying. This guide is written from the builder's perspective. We'll cover code, materials, structural requirements, real 2025–2026 pricing for the Seattle market, and the maintenance reality of stainless steel in a salt-air coastal environment. No fluff, no bait-and-switch. Just what you need to make a good decision.
Why Cable Railing Dominates Seattle View Decks
There's a reason cable railing has become the default choice for premium residential decks across King County's view-oriented neighborhoods. It's not marketing. It's practical logic applied to a specific landscape and climate.
The View Preservation Argument
Seattle is one of the few major American cities where a residential lot can look west across open water and, on a clear day, offer an unobstructed line of sight to a 14,000-foot volcanic peak. The view corridors in Medina, along the west hills of Bellevue above Lake Washington, through the Madrona neighborhood, and up along the bluffs in Magnolia are genuinely rare. When those properties have elevated decks — which many do, because the topography of the Seattle basin creates frequent grade changes — the railing becomes either a framing element for the view or an obstacle to it.
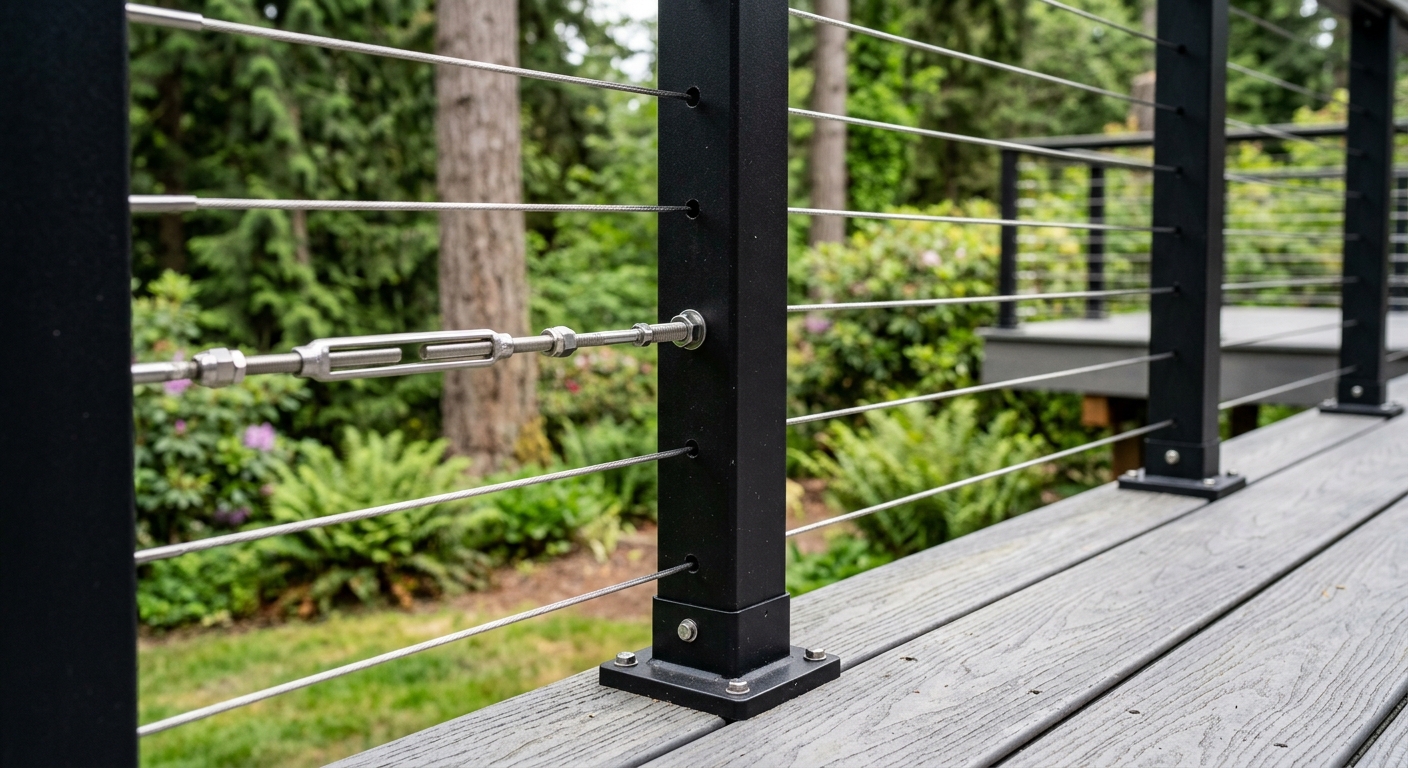
Cable railing threads cables horizontally across post-mounted spans, typically with cables spaced 3 inches or less apart (more on the code side of this later). The cable diameter is typically 1/8 inch or 3/16 inch. From a distance of 10 feet or more, horizontal cable arrays essentially disappear visually. A solid wood or aluminum baluster railing, by contrast, breaks the view into segments and draws the eye to the fence rather than the landscape behind it. For view-oriented properties, this isn't an aesthetic preference — it's a functional requirement.
The Aesthetic Fit with PNW Architecture
Contemporary Pacific Northwest architecture favors clean lines, natural materials, and strong indoor-outdoor connections. Cable railing fits that vocabulary cleanly. It pairs well with the wide-plank composite decking products that have become dominant in this market — Trex's Transcend Lineage and AZEK's Arbor collection both photograph particularly well alongside stainless cable systems. It also works with cedar, where the contrast between warm grain and silver hardware creates a specific Northwest look that has remained popular through multiple design cycles.
This isn't regional parochialism. The National Association of the Remodeling Industry's remodeling impact data consistently shows that outdoor living projects in markets with strong view inventory command premium recovery rates. Cable railing is part of what defines the finished product that buyers in this market expect to see.
Where Cable Railing Makes the Most Sense
Not every Seattle deck is a candidate for cable railing. Here's the honest breakdown of where it earns its cost premium:
High-value view decks. Any elevated deck where the view is the primary feature of the space. This is the core use case. The economics make sense when you're protecting a $800,000 sightline.
Modern or contemporary builds. Cable pairs well with sleek horizontal designs, metal-framed structures, and composite decking in gray or brown tones. It reads as intentional and polished.
Decks where maintenance-free materials are a priority. When paired with composite decking, a stainless cable system creates a deck that requires virtually no periodic refinishing — just annual cleaning. This is a significant draw for Seattle homeowners who are tired of cedar deck sealing schedules.
Where cable railing is harder to justify: Small ground-level decks where views aren't a factor, where cost-per-linear-foot math makes premium systems hard to justify, or where HOA restrictions prevent the aesthetic. Also, any deck with a significant horizontal run that would require intermediate corner posts — cable systems are not as clean as they look in catalog photos when corners get involved, and corners add 20–30% to total cost.
The Competition: Glass and Wood
The other dominant premium railing choice in Seattle view markets is glass panel railing — frameless tempered glass with minimal hardware. Glass railing offers a completely unobstructed sightline and a high-end appearance, but it runs $150–$300+ per linear foot installed, it requires regular cleaning to remain transparent in our rainy climate, and it's more susceptible to damage from impact. We cover glass railing in more depth in our railing options guide, but the short version is: cable railing typically offers a better cost-to-visibility ratio, and glass railing is more common on properties where the deck is partially covered or sheltered from direct weather exposure.
Wood railing — whether cedar, pressure-treated, or composite baluster systems — costs $50–$100 per linear foot installed and performs fine on ground-level or low-view applications. It's not a real alternative on a view deck.
Seattle and King County Code Requirements for Cable Railing
Code compliance is not optional, and cable railing has specific requirements that go beyond what standard baluster systems face. If you're working with a contractor who doesn't bring up these requirements in the first conversation, that's a problem.
Guardrail Height Requirements
Washington State has adopted the International Residential Code with state-specific amendments. For residential applications, the IRC requires guardrails on any walking surface that is 30 inches or more above the floor or grade below. The minimum guardrail height is 36 inches for residential decks. This is a hard floor — your cable railing system must achieve 36 inches from the deck surface to the top rail, measured vertically.
For commercial or multi-family projects, the International Building Code applies and requires 42 inches minimum height. If you're building a deck on a property with a detached ADU, duplex, or any commercial component, verify which code applies before you spec the railing.
Important
The 4-Inch Sphere Rule: IRC Section R312
This is the requirement that catches the most homeowners off guard. IRC Section R312, which Washington State has adopted, states that no opening in a guardrail may allow a 4-inch diameter sphere to pass through. The intent is to prevent small children from getting their heads trapped between balusters.
For horizontal cable railing, this creates an immediate tension: if cables are spaced too far apart, they fail the 4-inch test. Standard horizontal cable spacing for code compliance is 3 inches on center or less — not the 4-inch spacing you might assume from the rule. This is because cables deflect slightly under load, and a 4-inch gap at zero tension can become a 4-inch-plus gap when a child pushes against the cables. Inspectors in King County know this, and some jurisdictions require a deflection test as part of inspection.
The documentation requirement is real: you'll need to provide cable spacing specifications in your permit application, and in some cases the inspector will physically test spacing during the final inspection.
Cable Tension Requirements: The 150-Pound Pull-Through Test
Washington's county-level building bulletins, including guidance aligned with Pierce County's cable rail guard bulletin which provides useful reference for similar construction requirements across the region, specify that each cable must sustain a minimum of 150 pounds of tension to pass the pull-through test. This is the force required to prevent a cable from being pushed out of the way far enough to create an unsafe opening.
Achieving and maintaining 150 pounds of cable tension has direct implications for post design and spacing. Tensioned cables exert significant inward load on terminal posts — the posts at each end of a cable run. At high tension levels across multiple cables (a typical system has 10–14 cable runs), the cumulative inward load on corner and terminal posts can exceed 1,000 pounds. This is why corner and end posts are typically heavier gauge, require larger footings, and are sometimes engineered as a separate structural element from the intermediate posts.
Post Spacing and Unsupported Cable Span Limits
State guidance specifies that cable railing posts cannot exceed 8 feet on center and that unsupported cable spans are limited to 48 inches. These two requirements interact: on a long straight run, you'll need intermediate posts at 6–8 feet regardless of what the terminal posts can handle structurally.
Intermediate posts on cable systems serve a specific function — they prevent cable sag and maintain consistent spacing along the run. They don't bear the same terminal tension loads as end posts, but they need to be structurally connected to the deck frame properly, and their installation creates interruptions in the cable line that some homeowners find visually disruptive. High-end systems minimize this by using thinner intermediate post profiles — 1.5-inch square versus 2.5-inch square for terminal posts — but you can't eliminate them on spans longer than 48 inches.
The 200-Pound Lateral Load Requirement
The entire guardrail system — posts, cables, top rail, hardware, and attachment to the deck frame — must resist a concentrated horizontal load of 200 pounds applied at any point along the top rail. This is the code's version of "a large person falls against the railing." The structural path for that 200-pound load runs from the top rail, through the post, through the post base hardware, through the deck framing, and ultimately to the foundation.
This requirement drives post size and post base selection. Undersized posts or inadequate post base hardware fail this test. In Seattle's seismic zone, the connections also need to account for lateral seismic loads, which adds engineering complexity to anything on an elevated structure.
Note
SDCI Permit Requirements for Cable Railing Projects
The Seattle Department of Construction and Inspections requires permits for any deck over 18 inches above grade. If you're adding cable railing to an existing permitted deck, you may need a separate railing permit if the original permit did not specify the railing system. If you're building a new elevated deck with cable railing, the railing system is part of the deck permit package.
Standard residential permits through SDCI run $300–$650 with 2–4 week processing times for straightforward applications. Projects that require structural engineering letters — elevated decks, decks with unusual loading conditions, or projects where the inspector requires documentation of cable tension calculations — can add 3–6 weeks to the timeline and $500–$1,500 in engineering fees.
King County's Department of Local Services handles permitting for unincorporated areas of the county — including parts of Bothell, Kenmore, and areas outside city limits. The requirements are similar to SDCI's but the review timelines and fee structures differ. We cover the full permit process in detail in our King County deck permit guide.
Steel Spec Decisions: 316 vs. 304 Stainless and Why It Matters in Puget Sound
This is where homeowners make expensive mistakes. Both 304 and 316 stainless steel look identical out of the box. The price difference at installation time is modest — maybe 15–25% on the cable and hardware line items. The performance difference in a marine environment is not modest.
The Chemistry of Corrosion Resistance
Stainless steel resists corrosion because of a passive chromium oxide layer on the surface. Both 304 and 316 stainless contain chromium (18% in both grades). The critical difference is molybdenum: 316 stainless contains 2–3% molybdenum, which 304 does not. Molybdenum significantly increases resistance to chloride-induced pitting corrosion — the specific corrosion mechanism most active in coastal environments.
Puget Sound is a saltwater inlet. Salt air doesn't just affect waterfront properties — wind patterns carry chloride deposits well inland. Neighborhoods in Queen Anne, Capitol Hill, First Hill, and even parts of Bellevue that seem inland still receive meaningful salt deposition, particularly during winter storm events that push marine air inland. For properties within a mile of saltwater — Magnolia, Madison Park, Leschi, Madrona, Mercer Island, anything on Lake Washington's shores — this is not a theoretical concern.
We have seen 304 stainless cable systems installed in Puget Sound-facing locations that showed pitting corrosion within 3–5 years. At that point, replacement is the only option — the cables cannot be retreated or refinished. The cost difference between 304 and 316 at installation is a few hundred dollars on a typical project. The cost of replacement is the full cable and hardware budget again.
Railworks' guidance on Seattle's marine climate requirements confirms what we spec on every project: corrosion-resistant hardware — meaning 316-grade stainless or hot-dip galvanized — is the correct material specification for Puget Sound properties. This is a climate-driven requirement, not a luxury upgrade.
Cable Diameter: 1/8 Inch vs. 3/16 Inch
Standard residential cable railing uses 1/8-inch (T-316 stainless) cable. This is the minimum diameter for most code-compliant residential systems and is adequate for most applications. The 3/16-inch cable is heavier gauge, resists deflection better under load, and has a longer service life under high tension — but it also costs more per linear foot and requires higher-torque terminal fittings.
For longer spans — anything over 30 feet of continuous run between terminal posts — 3/16-inch cable is worth the premium. For standard 12–20 foot spans, 1/8-inch T-316 performs correctly and costs less.
Hardware: Swage vs. Thread-and-Nut Terminals
Terminal fittings are the hardware pieces that anchor each cable to the end posts. Two main systems dominate:
Swage terminals are factory-pressed onto the cable end, creating a permanent mechanical connection. They have a cleaner appearance and are the dominant choice for high-end residential installations. They require professional installation equipment and cannot be re-tensioned after installation.
Thread-and-nut (stud) terminals attach via a threaded rod that passes through the post and is secured with a nut on the far side. They can be re-tensioned in the field — useful because cable stretches slightly under initial loading and may need adjustment at the 6-month or 1-year mark. They're slightly more visible than swage terminals but more forgiving for DIY installation and easier for future adjustments.
Both are available in 316 stainless. Both are code-compliant. The choice is partly aesthetic and partly practical depending on who's installing and what post system is being used.
| Hardware Type | Appearance | Re-tensionable | Installation Skill Level | Relative Cost |
|---|---|---|---|---|
| Swage Terminal | Cleanest | No | Professional | Higher |
| Thread-and-Nut Stud | Slightly visible nut | Yes | DIY-capable | Lower |
| Jaw/Toggle | Mid-grade | Limited | Moderate | Mid |
What Cable Railing Costs in Seattle: 2025–2026 Pricing Breakdown
Let's talk real numbers. Cable railing is an investment, and the range is wide enough that homeowners need a clearer picture of what drives cost within that range.
The Installed Cost Range
Based on current Seattle-area market pricing, cable railing installed by a licensed contractor runs $100–$250 per linear foot. This is 2–2.5x the cost of a basic wood baluster system ($50–$100 per linear foot) and roughly comparable to, or slightly less than, frameless glass panel systems ($150–$300+ per linear foot).
The national average cited by HomeAdvisor's 2025 data is $75–$260 per linear foot, with a typical 50-linear-foot project averaging around $9,000. Seattle pricing trends toward the upper half of that national range, consistent with regional labor costs and the 316-grade stainless specification that the climate demands.
A useful benchmark: a 50-linear-foot cable railing project in the Seattle market (typical for a mid-size elevated deck) runs $5,000–$12,500 installed, before permits and engineering. At 100 linear feet — a larger deck with multiple runs — expect $10,000–$25,000.
Installed cost ranges by system type and material grade. Seattle market pricing reflects 316-grade stainless and current labor rates.
| Category | Value |
|---|---|
| Basic Wood Railing | $75 |
| Cable Railing (Low) | $100 |
| Cable Railing (Mid) | $175 |
| Cable Railing (High) | $250 |
| Glass Panel Railing | $225 |
Breaking Down the Cost Components
Material costs:
- Stainless steel cable (T-316, 1/8 inch): $0.50–$1.70 per linear foot of cable (not deck perimeter — total cable footage, which is typically 10–14x the deck perimeter)
- Stainless steel posts (316): $110–$230 per post depending on profile, height, and end vs. intermediate spec
- Aluminum posts: $65–$125 per post — a cost-saving alternative where the marine environment is less aggressive
- Top rail (aluminum or stainless): $8–$20 per linear foot
- Terminal fittings, tensioners, and hardware: $15–$35 per cable run end
Labor costs:
- Cable railing installation labor runs $20–$50 per linear foot on straight runs. Corner work, elevated installation, and structural post anchor work pushes toward the high end.
Project add-ons:
- Permits: $300–$650 for standard residential SDCI permits
- Engineering letters (when required): $500–$1,500
- Total permit and engineering budget: $500–$2,000 per project
Tip
What Drives Cost Within the Range
Post material and profile. Stainless steel posts are the most expensive option and create the cleanest, most consistent appearance. Aluminum posts cost less and are lighter, but they require capping the exposed top with stainless hardware to avoid galvanic corrosion where the two metals contact. Powder-coated aluminum posts in black or bronze are a popular mid-range choice.
Straight runs vs. corners. A simple rectangular deck with four corner posts and straight runs between them is the least expensive cable railing configuration per linear foot. Every interior or exterior corner requires a corner post with a different hardware configuration, adds tension complexity, and increases installation time. Projects with multiple angles — L-shaped decks, curved decks — can run 20–30% more per linear foot than simple rectangles.
Span length and post count. At 8-foot maximum post spacing, a 40-foot run requires a minimum of five posts. Post cost is one of the higher line items per unit, so post-dense configurations cost more. Reducing span count by allowing 8-foot spacing where structurally appropriate keeps cost lower, but requires verifying that the 48-inch unsupported cable span limit is being respected.
Code-driven engineering. If your project requires a structural engineering letter — common for elevated decks, unusual post attachment conditions, or any project where the plan reviewer flags a question — that adds $500–$1,500 to the project and 3–4 weeks to the schedule. This is not padding; it's the cost of getting the documentation right.
For a broader look at how deck components combine to affect total project cost, see our Seattle deck cost guide and our deck cost calculator page.
| Project Type | Typical LF | Estimated Installed Cost (Seattle) | Notes |
|---|---|---|---|
| Small ground-level deck | 30–40 LF | $3,000–$10,000 | Lower end if no engineering required |
| Mid-size elevated deck | 50–70 LF | $5,000–$17,500 | Permits typically required |
| Large view deck with stairs | 80–120 LF | $8,000–$30,000 | Stair sections add 30–50% premium |
| Wraparound deck, multiple corners | 100–150 LF | $12,000–$37,500 | Corner premium 20–30% |
Post Materials and Spacing: The Structural Decisions That Drive Real Cost
Post selection is the decision that homeowners least understand and contractors most often underexplain. Posts are not decorative elements — they're structural members, and in a cable railing system, they carry loads that posts in a wood baluster system never see.
Understanding Terminal Post vs. Intermediate Post Loading
In a cable railing system, the terminal posts — the posts at each end of a cable run — carry the full accumulated tension of all cables terminating at that point. A system with 12 cable runs at 150 pounds each creates 1,800 pounds of inward horizontal load on each terminal post. This load is transferred through the post, through the post base, and into the deck framing. The deck framing must be designed to accept this load, and if it isn't, the post will lean inward over time or fail outright.
Intermediate posts — the posts between terminal ends on a long run — don't carry terminal tension loads. Their job is to maintain cable spacing and prevent excessive sag. They're typically lighter gauge and have simpler base hardware, which is why they cost less than terminal posts.
The structural design of terminal posts is why corner configurations are expensive: a 90-degree corner creates two simultaneous terminal conditions in perpendicular directions, requiring a post and base that can resist tension loads in two axes at once. This is a different engineering problem than a straight run, and it has a different hardware solution.
Post Material Options
316 Stainless Steel Posts
The premium option. Heavy gauge (typically 2–3 inch square or round tube, 11-gauge or heavier for terminal posts), brushed or satin finish. Costs $110–$230 per post. Compatible with 316 cable and hardware without galvanic corrosion concern. The cleanest aesthetic option and the most durable in a marine environment. Correct specification for waterfront and salt-air-exposed properties.
Aluminum Posts (Powder-Coated)
Mid-range option at $65–$125 per post. Lighter weight, less expensive, and available in a range of powder-coat colors (black is the dominant choice in the Seattle market for modern aesthetics). Aluminum is anodized or powder-coated for corrosion protection — it does not rust in the same way steel does, but it can corrode in chloride environments if the coating is damaged. The contact points between aluminum posts and stainless hardware require isolation or specific hardware specification to prevent galvanic corrosion. Not the right choice for waterfront properties; acceptable for properties more than half a mile from saltwater.
Steel (Hot-Dip Galvanized)
A less-common third option, more typical in commercial applications. Hot-dip galvanized steel posts are corrosion-resistant through a zinc coating process and are less expensive than stainless, but the appearance is more industrial and the coating can be damaged by surface contact during installation. Generally not the preferred choice for high-end residential applications in King County.
Post Spacing in Practice
Code maximum is 8 feet on center, and many installers work at 6–8 feet for standard runs. But there are two practical constraints that often require tighter spacing:
Terrain and framing. Posts must attach to deck framing members. Framing is typically 16 inches on center for joists. Terminal posts land where the engineering requires them — often at beam or rim joist locations. This means post spacing is sometimes driven by what the framing can accept as an attachment point rather than by code maximum.
Staircase integration. Where the cable railing transitions from a flat run to a stair railing, the post spacing and hardware change significantly. Stair cable runs are typically raked (angled to match the stair pitch), which requires raking terminal fittings and often additional intermediate posts to maintain cable tension along the angled run. Stair sections are the most complex part of a cable railing installation and the part most prone to cutting corners — which then fails inspection.
Key insight
Permits and Inspections: What SDCI and King County Require
We've touched on permit requirements throughout this guide, but let's walk through the actual process because it trips up more projects than any other single issue — and it affects your construction timeline significantly.
Who Needs a Permit?
In Seattle proper, SDCI's deck permitting guidance is clear: any deck over 18 inches above grade requires a building permit. This threshold applies to the deck structure itself. If you're replacing an existing railing on a permitted deck with a new cable system, whether you need a railing-specific permit depends on whether the existing permit covered the railing. Most older deck permits specify "wood railing" or leave railing as a field-specified item — which means switching to cable may require a permit amendment or separate railing permit.
For projects in unincorporated King County — which includes portions of Bothell near our Bothell shop, as well as Kenmore, parts of Sammamish, and areas around Maple Valley — the King County Department of Local Services handles permitting. The basic threshold is similar (30 inches above grade for guardrail requirements), but the permitting process and fee schedule differ from SDCI's.
What Goes Into the Permit Package
For a cable railing project on an elevated deck, a complete permit package typically includes:
- Site plan showing deck location relative to property lines and setbacks
- Deck framing plan with joist, beam, and footing specifications
- Railing plan showing post locations, cable routing, and spacing
- Post and hardware specification sheet with load ratings
- For engineered systems: a letter from a licensed Washington State structural engineer confirming that the post design, base hardware, and deck frame connection meet the 200-pound lateral load requirement and applicable seismic provisions
The engineering letter requirement is not universal — it depends on deck height, span, and the plan reviewer's judgment. But for elevated decks above 8 feet, decks in locations with unusual soil conditions, or any project where the cable system has atypical loading (long spans, corner concentrations), expect to need one.
The Inspection Process
Seattle building inspections for deck projects typically involve two to three visits:
Footing inspection: Before concrete is poured for post footings or deck piers. Inspector confirms footing size, depth, and reinforcement.
Framing inspection: After deck framing is complete but before decking is installed. Inspector verifies joist sizing, beam sizing, connections, and ledger attachment (if deck is house-attached).
Final inspection: After all work is complete including railings. Inspector measures guardrail height, checks cable spacing for 4-inch sphere compliance, verifies terminal hardware installation, and may conduct a physical deflection test on cable tension.
Failing final inspection is expensive — it delays Certificate of Occupancy, may require rework, and extends your project timeline by 2–4 weeks while reinspection is scheduled. Common failure causes: cable spacing slightly over 3 inches at midspan due to initial stretch, guardrail height short at stairs (stair guardrail height is measured differently than flat-run height), or post base hardware installed without required hold-down bolts.
Tip
Seismic Considerations
Seattle sits in an active seismic zone, and building code here incorporates seismic design provisions that don't apply in most parts of the country. For deck railings, this manifests primarily in the post-to-framing connection requirements. Posts near deck ends — specifically the terminal posts that also carry cable tension — must be connected to the deck frame with hold-down devices rated for both vertical uplift and horizontal seismic loads.
RailWorks' analysis of Seattle railing code requirements confirms that Seattle's marine climate and seismic provisions create a more complex structural environment than most jurisdictions. This is not a reason to avoid cable railing — it's a reason to work with a contractor who understands the local requirements and doesn't treat a Seattle cable railing project like a generic national installation.
DIY vs. Hiring a Seattle Deck Contractor for Cable Railing
Cable railing is one of the more DIY-attempted projects in the residential deck space, and the results are mixed enough that it warrants an honest discussion of where DIY works and where it doesn't.
What DIY Cable Railing Actually Involves
Complete DIY cable railing kits are available from several manufacturers. The component-level cost for a 50-linear-foot project is roughly $2,000–$5,000 in materials, versus $5,000–$12,500 installed. That gap is real and meaningful. The question is what you're actually buying with the difference.
DIY cable railing installation requires:
- Accurate layout and post placement — errors in post spacing create cable tension problems that are difficult to correct after posts are set
- Proper post base attachment — undersized hardware or incorrect fastener patterns fail the 200-pound lateral load test and may fail inspection
- Cable cutting and termination — swage terminals require a swage press (rental available but adds cost and complexity); thread-and-nut systems are more DIY-friendly
- Cable threading — routing 12–14 cables through 6–10 posts is a two-person job requiring patience and consistent tension management
- Tensioning and adjustment — achieving consistent 150-pound tension across all cables requires a tension gauge and systematic approach
- Inspection preparation — you'll need to pull the permit yourself (contractors do this routinely; homeowners occasionally struggle with the documentation requirements)
The cable and hardware portion of the installation is genuinely achievable for a skilled DIYer with some mechanical aptitude and a full weekend. The structural post work — particularly terminal post base installation, hold-down hardware, and seismic connections — is where most DIY projects fall short. These are not visible issues. They pass a casual look. They fail inspection.
What Contractors Do Differently
An experienced Seattle deck contractor brings several things a DIYer typically lacks:
Current permit experience. Permit requirements change, and SDCI's interpretations of cable spacing, engineering letters, and seismic hold-down requirements have evolved over the past several years. A contractor who pulled a dozen King County cable railing permits last year knows what reviewers are currently asking for. A homeowner pulling their first permit is reading documents that may not reflect current interpretation.
Supplier relationships. Contractors source 316 stainless cable and hardware at better prices than retail, often with shorter lead times. Material quality is also more consistent — contractor suppliers don't carry the gray-market fittings that show up on some online marketplaces.
Warranty on workmanship. A quality Seattle deck contractor should stand behind cable tension and structural connection work for a minimum of one to two years. DIY has no warranty path.
Inspection relationship. Contractors who regularly work in a jurisdiction develop a professional relationship with inspectors. When an inspector flags something borderline, a contractor can have a direct technical conversation that resolves it quickly. A homeowner in that same situation often ends up scheduling a reinspection weeks later.
The Honest Verdict
If you're a skilled DIYer, comfortable with structural work, willing to pull the permit and deal with the inspection process, and your project is a simple straight-run railing on a low-to-moderate deck height, DIY cable railing is a legitimate path. Budget accurately for materials, rent the tools you need, and don't cut corners on post bases.
If your deck is elevated, has corners or irregular geometry, requires an engineering letter, or is in a Seattle permit jurisdiction where you've never pulled a permit before — hire a contractor. The cost difference doesn't justify the risk of a failed inspection, structural problems that emerge over time, or a warranty gap on a $150,000+ view deck.
We've written more about the overall cost and tradeoff picture in our composite vs. cedar comparison and in our best decking materials guide for 2026, which also covers how material choices affect railing selection.
Maintenance and Long-Term Care in the Pacific Northwest Climate
One of cable railing's biggest selling points is low maintenance. That claim is substantially true — but "low maintenance" is not "no maintenance," and the Pacific Northwest climate creates specific care requirements that differ from what you'd read in a generic railing maintenance guide.
Annual Cleaning: The Minimum Required
Seattle's climate — 150+ days of rain per year, persistent overcast from October through March, and significant organic matter from the tree canopy that covers most residential neighborhoods in King County — means that decks and railings collect algae, lichen, and tannin deposits faster than in drier climates. On cable systems, this buildup occurs at contact points: where cables pass through intermediate posts, at terminal fittings, and at the base of posts where the metal meets the deck surface.
Annual cleaning with a stainless steel-safe cleaner (avoid chloride-containing products, which can undermine the passive oxide layer) and a soft brush removes these deposits before they become permanent staining. Do not use bleach or chlorinated pool chemicals on stainless hardware — the chloride attack that follows isn't visible initially but accelerates corrosion.
The top rail — typically aluminum with a powder-coat finish — should be wiped down and checked for coating damage annually. Chips or scratches in the powder coat on aluminum rail are the beginning of corrosion pathways if left unaddressed. Touch-up paint in the original powder-coat color is available from most railing fabricators.
Cable Tension Monitoring
New cable railing systems stretch slightly under initial load during the first 6–12 months of installation. Most quality installations include a follow-up service visit at 6 months to re-tension cables. Thread-and-nut terminal systems make this easy — the nut on the far side of the post is simply turned to take up stretch. Swage systems cannot be re-tensioned; the cables must reach their final tension at installation.
After the initial settling period, cable tension on properly installed 316 stainless systems is stable for many years. Annual visual inspection to check for obvious sag or deflection is adequate. If cables ever feel loose enough to deflect more than 1 inch under moderate hand pressure at midspan, have a contractor check tension and spacing — this is a code compliance issue if it creates openings larger than 4 inches.
Dealing with PNW-Specific Corrosion Risks
For properties within a mile of Puget Sound saltwater — which covers large portions of the Seattle waterfront, Mercer Island, the Madrona and Leschi neighborhoods, Magnolia, and any waterfront property from Edmonds south to Renton — salt deposition is a real concern even on properly specified 316 stainless systems. Salt spray doesn't rust T-316 quickly, but chloride deposits that sit on cable surfaces during the wet season can create crevice corrosion at contact points.
The solution is straightforward: rinse saltwater-exposed stainless cable and hardware with fresh water after significant storm events that push marine air inland. A garden hose at low pressure is sufficient. This is the same care protocol used on marine stainless hardware (sailboat rigging, dock cleats), and it's effective.
Expected Service Life
A properly specified, professionally installed T-316 stainless cable railing system in the Seattle market should last 20–30 years before cable replacement is warranted. Posts and hardware typically outlast the cable by a significant margin — a replacement cable project at year 20–25 would involve rethreading new cable through existing posts and replacing terminal fittings, at a fraction of the original installation cost.
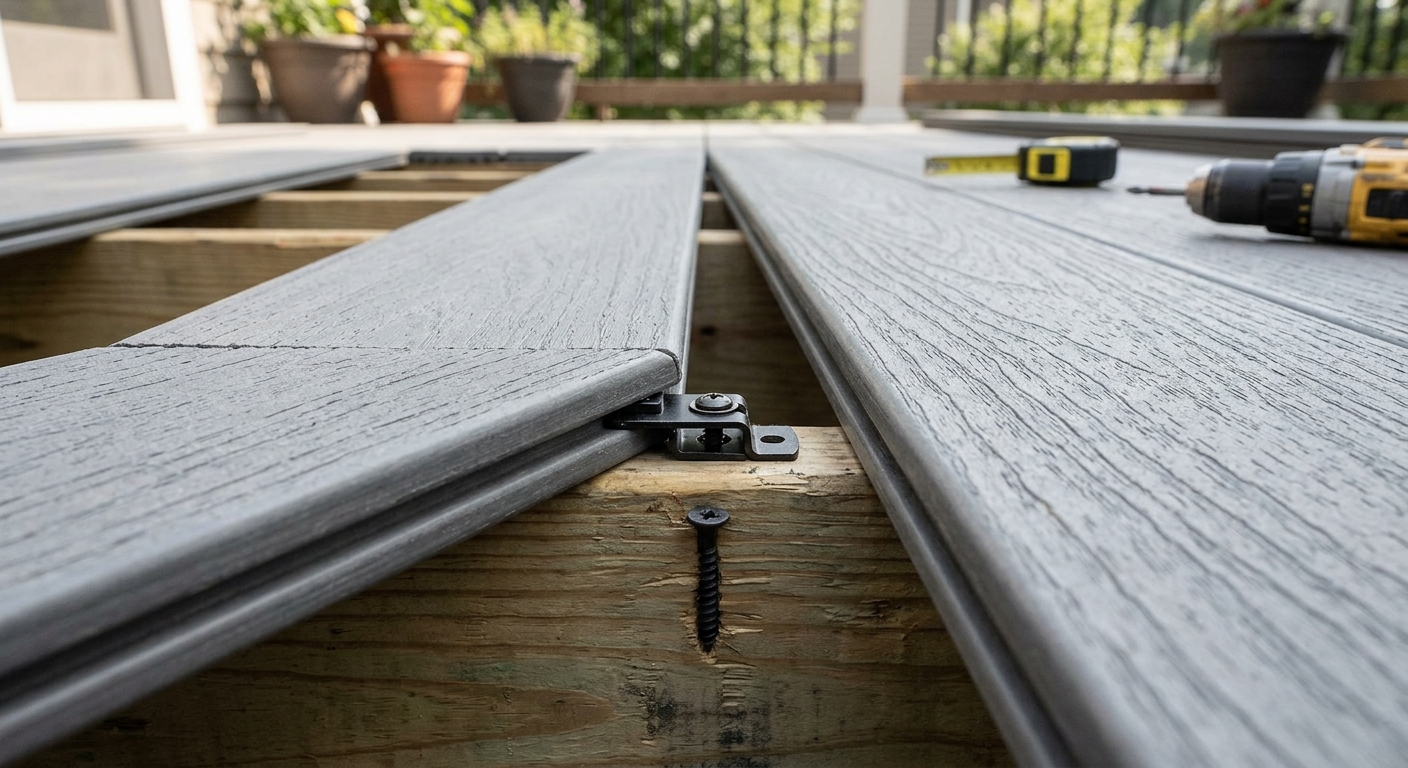
For composite decking maintenance, which is the most common pairing with cable railing in our market, the care protocols are similar in their minimal nature — annual cleaning, checking fastener tightness, monitoring for surface scratches or staining. The combination of composite decking and stainless cable railing is genuinely the lowest-maintenance elevated deck system available in the Pacific Northwest.
Choosing Between Cable Railing Brands and Systems
The cable railing market has matured significantly over the past decade. Where homeowners once had to custom-fabricate systems from raw materials, there are now several established systems with consistent quality, code documentation, and supply chain reliability. Here are the systems we see most often in King County projects.
Feeney CableRail
Feeney is the longest-established pre-engineered cable railing system in the residential market and the system most familiar to Seattle-area inspectors. Their CableRail infill kits are designed for installation into customer-supplied posts or Feeney's own post systems. Feeney uses T-316 stainless cable as standard, and their terminal fittings are available in swage and thread-and-nut configurations. ICC evaluation reports are available for their systems, which simplifies the permit process significantly — you submit the ICC report reference rather than requiring a custom engineering letter.
Pricing for Feeney CableRail runs at the mid-range for the Seattle market — $130–$180 per linear foot installed with professional-supplied posts.
Atlantis Rail Systems
Atlantis offers complete post-and-cable systems in both stainless steel and aluminum post configurations. Their SL-11 system, which uses a sleek 1.5-inch square post profile, is popular in King County for its minimal visual footprint. Atlantis posts are engineered with documented load ratings that satisfy SDCI's structural documentation requirements without requiring a separate engineering letter in most residential applications.
Systems Through Major Deck Manufacturers
Trex offers cable railing components through its Signature collection — aluminum posts with a powder-coat finish compatible with Trex composite decking. Similarly, Fiberon and TimberTech have railing systems that incorporate cable infill. These manufacturer-integrated systems are convenient when the same contractor is supplying both decking and railing, and they simplify the aesthetic coordination between decking color and post finish.
The limitation of manufacturer-integrated cable systems is that the posts are aluminum rather than stainless, and the hardware may not be T-316 stainless throughout. For Seattle's marine environment, verify the hardware specification before committing — some systems use T-304 fittings as standard and offer T-316 as an upgrade.
We cover the major composite decking manufacturer comparisons in detail in our Trex vs. Fiberon vs. TimberTech guide, which addresses not just decking but also railing system integration.
Custom Fabricated Systems
For properties where standard post profiles and catalog hardware won't achieve the desired aesthetic — or where unusual geometry requires custom corner solutions — local metal fabricators in King County can produce custom stainless or aluminum post systems. Custom fabrication is the most expensive path ($250+ per linear foot installed) and requires the most lead time, but it allows complete design control. We've used custom stainless post systems on several curved deck projects where the standard corner hardware options couldn't cleanly follow the curve of the deck perimeter.
How Cable Railing Affects Deck Resale Value in Seattle
Real estate data on specific railing systems is hard to isolate — appraisers don't typically break out railing type in their comps. But the broader outdoor living investment story, and the specific preferences of King County buyers, support the value case for cable railing on view-oriented properties.
The NAR Remodeling Impact Report consistently identifies deck additions and outdoor living upgrades as among the highest-recovery exterior projects in the residential remodeling category. In Seattle's specific market — where outdoor living season is compressed but intensely valued, and where view properties carry significant premium — the presence of a well-built, view-preserving railing system is a meaningful differentiator.
Buyers in Bellevue's west hills, in Mercer Island's lakefront neighborhoods, in Medina and Clyde Hill, and in the Madison Park and Leschi neighborhoods in Seattle proper are buying views. A deck that obscures those views with wood balusters is less appealing than a deck with cable railing that preserves them. Whether that difference is worth the $3,000–$8,000 premium cable railing commands over a wood system depends on the property's price point and the specific view — but on a $1.5M home with a water view, it's almost certainly justified.
For homeowners planning a deck addition specifically to increase resale appeal, we cover the full value case in our deck addition guide and our deck and patio combo guide.
Note
Putting It All Together: A Sample Seattle Cable Railing Project
To make this concrete, let's walk through a realistic King County project scenario with actual numbers.
The project: A new 400 square foot elevated deck on a Medina waterfront property. The deck is 8 feet above grade on the view side, accessed by a 4-foot-wide stair from ground level. Total railing perimeter: 72 linear feet of flat run plus 14 linear feet of stair railing, for a total of 86 linear feet. 316 stainless posts with brushed satin finish, T-316 1/8-inch cable, Feeney swage terminals.
Permit and engineering: SDCI residential permit — $475 estimated. Structural engineering letter for post base design and seismic hold-downs on elevated deck — $1,100. Total: $1,575.
Materials (contractor pricing):
- 16 stainless steel posts (12 flat-run, 4 stair) at $175 average: $2,800
- Cable and terminal hardware, 86 LF run at approximately $35/LF: $3,010
- Aluminum top rail and brackets: $900
- Post base hardware (including hold-downs): $1,200
- Miscellaneous hardware, anchors, blocking: $350
- Total materials: $8,260
Labor: 86 LF at $35/LF: $3,010
Project total (before deck framing and decking): $12,845
Per linear foot total: $149. Right in the middle of the $100–$250 Seattle range, which is where a clean stainless system on a complex elevated project should land.
If this same project used aluminum posts (saving $800 on posts) and thread-and-nut terminals rather than swage (saving $400 on hardware), the total drops to approximately $11,645 — a 9% reduction. The view from the deck is identical. The structural performance is equivalent. Whether the difference in post finish and terminal style is visible to the homeowner at normal distance is a judgment call.
Frequently Asked Questions About Cable Railing in Seattle
Before calling contractors, most homeowners come to us with a core set of questions. We've answered the most common ones below with specific, honest answers rather than the hedged non-answers you'll find in generic national guides.
Frequently Asked Questions
Do I need a permit to install cable railing on an existing deck in Seattle?
What is the minimum height for cable railing in King County?
Does cable railing block the view less than glass railing?
What's the difference between 316 and 304 stainless steel for cable railing?
Can I install cable railing myself or do I need a contractor?
How much does cable railing cost for a typical Seattle deck?
How long does cable railing last in Seattle's climate?
Do cable railings pass the 4-inch sphere test?
What's the right cable size for a residential deck railing?
Are there neighborhoods in Seattle where cable railing is especially popular?
How long does a cable railing installation take?
Can cable railing be installed on a curved deck?
Ready to Plan Your Cable Railing Project?
If you've read this far, you have a solid foundation for the conversations you need to have — with your contractor, with your permit office, and with your budget. Cable railing is the right choice for Seattle view decks when specified correctly and installed by someone who knows the King County permit environment and the Puget Sound material requirements. It's not the right choice for every project, and an honest contractor will tell you that.
At The Seattle Decking Company, we build cable railing systems across King County — from Medina and Mercer Island to Bothell and Kenmore — with T-316 stainless hardware, proper permit packages, and structural designs that pass inspection the first time. We're builders, not marketers, and we'll give you a straight answer about whether cable railing makes sense for your specific deck and view orientation before we give you a price. Call us at (425) 675-6259 or visit our contact page to schedule a site visit. We'll look at your deck, understand your view, and give you a real number — not a range that spans $100,000.
Planning a deck in the Seattle area?
Get an onsite design review and a clear, itemized quote from a licensed local builder.
Request a Free Quote