Most Seattle homeowners seal their cedar deck once, feel good about it, and then wonder three years later why the boards are silvering, checking, and starting to feel spongy underfoot. The problem usually isn't neglect — it's the wrong product, the wrong timing, or both. Cedar behaves differently in a maritime climate than it does in Colorado or Georgia, and the advice you find on national home improvement sites reflects those drier climates. King County gets roughly 38 inches of rain per year, the sun often doesn't reach north-facing decks until late morning, and fungal spores are in the air year-round. What works in Phoenix will quietly fail on a deck in Kirkland or Kenmore.
We build cedar decks across King County — from Bothell down through Bellevue, Renton, and into Seattle proper — and we spend a lot of time repairing decks that were sealed with the wrong product or re-sealed too infrequently. The pattern is consistent: a homeowner uses a big-box-store film-forming deck stain, it looks great for about eight months, then it starts to peel where water pools. Once a film-forming finish peels, moisture gets underneath and becomes trapped. The wood can't breathe. Rot starts in the end grain and around the fasteners, usually invisibly. By the time you can see it from the surface, the damage is already structural in places. This article is our attempt to put the correct PNW-specific information in one place, so you can make better decisions about what product to use, when to apply it, and how often to come back and do it again.
Why Seattle's Climate Demands a Different Approach to Cedar Sealing
The Pacific Northwest does not behave like the rest of the country when it comes to wood moisture dynamics. In a climate like Denver or Atlanta, cedar can go years between sealing applications without catastrophic consequence. The wood dries out thoroughly between rain events, ultraviolet exposure drives off moisture, and the environment is simply less hospitable to the fungal species that cause rot and mildew. King County is the opposite of all that.
The Moisture Problem Is Constant, Not Seasonal
In most of the US, you have a wet season and a dry season that give wood a reliable drying cycle. In Seattle, the wet season runs from roughly October through April — seven months of near-continuous overcast, drizzle, and rain, with average November rainfall of around 5.9 inches. The "dry" season from May through September still brings measurable rain most weeks, morning dew that sits on horizontal surfaces until mid-morning, and the maritime fog that rolls off Puget Sound. Even during a warm July, north-facing decks in neighborhoods like Maple Leaf, Wedgwood, or the hillside lots above Lake Washington may not fully dry out between rain events if there's a tree canopy above.
What this means practically is that cedar on a King County deck is operating at a higher average moisture content than cedar almost anywhere else in the contiguous United States. Wood that stays wet supports biological activity — mold, mildew, and the early fungal colonies that precede structural rot. It also cycles more aggressively through expansion and contraction as it gains and loses moisture, which mechanically stresses the wood fiber and accelerates checking (the small surface cracks that run along the grain).
North-Facing vs. South-Facing: Not the Same Deck
One of the most important variables for a Seattle cedar deck is orientation. A south-facing deck in Bellevue or Redmond — one that gets full afternoon sun and good air circulation — will dry out reliably between rain events. The UV exposure actually helps drive off moisture, and the deck can legitimately run on a 2–3 year sealing cycle if the right product is applied correctly. But a north-facing deck, or any deck with significant overhead tree cover, can go weeks without seeing direct sun. We've seen cedar decks on north-facing lots in Shoreline or Kenmore that were essentially wet from October through May with only brief drying periods. Those decks need sealing every single year, and they need a product that includes mildewcide additives.
As noted in research from Knocking Wood Construction, cedar is the right choice only for south-facing, well-drained lots in this climate — on chronically shaded north-facing lots, cedar deteriorates significantly faster than composite or PVC alternatives. That's honest, and we agree with it. If you have a heavily shaded, north-facing deck in Seattle and you're weighing cedar versus composite, that's a conversation worth having. You can read our full breakdown in Composite vs. Cedar Decking in Seattle. But for those who have cedar already, or who are choosing cedar for the right site, proper sealing protocol is what keeps it performing for decades.
What Fungal Spores Actually Mean for Your Sealer Choice
Corvus Construction's Pacific Northwest deck guide makes a point worth repeating: in PNW conditions, look for a sealer that fights fungus as well as moisture, because mold and mildew can grow even on sealed wood if it stays wet. This isn't hypothetical. We routinely see green and black biological growth on cedar decks that have been sealed within the past 18 months, when the product used did not contain mildewcide. The sealer may be repelling liquid water, but if the deck stays damp and shaded long enough, mold will establish on the surface of even a sealed board.
The practical implication is that your product checklist for Seattle has one more requirement than it would in a drier climate: the penetrating oil stain you choose should include a mildewcide or fungicide additive. This is usually listed on the product label as a preservative ingredient. Products like CUTEK Extreme CD50 and Armstrong Clark include wood preservatives specifically to address this. We'll cover specific products in the product section below.
Note
Penetrating Oil Stain vs. Film-Forming Finish: The PNW Rule
This is the most important section of this article. More cedar decks in Seattle are damaged by the wrong product category than by any other single factor. Walk into any big-box home improvement store in Lynnwood or Bellevue and you'll find shelf after shelf of deck stains and sealers — water-based acrylics, semi-transparent film-formers, solid-color "deck paints," and penetrating oils. They all promise to protect your wood. In King County, only one of those categories is appropriate for cedar: penetrating oil stain.
How Film-Forming Finishes Fail in Wet Climates
Film-forming finishes — which include water-based acrylics, latex deck stains, and solid-color deck finishes — work by depositing a continuous layer of resin on top of the wood surface. This creates a barrier between the wood and the weather. In dry climates, this works reasonably well because the wood underneath stays at a relatively constant moisture content, the film doesn't experience dramatic expansion and contraction stress, and if moisture does get under the film at an edge or crack, the deck dries out quickly enough that rot doesn't advance.
In Seattle, this model fails in a predictable sequence. The film looks excellent for six to twelve months. Then, at points where water can enter — board ends, fastener holes, any imperfection in the film surface — moisture gets beneath the coating. The wood swells when wet and shrinks when it dries. The film doesn't flex with it. The film cracks, then lifts, then peels. Once the film starts peeling, you have an active moisture trap: water can get under the lifted section easily, but it cannot evaporate out through the intact film around it. The wood under the peeling area stays perpetually damp. Rot organisms establish. The damage advances invisibly.
As noted in guidance from Wood-Source.com, penetrating stains infuse into the wood with stabilizing oils, avoiding the flaking and peeling that film-forming products are prone to. This is the core physical reason for the rule. A penetrating product doesn't sit on top of the wood — it becomes part of the wood fiber. When the wood moves seasonally, the finish moves with it. There's no surface film to crack and lift. When the finish begins to wear out, it simply becomes less effective at repelling water — it doesn't peel, doesn't trap moisture, and doesn't create a rot incubator. You can reapply it without stripping the old product, because there's no old product sitting on the surface.
Water-Based vs. Oil-Based Penetrating Stains
Within the penetrating stain category, there's a further distinction: water-based penetrating stains and oil-based penetrating stains. Both penetrate, but oil-based products generally achieve deeper penetration into the wood fiber and provide better performance in high-moisture conditions. The trade-off is that oil-based products have higher VOC content and require mineral spirits for tool cleanup. In the Seattle area, where air quality regulations have tightened in recent years, some contractors have shifted toward water-based penetrating stains. For a north-facing or heavily shaded deck in King County, we still recommend oil-based — the performance difference in extreme moisture conditions is meaningful. For a well-exposed south-facing deck that dries reliably, a premium water-based penetrating product from a manufacturer like Armstrong Clark can perform acceptably.
The "Waterproofing Sealer" Category: Proceed With Caution
There is a third product category that fills the space between penetrating stains and film-formers: clear waterproofing sealers, often marketed as "water repellent preservatives." Products like Thompson's WaterSeal fall into this category. They penetrate somewhat, add water repellency, but typically do not contain the oil content needed to stabilize and condition cedar fiber, and they often do not include mildewcide. In our experience building and maintaining cedar decks in King County, these products are the bottom of the acceptable range. They'll provide a season of protection but will need more frequent reapplication than a true penetrating oil stain, and they don't address the fungal growth issue. We don't recommend them as a primary approach for Seattle cedar.
Important
How Often to Seal Cedar in King County: The Real Timeline
The number that circulates on national home improvement sites — "seal your deck every 3–5 years" — is based on climates that bear no resemblance to King County's. It's not wrong for Phoenix or Dallas. It is wrong for Bellevue or Bothell. Let's set out the actual timeline, broken down by deck conditions.
Sealing Frequency by Deck Orientation and Exposure
| Deck Condition | Sealing Interval | Notes |
|---|---|---|
| South-facing, full sun exposure, good drainage | Every 2–3 years | Best-case scenario for cedar in PNW |
| East or west-facing, partial sun | Every 1.5–2 years | Moderate-risk category |
| North-facing, partial sun | Every 1–2 years | High-risk; use mildewcide product |
| North-facing, heavy shade / tree canopy | Every 1 year | Inspect every spring for biological growth |
| Any deck with chronic pooling water | Every 1 year | Address drainage first if possible |
The Burgess Construction cedar care guide makes it explicit: without regular sealing every 1–2 years (not every 5), wood absorbs moisture, grain opens up, and rot begins in places you can't see. The rot-in-places-you-can't-see is the part that catches homeowners off guard. By the time a cedar deck shows visible surface rot — soft spots underfoot, splintering boards, visible discoloration — the structural damage at the joists and ledger board may already require significant repair costs. See our deck cost guide for Seattle for context on what structural repairs run compared to preventive maintenance.
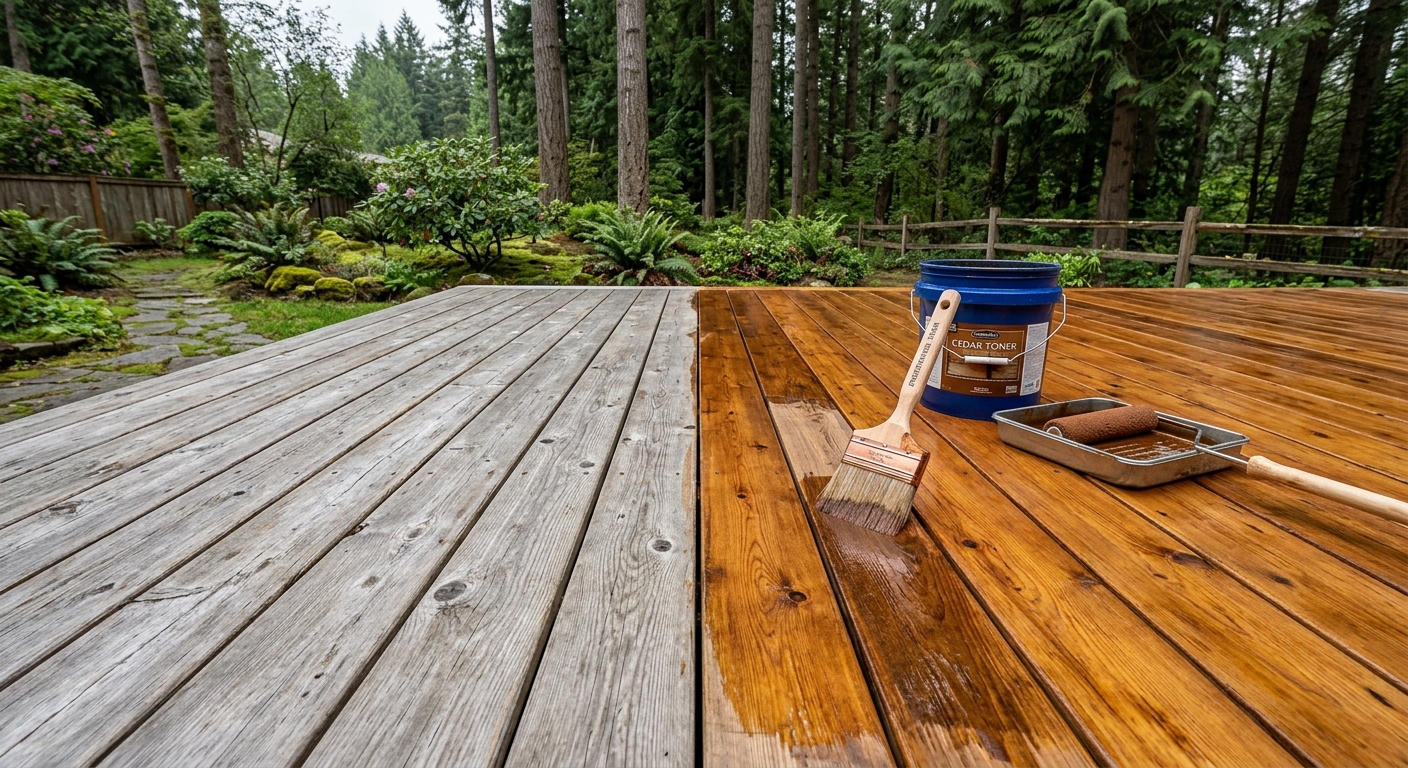
The Water Bead Test: How to Know When Resealing Is Due
Between scheduled maintenance intervals, the water bead test gives you a real-time reading on your sealer's performance. Splash a cup of water on a deck board. If the water beads up and rolls off, the penetrating sealer is still working. If the water soaks in immediately and darkens the wood, the sealer is spent and the deck needs attention within the next dry weather window. This test works best in late spring before the first summer dry period — if your deck fails the bead test in May, you want to reseal in June or July, not wait until fall.
Run the water bead test in multiple locations: a sunny exposed section, a shaded section under an overhang, the areas around stair posts where water tends to concentrate. Different sections of the same deck wear at different rates. It's common for the north-facing edge of a deck to fail the bead test while the southern half still passes — that section needs attention even if the whole deck isn't due for a full reapplication.
What Happens When You Miss a Sealing Cycle
Missing one sealing cycle on a well-exposed south-facing deck usually means a year of reduced protection — the wood will grey faster, checking will progress, and the next sealing application will require more prep. Not a disaster, but a step backward. Missing one sealing cycle on a north-facing shaded deck can mean the beginning of visible mold and mildew colonization, grain opening, and the first stages of surface rot in the highest-risk areas. Miss two years on a north-facing shaded deck and you are now looking at a restoration project rather than routine maintenance — cleaning, brightening, possibly sanding, addressing any gray or stained areas — before you can even think about applying new sealer.
The math on preventive maintenance is straightforward. Professional cedar sealing in Seattle runs $1.50–$3.50 per sq ft depending on prep required. A 300 sq ft deck sealed every two years costs roughly $900–$2,100 every two years. A deck restoration — cleaning, sanding, staining a degraded surface — runs significantly more, and if structural damage has begun at the frame, you're into repairs that can reach $5,000–$15,000+ depending on scope.
When to Apply: Finding Dry Windows in Seattle's Rainy Season
Application timing is the variable that frustrates Seattle homeowners most. The product requirements are clear: you need at least two consecutive dry days before application and two consecutive dry days after. The wood surface temperature must be between 50°F and 90°F. The wood moisture content should be below 19%. In Seattle, those conditions exist reliably for roughly four to five months per year, from approximately mid-May through mid-September.
The Seattle Application Window
The practical Seattle sealing window is narrower than it first appears. May can be workable but is frequently broken up by rain systems — a reliable 4-day dry stretch in May is not guaranteed. June is more consistent but still variable. July and August are your best months: Seattle's average July precipitation is only about 0.6 inches, and you can reasonably plan a project for any given weekend without the near-certainty of rain interrupting it. September is generally reliable through mid-month, then becomes increasingly risky as fall marine systems start pushing in from the Pacific.
The optimal time to schedule professional cedar sealing in Seattle is the last week of June through the first week of September. If you're doing it yourself, watch the 10-day forecast and look for a window with at least 72 hours of dry weather forecast on either side of your application day. Don't trust a 48-hour window if there's any uncertainty in the forecast — the consequences of rain on freshly applied penetrating oil stain range from blotching and streaking to wash-off and complete failure of adhesion.
Temperature and Surface Conditions
Surface temperature matters as much as air temperature. A cedar deck on a cloudy 65°F day may have boards that are cold enough to slow oil penetration — oil stains penetrate better into slightly warm wood. Avoid applying in direct hot sun when surface temperatures can exceed 90°F; the product can dry before it fully penetrates, leaving a surface residue rather than a penetrating bond. Early morning on a warm day, with the sun not yet hitting the deck full-force, is often ideal. If you're applying in full sun, work in sections and keep the wet edge moving.
Tip
Checking Wood Moisture Content
If you want to be precise about timing — and for a cedar deck, precision pays — invest in an inexpensive pin-type moisture meter (available for $20–$50 at most hardware stores). Stick the pins into the cedar board surface. For penetrating oil stain application, you want a reading below 19% moisture content. After a wet stretch in Seattle, cedar boards may read 25–30% moisture or higher. Give the deck three to five consecutive dry days before testing and expecting readings in the safe range. On shaded decks under tree canopy, add a few extra days — shade dramatically slows the drying rate.
Applying After a Rainy Stretch
After a prolonged wet period — say, the two weeks of rain that Seattle often gets in April before the first spring dry stretch — cedar boards have absorbed significant moisture. You may need a full week of dry weather before moisture content drops to application range. Do not rush this. Sealing a deck that has too-high moisture content is one of the most common mistakes homeowners make. The stain won't penetrate properly, it will sit at the surface, and it will peel or fail within months. If you sealed your deck at too-high moisture and it failed quickly, that's likely the reason.
Prep First: Cleaning, Brightening, and Sanding Cedar Before You Seal
The single most determinative factor in how long a cedar sealing job lasts is prep work. A mediocre product applied over a perfectly prepped surface will outperform a premium product applied over a dirty, oxidized, or mill-glazed surface every time. We see this consistently in the field: decks that were sealed without adequate prep start showing problems in 6–12 months. Decks with thorough prep hold their finish for the full expected service life.
Cleaning: What You're Actually Removing
Cedar decks accumulate several categories of contaminants that must be removed before sealing:
Organic matter: Algae, mold, mildew, and mildew staining. Common on shaded King County decks, often appearing as green or black discoloration. Standard cleaning with a deck wash solution containing sodium percarbonate (oxygen bleach) or sodium hypochlorite addresses this. We prefer oxygen-bleach-based cleaners — they're effective on organic matter and less damaging to the wood fiber and surrounding plants than chlorine bleach.
Tannin and iron staining: Cedar naturally contains tannins, and when cedar gets wet and dries repeatedly, tannins can leach to the surface and oxidize, creating a dark gray or black discoloration. Iron fasteners (cheaper screws or nails) create similar black staining around fastener heads. These stains require an oxalic acid-based brightener to address.
Mill glaze: On new cedar, the surface of the boards has been compressed and burnished by the mill's cutting and planing process. This glazed surface repels penetrating stain. New cedar that hasn't been weathered must either be allowed to weather naturally (3+ months) or cleaned and brightened to open the surface before any finish is applied.
Old finish residue: If you're resealing over a previous penetrating oil stain that's in good condition, cleaning is usually sufficient. If you're resealing over a worn or failing film-forming finish, or over a penetrating finish that has grayed significantly, additional prep is required.
The Brightening Step: Don't Skip It
Deck brightening is the step that most DIYers omit, and it makes a significant difference. After cleaning, cedar surfaces are typically oxidized and have an elevated pH from the alkaline cleaner. A deck brightener — typically an oxalic acid or citric acid solution — neutralizes the pH, removes oxidation and gray discoloration, and opens the wood grain. Bear Creek Lumber's guide to finishing Western Red Cedar notes that transparent stains penetrate best on slightly rough wood surfaces. Brightening achieves this by opening the grain rather than closing it.
Apply deck brightener according to manufacturer directions after cleaning. Let it dwell for 10–15 minutes, work it in gently with a brush on heavily oxidized areas, then rinse thoroughly. After brightening, let the deck dry fully — again, this means getting to below 19% moisture content before sealing, which typically requires 48–72 hours of dry weather after rinsing.
Sanding: The 40-Grit Rule for Cedar
If the cedar surface is rough, splintered, or weathered, light sanding before staining can improve the result. The rule from Bear Creek Lumber's guide is specific and important: sand to approximately 40 grit, and do not exceed 80 grit. This is counterintuitive to homeowners used to fine finish sanding. The reason is that cedar's open grain structure is what allows penetrating oil stain to enter the wood fiber. Sand with 100 or 120 grit paper — the kind of sandpaper you'd use on furniture — and you close those grain pores, dramatically reducing how much oil penetrates. Sand with 40–60 grit and you create a slightly rough, open surface that pulls oil stain in deeply.
After sanding, sweep or blow off all dust before applying cleaner or brightener. Sanding dust can clog the grain just like fine sanding does.
Per sq ft costs for a 300 sq ft cedar deck in King County, WA (2025 estimates)
| Category | Value |
|---|---|
| Cleaning (pro) | $1 |
| Brightening (pro) | $0.75 |
| Sanding (if needed) | $0.5 |
| Sealing (pro labor) | $2.5 |
| Product cost (oil stain) | $0.6 |
When to Call a Professional for Prep
Prep work on a cedar deck is physically demanding and requires the right equipment — a garden sprayer for cleaners and brighteners, a pressure washer set to low-pressure for rinsing (high pressure can raise grain and damage cedar), and proper safety equipment for working with oxalic acid brighteners. Professional deck cleaning and brightening in the Seattle area runs $0.50–$1.25 per sq ft. For a 300 sq ft deck, that's $150–$375 for prep alone.
If the deck has significant mold or mildew staining, gray weathering across the full surface, or any areas of suspected soft wood, professional assessment before sealing is worth the money. Applying new sealer over a compromised surface just delays the inevitable and adds cost when the deck eventually needs deeper restoration.
Product Picks: Best Penetrating Sealers for Western Red Cedar in the Pacific Northwest
With the product category established (penetrating oil stain, with mildewcide, oil-based preferred for shaded/high-moisture situations), here are the specific products we have used and trusted on King County cedar decks.
CUTEK Extreme CD50
CUTEK has become the professional-grade choice for many PNW deck contractors, and for good reason. It's a penetrating oil system based on linseed oil that also contains CD50 preservative, a biocide that protects against mold, mildew, and wood-degrading fungi. It penetrates deeply into cedar fiber, is UV-stable with appropriate colorant added, and can be reapplied without stripping the previous coat. Price point is in the $70–$90 range for a 5-liter unit from specialty suppliers.
CUTEK is available in clear or with added color concentrates (Colortones), which allows you to achieve a range of natural cedar tones while maintaining the penetrating system's performance. For north-facing or heavily shaded decks in Shoreline, Kenmore, or the north Seattle neighborhoods, CUTEK with CD50 preservative is our first recommendation.
Ready Seal Natural Cedar
Ready Seal is an oil-based penetrating stain and sealer that has a strong following among both professionals and experienced DIYers. It contains linseed oil, mineral spirits, UV absorbers, and mildewcide. The application is flexible — it can be sprayed, brushed, or rolled, doesn't require back-brushing after spraying, and the "back to back application" method (apply a generous first coat, let it penetrate 45 minutes, apply a second coat while still wet) achieves excellent penetration depth. Price is typically $50–$65 per 5-gallon pail.
Ready Seal in the Natural Cedar color tone looks excellent on fresh or moderately weathered Western Red Cedar and holds its tone well through the first Seattle winter. It's a solid mid-range choice for south-facing or east-facing decks that have reasonable sun exposure.
Armstrong Clark Semi-Transparent Deck Stain
Armstrong Clark produces both oil-based and water-based penetrating deck stains. Their oil-based formula is a professional-grade product with excellent penetration characteristics and UV stability. It's priced slightly higher than Ready Seal but below CUTEK — typically $55–$75 per gallon — and is available in a wide range of tones from near-clear to rich amber. Armstrong Clark includes UV blockers and mildewcide in their formula, making it appropriate for King County's full climate range.
One notable characteristic of Armstrong Clark is its compatibility with previously stained surfaces — it can be applied over most penetrating oil stains without stripping, as long as the surface is thoroughly cleaned and brightened first. This makes it a good choice for ongoing maintenance applications where the previous product isn't known with certainty.
Products to Avoid on Seattle Cedar
| Product Category | Example Products | Why It Fails in PNW |
|---|---|---|
| Water-based acrylic deck stain | Behr DeckOver, Rust-Oleum Deck Restore | Film-forming; peels in high-moisture conditions |
| Solid-color deck stain | Various major brands | Film-forming; hides the wood, traps moisture |
| Clear waterproofing sealer (film) | Thompson's WaterSeal Original | Minimal penetration; no mildewcide; short service life |
| Lacquer or polyurethane | Exterior varathane | Film-forming; catastrophic failure rate on horizontal decks |
| Latex semi-transparent stain | Many box-store brands | Water-based film; lifts on high-moisture cedar |
Key insight
Problem Spots: End Grain, Fastener Holes, and Shaded Sections
Even with the right product applied correctly across the field of a deck, there are specific high-risk locations on every cedar deck that require extra attention. These are the points where moisture enters and where rot begins. Knowing them and treating them correctly makes the difference between a deck that lasts 25 years and one that develops structural problems in 10.
End Grain: The Open Wound on Every Cedar Board
Cedar board ends — the cut cross-sections at the outer perimeter of the deck — are the highest-risk moisture entry points on the entire structure. When a board is cut across the grain, all the longitudinal channels of the wood fiber are exposed and open. These channels wick moisture into the wood's interior by capillary action far more aggressively than the face grain of the board. On a PNW deck that sees months of rain each year, unsealed or under-sealed end grain will be saturated for most of the wet season.
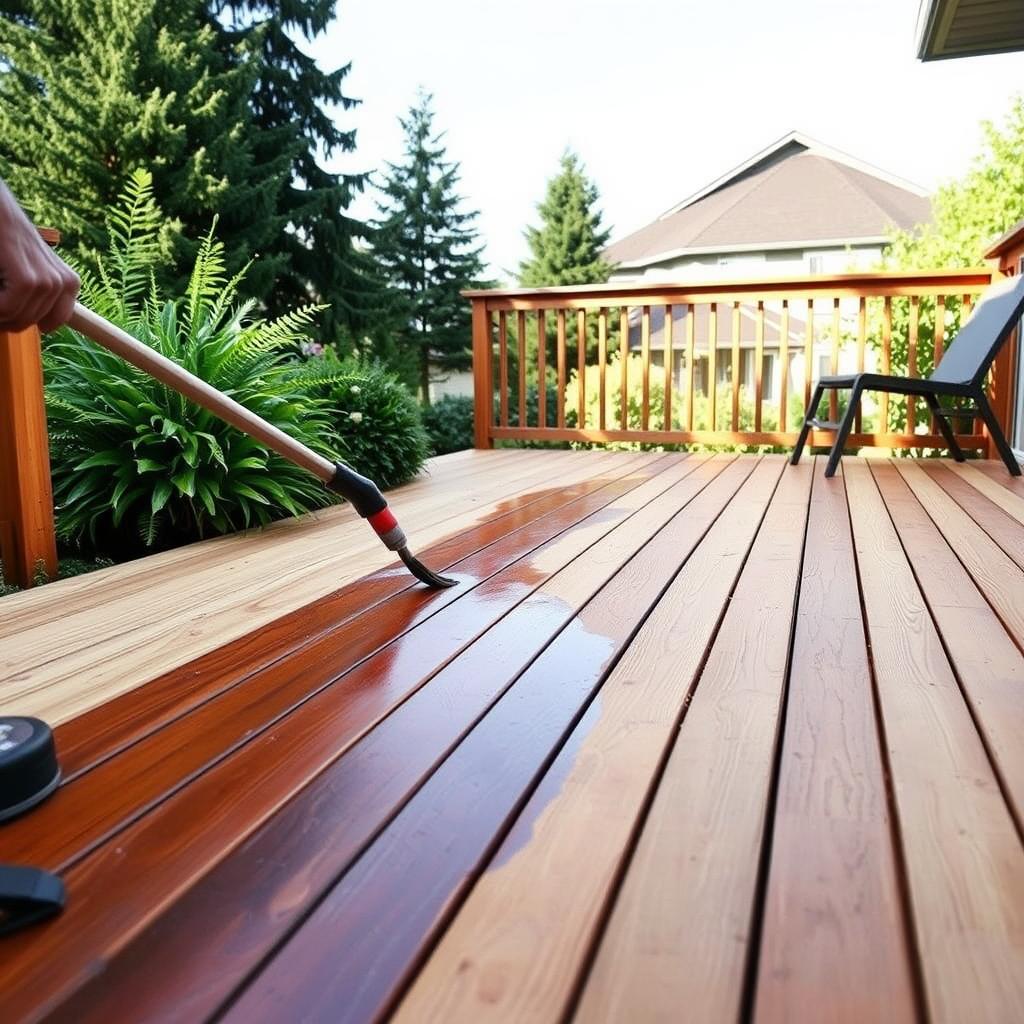
Bear Creek Lumber's finishing guide is explicit on this point: apply generous amounts of penetrating sealer to end grain and around nail and screw holes, because these are where moisture enters most readily. In practice, this means applying penetrating oil stain to all board ends with a brush — not a roller, not a spray applicator — working the oil in with deliberate brush strokes and applying at least two coats before the first coat fully dries. The end grain will pull in oil aggressively. Keep feeding it until it stops absorbing readily. This step often uses more product than sealing an equivalent surface area of face grain.
For a deck that's already built, the most accessible end-grain locations are the outer deck perimeter. If your deck has a picture-frame border (a perimeter border board running parallel to the house), the inner ends of the field boards behind it are end-grain areas that are difficult to reach and often poorly sealed — pay attention to them during application.
Fastener Penetrations: Every Screw Is a Potential Entry Point
Every screw or nail that fastens cedar decking to the framing creates a penetration in the wood fiber. Even stainless steel fasteners — which don't rust and don't create the black iron staining that cheap fasteners do — create a small channel where moisture can enter. The wood around the fastener is also often compressed by the driving force of the screw, which can create micro-fractures in the surrounding grain.
During sealing application, fastener locations need deliberate attention. Apply penetrating oil stain with a brush over each fastener location, working the oil into the area around the screw head and allowing it to penetrate the compressed wood around the fastener shaft. This is more time-consuming than rolling the field of the deck, but it addresses the highest-risk locations specifically.
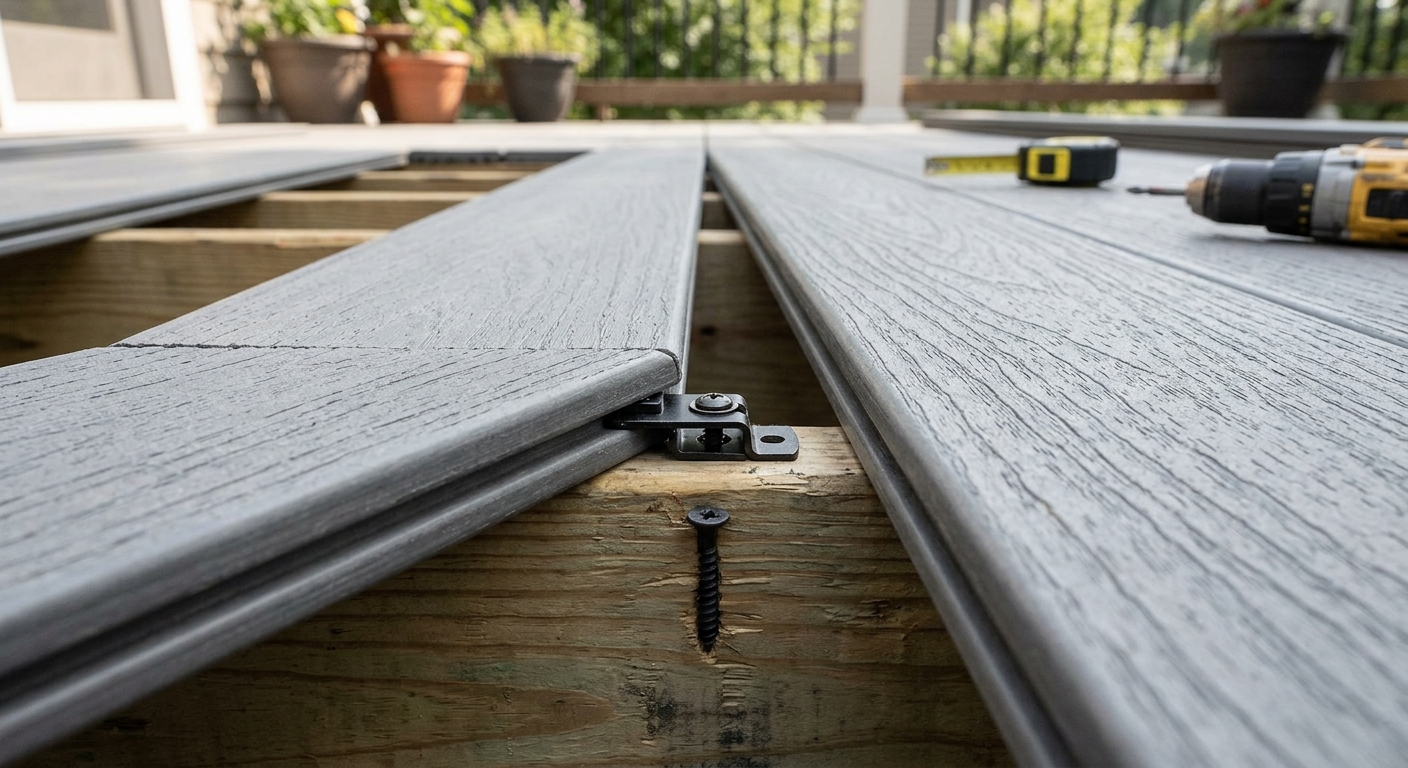
Hidden fasteners — clip systems that fasten decking from the board's underside rather than face-screwing — are superior from a moisture management standpoint because they eliminate face penetrations entirely. When we build new cedar decks, we use hidden fasteners wherever budget and board thickness allow. The higher upfront cost is worth it in reduced maintenance complexity and reduced rot risk at fastener locations. Our deck railing options and construction guide touches on fastener systems in the context of structural connections.
Shaded Sections Under Overhangs and Furniture
Decks with overhead structures — pergolas, rooflines, awnings — have sections that stay shadowed and damp even during dry periods. The boards under a pergola beam stay wetter than adjacent boards, dry more slowly, and develop biological growth faster. These sections need sealing at the same or higher frequency than the rest of the deck, and they're the areas where mildewcide in the stain product is most critical.
The same issue applies to the areas under furniture and planters that sit on the deck year-round. A large planter sitting on cedar boards keeps those boards perpetually damp and reduces air circulation — conditions ideal for rot initiation. If you have heavy planters on a cedar deck, they should sit on pot feet or stands that lift them off the deck surface and allow air circulation and drainage. Move planters periodically to inspect the boards beneath them.
Step Stringers and Post Bases: The Structural Risk Areas
The highest-consequence moisture entry points on a cedar deck aren't on the decking boards themselves — they're in the structural framing. Step stringers (the diagonal framing members that carry stair treads) and the bases of posts where they contact footings are the most common locations for structural rot to begin invisibly. These are areas where cedar framing is in close proximity to the ground, where rain splash-back wets the wood repeatedly, and where the geometry traps moisture.
Post bases should be elevated above concrete footings — a metal post base hardware fitting creates an air gap that allows drainage and prevents direct wood-to-concrete contact. Step stringers should be pressure-treated lumber at minimum, or preferable in a situation where cedar is desired for aesthetic continuity, the bottom of each stringer should be end-sealed with penetrating oil at every maintenance interval. These structural elements fall outside the scope of a simple deck sealing project but should be part of your annual inspection routine.
New Cedar Decks: The Mandatory Waiting Period and First Application
If you've just had a cedar deck built — or if you're building one this summer — there's a crucial rule about the first sealing application that gets ignored with some frequency and causes expensive early failures.
Why New Cedar Must Weather Before Staining
New cedar from the lumber yard has been through a milling process that compresses and burnishes the surface of the boards. This "mill glaze" is a real physical phenomenon — it's the same kind of surface compaction you'd see if you ironed a piece of cloth. The result is a surface that is significantly less porous than weathered cedar. Penetrating oil stain applied to mill-glazed cedar doesn't penetrate — it sits on the surface, looks okay initially, and then fails rapidly.
DeckStainHelp's research on the best stains for new cedar decks confirms this: wait at least 3 months before staining new smooth cedar to allow weathering and open pores, then clean and brighten to remove oxidation and mill glaze before applying stain. In Seattle's climate, where sun exposure is limited, this weathering period may need to be extended to 4–6 months for north-facing or shaded decks where UV exposure (which helps break down mill glaze) is minimal.
The practical implication: if you build a cedar deck in August in Seattle, don't stain it until January at the earliest — and January in Seattle doesn't have workable sealing conditions. Build in August, let it weather through fall and winter, and apply the first sealing coat the following June. Yes, that means your new cedar deck goes through one Seattle wet season unsealed. That's okay if you've used quality cedar — the wood is designed to weather. What you're not okay with is staining too early, having it fail in eight months, and needing to strip and redo the application.
The First Application Process for New Cedar
After weathering for 3–6 months (confirmed by the surface losing its fresh-cut brightness and acquiring some gray patina), new cedar goes through the same prep sequence as any cedar:
- Clean with oxygen-bleach deck cleaner to remove any accumulated organic growth and surface dirt from the weathering period
- Brighten with oxalic acid brightener to remove oxidation and neutralize pH
- Allow to dry fully (48–72 hours after rinsing, confirmed with moisture meter if possible)
- Apply penetrating oil stain in the application conditions described above
The first application on weathered-but-fresh cedar will absorb stain aggressively — the open pores from weathering pull oil in readily. This is the ideal application condition. Be generous with product, especially at board ends and fastener locations. A two-coat wet-on-wet application (second coat applied while first coat is still tacky) achieves the best depth of penetration on the first sealing of a new deck.
New cedar decks in Seattle represent a significant investment. Cedar decking installed in Seattle runs $34–$45 per sq ft, meaning a 300 sq ft deck represents $10,200–$13,500 in decking materials and labor. Protecting that investment with correct first-application timing and product choice is straightforward. See our deck cost page for a full breakdown of what goes into cedar deck pricing in this market.
Cost Breakdown: DIY vs. Professional Cedar Deck Sealing in Seattle
Let's put real numbers on this. The decision between doing cedar sealing yourself and hiring a professional in Seattle depends on the deck's condition, your access to equipment, and your confidence with the process. Here's what both paths actually cost.
DIY Cedar Sealing Cost Estimate (300 sq ft deck)
| Item | Cost Range |
|---|---|
| Deck cleaner (oxygen bleach, 2 lb) | $15–$25 |
| Deck brightener (oxalic acid, 1 lb) | $10–$20 |
| Penetrating oil stain (5 gallons) | $55–$90 |
| Pump sprayer (if not owned) | $25–$45 |
| Natural bristle brush (for ends/fasteners) | $10–$20 |
| Roller and roller covers | $10–$20 |
| Paint tray, drop cloth, safety equipment | $15–$30 |
| Moisture meter (if purchasing) | $20–$50 |
| Total DIY Cost | $160–$300 |
Time investment for a 300 sq ft deck: plan for a full day for prep (cleaning, brightening, drying time) plus a half-day for application. The physical work is manageable but requires some comfort with the process — applying penetrating oil stain to end grain with a brush, working around furniture and railings, and managing the wet edge on a warm day.
Professional Cedar Sealing Cost Estimate (300 sq ft deck)
| Service | Cost Range | Notes |
|---|---|---|
| Deck cleaning | $150–$300 | $0.50–$1.00/sq ft |
| Deck brightening | $75–$225 | $0.25–$0.75/sq ft |
| Penetrating oil stain (labor + product) | $450–$1,050 | $1.50–$3.50/sq ft |
| Total Professional Cost | $675–$1,575 | For a 300 sq ft cedar deck |
Professional services include all equipment, proper product selection, and experienced application — including correct attention to end grain, fasteners, and problem spots. For homeowners with complex decks (multi-level, built-in seating, intricate railing designs), professional application ensures complete coverage of every surface. For a straightforward single-level deck, confident DIYers can get comparable results at significantly lower cost.
Tip
When Professional Is Worth the Premium
The cases where professional application pays for itself relative to DIY:
Severe gray weathering or mold: Restoration of significantly degraded cedar surfaces requires stronger cleaning chemistry, possible wood brightener concentrations above what's safe for non-professionals, and experience in identifying whether the wood is sound enough to restore vs. requiring board replacement.
Two-story or elevated decks: Any cedar sealing work on elevated decks requires proper staging or ladder access to reach all board faces, underside surfaces, and stair stringers. Falls from deck sealing work are a real occupational hazard. Our elevated deck cost breakdown covers why elevated structures carry both higher build costs and higher maintenance costs.
Decks with extensive built-ins: Decks with built-in benches, planters, overhead structures, or complex railing systems have many more linear feet of detail work (end grain, joints, intersections) relative to field surface area. Professional applicators who work on decks daily are faster and more thorough on these details than most homeowners.
After a failed DIY application: If a previous DIY sealing failed early — you applied in wrong conditions, used the wrong product, or skipped prep — the restoration process is more complex than a standard maintenance application and benefits from professional assessment.
Cedar Deck Maintenance Beyond Sealing: Annual Inspection Protocol
Sealing is the most important maintenance task for a Seattle cedar deck, but it's not the only one. An annual inspection — ideally in early spring after the wet season, before the summer sealing window opens — catches problems early and keeps small issues from becoming large ones.
Annual Spring Inspection Checklist for Seattle Cedar Decks
Surface condition: Walk every board and look for soft spots (probe with a screwdriver — sound cedar is hard, rotting cedar will give way). Check for checking (surface cracks along the grain), splitting at board ends, or cupping (boards curving up at the edges). Minor checking is normal in cedar and doesn't require board replacement. Soft spots or boards that probe soft require replacement before sealing.
Biological growth: Assess the extent and location of any green, gray, or black discoloration. Light surface mold can be addressed with cleaning alone. Persistent or deep-seated mold that returns quickly after cleaning may indicate that the underlying wood has degraded enough to harbor the mold colony — that section may require board replacement.
Fastener condition: Check screw and nail heads for corrosion. Brown or orange staining around fastener heads on a cedar deck indicates inferior fasteners that are rusting — they need to be replaced with stainless steel or hot-dipped galvanized fasteners. Rusty fasteners create ongoing iron staining in the wood and can lose structural holding power over time.
Structural inspection: Check post bases for wood-to-concrete contact or debris accumulation at the base. Look at ledger board connection to the house (if applicable) — this is a chronic rot location and should be inspected carefully. Check beam and joist connections at post tops. Any spongy, discolored, or crumbling wood in structural framing is a repair priority before cosmetic maintenance.
Railing system: Test every railing post for stability (grab and apply lateral force — there should be no movement). Check railing cap connections and any cable or glass panel hardware for corrosion or loose connections. Our cable railing guide covers inspection specifics for cable railing systems, which have their own maintenance requirements.
Cleaning Between Sealing Cycles
Even between full sealing applications, cedar decks benefit from annual cleaning with a mild deck wash solution. This removes accumulated organic material, surface mold, and pollen deposits that would otherwise accelerate degradation. An annual cleaning with oxygen bleach solution — without full brightening and restaining — costs $0.50–$1.00 per sq ft professionally or can be done DIY for the cost of materials. It's good practice for any cedar deck but is particularly valuable on north-facing and shaded decks where organic growth establishes quickly.
For homeowners interested in the long-term perspective on cedar maintenance versus the alternative, our composite deck maintenance guide lays out what composite decking maintenance looks like over the same 25-year period — a useful comparison for making the cedar-versus-composite decision with full information.
The Long-Term View: When Sealing Isn't Enough Anymore
No maintenance program keeps a cedar deck going indefinitely. At some point — for most Seattle cedar decks, somewhere between 20 and 30 years with good maintenance — the cumulative cycles of wetting, drying, UV exposure, and biological activity reach a tipping point where maintenance is no longer cost-effective and replacement is the right economic decision.
Signs That a Cedar Deck Has Reached End of Life
Pervasive gray weathering below the surface: If brightening and fresh stain no longer restore natural cedar color but instead reveal gray that goes deep into the wood fiber, the surface layers have degraded past the point of effective restoration.
Multiple soft spots in decking boards: One or two soft boards can be replaced. If probing the deck surface reveals soft spots across 20%+ of the boards, you're looking at wholesale decking replacement, not spot repair.
Structural frame compromise: Soft or rotted joists, beams, or ledger board are a structural safety issue and must be addressed. In many cases, if the framing has reached this condition, a full deck replacement — new framing, new decking, new railings — is more cost-effective than piecing together a structural restoration.
Economic calculation: Get quotes for restoration versus replacement. If restoration reaches 60–70% of replacement cost, replacement almost always wins economically — you're spending significant money to extend a compromised deck's life by 5–8 years rather than starting 25+ fresh years with a new structure.
At that decision point, the materials conversation opens up again. Many King County homeowners who replace a cedar deck choose composite decking for the replacement — Trex, Fiberon, AZEK, or TimberTech — specifically because composite eliminates the sealing maintenance requirement. We've covered the tradeoffs in depth at Trex vs. Fiberon vs. TimberTech for Seattle and Best Decking Materials for Seattle in 2026. The composite vs. cedar decision has no universal right answer, but it's worth making with clear eyes about what ongoing cedar maintenance actually requires in a King County climate.
For decks being replaced or newly built, King County building permits are required for most deck construction and significant structural modifications. The City of Seattle has its own permitting process through SDCI. Our King County deck permit guide walks through what triggers a permit and what the process looks like from the homeowner's side.
Return on Investment: What Proper Cedar Maintenance Means for Your Property Value
Cedar maintenance isn't just about the deck itself — it's about what the deck contributes to your property. The National Association of Realtors' remodeling impact report consistently shows that outdoor living spaces, particularly decks, deliver meaningful returns on resale. NADRA (the National Association of Deck Builders) cites that well-maintained decks recoup a significant portion of their cost at time of sale and materially improve buyer perception of a property.
The critical word is "well-maintained." A cedar deck that's gray, checking, splintered, and visibly neglected has the opposite effect — it signals deferred maintenance to buyers and appraisers, and it often comes up on home inspection reports as a deficiency. In the Seattle and Bellevue real estate markets, where home prices and buyer expectations are high, a neglected deck can become a negotiating point that costs the seller more than a decade of proper maintenance would have.
Proper cedar sealing — done on schedule, with the right products, by professionals or careful DIYers — keeps a cedar deck in the "asset" column of a property rather than the "liability" column. For a deck that represents $10,000–$15,000 of installed value, the $900–$2,100 every two years to maintain it properly is a straightforward investment decision.
Working With The Seattle Decking Company on Cedar Maintenance
We are deck builders based in Bothell, WA, and we work across King County — from Bellevue and Redmond on the east side, through Seattle neighborhoods including Maple Leaf, Northgate, and Capitol Hill, down to Renton and south King County. We build new cedar and composite decks, and we provide maintenance services including cleaning, brightening, and professional sealing for existing cedar decks.
If you have a cedar deck that needs assessment — whether you're not sure it's still in resealable condition, you're seeing soft spots, or you just want professional eyes on the prep and product selection before you invest in sealing — we're glad to take a look. We're honest about what we find: if a deck needs restoration rather than routine sealing, we'll tell you, and if boards need replacement before sealing makes sense, we'll tell you that too. We won't apply new stain over a compromised surface and charge you for a result that won't last.
Reach us at (425) 675-6259 or fill out our project form at theseattledeckingcompany.com/contact. We schedule cedar maintenance projects during the Seattle sealing season from June through September. If you're thinking about next summer's maintenance, spring is the right time to get on the schedule — our summer calendar fills quickly.
Frequently Asked Questions
How often should I seal my cedar deck in Seattle?
What's the best cedar deck sealer for Seattle's climate?
Can I seal my cedar deck myself, or do I need a professional?
When is the best time to seal a cedar deck in Seattle?
My new cedar deck was just built. When can I seal it?
What happens if I use a film-forming stain or solid deck paint on my cedar deck in Seattle?
Why is my cedar deck turning gray even though I sealed it?
Should I pressure wash my cedar deck before sealing it?
How do I know if my cedar deck needs to be sealed or fully replaced?
How much does it cost to professionally seal a cedar deck in Seattle?
Do I need a permit to seal or maintain my cedar deck in Seattle?
Does cedar sealing in Seattle require any specific mildew protection?
Planning a deck in the Seattle area?
Get an onsite design review and a clear, itemized quote from a licensed local builder.
Request a Free Quote