
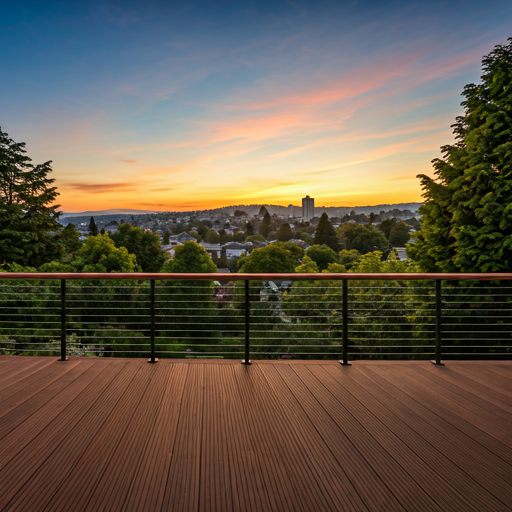
Seattle homeowners are sitting on a problem — quite literally. Millions of square feet of aging concrete slabs spread across backyards in Bothell, Kirkland, Bellevue, Redmond, and every neighborhood in between. Some were poured in the 1970s when the house was built. Others were added as a quick-and-cheap patio solution sometime in the 1990s. Now they're cracked, stained, sunken in spots, and wildly out of step with the sliding glass doors they're supposed to complement. The threshold sits six inches above the slab. Moss grows in every crack. Winter rain pools toward the foundation. And yet the concrete itself is structurally sound — just ugly, uneven, and doing nobody any favors.
The good news is that you don't always have to tear it out. Building a deck over an existing concrete slab is a legitimate, cost-effective solution that works extremely well in the Pacific Northwest — when it's done right. The Seattle climate makes this project slightly more demanding than it would be in drier regions. Our annual rainfall averages roughly 38 inches, and we see persistent marine-layer humidity through much of the year. That moisture load means every material choice, every ventilation gap, and every drainage detail matters more here than it does in, say, Phoenix. Get it right, and a concrete overlay deck can last 25 to 30 years with minimal maintenance. Get it wrong, and you're dealing with trapped moisture, rot, mold, and a replacement project inside of five years.
This guide covers everything Seattle homeowners need to know about building a deck over concrete: the three main system types, the only materials that belong in a below-grade-moisture environment, drainage and ventilation requirements specific to our climate, permit rules in King County and Seattle proper, and honest cost comparisons between overlay approaches and full concrete demolition. We build these systems regularly at The Seattle Decking Company, and we want you going into this project with real information rather than optimistic guesswork.
Why Homeowners Want to Build Over Concrete — and When It Actually Makes Sense
The three most common reasons Seattle homeowners call us about a deck over concrete are: the slab is visually unacceptable, the surface level doesn't match the door threshold, and the concrete is cracking but not critically failed. Each of these is a legitimate candidate for an overlay. The question is always whether the concrete beneath is sound enough to serve as a base.
The Ugly Slab Problem
Concrete patios age poorly in the Pacific Northwest. Freeze-thaw cycles, sustained moisture, and biological growth from moss and algae create a surface that looks terrible within a decade even when structurally fine. Staining and sealing can help, but the improvement is temporary and requires re-application every two to three years. A deck overlay transforms the visual entirely — and the new surface, properly specified, requires almost no maintenance for decades.
The Threshold Mismatch
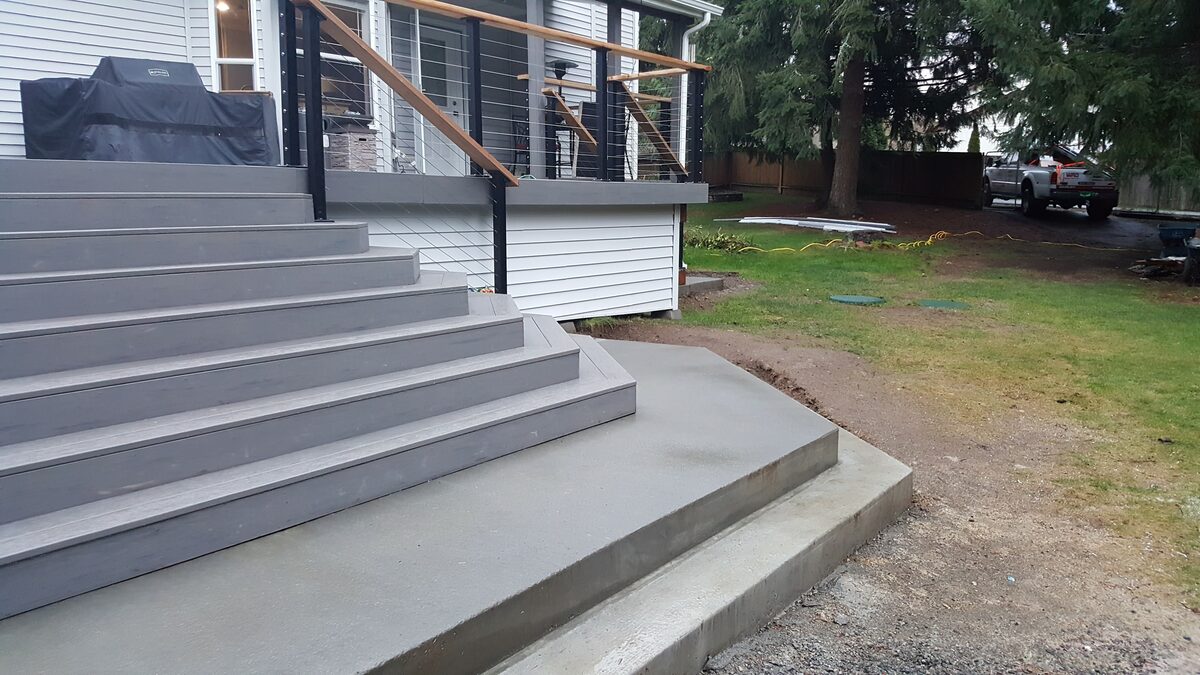
This is one of the most functional problems we solve with overlay decks. When a sliding door or French door threshold sits four to eight inches above a flat concrete slab, stepping out feels awkward and potentially unsafe. Adding a sleeper system with composite decking on top can raise the finished surface to within half an inch of the threshold, creating a smooth, natural transition from interior to exterior. This is often cheaper and less disruptive than the alternatives, which include either pouring additional concrete (messy, expensive, adds weight) or rebuilding the door framing (a major carpentry project).
The Cracked-But-Sound Slab
Hairline cracks and minor spalling are normal in concrete that's 20 or 30 years old. They don't necessarily mean the slab needs to go. What disqualifies a slab from overlay candidacy is heaving (sections pushed up by tree roots or frost), major fractures that have caused sections to shift vertically relative to each other, and negative drainage — meaning water runs toward the house rather than away from it. If your slab has any of these conditions, a deck overlay isn't the answer, and we'll tell you that plainly rather than take your money on a project that's set up to fail.
When Demolition Is the Right Call
Concrete demolition in the Seattle area runs $3–$8 per square foot for removal alone, plus haul-away. Add a new conventional deck at $37–$60 per square foot (per 2026 Seattle area pricing data) and you're looking at a total of $40–$68 per square foot all-in. That's a significant investment. But if your concrete has heaving, if it drains toward your foundation, or if it's fractured in ways that create an unstable base, demolition is not optional — it's necessary for the safety and longevity of whatever comes next. A good contractor will be honest with you about this. If someone quotes you an overlay without walking the slab carefully and discussing drainage, that's a red flag.
Important
The Three Systems: Sleepers, Pedestals, and Floating Tiles
There are three primary approaches to building over concrete, each suited to different situations. Understanding the differences will help you know which conversation to have with your contractor — or which questions to ask.
Option 1: Sleeper Systems
A sleeper system is the most common approach for residential backyard slabs in Seattle. Sleepers are pressure-treated 2x4 or 2x6 lumber laid flat on the concrete surface, typically spaced 16 inches on center to match standard composite decking span ratings. Between the concrete and the sleepers, you install a drainage-capable synthetic underlayment — products like DeckWise WiseWrap or DriBak membrane serve this purpose. These underlayments accomplish two things: they protect the concrete from prolonged moisture contact with the wood (which accelerates decay even in pressure-treated lumber), and they channel water away from the sleepers and out from under the deck.
The critical spec for Seattle installations is the air gap. You need a minimum of 1.5 inches of clear space between the bottom of the decking boards and the top of the concrete. Many national guides recommend 1 inch, but in our climate, we push clients to 1.5 inches minimum, and 2 inches is better. That gap is what allows moisture vapor — the constant low-level evaporation coming up through any concrete slab — to move out from under the deck rather than accumulating against the underside of your decking boards. It's the difference between a deck that looks perfect after 20 years and one that's showing signs of moisture damage after 5.
For the sleepers themselves, you want pressure-treated lumber rated for ground contact — look for UC4A or UC4B treatment levels, not the lighter UC3B that's used for above-ground applications. The concrete will be in intermittent contact with the sleepers for the life of the deck, and you want appropriate treatment. Some contractors use composite sleeper products, which eliminate the rot concern entirely but add cost.
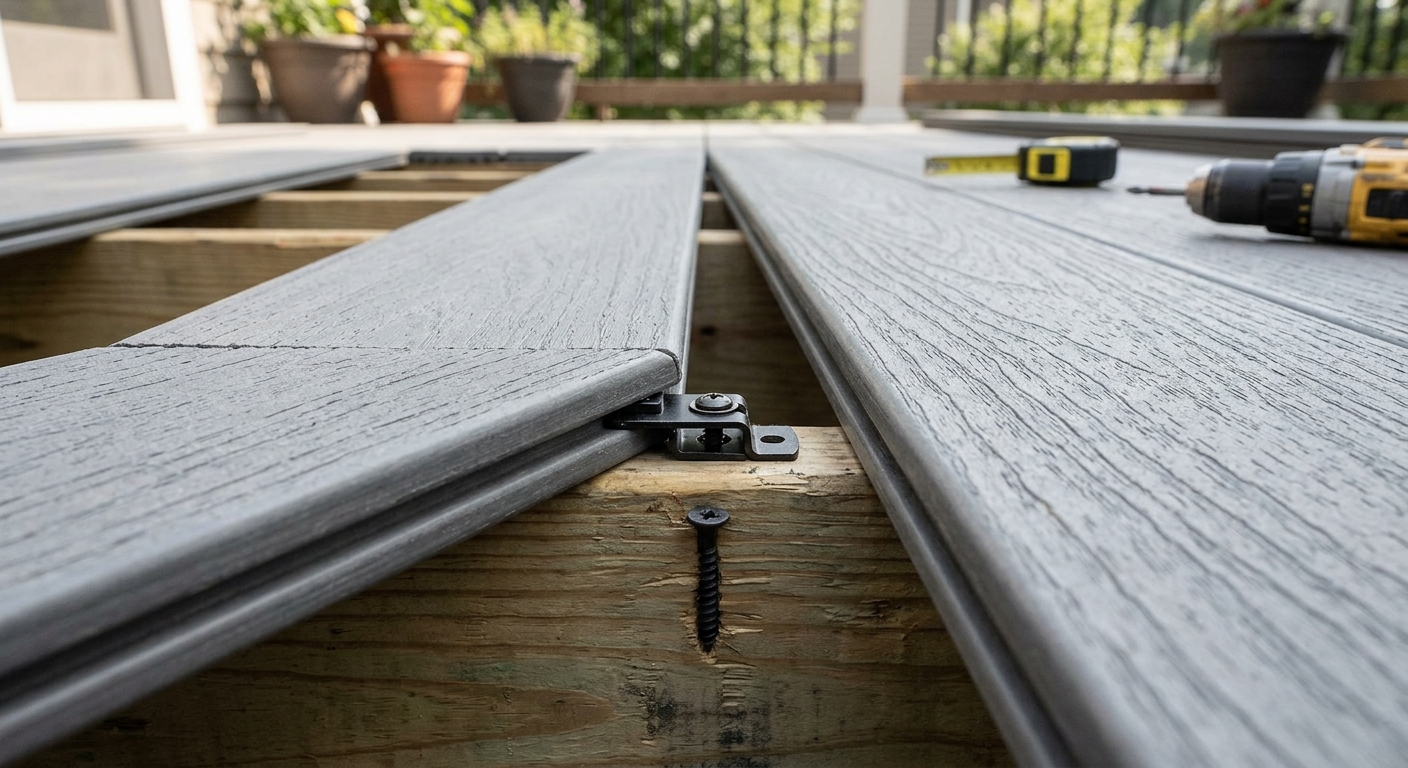
Decking boards run perpendicular to the sleepers, just as they would on a conventional deck. Fastening follows the manufacturer's specs for the specific composite or PVC product you've chosen — most modern composite decking uses hidden fastening systems that engage the grooved edges of adjacent boards and clip to the joists or sleepers below.
Option 2: Pedestal Systems
Pedestal systems use adjustable-height plastic pedestals set directly on the concrete surface to create a perfectly level platform regardless of the concrete's slope or surface condition. Each pedestal can be adjusted independently, so you can dial in a level finished deck surface even when the concrete beneath varies significantly in elevation across the slab.
This system excels in two specific situations: rooftop or balcony applications where adding significant weight is a concern (pedestals and decking boards are far lighter than a conventional framed deck), and slabs with significant slope variation where a sleeper system would require tapered shims at every point. Pedestal systems are also fully reversible — the decking lifts off without any damage to the concrete beneath, which matters to renters and homeowners who want to preserve the option to restore the concrete later.
The tradeoff is cost. Pedestal systems run roughly 20–30% more than sleeper systems for comparable square footage because the pedestals themselves are more expensive than treated lumber, and installation requires more time to dial in the leveling. They're also better suited to smooth, well-poured concrete — very rough or severely spalled surfaces may not provide the stable contact points the pedestals need.
For Seattle rooftop deck applications, pedestal systems combined with PVC or capped composite decking are the standard of care. We discuss rooftop-specific considerations in our rooftop deck Seattle guide.
Option 3: Composite Deck Tiles
Floating composite or wood-plastic composite deck tiles are the DIY-accessible end of the market. These are modular tiles — typically 12x12 or 24x24 inches — that snap or interlock together and sit directly on the concrete. No fasteners, no underlayment, no framing. You just lay them down.
The appeal is obvious: a homeowner can transform a 200-square-foot patio in a weekend afternoon. The limitations are real too. Tile systems don't allow you to set the finished surface height — you get whatever the tile thickness gives you (typically 1 to 1.5 inches), which may or may not resolve your threshold mismatch. They have limited drainage design compared to a properly installed sleeper system. The deck tile market offers a relatively narrow range of aesthetic options compared to full plank composite decking. And they move — not dramatically, but floating tiles shift slightly over time in ways that a fastened system doesn't.
For a back corner patio that just needs to look better, deck tiles are a reasonable solution. For anything involving a threshold match, a substantial area, or a long-term investment in your home's appearance and value, a sleeper or pedestal system with full-plank composite or PVC decking is the right approach.
Note
Material Requirements: Why Only Capped Composite or PVC Belongs Over Concrete
This is the point where a lot of homeowners push back: "Can't I just use cedar? It's so much cheaper." The short answer is no — not if you want the deck to last. Here's why, and here's what the right materials look like.
The Moisture Problem Unique to Concrete Overlay Decks
All concrete is permeable. Water moves through concrete via capillary action continuously — it's physics, not a flaw. In a conventional elevated deck, this isn't a problem because the framing and decking are far above any concrete (the footings), with plenty of air circulation everywhere. In a concrete overlay deck, your decking boards are 1.5 to 2 inches above a surface that is continuously emitting moisture vapor. That vapor has to go somewhere. If it can't escape laterally through the air gap, it condenses against the underside of the decking.
Cedar and pressure-treated wood, even kiln-dried dimensional lumber, will absorb this moisture and begin to degrade. Uncapped composite decking — an older generation of product that's largely been phased out, but still appears in the low end of the market — has a wood-fiber core that absorbs moisture through cut ends and fastener holes. That absorbed moisture leads to swelling, delamination, and fungal growth over time.
Capped composite decking wraps the wood-fiber core in a continuous shell of protective polymer. Moisture can't enter through the face, the sides, or the ends (with end caps installed). This is the reason manufacturers like Trex, TimberTech, and Fiberon specify capped composite for any application where moisture exposure is elevated — including ground-contact, marine, and concrete overlay installations. See our full comparison of Seattle's leading composite brands at Trex vs. Fiberon vs. TimberTech Seattle.
PVC decking — 100% cellular PVC with no wood fiber — goes one step further. There's nothing organic in a PVC board to absorb moisture or support biological growth. PVC is the choice for the most moisture-intensive applications: rooftop decks, pool surrounds, and concrete overlays in particularly low-ventilation configurations. The tradeoff versus capped composite is usually cost (PVC runs roughly 15–25% more for the decking material itself) and thermal expansion (PVC expands and contracts more than composite with temperature changes, requiring specific fastening and gapping specs). Learn more about PVC decking at our PVC decking guide.
What the Manufacturers Actually Say
Read the warranty documentation for any composite decking product you're considering. Most major brands have specific requirements for concrete overlay installations that go beyond their standard deck applications. TimberTech, for example, specifies minimum joist spacing, maximum moisture content in the substructure, and required ventilation clearances for ground-level and over-concrete installations. Ignoring these specs doesn't just risk voiding the warranty — it often represents genuinely bad practice that will lead to visible failure within a few years.
If a contractor proposes using cedar sleepers with uncapped composite decking over your concrete slab, that's not a money-saving shortcut — it's a setup for a failed deck. The right materials cost more upfront and save substantially over the life of the installation.
Pressure-Treated Lumber for Sleepers: Ground-Contact Rating Required
For the sleepers themselves, pressure-treated lumber is acceptable and common. But the treatment rating matters. Standard above-ground rated PT lumber (UC3B) is appropriate for deck framing that's above grade with good air circulation. Sleepers laying on concrete need UC4A or UC4B ground-contact treatment, because intermittent contact with wet concrete over years is effectively the same moisture environment as ground contact. The lumber will look identical — the difference is in the chemical retention level of the preservative treatment. Ask your contractor what treatment rating the sleepers carry, and verify it's appropriate for the application.
Key insight
Drainage and Ventilation: The Seattle-Specific Details That Make or Break This Project
In a dry climate, you can get away with a lot. In Seattle, drainage and ventilation are the difference between a deck that performs flawlessly for 25 years and one that's showing problems in year three. Here's what needs to happen under that deck.
Concrete Must Drain Away From the House
The first conversation on any overlay project is about where the water goes. A properly poured concrete patio slopes away from the house at a minimum of 1/8 inch per foot — ideally 1/4 inch per foot. This keeps rain runoff and irrigation overspray moving away from your foundation. The deck overlay system sits on top of this slope and doesn't change it. Water still needs to move off the concrete and out from under the deck at the perimeter.
If your concrete currently drains toward the house, an overlay won't fix that. In fact, it will make it worse by slowing the water's path out and concentrating it at the slab's low edge — against your foundation. In this case, the correct path is often to demolish the slab, regrade the base, and pour new concrete with proper slope. It's expensive and disruptive, but it's the only answer that actually protects your home.
Sleeper Orientation and Drainage Channels
Sleepers should run perpendicular to the direction of water flow on the concrete — meaning water moving down the slope should be able to flow between sleepers toward the perimeter rather than being dammed by them. In practice, most concrete slabs drain toward the outer edge (away from the house), and sleepers typically run parallel to the house — which is perpendicular to the water flow direction. That's the right configuration.
Between the concrete and each sleeper, the drainage underlayment creates a capillary break and a minor channel that allows water to move under the sleepers toward the edge. Products designed for this — synthetic mesh mats, dimpled HDPE membranes, or woven drainage fabrics — perform significantly better than no underlayment, which allows moisture to be wicked directly into the bottom surface of the sleepers.
The Air Gap Requirement
At the perimeter of a sleeper-system deck, the gap between the bottom of the decking and the concrete surface should be maintained as an open channel — not filled with fascia boards, edging, or decorative elements that seal the airspace. Many homeowners want to close off the gap for aesthetic reasons, and we understand that. The answer is not to close it completely but to use a material that allows airflow: lattice, perforated metal, or a narrow gap between the fascia board and the concrete.
For Seattle installations, we recommend verifying the air gap at multiple points across the slab after sleeper installation. Concrete is rarely perfectly flat, and low spots on the concrete can close the gap between the concrete surface and the underside of your decking boards. Shimming sleepers in low spots maintains the gap everywhere.
Under-Deck Moisture in Seattle: The Numbers
The Seattle metro area averages approximately 152 rainy days per year, with the heaviest rain falling between October and April. During that seven-month wet season, the concrete under your deck is essentially constantly saturated. Evaporation during dry months is slower than in inland climates because our relative humidity stays relatively high even in summer. This means the cumulative moisture exposure over the life of a concrete overlay deck in Seattle is significantly higher than the national average scenarios that many manufacturer specs are calibrated for. It's one reason we specify more aggressive ventilation than minimum code, and why we favor PVC decking over capped composite in applications where the air gap is tighter than ideal.
Tip
Cost Breakdown: Overlay vs. Demolition and Rebuild
Let's put real numbers on this. These figures reflect current Seattle-area contractor pricing as of 2026, incorporating local labor rates that run 25–40% above national averages.
Sleeper System Overlay: $12–$22 per Square Foot Installed
This range covers a sleeper-system deck over concrete with capped composite decking, drainage underlayment, hidden fasteners, and basic perimeter fascia. The low end ($12–$15/sq ft) reflects a simple rectangular slab, straightforward slope, no railing required (ground-level deck at door threshold height), and a mid-range composite product like Trex Enhance or Fiberon Concordia. The high end ($18–$22/sq ft) applies to complex shapes, premium composite or PVC products, pedestal system instead of sleepers, and rooftop or balcony applications with additional waterproofing requirements.
Add railing to any deck over 30 inches above grade and add $60–$120 per linear foot for the railing system itself, depending on material. See our full deck railing options Seattle guide for a detailed breakdown.
Full Demolition and New Conventional Deck: $40–$60+ per Square Foot
This covers concrete demolition and removal ($3–$8/sq ft), disposal fees, re-grading if needed, new deck framing with footings, and composite decking. The total cost is roughly three times that of an overlay. For a 400-square-foot patio, that's $16,000–$24,000 versus $4,800–$8,800 — a difference of $10,000 or more on the same footprint.
The demolition route makes sense when the concrete needs to go anyway (heaving, negative drainage, major structural issues) or when the homeowner wants to add height that a sleeper system can't achieve — converting a flat ground-level patio into an elevated deck with storage underneath, for example.
Installed cost estimates for 400 sq ft project. Overlay = sleeper system with capped composite. Rebuild = concrete demo + new elevated deck with composite. Source: The Seattle Decking Company 2026 project data.
| Category | Value |
|---|---|
| Tile Overlay (DIY) | $6 |
| Sleeper System (Entry Composite) | $14 |
| Sleeper System (Premium Composite) | $19 |
| Pedestal System (PVC) | $26 |
| Full Demo + New Deck (Mid) | $48 |
| Full Demo + New Deck (Premium) | $62 |
What's Included (and What's Not) in Overlay Pricing
When comparing quotes for a concrete overlay project, make sure you're comparing the same scope. Items that are sometimes excluded from base pricing and should always be clarified:
- Drainage underlayment (should always be included)
- End caps on composite decking boards (necessary at exposed ends)
- Perimeter fascia treatment (air-gap-preserving vs. sealed — ask how it's handled)
- Railing (excluded unless specified)
- Permits and inspections (should be included; ask who pulls the permit)
- Sleeper shimming for unlevel concrete (sometimes excluded and then becomes a change order)
For help understanding what a complete deck quote should contain, read our guide on how to read a deck quote.
Permit Requirements in Seattle and King County
Permit rules for decks over concrete are determined by the jurisdiction your property falls in. This matters because permit requirements vary between the City of Seattle, incorporated King County cities like Bothell, Kirkland, and Redmond, and unincorporated King County.
City of Seattle
The Seattle Department of Construction and Inspections (SDCI) requires a construction permit when a deck's walking surface is more than 18 inches above grade. For a ground-level concrete overlay that brings your finished surface to within a few inches of the door threshold, you may fall below this threshold — but verify with SDCI, because the grade measurement is taken from the lowest adjacent grade to the deck surface, not from the concrete.
Seattle also requires permit review when:
- The deck is over 750 square feet
- The deck is located in an environmentally critical area (steep slopes, landslide zones, wetland buffers — more common than many homeowners realize in Seattle's terrain)
- The deck has solid decking with no gaps (drainage concern)
- Beams span 14 feet or longer
A subject-to-field-inspection (STFI) permit is the typical path for standard residential decks that don't require full plan review. These are faster and less expensive than full permit review.
King County Unincorporated Areas and Other Jurisdictions
King County and incorporated cities like Bothell (where The Seattle Decking Company is based at 22722 29th Drive SE) use a 30-inch threshold — a deck over 30 inches above grade requires a permit. Below 30 inches, a permit may not be required, but this depends on the specific municipality. Bothell, Kirkland, Redmond, and Bellevue each have their own development services departments with their own processes.
Drainage Change as a Permit Trigger
Here's the permit requirement that catches homeowners by surprise: in many jurisdictions, significantly altering how stormwater drains off a property triggers permit requirements regardless of deck height. If your overlay deck changes where and how rainwater leaves your property — directing it toward a neighbor's yard or changing sheet flow patterns — that can require a stormwater review even if the deck itself is below the height threshold. This is one more reason to work with a licensed contractor who knows local requirements rather than attempting a DIY project and hoping for the best.
For a comprehensive walkthrough of permit processes in the region, see our deck permit King County guide.
Note
Step-by-Step: How a Professional Sleeper System Installation Works
Understanding what a professional concrete overlay installation actually looks like helps you evaluate contractor proposals and set expectations for your project. Here's how a sleeper-system deck over concrete proceeds from site visit to finished deck.
Step 1: Slab Assessment
Before any materials are ordered or pricing is finalized, an experienced contractor walks the slab systematically. They're looking for: crack patterns (hairline vs. structural), surface condition (spalling, heaving), drainage direction (use a hose to confirm where water flows), moisture at the surface (is the slab visibly damp after dry weather?), and threshold height (how much elevation gain does the overlay need to achieve?). This assessment determines whether the project proceeds as an overlay or whether demolition is recommended.
Step 2: Concrete Preparation
Minor cracks and spalls are filled or stabilized. If the concrete has areas where the surface is lifting or flaking significantly, those need to be addressed before sleepers go down — a loose concrete surface under a sleeper creates movement and noise underfoot. The slab is cleaned of moss, algae, and debris.
Step 3: Drainage Underlayment Installation
A drainage membrane or mat is rolled out across the entire concrete surface. This product creates the capillary break between the concrete and the sleepers, and its dimpled or woven structure maintains micro-channels for water movement even under the compression of the sleeper weight and decking load. Edges are lapped and taped at seams.
Step 4: Sleeper Layout and Installation
Sleepers are cut to length and laid flat on the drainage membrane, perpendicular to the planned decking direction. Spacing is typically 12 or 16 inches on center — verify with the composite decking manufacturer's specifications for your specific product, as span ratings vary. Sleepers are shimmed where necessary to maintain a consistent finished surface elevation and to preserve the air gap where the concrete dips. Some contractors fasten sleepers to the concrete with concrete screws; others rely on the decking weight to hold the system in place (check local code and manufacturer specs).
Step 5: Decking Installation
Composite or PVC boards are laid perpendicular to the sleepers. The first board is positioned at the perimeter with attention to the reveal at the edge — where the board ends relative to the fascia. Hidden fasteners clip into the grooved edges of each board and fasten to the sleeper below before the next board is slid into position. This process repeats until the field is complete.
End caps are installed on any exposed board ends. Perimeter fascia is attached with a gap or screen maintained at the bottom edge to preserve airflow into the under-deck space.
Step 6: Final Inspection and Cleanup
The finished deck is inspected for level, for consistent gaps between boards, for any fastener issues, and for drainage performance at the perimeter. If a permit was pulled, the building inspector visits for a final sign-off.
Choosing the Right Contractor for a Concrete Overlay Deck
Not every deck contractor has experience with concrete overlay systems. It's a more technical application than a conventional elevated deck in some respects — the drainage design, material specification, and ventilation details require specific knowledge. Here's how to vet contractors for this particular project type.
Questions to Ask
Ask specifically: "Have you installed sleeper-system or pedestal-system decks over concrete before, and can you show me examples or references?" A contractor who primarily builds conventional elevated decks can certainly learn the overlay approach, but you want someone who's done it before in Seattle's climate — not someone who's figuring it out on your project.
Ask about the drainage membrane: "What underlayment product do you use between the concrete and the sleepers, and why?" A contractor who says "we don't use anything between the sleepers and the concrete" is not following best practice for our climate.
Ask about air gap maintenance at the perimeter: "How do you handle the fascia detail to maintain airflow under the deck?" This is a detail question that reveals how much they've actually thought about moisture management in the finished system.
Ask about material specs: "What composite decking product do you recommend for this application, and is it a capped product rated for moisture-intensive environments?" If they propose cedar or uncapped composite, that's not the right answer.
For a comprehensive list of questions to ask any deck contractor, see our guide at questions to ask your deck builder. To understand how to compare proposals apples-to-apples, read how to find a deck builder in Seattle.
Licensing and Insurance
In Washington State, deck construction requires a general contractor license with the Washington State Department of Labor and Industries. Verify your contractor's license at the L&I contractor lookup. Also confirm they carry general liability insurance and workers' compensation — concrete overlay work involves power tools, heavy materials, and working in proximity to your home's foundation, and you want proper coverage in place.
Getting Multiple Quotes
For any project over $5,000, get at least three written quotes. For a concrete overlay deck, the proposals should specify: the drainage underlayment product, the treatment rating of the sleepers, the composite or PVC product being used with its specific product line name, the air gap maintenance approach at the perimeter, and what permit handling is included. If a proposal doesn't address these details, it's either because the contractor doesn't think about them (a problem) or because they're leaving room to cut corners during construction (also a problem).
See our guide on deck cost Seattle 2025 for the full regional pricing context that helps you evaluate whether a quote is reasonable.
Long-Term Performance and Maintenance Expectations
A properly built concrete overlay deck in Seattle should perform for 25 to 30 years with minimal maintenance. Here's what that maintenance looks like, and what warning signs indicate a problem developing under the surface.
Annual Maintenance for Concrete Overlay Decks
Capped composite and PVC decking need very little maintenance — an annual wash with a composite deck cleaner and a soft-bristle brush is typically all that's required. What's specific to overlay decks is the importance of keeping the perimeter clear. Leaves, debris, and organic material that accumulates at the deck edge can block the drainage gap and create the saturated environment at the perimeter that you've gone to pains to prevent elsewhere. Clear the perimeter gap each fall before the wet season begins.
Inspect the perimeter gap every two to three years. If you see any signs of the fascia settling against the concrete and closing the gap, address it — either by adjusting the fascia attachment or by creating an opening that restores airflow. This is a 30-minute job when caught early and a much more significant project if it leads to moisture damage in the sleepers.
For seasonal deck care guidance specific to Seattle's climate, see our deck winter inspection Seattle guide.
Warning Signs of Moisture Problems
If boards develop a sponginess or softness underfoot — even capped composite boards shouldn't flex noticeably — that may indicate the sleepers beneath are absorbing moisture and beginning to deteriorate. If you see staining or biological growth tracking upward through the gaps between boards, that indicates water isn't draining out from under the deck as designed. If boards begin to cup or buckle, that's a sign of differential moisture exposure between the top and underside of the boards.
Any of these symptoms warrants pulling a few boards to inspect the sleepers and the drainage membrane condition. Catching moisture-related deterioration early means replacing sleepers and membrane — a modest repair. Catching it late means replacing the entire substructure along with whatever decking boards have been damaged.
FAQ
Frequently Asked Questions
Can I build a deck over cracked concrete?
Do I need a permit to build a deck over my concrete patio in Seattle?
What's the difference between a sleeper system and a pedestal system?
Can I use cedar decking over concrete?
How much does it cost to build a deck over concrete in Seattle?
How long does a deck over concrete last?
How much ventilation gap do I need under a deck over concrete?
Will a deck over concrete increase my home's value?
Can I install a deck over concrete myself?
What's the best composite decking brand for a deck over concrete in Seattle?
Does building a deck over concrete change my drainage and affect my neighbors?
Should I seal or paint the concrete before building a deck over it?
Ready to Build Your Deck Over Concrete?
Building a deck over your existing concrete slab is one of the smartest investments you can make in Seattle-area outdoor living — when it's designed and built correctly. The cost savings versus full demolition are significant. The performance of properly specified capped composite or PVC decking over an appropriate sleeper system is excellent. And the visual transformation from cracked, stained concrete to a clean, contemporary deck surface is dramatic.
The key variables are all manageable with the right contractor: slab condition assessment, drainage design, material specification, air gap maintenance, and permit compliance. These aren't optional considerations in our climate — they're the foundation of a concrete overlay deck that actually performs for 25 years rather than five.
At The Seattle Decking Company, we've installed concrete overlay decks across the greater Seattle area — from Bothell and Kenmore to Kirkland, Redmond, Bellevue, and beyond. We'll walk your slab, give you an honest assessment of whether overlay or demolition is the right path, and provide a detailed written proposal that covers every element of the installation.
Call us at (425) 675-6259 to schedule a consultation, or visit us online at theseattledeckingcompany.com/contact to request a quote. We're located at 22722 29th Drive SE, Bothell, WA 98021, and we work throughout King and Snohomish counties. Let's talk about what we can do with that concrete slab.
Planning a deck in the Seattle area?
Get an onsite design review and a clear, itemized quote from a licensed local builder.
Request a Free Quote