
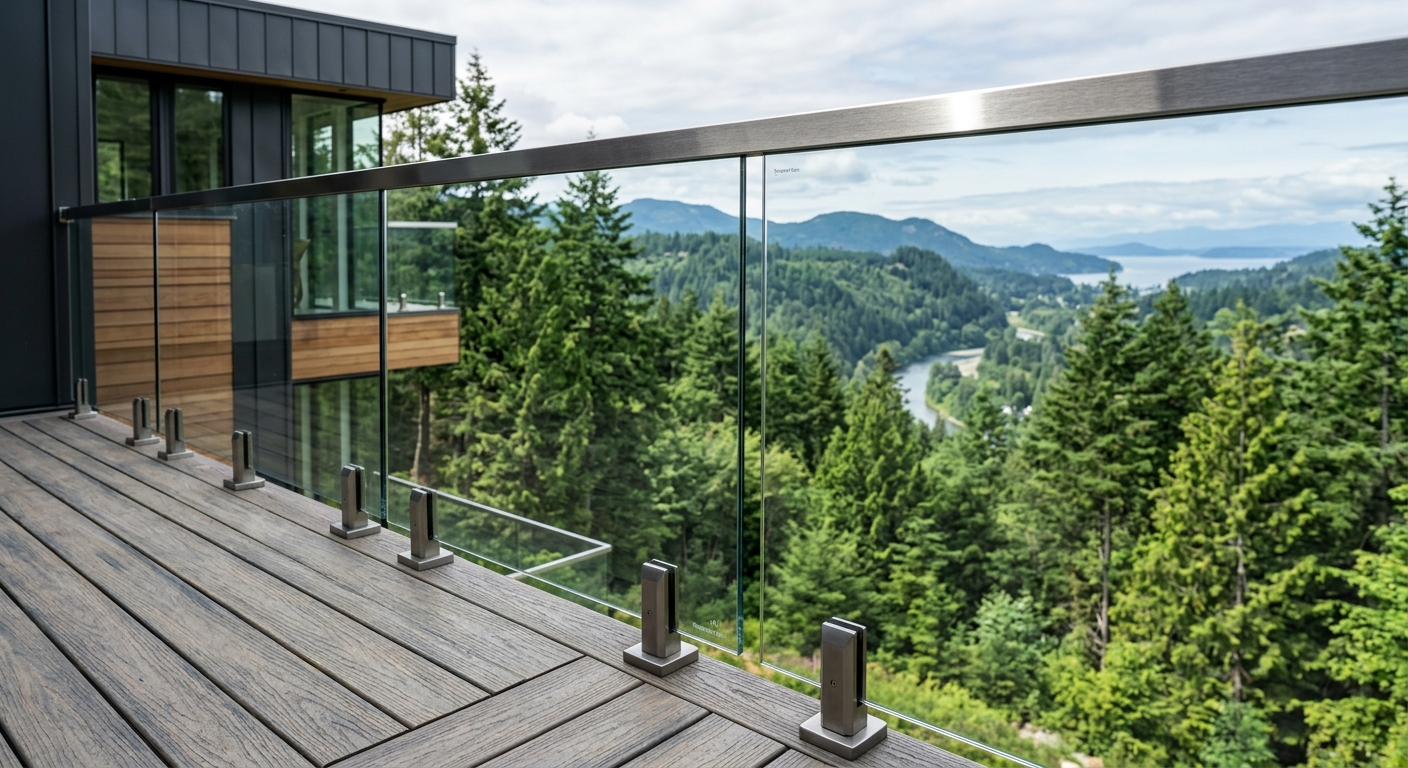
If your deck has seen better days — splintered boards underfoot, gray weathered cedar that no longer holds stain, rails that wobble when guests lean on them — the question every Seattle homeowner eventually asks is: do I need to tear the whole thing down, or can I save it? The answer, surprisingly often, is that you can save it. Deck resurfacing is one of the most cost-effective projects in the remodeling world when the underlying frame qualifies, and in the Pacific Northwest, where cedar decks built in the late 1990s and early 2000s are hitting their surface lifespan while their pressure-treated frames often still have years left, that qualification comes up more than you'd think.
The key word is "when." A resurfacing project — removing the old decking boards and replacing them with new material while keeping the existing joists, beams, posts, and ledger — only makes financial and structural sense if the frame underneath is genuinely sound. The PNW climate is hard on wood. Our wet winters, the freeze-thaw cycles we see in elevated neighborhoods like Issaquah, Sammamish, and Snohomish County, and the shaded north-facing decks that never fully dry out create conditions that accelerate rot in ways most homeowners underestimate. We've opened up decks in Bellevue where the surface boards looked rough but the frame was perfect, and we've opened up decks in Redmond where everything looked cosmetically okay from the top but the joists were punky all the way through. You genuinely cannot know until you look.
This guide walks you through exactly how to assess your frame, what a legitimate resurfacing project includes, what the material and labor costs look like in the Seattle market in 2026, and how to know when resurfacing is the right call versus when full replacement is the honest answer. We'll also cover the King County and City of Seattle permit questions that trip up a lot of homeowners — because yes, resurfacing can trigger a permit requirement, and finding that out mid-project is an expensive surprise.
What Deck Resurfacing Actually Includes — and What It Doesn't
The term "resurfacing" gets used loosely in the industry, so let's define exactly what it means in the context of a legitimate deck rebuild project. When we resurface a deck, we remove every surface board from the existing frame, then systematically inspect every structural member before installing new material on top of the same skeleton.
The Scope of Work, Board by Board
A proper resurfacing project includes:
Decking removal: All field boards come off, including any hidden-fastener grooved boards if the original deck used that system. We're not working around existing boards — everything on the surface is stripped to bare joists.
Full frame inspection: Once the surface is off, every joist, rim joist, beam, post, post base, and ledger connection gets a hands-on inspection. This is the step that determines whether resurfacing is viable or whether you're having a different conversation.
New decking installation: New boards go down across the full deck surface. On a resurfacing project, you're not patching — you're replacing all field boards and typically the fascia boards on the perimeter as well.
Railing replacement: Most resurfacing projects replace the railing system simultaneously. If you're going to the effort of replacing all the boards, rebuilding the railing to match is both practical and often required to bring the deck up to current code if the railing was undersized or the balusters are too widely spaced.
Stair work: If the stairs use the same decking material as the field boards, stair treads get replaced as part of the project. Stringers (the structural diagonal members the treads attach to) are assessed during the frame inspection.
What resurfacing does not include: It does not replace the primary structure — the posts, beams, and main joists — unless the inspection reveals damaged members that need swapping out. It also doesn't change the footprint of the deck or add square footage, which is what separates a resurfacing permit from a new construction permit.
Note
The Material Upgrade Decision
Resurfacing is the natural moment to reconsider your material choice. The most common upgrade we do in Seattle is cedar surface to composite — specifically Trex, Fiberon, or TimberTech on frames that were originally built for pressure-treated cedar decking.
The good news is that most older cedar-framed decks are built with 12-inch joist spacing or tighter, which is within composite manufacturers' span ratings. You want to verify this before committing to a specific product line — composite span requirements vary by board profile and thickness, and some economy-tier composite products require 12-inch spacing while premium boards can span 16 inches. We'll get into the specifics later, but the structural compatibility question is part of the assessment process.
If you're keeping cedar as your surface material, a resurfacing project still makes sense — new cedar is significantly less expensive than new composite, and if you're willing to maintain a staining schedule, cedar is a beautiful material that performs well in our climate when properly maintained. See our full breakdown in composite vs. cedar decking Seattle if you're on the fence.
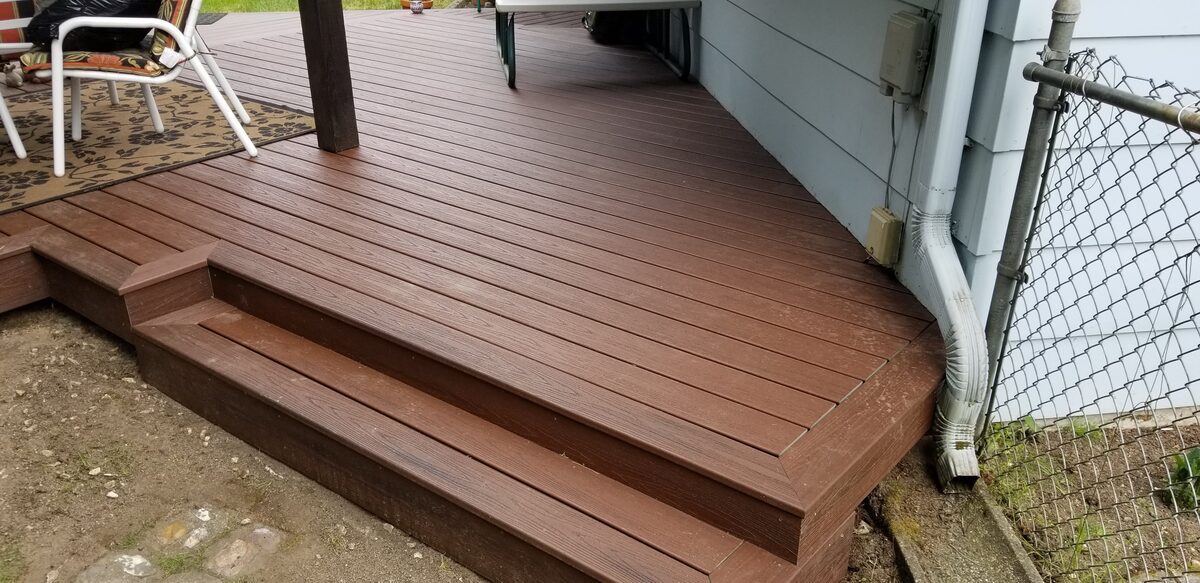
What Your Frame Must Pass: The Structural Qualification Test
The entire economics of resurfacing hinge on one question: is the frame salvageable? If it is, you're looking at $12–20 per square foot for new material and labor. If it isn't, you're replacing everything, and the cost structure looks completely different. This is why a thorough frame inspection isn't optional — it's the entire basis for the project.
The Screwdriver Test: Your First Field Diagnostic
Before you call anyone, you can do a preliminary assessment yourself. The NADRA Check Your Deck checklist — published by the North American Deck and Railing Association, the industry's primary trade organization — recommends the screwdriver test as the first-pass diagnostic for wood rot.
Here's how to do it: Take a standard flathead screwdriver and press the tip firmly into the wood in several key locations — the ledger board where the deck attaches to the house, the ends of joists where they bear on the beam, any post bases, and any spots where water visually collects (around hardware, at beam-to-post connections, anywhere you can see staining or discoloration).
If the screwdriver meets firm resistance and you hear a solid thud when you knock on the wood, the member is sound. If the screwdriver penetrates with light pressure — what deck builders call "punky" — you have active decay. A punky sound when knocked on is distinguishably dull versus the sharp crack of healthy wood. You can also break off a small fiber from a suspected area: healthy wood splinters cleanly, while decayed wood tears with a soft, spongy quality.
Do this at minimum at: the ledger (both the field and the edge closest to the house), the beam ends, the tops and bottoms of posts, any joist end bearing on the beam, and anywhere you see dark staining.
Important
Post Bases: The Often-Missed Failure Point
Post bases — the metal connectors that secure deck posts to concrete footings — are one of the most common failure points on Seattle-area decks, and one of the most commonly overlooked during a DIY assessment. The problem is that the base hardware is often hidden behind the post or partially buried, and the corrosion that compromises them happens at the interface between the metal and the damp concrete.
During a proper resurfacing assessment, we pull the post base covers and inspect the metal for active rust and section loss. Surface rust (reddish surface oxidation) is cosmetic. Structural rust (where the metal has lost thickness, is flaking in layers, or has developed cracks) compromises the lateral load transfer from post to footing and is a safety issue.
Post bases are relatively inexpensive to replace during a resurfacing project — it's worth replacing them proactively even if they show only early corrosion, because access is much easier with the decking off.
Ledger Inspection: The Most Critical Check
The ledger — the horizontal lumber bolted directly to your house framing — is the highest-risk structural member on any attached deck. When ledger connections fail, decks don't lean or sag gradually: they separate from the house suddenly, which is how deck collapses happen.
Ledger inspection covers three things:
The ledger board itself: Probe with the screwdriver across the full width, paying special attention to the top edge where water can accumulate if the flashing above is inadequate. Check behind the ledger if accessible — sometimes the back face is rotted while the front appears sound.
The lag bolt pattern: Older decks often used inadequate lag spacing or undersized bolts. Current code (IRC 2021, which Washington has adopted) requires specific lag patterns based on joist span and tributary load. If your ledger connection is undersized, it needs to be remediated as part of the project.
The flashing: The metal or membrane flashing at the house-to-ledger interface is what keeps water from infiltrating the wall assembly. Missing, improperly lapped, or deteriorated flashing is the number-one cause of ledger rot and the main reason why deck ledgers fail in the PNW. If the flashing is wrong, it has to be rebuilt, and that work involves the house wall assembly — adding scope and cost to the project.
Key insight
What Frame Issues You Can Fix During Resurfacing
Not every frame problem disqualifies a deck for resurfacing. With the surface boards off, you have complete access to the framing, which makes many targeted repairs practical:
Individual joist replacement: If the inspection finds one or two joists with localized rot at the bearing end, those joists can be sistered or replaced without touching the rest of the structure. This is a common situation on decks where a single bay near a downspout took more water exposure than the rest of the frame.
Blocking additions: Adding blocking (short horizontal members between joists) improves lateral stiffness and is required by some composite manufacturers for certain span conditions. Installing it during resurfacing is easy — with the boards off, it's a straightforward carpentry task.
Joist tape application: One of the best things you can do during a resurfacing project is apply butyl joist tape to the top edge of every joist before the new boards go down. Joist tape creates a moisture barrier at the joist-to-board contact point, which is exactly where water infiltration causes decay. This is standard practice on new construction now and should be retrofitted on any resurfacing project.
Hardware upgrades: All the joist hangers, post bases, and hardware visible during the open-frame phase can be assessed and upgraded. This is the last time access to this hardware will be easy.
Frame Assessment: What Actually Disqualifies a Deck for Resurfacing
Some conditions make resurfacing the wrong answer economically and structurally. It's important to know these upfront so you can have a direct conversation with your contractor — and so you know if you're being sold a resurfacing project when replacement is the honest recommendation.
Widespread Structural Rot
If the screwdriver test finds punky, soft wood not in one or two isolated joists but throughout the frame — multiple joists, the beam, the ledger — the frame is not salvageable for resurfacing. Widespread decay means the structural system has been compromised beyond the point where selective repair makes sense. The cost of sistering or replacing half the joists, rebuilding the ledger, and potentially replacing the beam approaches the cost of full demolition and replacement, with the added complication that you're working in and around compromised members throughout.
In our experience, widespread decay usually indicates one of three root causes: a fundamentally flawed original drainage design (usually a flat or minimally sloped deck with no drainage path), long-term absence of any maintenance, or original construction with non-pressure-treated lumber in contact locations. All three are problems that resurfacing alone won't fix — the underlying design or material issue will create the same decay in the new frame over time.
Undersized Framing
Washington has been on the IRC (International Residential Code) for structural requirements, but older decks — particularly those built in the 1980s and early 1990s — were sometimes built with joist or beam sizing that doesn't meet current load requirements. If your deck was originally built with undersized joists (a common situation when 2x8 joists were used at spans that require 2x10), a resurfacing project that replaces the surface material doesn't fix the structural undersizing.
This matters for two reasons: safety, obviously, and permitting. If a building inspector visits the project for the railing permit and notices undersized framing, you'll be required to bring the structure up to current code, which may mean sistering joists across the full deck. That scope change can eliminate the cost advantage of resurfacing versus replacement.
Settled or Failed Footings
Post footings that have shifted, heaved, or settled — visible when you sight along the deck surface and see a visible bow or tilt, or when you measure post heights and find them significantly out of level — typically indicate a footing problem that resurfacing doesn't address. Replacing the surface while leaving settled posts in place means the new deck will look and perform like the old one within a few years.
Tip
Material Upgrade Options: What Goes Back on the Frame
Assuming the frame qualifies, you have real choices about what new material goes down. This is where a resurfacing project becomes an opportunity, not just a repair.
Composite Decking: The Default Upgrade Choice in Seattle
Composite decking — boards made from a combination of recycled wood fiber and polyethylene with a protective capping shell — has become the dominant resurfacing choice in the Seattle market for one simple reason: it doesn't require the annual or biennial maintenance cycle that cedar demands. In a climate where we get 38+ inches of rain annually and many decks spend winters under a layer of fallen leaves and persistent moisture, a material that doesn't need to be cleaned, sanded, and resealed every two years is a significant quality-of-life improvement.
The leading composite brands in our market — Trex, Fiberon, and TimberTech/AZEK — all offer capped composite products with moisture absorption rates under 1% (compared to cedar, which can absorb 15–25% of its weight in water in wet conditions). The protective shell is what makes the difference: uncapped composite products from the early 2000s were notorious for swelling, staining, and mold growth, but capped composite from the major manufacturers today is a fundamentally different product.
For Seattle-area frame compatibility, most composite products specify 12-inch maximum joist spacing for 90-degree installations and allow 16-inch spacing for 45-degree diagonal patterns. If your frame is 16-inch on center and you want to run boards straight (not diagonal), verify the span rating with your specific product selection before ordering.
You can see our full comparison of the leading composite brands at Trex vs. Fiberon vs. TimberTech Seattle.
PVC Decking: The Premium No-Maintenance Option
For covered decks, roof decks, or situations where a homeowner wants absolute maximum moisture resistance, cellular PVC decking (100% plastic, no wood fiber content) is worth considering. AZEK's TimberTech Landmark series and similar all-PVC products have zero moisture absorption, can be used in fully shaded applications without mold concerns, and carry 50-year residential warranties.
PVC runs $2–4 per lineal foot more than composite and requires more attention to installation details (thermal expansion is greater than composite, requiring specific fastener gaps at board ends), but for the right application it's the most durable surface material available.
Cedar: Still a Valid Choice
If you love the look of natural wood and you're committed to maintaining it, new cedar is still a legitimate resurfacing material. Western red cedar — the species used in Pacific Northwest decks — has natural oils that provide rot resistance, machines beautifully, and when properly maintained with a penetrating stain every two to three years, will outlast a poorly maintained composite installation.
The honest trade-off: cedar requires real maintenance. If you're replacing a cedar deck that got soft because it was never stained, replacing it with more cedar and not changing your maintenance habits will produce the same result in another decade. See deck staining vs. composite Seattle for the full analysis.
Railing System Options
Railing replacement during resurfacing gives you access to the full range of current railing systems: aluminum balusters, cable rail, glass panel, and composite post-and-rail systems. The material choice matters both aesthetically and structurally — post mounting method and post sizing requirements vary by railing system, and some cable and glass rail systems require specific post sizes and blocking configurations that should be addressed during the open-frame phase.
Tip
See deck railing options Seattle for detailed coverage of railing systems and costs.
Cost ranges for a 350 sqft deck in the Seattle market. Resurfacing costs assume a qualified frame. Full replacement includes demolition and new framing.
| Category | Value |
|---|---|
| Cedar Resurfacing | $14 |
| Composite Resurfacing | $18 |
| PVC Resurfacing | $22 |
| Full Cedar Replacement | $42 |
| Full Composite Replacement | $50 |
Permitting: What King County and Seattle Require for Resurfacing
This is the section most contractor-written guides skip because it complicates the sales process. We're not going to skip it, because getting caught without a permit mid-project is more expensive than pulling one at the start.
City of Seattle (SDCI) Requirements
The Seattle Department of Construction and Inspections (SDCI) has specific permit requirements for deck work. For resurfacing projects in the City of Seattle:
A permit is generally required when: you're changing the railing system (since railings are a code-regulated safety element), when the deck is more than 30 inches above grade, or when the project value exceeds the threshold that requires a building permit application.
A subject-to-field-inspection (STFI) permit may be sufficient for smaller resurfacing projects where the structural work is limited and the footprint isn't changing. STFI permits are simpler and faster than full building permits but still require a permit number and inspection.
No permit may be required for like-for-like surface board replacement on a small deck under 200 square feet where the railing is not being changed and the height is under 30 inches — but this is a specific narrow scenario. If your project involves any railing change or your deck is over 200 square feet, budget for a permit.
King County Unincorporated Areas (Bellevue, Redmond, Kirkland, Sammamish, etc.)
For decks outside Seattle city limits but within King County's jurisdiction, the King County Permitting Division follows the IRC with local amendments. The permit trigger for resurfacing is generally:
- Any change to the railing system
- Structural repair work (joist replacement, ledger rebuilding)
- Projects over 200 square feet in total deck area
- Any deck more than 30 inches above grade
Permit costs in King County vary by project valuation but typically run $500–$1,500 for a standard resurfacing project. Your contractor should be pulling permits in their name (as the licensed contractor of record), not asking you to pull them as a homeowner. If a contractor tells you "we don't need a permit for this" on a railing change on a 350-square-foot deck, treat that as a red flag.
Important
Contractor License Verification
Before signing any contract, verify your contractor's registration with Washington L&I. Washington requires all contractors performing paid construction work to be registered with the Department of Labor and Industries, carry a $15,000 surety bond, and maintain workers' compensation coverage. The L&I lookup shows registration status, bond status, and any complaints or infractions. Active registration, active bond, and active WC are the three things to verify — a contractor with a lapsed bond technically has an invalid registration even if they're showing up in the database.
See how to find a deck builder in Seattle and questions to ask your deck builder for full contractor vetting guides.
Seattle Deck Resurfacing Costs: Real Numbers for 2026
Let's talk specifics, because "it depends" is not useful when you're trying to budget a project. Here are realistic cost ranges for deck resurfacing in the Seattle market in 2026, broken down by scope.
Base Resurfacing Labor and Material Ranges
For a standard 300–400 square foot attached deck in the Seattle/Eastside market:
| Project Scope | Material | Cost Per Sqft | Total (350 sqft) |
|---|---|---|---|
| Cedar resurfacing, like-for-like | Pressure-treated cedar | $12–16/sqft | $4,200–$5,600 |
| Composite resurfacing, mid-tier | Trex Enhance, Fiberon Eon | $15–20/sqft | $5,250–$7,000 |
| Composite resurfacing, premium | Trex Transcend, TimberTech Landmark | $18–24/sqft | $6,300–$8,400 |
| PVC resurfacing | AZEK Harvest, TimberTech PVC | $22–28/sqft | $7,700–$9,800 |
These ranges include labor, material, and basic frame assessment. They assume the frame is sound and needs no significant repair.
Additional Cost Items
Railing replacement: $75–$150 per lineal foot for aluminum or composite rail systems, $100–$200 per lineal foot for cable rail, $150–$300 per lineal foot for glass panel rail. A 50-foot perimeter railing replacement is a $4,000–$10,000 line item depending on system choice.
Individual joist sister/replacement: $150–$300 per joist for sistering a damaged joist during the open-frame phase.
Ledger rebuilding: $800–$2,500 depending on length and accessibility. This includes new flashing.
Permit fees: $500–$1,500 for King County / City of Seattle resurfacing permits.
Stair tread replacement: $75–$200 per tread depending on material.
Joist tape application: $200–$500 for a 350-square-foot deck. This is a relatively low-cost add that we consider standard practice — it significantly extends frame life.
Comparison to Full Replacement
Full deck replacement — demolition, new footings if needed, complete new framing, new surface — runs $35–55 per square foot in the Seattle market in 2026 for a standard attached deck. See our full deck cost breakdown for replacement cost details.
The math on resurfacing versus replacement: on a 350-square-foot deck with a qualified frame, resurfacing with mid-tier composite might cost $7,000–$8,500 all-in (including railing and permit). Full replacement of the same deck with composite runs $15,000–$22,000. The savings — $7,000 to $13,000 — are real when the frame qualifies. That's the decision point.
Key insight
If you're concerned about financing the project either way, see deck financing Seattle for HELOC and personal loan options popular in the local market.
Timeline: How Long Does Resurfacing Actually Take?
One of the legitimate advantages of resurfacing over full replacement is project duration. Here's a realistic timeline for a standard 300–400 square foot deck in the Seattle market.
Project Phases
Pre-construction (1–3 weeks before start):
- Frame assessment visit
- Material selection and ordering
- Permit application (where required)
Composite decking for a 350-square-foot project typically needs 2–4 weeks lead time from major suppliers in the Seattle market. Some in-stock products can ship faster, but for specific colors or profiles, order early.
Active construction (3–7 working days):
Day 1: Surface board removal and full frame inspection. This is when you get definitive answers about frame condition. If significant repair is needed, this is when the scope conversation happens.
Day 1–2: Frame repairs, joist taping, blocking installation, ledger work if needed.
Day 2–4: New decking board installation. Composite goes down faster than cedar due to consistent dimensions and hidden fastener systems. A two-person crew can typically complete field decking on a 350-square-foot deck in 1.5–2 days.
Day 3–5: Railing system installation. This is often the most time-variable element — cable rail with turnbuckle tensioning takes longer than composite baluster rail, and glass panel systems have their own timeline.
Day 5–7: Stair work, fascia, finishing details, cleanup.
Post-construction:
- Permit inspection (where required) — scheduling can add 1–2 weeks depending on inspector availability.
Weather Considerations in the PNW
Most decking manufacturers allow installation at temperatures above 40°F, which means Seattle-area work continues year-round for composite and PVC materials. Cedar installation is less weather-sensitive. However, wet conditions during installation can cause issues with composite hidden fastener systems and composite board dimensions, so most contractors prefer to schedule resurfacing projects during drier periods — May through September is the prime window in our market.
If your project is scheduled during the rainy season (which in Seattle means October through April, realistically), a good contractor will have a plan for weather delays and protecting open framing from rain exposure during the project.
Tip
Maintenance After Resurfacing: What Changes and What Doesn't
One of the things homeowners sometimes don't realize is that resurfacing changes your ongoing maintenance responsibilities — significantly, if you're switching from cedar to composite.
Cedar Resurfacing Maintenance
If you replace cedar boards with new cedar, your maintenance schedule doesn't change: clean the deck annually (removing leaf debris, especially in shaded areas that stay damp), apply a penetrating stain or sealer every 2–3 years, and inspect the frame annually per our deck winter inspection guide. The new cedar will need its first stain application within 1–2 years after installation.
Composite Resurfacing Maintenance
Composite decking's maintenance requirements are dramatically simpler: annual cleaning with a garden hose and mild soap is typically all that's needed for standard composite. Capped composite from major manufacturers won't need sealing, staining, or sanding. However:
- Clean regularly in shaded areas: While composite doesn't rot, organic debris (leaves, pollen, pine needles) on the surface can support surface mold growth if left damp over winter. Annual cleaning prevents this.
- Don't use pressure washers on composite: They can damage the capped surface. Stick to a medium-pressure garden hose.
- Inspect fasteners annually: Composite expands and contracts more than wood seasonally, and fasteners can back out slightly over time, particularly in the first year or two after installation.
Frame Maintenance (Applies to All Resurfacing Projects)
The frame still needs periodic inspection regardless of what material is on the surface. Annual probing of the ledger, post bases, and any visible joist ends (typically visible from below) takes 20 minutes and catches developing problems before they become structural issues. See deck winter inspection Seattle for a full annual inspection checklist.
Getting an Accurate Resurfacing Quote in Seattle
Resurfacing quotes vary significantly depending on how thorough the contractor's assessment process is. A quote delivered before frame inspection is not a real quote — it's an estimate that will change once the boards come off, and the direction of change is always up, never down.
Here's what a legitimate resurfacing quote should include:
Pre-quote assessment: A contractor who will give you a firm price should do a site visit that includes at minimum probing the accessible structural members, checking the ledger and its flashing, and assessing post base condition. If someone is quoting over email or based on photos, they're not doing a real assessment.
Line-item breakdown: Materials and labor should be itemized — decking material, railing material, labor for removal and installation, frame repair allowance, permit fee. See how to read a deck quote for full guidance on what should be in a resurfacing contract.
Contingency for frame repairs: An honest contractor will include either a line-item allowance for potential frame repairs discovered during demolition or a clear change-order clause that specifies the per-unit rate for joist sistering, blocking, or other frame work discovered after boards are removed. This protects both parties.
Permit inclusion: The permit should be included in the scope, not treated as an optional add-on.
Note
For help evaluating competing bids, see how to find a deck builder Seattle and questions to ask your deck builder.
Ready to Find Out If Your Deck Frame Qualifies?
The only way to know for certain whether your deck is a candidate for resurfacing — or whether full replacement is the more honest answer — is a hands-on frame assessment by someone who will tell you the truth regardless of which project is larger.
At The Seattle Decking Company, we do thorough frame assessments before every resurfacing quote because that's the only way to give you a price that holds. We've been building and restoring decks across King County and Snohomish County for years, and we know the difference between a deck that has 15 more years of life in its frame and one that needs to come down. Sometimes the answer is good news — a $7,000 resurfacing instead of a $20,000 replacement. Sometimes it isn't, and we'll tell you that too.
Call us at (425) 675-6259 to schedule a frame assessment. We serve Seattle, Bellevue, Redmond, Kirkland, Sammamish, Issaquah, Bothell, Woodinville, and surrounding King and Snohomish County communities. You can also reach us at The Seattle Decking Company contact page — tell us your deck age, approximate size, and any areas where you've noticed soft wood or staining, and we'll schedule a time to come out and give you a straight assessment.
Our office is in Bothell at 22722 29th Drive SE — we're centrally located for quick response across the entire Eastside and North Seattle markets.
Frequently Asked Questions
How do I know if my deck qualifies for resurfacing versus full replacement?
What does deck resurfacing cost in Seattle in 2026?
Do I need a permit to resurface my deck in Seattle or King County?
How long does deck resurfacing take?
Can I upgrade from cedar to composite when I resurface?
What frame conditions disqualify a deck for resurfacing?
Does deck resurfacing add value to my home in the Seattle market?
How does the PNW climate affect deck resurfacing material choices?
Should I replace my railing during resurfacing even if it looks okay?
What is joist tape and why does it matter during resurfacing?
How do I find a qualified deck resurfacing contractor in Seattle?
What time of year is best for deck resurfacing in Seattle?
Planning a deck in the Seattle area?
Get an onsite design review and a clear, itemized quote from a licensed local builder.
Request a Free Quote