
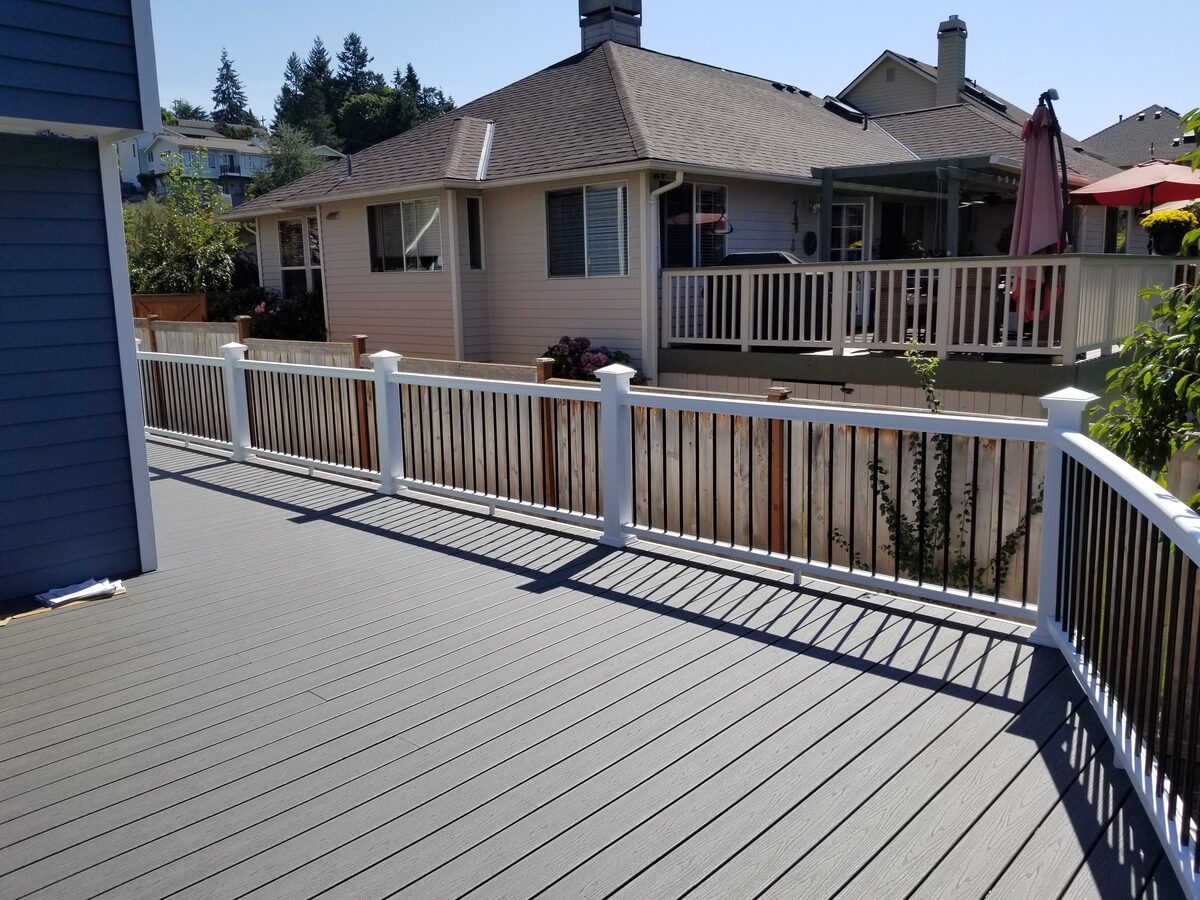
Most deck builders in the Seattle area will tell you they can "do curves." What they mean, if you press them, is that they can frame an angled corner, maybe cut a few boards on a radius for a decorative fascia. What they cannot do — and what very few contractors in King County actually have the tooling, jigs, and structural experience to execute properly — is build a true curved deck from the ground up, with a consistent radius, properly engineered framing, and bent composite boards that hold their shape for twenty years in the Pacific Northwest's relentless wet climate.
We get calls every month from homeowners who had a "curved deck" built by someone else and are now dealing with the consequences: boards that snapped back and split at the curve, framing that couldn't support the geometry, or a design that looks vaguely round from above but is really just a series of angled straight cuts disguised with trim. Curved deck construction is a specialty within a specialty, and in a market like Seattle — where the rain, the moss, the freeze-thaw cycles, and the steep topography already make deck building more technically demanding than most of the country — doing curves wrong is an expensive mistake.
This guide is written by builders who specialize in curved and custom deck work in the Seattle metro, King County, and the surrounding Puget Sound communities. We'll walk you through what actually makes a curved deck structurally different, which materials can realistically be bent and shaped, how the fabrication process works, what the honest cost premium looks like in the 2025-2026 Seattle market, and what questions you need to ask any contractor before signing a contract. If you're considering a custom curved deck in Seattle, Bellevue, Kirkland, Bothell, Redmond, or anywhere across King or Snohomish County, this is the information you need before making any decisions.
Why Curved Decks Are Structurally Different (and Harder to Build)
Before we get into materials or costs, it's worth understanding the fundamental structural challenge that separates a curved deck from a standard rectangular build. Most homeowners think of a deck as a platform — some boards nailed to a frame — and in the simplest sense, that's accurate. But the reason rectangular decks are the default isn't just aesthetics or builder preference. It's engineering efficiency. Right angles are load-transfer optimal. Beams run parallel. Joists span perpendicular at consistent intervals. Fasteners hit solid lumber at predictable locations. Every structural decision reinforces the others.
Introduce a curve, and that system begins to break down unless you actively compensate for it at every step.
The Framing Challenge
A curved deck requires curved framing, and wood does not curve without major engineering intervention. What most builders do when they "frame for curves" is create a polygonal approximation — a series of short straight segments that, from a distance, reads as a curve. This works reasonably well aesthetically, but the shorter the segments, the more complex the framing connections become. Every joint is at a non-standard angle. Every joist connection has to be cut and fastened at that angle. Header boards and rim joists have to be laminated from thinner stock to achieve the curve, typically built up from three or more layers of 3/4-inch plywood or 1x lumber ripped and bent around the framing perimeter.
At The Seattle Decking Company, we use engineered rim systems for our curved decks — laminated rims built up in multiple layers, each layer offset at the curve so the finished rim has structural continuity around the full radius. This is more material and more labor than a standard rim joist, but it's what keeps the edge of a curved deck from deflecting over time under load.
Load Distribution on Non-Rectangular Geometry
On a rectangular deck, load paths from the decking surface travel through joists to beams to posts to footings in a clean, predictable hierarchy. Curved sections interrupt this. Joists on a curved deck often need to be fanned — running at different angles from a common beam — to maintain adequate support across the curved section. This means no two joists in the curved section are parallel. Each one is cut at a unique angle at both ends. Each one has to be fastened independently, with careful attention to the angle of the fastener relative to the wood grain.
In Seattle specifically, this is compounded by our seismic considerations. King County sits in a seismically active region, and deck lateral loads — the horizontal forces that try to rack a deck sideways during an earthquake — are addressed in structural requirements that most rectangular deck designs handle implicitly through their geometry. A curved deck needs explicit lateral bracing detailing, which should be part of any engineered plan submitted for permit.
Important
Span Tables Don't Apply the Same Way
Standard deck span tables — the published guides that tell you how far a 2x10 joist can span at 16 inches on center — are written for straight rectangular framing. When joists are fanned, their effective span changes. When rim boards are curved, the bearing surface geometry changes. An experienced curved deck builder knows how to interpret and apply span table data to non-standard geometry, or knows when a project requires a structural engineer's stamp. Most general contractors and even many deck specialists do not have this specific experience, and that's the core reason why curved deck failures happen.
See our detailed breakdown of structural and material tradeoffs in our composite vs. cedar decking Seattle guide, which covers framing species selection and why western hemlock dominates PNW structural framing over Douglas fir alternatives.
Which Materials Actually Bend: Composite vs. Wood vs. PVC
Not all decking materials respond the same way to curved installation. The material you choose for your curved deck will determine not just the aesthetics but the fabrication method, the radius you can achieve, the long-term durability of the curve, and to a significant degree, the overall project cost. Here's what actually works and what doesn't.
Composite Decking: The Right Answer for Curves
Composite decking — products like Trex, TimberTech, Fiberon, and AZEK — is the material of choice for curved deck construction, and the reason is straightforward: it can be heated until it becomes pliable, shaped around a curved form, and held until it cools back to a rigid state that retains the new shape permanently.
The process, which we'll detail in the next section, involves heating composite boards to approximately 250°F — hot enough to make the thermoplastic polymer binder in the composite matrix temporarily flexible without degrading the material. At this temperature, a standard composite board that would snap if you tried to force a tight bend can be shaped smoothly around a curved jig, then held with clamps and ropes while it cools. The result is a board that holds the curve without internal stress, without surface cracking, and without any tendency to spring back toward straight over time.
TimberTech's own guidance on curved composite decking confirms that PVC-based and composite boards can be heated and bent to create curved edges that complement organic shapes, with wood offering little usable flex by comparison. In practice, all the major composite brands perform similarly in the bending process, though PVC-dominant products like AZEK tend to reach pliability at slightly lower temperatures and hold curves with marginally less risk of surface marking from the jig contact.
For our curved deck projects in Seattle, we've worked extensively with Trex Transcend and TimberTech AZEK for curved sections. Both materials perform well in the PNW climate, resist moisture absorption, and hold curves over the long term. If you're comparing these products in more detail, our Trex vs. Fiberon vs. TimberTech Seattle guide covers their specific performance characteristics in our climate.
Wood: Technically Possible, Practically Problematic
Cedar, pressure-treated lumber, and other natural wood species offer very little flexibility at room temperature. Forcing a tight curve in a standard cedar board will crack the wood fibers on the tension face and crush them on the compression face. The techniques that do work with wood — steam bending, kerf bending (cutting a series of shallow parallel cuts across the back face to allow the board to flex), or laminating thin strips — all require significantly more time, specialized equipment, and skill than composite bending, and the results are less consistent and less durable in a wet climate.
Steam bending wood requires a steam box and specific moisture content management before and after bending. Kerf bending produces a curve but weakens the board structurally and leaves the kerfs exposed unless they're filled and painted — which is difficult to maintain in Seattle's climate where any paint failure opens a moisture pathway. Laminated curves from thin strips produce excellent results structurally but are labor-intensive to execute at the scale of a full deck surface.
The bottom line: if you want true curves in your decking surface, use composite. If you're committed to a natural wood deck, design around geometric angles and straight sections rather than true radius curves. Our cedar deck sealing Seattle guide covers the maintenance commitment for natural wood in the PNW, which is worth reading before committing to a wood surface in any configuration.
PVC Decking: Best Flexibility, Premium Price
Pure PVC decking products — AZEK being the most prominent — are technically easier to bend than wood-fiber-composite products because there's no wood content to resist the bend or potentially delaminate under heat. PVC reaches its working temperature faster, bends to tighter radii, and cools with excellent surface consistency. The tradeoff is cost: AZEK PVC products run at the high end of the composite category, adding perhaps 10–15% to material costs compared to entry-level composites like Trex Select.
For high-visibility curved sections where surface quality and tight radius are priorities — a curved railing cap, a curved fascia band, or an accent section around a fire pit — PVC products are worth the premium. For the field decking on a large curved platform, standard composite performs well enough at lower cost.
How the Bending Process Works: Heat, Jigs, and Radius Limits
Understanding the technical process behind composite bending helps you evaluate whether a contractor actually has curved deck experience or is telling you what you want to hear. Here's what the process actually looks like on a properly executed curved deck build.
The Heating Process
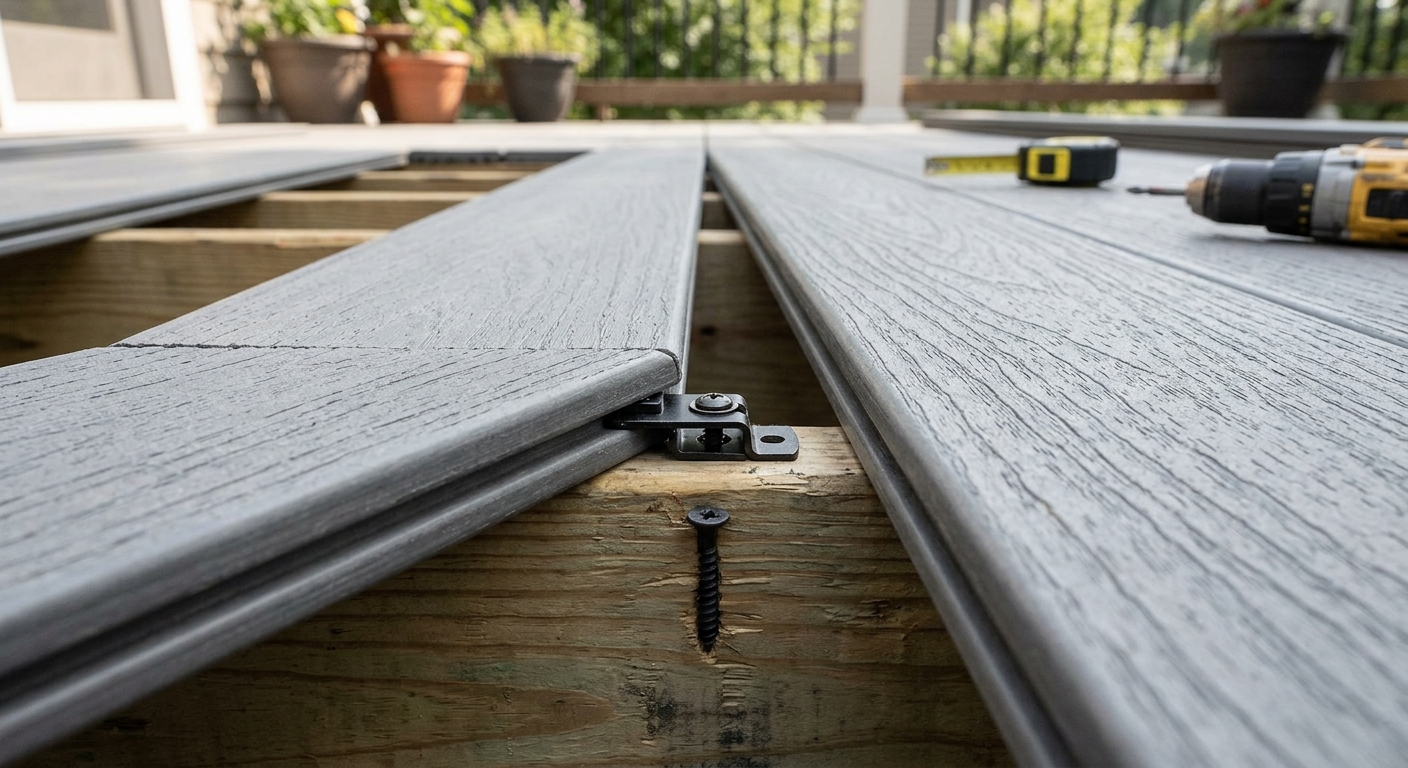
As noted above and documented by experienced curved deck builders like Woodcraft Build, composite and PVC decking boards are heated to approximately 250°F to become workable. The method used to apply this heat matters. Propane heat blankets or heat guns are the most common approaches. Heat blankets — electric resistance blankets similar to commercial concrete curing blankets — are generally preferred because they apply consistent, even heat across the full board width, reducing the risk of overheating one section while another remains too stiff to bend.
Heat guns are faster to set up but require constant movement to avoid hot spots. A hot spot in a composite board can cause surface marking, bubbling, or discoloration. On a high-end deck surface, these marks are unacceptable. Experienced builders know their equipment and know how long a given board cross-section needs to heat before bending.
The heating process typically takes 15–30 minutes per board depending on board width, thickness, and the ambient temperature (which matters more in a Seattle winter than a Phoenix summer). On a large curved deck with dozens of bent boards, the heating and bending process alone can add multiple days to the construction schedule.
Jig Construction and Radius Templates
Before a single board is heated, the bending jigs have to be built. A jig is simply a curved form — usually built from plywood or OSB cut to the desired radius — around which the heated board is bent and clamped while it cools. The jig has to be accurate because the cooled board will closely follow the jig's curve. A jig that's 2 inches off in radius produces boards that don't fit the framing they were intended for.
For a full curved deck, we typically build full-scale radius templates in our shop, verify the template against the engineered plans, and then fabricate the jigs from that template. This pre-fabrication process is part of what drives the cost premium on curved decks — it's real shop time and material before we ever show up on site.
The bending jig also needs to account for spring-back. Just like steel or other materials, composite boards that are bent and released will relax slightly from the bent position. Experienced builders know the spring-back characteristics of their materials and overbend slightly to compensate. A builder doing their first curved deck often discovers spring-back the hard way.
Radius Limits by Material
Not all radii are achievable with all materials. Composite and PVC boards have minimum bend radii below which the material will crack or deform unacceptably even when heated. These limits vary by product, board thickness, and board width. As a general guide for standard 1-inch-thick composite decking:
| Material | Approximate Minimum Radius | Notes |
|---|---|---|
| AZEK PVC (5/4 x 6) | 2–3 feet | Excellent flex, fastest heating |
| TimberTech composite (1" x 6") | 3–4 feet | Good performance, consistent quality |
| Trex Transcend (1" x 6") | 3–5 feet | Standard composite, reliable results |
| Fiberon composite (1" x 6") | 4–5 feet | Slightly stiffer than Trex at equal temps |
| Cedar (5/4 x 6) | Not recommended | High failure rate, not suitable for true curves |
These are working estimates, not manufacturer specifications for bending — manufacturers typically don't publish bending radii because it's not an advertised feature of their products. These numbers come from field experience building curved decks.
Tip
Clamping, Cooling, and Quality Control
Once a board is bent to the jig, it has to be clamped firmly against the form while it cools. Cooling time depends on board mass and ambient temperature — typically 20–45 minutes for a full cure. Rushing this step is one of the most common errors in curved deck fabrication. A board that's pulled from the jig too early will continue to relax and spring back, producing inconsistent radii across the field.
After cooling, bent boards need to be stored carefully — stacked flat or on a consistent curve support — until installation. Boards stacked wrong can deform, especially in Seattle's variable spring temperatures where a storage area might see 40°F nights and 70°F afternoons in the same week.
The Real Cost Premium: What Curves Add to a Seattle Deck Budget
Let's talk money, because this is where a lot of conversations about curved decks stall out. Homeowners come in with a Pinterest image of a flowing curved deck and leave with sticker shock when they get a realistic quote. Understanding where the premium comes from makes it easier to evaluate whether you're being quoted fairly or padded.
Installed cost ranges for 200 sq ft deck. Curved premium applies to full curved build. Source: Seattle Decking Company field data, 2025–2026.
| Category | Value |
|---|---|
| Pressure-Treated Basic | $20 |
| Cedar Standard | $30 |
| Composite Standard | $38 |
| Composite Curved (Full) | $49 |
| Composite Curved (Accent Only) | $41 |
The Baseline Seattle Deck Budget
Per market data from multiple Seattle-area deck contractors and our own project history, a typical 200 square foot composite or cedar deck in Seattle costs between $8,000 and $14,000 before any curve premium is applied. Full projects with stairs, railings, and lighting regularly reach $10,000 to $20,000 or more. Our deck cost Seattle 2025 guide breaks down these numbers in detail by material category and project scope.
On a per-square-foot basis:
- Pressure-treated lumber decks: $15–$25 per square foot installed
- Cedar or redwood decks: $25–$35 per square foot installed
- Composite decking (Trex or equivalent): $30–$45 per square foot installed
These ranges reflect Seattle market labor rates, permitting costs, and the material premiums that come with PNW climate requirements like corrosion-resistant fasteners and pressure-treated structural lumber.
The Curve Premium: Where the Money Goes
According to data from multiple Seattle-area contractors and our own job costing, curved deck layouts add 15–30% to the total project cost compared to an equivalent rectangular build. Olympic Decks' Seattle cost guide confirms this range, attributing it to custom engineering and carpentry demands. Here's how that premium breaks down in practice:
Design and engineering (added cost: $500–$2,500). A curved deck requires engineered drawings in most Seattle and King County permit applications. Even where it technically doesn't, it should. An engineer's stamp adds credibility to the permit application and ensures structural adequacy. Budget $800–$1,500 for a structural engineer's review and stamp on a curved residential deck.
Jig fabrication and shop time (added cost: $300–$800). Building accurate radius jigs before the project starts is shop time that doesn't show up on site. Experienced contractors include this in their quotes; those who don't will find themselves burning time on site trying to fabricate jigs under pressure.
Extended bending and installation labor (added cost: 20–35% of labor). Bending composite boards, waiting for cooling, verifying radius consistency, and installing boards that are all slightly different in their exact geometry takes significantly more time than installing straight boards. A field that might take two carpenters one day in a standard layout might take three carpenters two days in a curved layout.
Material waste (added cost: 8–15% of material). Curved sections require cuts at angles, often at both ends of a board, and curved fascia cuts that generate significant offcuts. Unlike rectangular builds where offcut material can often be reused elsewhere on the same project, curved cuts tend to produce waste that can't be repurposed. Good estimators build this into the material takeoff.
Rim and fascia systems (added cost: $400–$1,200). Curved rim joists require laminated systems or engineered rim products. Curved fascia boards — the visible edge treatment on the outside of the curve — require the same heating and bending process as the field decking, and they're often more visible so the quality standard is higher.
Curved Accent vs. Full Curved Deck
One way to manage the cost of a curved design is to limit the curve to a specific section of the deck rather than running curves through the entire build. A curved section at the edge of a rectangular deck — around a hot tub, at the transition to a lower level, or along a bay window wall — can add tremendous visual impact at a fraction of the cost of a fully curved deck.
Decks.com's resource on curved deck construction notes that curved sections within a larger deck carry a smaller premium of 10–15% on the curved portion only. On a project where the curved section is, say, 40 square feet of a 240 square foot total deck, that localized premium is manageable — perhaps $600–$1,200 extra on the curved portion versus making the entire 240 square feet curved.
This "accent curve" approach is what we recommend for homeowners who love the look of curved decks but are working within a defined budget. You get the visual payoff of the curve at the most impactful location — usually the outward-facing edge or a feature section — without paying the full premium across the entire deck surface.
Key insight
Seattle-Specific Considerations: Rain, Permits, and Fastener Choice
Building a curved deck anywhere requires skill. Building one in the Seattle metro requires additional awareness of local climate, permitting requirements, and material specifications that separate a deck that looks great on opening day from one that still looks great in year fifteen.
The PNW Climate and What It Does to Curved Decks
Seattle receives an average of 38 inches of rain annually, with the bulk falling between October and April. But it's not just the total rainfall that matters for deck construction — it's the constant ambient humidity, the prolonged wet seasons that keep wood and composite surfaces wet for weeks at a time, and the moss and algae growth that accelerates on any surface that retains moisture.
For curved decks specifically, moisture management is critical at two points: the bend itself, and the fastener locations. A curved board has internal stress gradients that a straight board doesn't — even with composite material that's been properly heated and cooled, there are areas of the board cross-section that are in slight tension and others in slight compression. In a wet climate where materials cycle through wet and dry states repeatedly, these stress gradients can drive differential movement that causes gapping, lifting, or in worst cases, cracking at the bend.
Proper composite selection matters here. Look for products with low moisture absorption rates. Among the major brands, AZEK PVC absorbs essentially zero moisture (it's not wood). Trex Transcend and TimberTech Legacy are capped composites with a polymer shell over the wood fiber core, which dramatically reduces moisture absorption compared to uncapped products. Avoid uncapped or "first generation" composite products for curved applications in Seattle — the wood fiber exposure at cut ends of curved boards creates a direct moisture pathway.
Fastener Choice in a Wet Climate
Dunn Lumber's Seattle deck building guide is explicit about fastener requirements: galvanized or stainless steel fasteners are essential in Seattle's moisture environment, adding 5–10% to material costs but preventing the rust, staining, and structural failure that carbon steel fasteners develop within just a few years of exposure.
For curved decks, this matters even more because fastener locations on a curved section are often at non-standard angles, which means the fastener carries more complex load vectors than a standard vertical-drive screw. A weakened or corroded fastener in a curved section is a structural concern in ways that a corroded fastener in a straight section isn't.
Our standard for all Seattle area curved decks:
- Structural framing connections: hot-dipped galvanized or stainless steel joist hangers and post bases
- Composite deck board fasteners: 316 stainless steel hidden clip systems where geometry allows, stainless steel face screws where clips can't be used
- Rim lamination fasteners: 3-inch hot-dipped galvanized ring-shank nails or structural screws rated for treated lumber contact
The hidden clip systems deserve a specific note for curved sections. Standard hidden clips for straight deck installation often can't accommodate the angle between adjacent boards in a curved section. Some manufacturers produce curved installation clips; more often, experienced builders use a combination of clips for the straight sections and face screws for the curved portions, chosen to match the decking color.
King County and Seattle Permit Requirements
Curved decks almost always trigger permit requirements under both the Seattle SDCI and King County DLS processes. Any deck 30 inches or more above grade requires a building permit in Seattle and most King County jurisdictions. Curved decks — because of their non-standard framing geometry — typically require engineered drawings rather than the pre-approved "prescriptive" framing details that simple rectangular decks can use.
Our deck permit King County guide covers the specific documentation requirements and timelines in detail. For curved decks specifically, plan on submitting:
- Site plan showing deck location relative to property lines and house
- Structural framing plan showing joist layout, beam sizes, post locations, and footing specifications
- Detail drawings of the curved rim construction and fastener schedule
- If elevated: full elevation drawings showing post heights and lateral bracing
King County permit review timelines vary by jurisdiction. Seattle SDCI has improved over-the-counter review availability for residential projects. Unincorporated King County permit reviews can take 3–8 weeks for residential structural projects. Factor this into your project timeline — the permit clock starts running the day you submit, not the day you want construction to start.
Design Possibilities: Full Radius Decks vs. Curved Accent Sections
Curved decks exist on a spectrum from a subtle curved nosing on one corner to a fully organic, multi-radius platform that flows around an entire backyard. Understanding what's actually possible — and what makes sense for different site conditions and budgets — is part of what we discuss with every client before design begins.
Full Radius Deck Designs
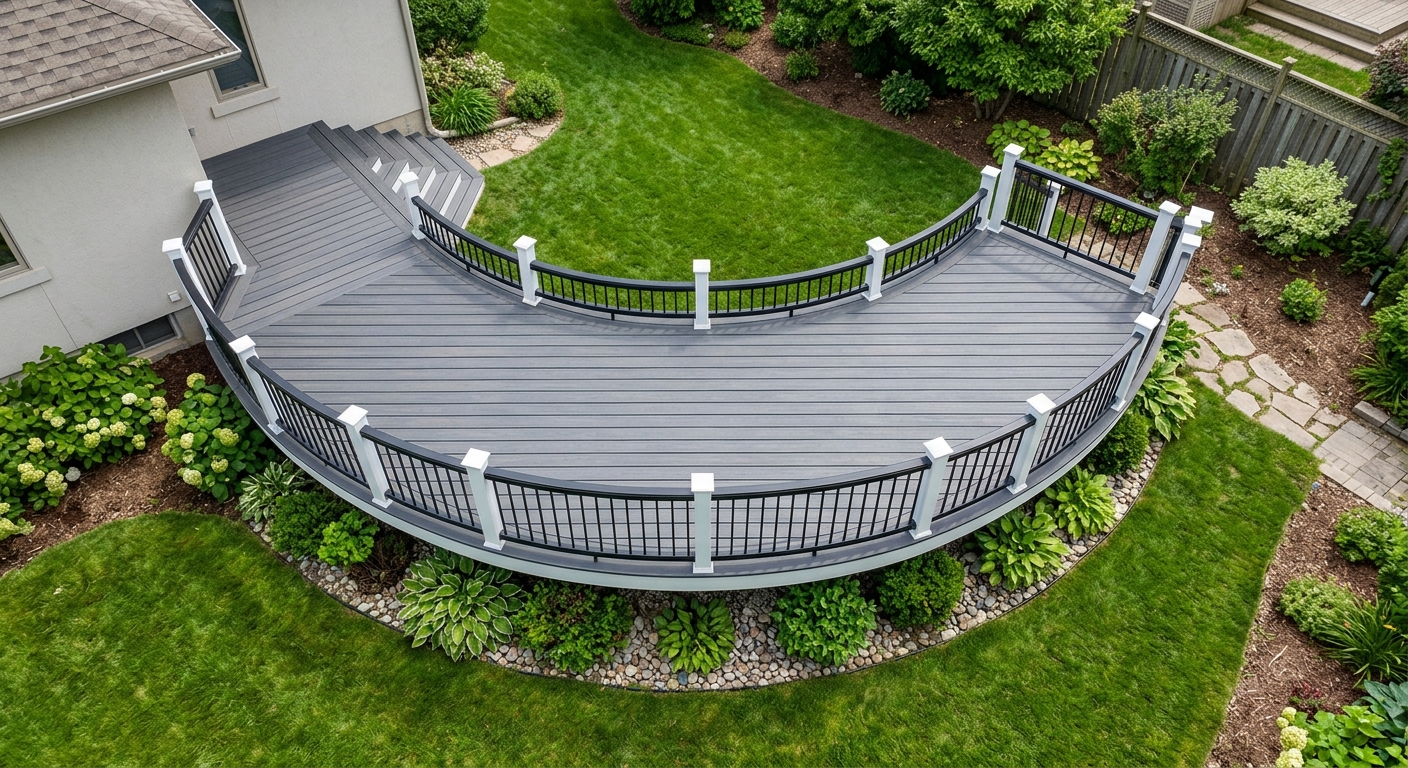
A full radius deck — where the entire outward-facing perimeter follows a consistent or compound curve — is the most visually dramatic option and the most technically demanding to build. These designs work particularly well on:
Elevated decks with clear sight lines. When a deck sits 6 feet or more above grade on a sloped lot — which is extremely common in Seattle neighborhoods like Seward Park, Magnolia, Queen Anne, and the hillside neighborhoods of Bellevue and Kirkland — the outward curve creates a dramatic viewing platform effect. The curved edge softens the visual bulk of the structure while maintaining a generous usable surface area.
Decks designed around a focal landscape feature. If the deck is oriented toward a specific view — a water view in Leschi or Madrona, a mountain view in Renton or Auburn, or a garden focal point in a Redmond or Sammamish backyard — a curved edge draws the eye toward that view while framing it from the platform.
Decks that wrap around or integrate with existing trees. One of the most satisfying curved deck applications in the Seattle area is a deck that wraps around an existing large tree — a Douglas fir, a mature maple, a heritage cherry. The curve allows the tree trunk to pass through or near the deck surface without requiring either the tree's removal or an awkward rectangular notch.
Full radius decks require the most engineering investment, the most complex framing, and the highest fabrication labor content. Expect the full 20–30% project premium for a deck where curves dominate the design.
Curved Accent and Transition Sections
For most homeowners, the optimal curved deck design isn't a fully curved platform — it's a primarily rectangular deck with one or more specifically placed curved elements that add visual richness without driving up cost across the entire project.
Curved leading edge. The most common and cost-effective curved element: a rectangular deck where the outward-facing edge follows a gentle curve rather than a straight line. The framing is predominantly rectangular; only the last 2–3 feet of joist span and the rim/fascia system need to follow the curve. This approach can be executed with a 10–20% premium on just that section of the deck.
Curved corner treatments. Replacing the sharp 90-degree corners of a rectangular deck with a quarter-circle or elliptical radius softens the aesthetic significantly. These corner curves require relatively little additional structural work but make a substantial visual difference, particularly when combined with matching curved railing sections.
Hot tub surrounds and fire pit circles. A rectangular deck with a curved section around a hot tub or fire pit is perhaps the most functionally motivated curved design. The curve allows comfortable seating clearance around the feature without wasting square footage, and the visual organization of the space is immediately clear. As noted earlier, curved sections of this type carry a 10–15% premium on the curved portion only.
Curved stair landings. Curved landings at the base of a stair run are a relatively straightforward curved application that dramatically improves the visual transition from deck to grade. The landing is a small area, so the absolute cost of the curve is modest even if the per-square-foot premium is similar to a full curved deck section.
Railing Integration on Curved Decks
Whatever the deck surface design, the railing system on a curved deck deserves careful attention. Standard straight balusters and rails don't accommodate curved sections without individual fitting of each baluster, which is time-consuming. Cable railing systems — using horizontal stainless steel cables in a curved post framework — work well for curved sections because the cables can follow the curve with appropriate post positioning. Our cable railing Seattle guide covers this in detail.
Glass panel railing systems on curved sections are more complex; curved glass panels need to be ordered custom, which adds lead time and significant cost. For tight-radius curves, glass panels are often impractical and cable or composite baluster systems are more realistic choices.
Our deck railing options Seattle guide covers the full range of railing systems and how they interact with curved deck designs.
Finding a Seattle Builder Who Actually Specializes in Curves
The word "specialty" gets used loosely in the contractor market. Most deck builders have seen a curved deck; very few have built enough of them to have a genuine process, proper tooling, and experienced crew. Here's how to separate actual curved deck specialists from contractors who are willing to figure it out on your dime.
Questions to Ask Before Hiring
"How many curved decks have you built in the last two years, and can I see completed examples?" A contractor who does curved work regularly will be able to cite specific projects and, ideally, connect you with those clients for references. One or two examples over several years is not a specialty. Ten or fifteen is.
"What's your bending process for composite boards, and what equipment do you use?" As we've described above, heat blankets or heat guns, proper jig fabrication, and controlled cooling are the standard process. A contractor who describes a different process — or who seems unfamiliar with the process entirely — is not a curved deck specialist.
"Who does your engineered drawings, and how do you handle permit submission?" For curved decks in King County, engineered drawings are the norm. A contractor who has a working relationship with a structural engineer they've used for previous projects is a good sign. One who says "we'll figure out the permit when we get there" is a red flag.
"What's your minimum radius, and how does that interact with the design I'm describing?" Every experienced curved deck builder knows their material limits. If they can't answer this question specifically, they're guessing.
"How do you handle the laminated rim system on a curved build?" The curved rim is one of the most failure-prone details on a curved deck built by an inexperienced contractor. Understanding their approach to rim construction tells you a great deal about their structural knowledge.
Note
Red Flags in Curved Deck Quotes
No engineering or permit line item. Curved decks in Seattle need permits. If a quote doesn't include permit fees and engineering (where applicable), either the contractor is planning to skip the permit or they haven't accounted for these real costs and the quote will change.
No mention of jig fabrication. If the quote has no line item or narrative explanation for bending and forming work, the contractor either doesn't know what's involved or is planning to figure it out on site — which means your project pays for their learning curve.
Material specs that don't include moisture-resistant fasteners. In a Seattle bid, if fastener specifications aren't called out as galvanized or stainless steel, the contractor isn't thinking about PNW-specific durability requirements.
Suspiciously low bid relative to other quotes. On curved decks specifically, significant underbidding usually means either the contractor doesn't understand the scope of work, plans to cut corners on the fabrication process, or is intending to substitute cheaper materials. The real cost premiums on curved decks are driven by labor and process, not arbitrary markup.
What to Expect: Timeline, Process, and Working Through Construction
Once you've selected a contractor and signed a contract, here's an honest account of what the construction process looks like for a curved deck in Seattle.
Pre-Construction Phase (3–12 Weeks Before Start)
The pre-construction phase for a curved deck is longer than for a standard rectangular build. After the initial site assessment — which Dunn Lumber's design tips feature notes should always include a professional site visit to assess architecture, functionality, and design needs — the sequence looks like this:
- Design development (1–2 weeks): Drawings that capture the radius geometry, placement, and dimensions
- Engineering review (1–2 weeks): Structural engineer reviews and stamps drawings
- Permit application (1–3 weeks in Seattle; 3–8 weeks in unincorporated King County): Application submitted; permit issued
- Material ordering (1–2 weeks after permit): Composite decking, structural lumber, hardware
- Jig fabrication (in shop, can overlap with permit review): Radius templates and bending jigs built and verified
By the time construction starts, you've typically invested 6–12 weeks of pre-construction process. This is normal and appropriate. Homeowners who expect to go from "yes, let's do it" to "construction starts Monday" on a curved deck are going to be disappointed — or are going to end up with a contractor who cut the pre-construction process short, which always shows up later in execution quality.
Active Construction Timeline
Most deck builds in Seattle run 1–3 weeks of active construction after permits are secured. Curved designs extend this timeline due to specialized fabrication steps. For a 200–300 square foot curved composite deck in Seattle with standard site access, expect:
| Phase | Straight Deck Timeline | Curved Deck Timeline |
|---|---|---|
| Footing excavation and pour | Day 1–2 | Day 1–2 (same) |
| Structural framing | Day 2–4 | Day 3–6 (fanned joists, laminated rim add time) |
| Composite board bending | Not applicable | Day 4–7 (all bent boards fabricated before installation) |
| Decking installation | Day 4–6 | Day 7–10 (individual board fitting) |
| Stairs and railing | Day 6–9 | Day 9–13 (curved rail sections) |
| Lighting, trim, inspection | Day 9–12 | Day 12–16 |
A curved deck that a straight deck equivalent would complete in two weeks might take three to three-and-a-half weeks of active construction. This is honest — anyone telling you they can build a quality curved deck faster than this is either working with a very large crew or cutting steps.
Inspections and Final Walkthrough
Most curved deck projects in Seattle require at least two inspection visits: a framing inspection after the structural framing is complete but before decking is installed, and a final inspection at project completion. For elevated decks, there may also be a footing inspection before concrete is poured.
The framing inspection on a curved deck is particularly important because it's the inspector's opportunity to verify that the non-standard geometry has been executed as per the approved drawings. A framing inspection that passes on a curved deck gives you meaningful assurance that the structure is built correctly. A contractor who tries to skip or delay the framing inspection on a curved build is a serious concern.
Maintenance Expectations After Build
Once your curved composite deck is complete, maintenance is straightforward — and significantly lighter than what a cedar deck would require. Our composite deck maintenance Seattle guide covers the full maintenance protocol, but the summary is:
- Annual cleaning with composite deck cleaner and a soft brush (no pressure washing that can damage board surfaces)
- Annual inspection of fastener locations, particularly at curved sections where boards may shift slightly in the first year
- Periodic inspection of the laminated rim at the curve for any signs of delamination or fastener movement
- No staining, no sealing, no sanding
The composite surface should look essentially the same in year fifteen as it did in year one, with appropriate cleaning. The framing underneath — protected by your material specifications and fastener quality — should be structurally sound for 25–30 years or more.
Design Inspiration: Curved Decks That Work in the PNW
We've built curved decks across a wide range of Seattle-area sites, and certain design patterns consistently deliver strong results in our climate and topography. Here are some of the curved deck configurations we see work best.
The Hillside Sweeping Platform
The topography of the Seattle area — Eastside communities like Bellevue, Issaquah, and Sammamish; south-end communities like Renton and Burien; north-end neighborhoods like Lake Forest Park and Kenmore — puts a large percentage of homes on slopes where the rear yard drops away from the house. An elevated deck on this type of lot is the obvious solution, and a curved leading edge on an elevated deck turns a utilitarian platform into an architectural feature.
The curve works here because it softens the visual mass of the elevated structure from below, creates a more dynamic sight line from inside the house, and provides a better viewing relationship for anyone standing at the curved edge looking out over the slope. We typically combine this configuration with cable railing — which preserves the view through the railing rather than blocking it — and integrated deck lighting along the curved fascia for nighttime visual effect.
The Garden Deck with Tree Integration
A number of Seattle homeowners have mature landscape features — old-growth rhododendrons, heritage apple trees, established Douglas firs — that they're unwilling to sacrifice for a deck installation. A curved deck can accommodate these features with elegant results, particularly when the curve is used to route the deck around a tree trunk rather than forcing a rectangular cutout.
This type of deck requires careful framing to maintain adequate clearance around the tree for root system health (typically 6 feet minimum from the trunk for established trees) while still integrating the tree visually into the deck design. We've done several of these across the Redmond, Woodinville, and Snohomish County areas where mature tree coverage is a defining feature of residential properties.
The Multi-Level Curved Transition
On larger lots with significant grade change, a multi-level deck with curved transitions between levels is one of the most impressive outcomes we can deliver. The curved stair landings and curved edge treatments on each level create a flowing, terraced appearance that reads more like landscape architecture than conventional deck construction.
These projects sit at the upper end of the budget range — $25,000 to $45,000+ depending on size and complexity — but they deliver returns in both enjoyment and property value that simpler designs can't match. The NAR Remodeling Impact Report consistently cites deck additions as among the highest-ROI exterior projects for residential properties, with composite deck additions recovering 60–70% of project cost at resale. A well-executed curved custom deck at the high end of the quality spectrum performs even better in Seattle's competitive real estate market.
For homeowners considering the financial dimension of a custom deck investment, our deck addition Seattle guide covers ROI considerations in detail, and our deck and patio combo Seattle guide addresses how deck and hardscape integration affects both function and value.
Lighting and Accessory Integration in Curved Designs
Curved decks have a natural synergy with integrated lighting because the curve creates a visual rhythm that lighting can follow and emphasize. Fascia-mounted LED strips that trace the curve are particularly effective at night, turning the curved edge into a visual feature that defines the space from inside and outside the house. Post cap lights, step lights recessed into curved stair risers, and under-railing lighting all work well in curved deck contexts.
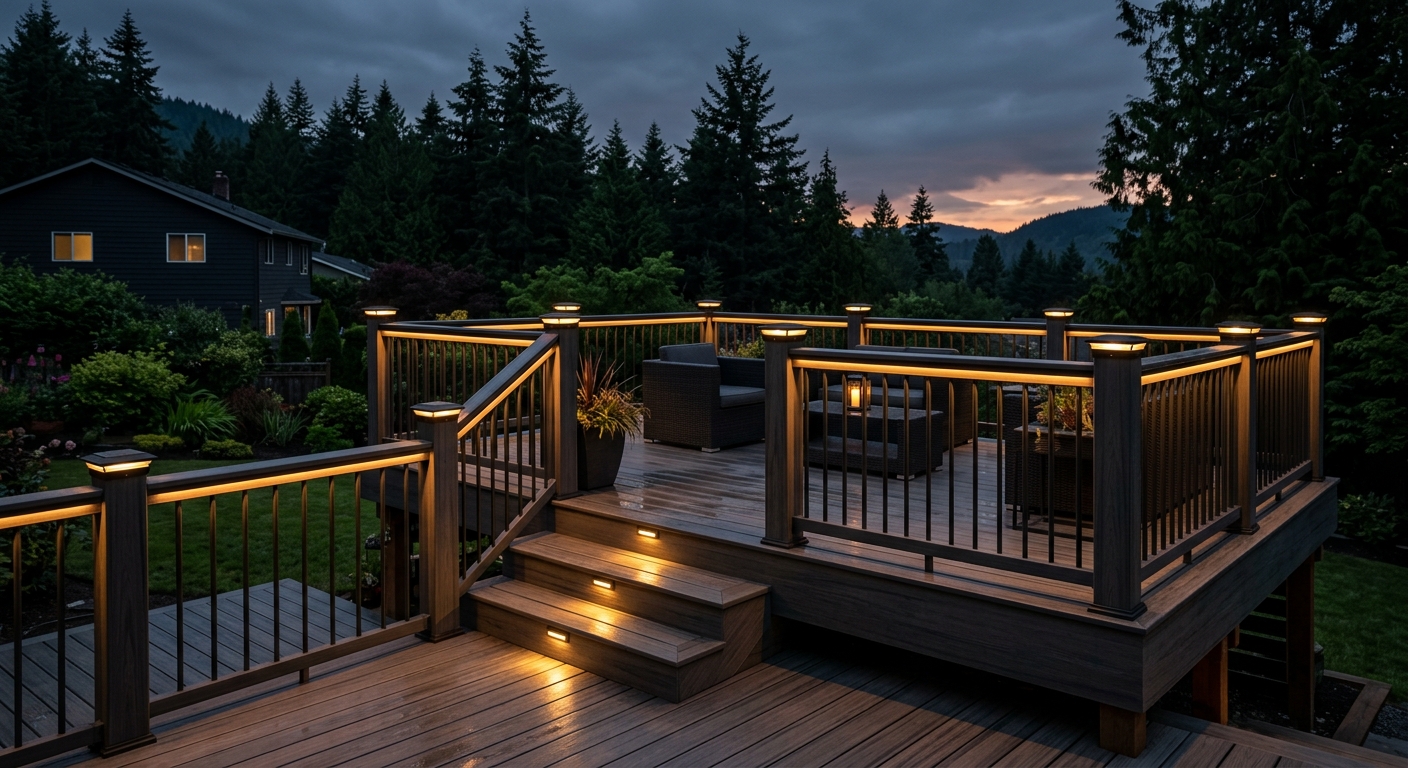
Integrated features like built-in planters (following the curve), bench seating (curved bench following the perimeter), and outdoor kitchens on curved sections all represent design opportunities that straight decks don't offer in the same way. Our design process for curved decks always includes a conversation about integrated elements early — it's much more cost-effective to rough in electrical, blocking for planters, or bench framing during construction than to add them afterward.
Getting Started: Your Next Steps With The Seattle Decking Company
If you've read this far, you're serious about a curved deck — and you deserve a contractor who's equally serious about executing it correctly. At The Seattle Decking Company, curved and custom deck construction is a genuine specialty, not an occasional accommodation. We have the tooling, the process, the engineering relationships, and the crew experience to build curved composite decks that perform in Seattle's climate and look the way you imagined them.
We serve homeowners across King County, Snohomish County, and the broader Seattle metro — from Bothell and Kenmore to Bellevue and Sammamish, from Kirkland and Redmond to Renton, Auburn, and Federal Way. Our office is located at 22722 29th Drive SE, Bothell, WA 98021, and we're accessible for consultations throughout the region.
The best first step is a site visit. Curved deck design can't be done accurately from a phone call — we need to see your site, understand your grade, assess your access conditions, and talk through what radius and scale of curve actually works with your home's architecture. From that visit, we can give you a realistic design concept, budget range, and timeline.
Call us at (425) 675-6259 to schedule your consultation, or use our online contact form at theseattledeckingcompany.com/contact. We also publish detailed cost and material information on our deck cost Seattle page if you want to do more research before reaching out.
We look forward to showing you what's actually possible with curved deck construction in the Pacific Northwest — not just what's easy.
Frequently Asked Questions
How much more does a curved deck cost compared to a standard rectangular deck in Seattle?
What's the best decking material for a curved deck in Seattle?
Can cedar or pressure-treated wood be used for a curved deck?
Do I need a permit for a curved deck in Seattle or King County?
How long does it take to build a curved deck in Seattle?
What fasteners should be used on a curved deck in Seattle?
What's the minimum radius achievable on a curved composite deck?
Is a curved deck worth the extra cost?
Can I add a curved section to an existing straight deck?
How do I maintain a curved composite deck in Seattle?
What types of railing work best with curved decks?
How do I find a contractor in Seattle who actually specializes in curved decks?
Planning a deck in the Seattle area?
Get an onsite design review and a clear, itemized quote from a licensed local builder.
Request a Free Quote