
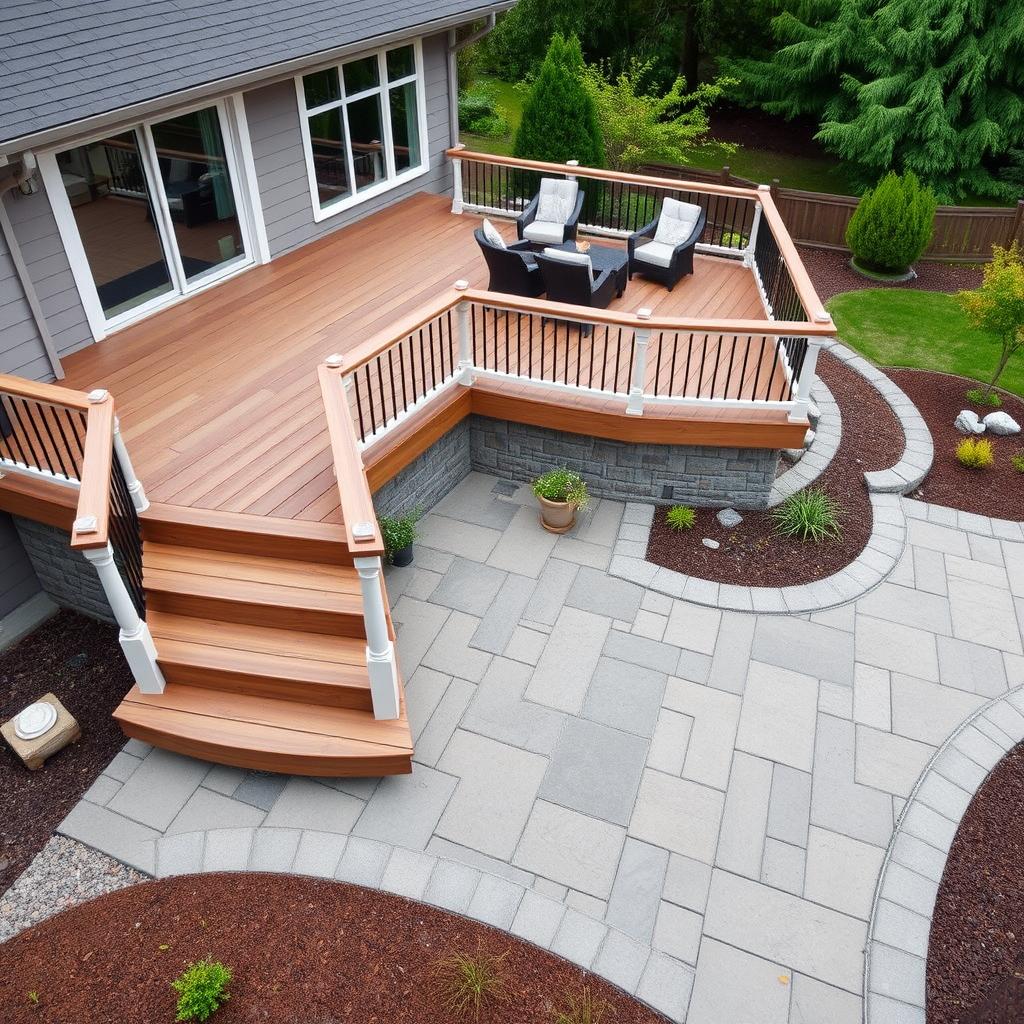
Most Seattle homeowners think of a deck and a patio as two separate projects — a deck gets added one year, a patio maybe gets poured a few summers later, and somewhere along the way you end up with a disjointed backyard that never quite flows together. We see this constantly in Kirkland, Issaquah, Maple Valley, and Renton — beautiful homes with an elevated deck bolted onto the back and a cracked concrete pad sitting disconnected ten feet below. Two spaces that were never designed to talk to each other.
When you plan a deck and patio combo from the start — treating the elevated deck, the transition stairs, and the ground-level patio as a single integrated outdoor living system — something different happens. The kitchen door opens onto a composite deck with a dining table and a grill. Steps cascade down to a stone paver patio with a fire pit and lounge furniture. Overhead string lights tie everything together. Kids can play on the lower level while adults cook above. The space functions because it was designed to function, not assembled piecemeal over a decade of separate contractor visits.
Seattle's topography makes this approach particularly relevant. Homes in Bellevue, Sammamish, Newcastle, and along the hillside neighborhoods of West Seattle often sit above sloped lots where a single ground-level solution simply doesn't work — the terrain demands an elevated structure. But those same sloped lots often flatten out below the deck line, creating a natural patio footprint that would otherwise go unused. The deck and patio combo isn't just an aesthetic preference here. In many PNW backyards, it's the most logical way to make the land work for you.
What Is a Deck and Patio Combo — and Why It Works So Well in Seattle?
A deck and patio combo is exactly what it sounds like: an elevated deck structure connected by stairs to a ground-level patio, designed and built as a single outdoor living system. The deck is a raised wood or composite platform — typically attached to the house and accessed directly from the kitchen, dining room, or primary living area. The patio sits below and in front of the deck, occupying the ground level of the yard. Stairs connect the two, and together they create a layered, multi-zone outdoor space that no single element could achieve alone.
The reason this works so well in Seattle has everything to do with how PNW homes are built and where they sit on the land. Most single-family homes in King County — whether in Redmond, Black Diamond, Auburn, or Shoreline — were constructed with the main living floor elevated several feet above grade. That's partly a function of the local building code, partly a response to the wet soil conditions that make deep perimeter foundations necessary, and partly because so many lots here have meaningful grade change from front to back. The result is that a standard door off the kitchen or dining room in a typical Seattle home sits anywhere from 18 inches to 8 feet above the backyard. A deck is the natural way to bridge that gap.
But here's what happens when builders and homeowners think only in terms of the deck: you end up with a raised platform that's wonderful for entertaining in the summer but leaves the rest of the backyard — especially the flat or gently sloped area directly below and beyond the deck — completely underutilized. In Seattle's famously compact residential lots, that's wasted square footage you can't afford to ignore.
The Two-Level Advantage in PNW Yards
The deck and patio combo solves this by treating both levels as intentional spaces. The elevated deck captures the indoor-outdoor connection — it's where the barbecue goes, where you set the dining table, where you step outside with your morning coffee because it's directly off the kitchen. The patio below becomes a different kind of outdoor room: lower, more grounded, more intimate in some ways, and better suited to furniture arrangements that don't work on a narrow elevated deck.
In neighborhoods like Capitol Hill or Magnolia where lots are tighter, the patio area may be compact — 10 by 14 feet of stamped concrete that creates a defined lounge zone under the deck. In more suburban neighborhoods like Maple Valley or Covington where lots are larger, the patio can expand to 400 or 600 square feet of natural stone or pavers, with space for a fire pit, a sectional, and a separate dining zone with its own pergola structure.
The underlying design principle is the same regardless of scale: define two distinct outdoor environments that complement each other and connect fluidly, rather than building one large undifferentiated deck that tries to do everything and ends up doing none of it particularly well.
Seattle's Climate Argument for a Combo Layout
There's also a strong climate argument for the two-level approach in the Pacific Northwest. Seattle gets roughly 37 inches of rain per year — most of it falling as persistent drizzle from October through April. A ground-level patio that sits under an elevated deck is naturally sheltered from overhead precipitation for a significant portion of its footprint. That doesn't make it a covered outdoor room in the way a true pergola or patio cover does, but it extends the usability of the lower level during the shoulder seasons when you'd otherwise be driven indoors.
The elevated deck above, meanwhile, benefits from its height — rain drains off composite or cedar decking far more efficiently than it does from a ground-level surface, and the slight breeze that comes with elevation helps surfaces dry faster after a rain. In the mossy, damp PNW climate where ground-level surfaces can stay wet and slippery for days, having an elevated composite deck dry out by midday is not a trivial benefit.
Tip
Design Principles: Connecting Indoor Living to the Deck and Patio Below
The best deck and patio combos we've built at The Seattle Decking Company share a common characteristic: they were designed from the inside out. That means the design process starts not with the yard but with the home's interior — specifically, the rooms that open to the back of the house and the functional patterns of the people who live there.
Start at the Door
The primary connection point between your indoor living space and the outdoor system is almost always a door — sliding glass, French door, or a standard hinged entry. That door establishes the elevation of your deck (it needs to be flush or within a step or two of the interior floor), the width of the primary deck zone, and the direction of travel through the outdoor space. Everything downstream in the design flows from that door position.
In most Seattle homes, the kitchen or dining room door is the primary access point, and it's typically positioned so that the deck becomes a natural extension of the cooking and eating function. That's appropriate — grills, outdoor dining sets, and drink stations all belong adjacent to the kitchen. But if your home also has a sliding door off the primary bedroom or a living room door that faces the yard, those secondary access points should inform how the deck wraps or extends.
We've built decks in Bellevue's Crossroads neighborhood that wrap around two sides of a home, with one wing off the kitchen and another off the family room, cascading down to a central patio that both wings share as a common outdoor living area. The multi-access approach is more expensive, but it creates a fundamentally different outdoor living experience — one where there's no wrong door to exit from.
The Flow Line: From Kitchen to Patio
Once you've established the primary door connection, the next design element is the flow line — the intuitive path a person takes moving from inside to the far end of the outdoor space. In a well-designed combo, that flow line runs: kitchen door → deck → stairs → patio → far end of patio. It should feel natural enough that guests move through it without being directed.
This means stair placement matters enormously. Stairs shouldn't be tucked into a corner as an afterthought — they should be positioned where the flow naturally wants to go. For most rectangular combo layouts, that means centered on the deck's front edge or positioned on one side, depending on where the patio's primary feature (fire pit, seating area, pergola) sits.
Wide stairs — we typically recommend a minimum 48-inch width, and often go 60 to 72 inches for premium combos — serve a dual purpose. They're functional for moving furniture, grills, and large groups between levels, and they're visual anchors that signal to anyone in the yard that these two spaces belong together. Narrow stairs feel like an escape route. Wide stairs feel like an invitation.
Sightlines and Privacy
Seattle backyards in the older established neighborhoods — Ballard, Wallingford, Green Lake, Seward Park — often have neighbors close on multiple sides. Part of what makes a well-designed combo work is managing sightlines so that both levels feel private enough to actually use. A deck that's visible from three neighbors' second-story windows discourages outdoor living regardless of how beautiful it is.
Railing choices play a significant role here. Cable railing systems (which we discuss in depth in our cable railing guide) maintain sightlines from the deck to the yard but don't provide privacy screening. Privacy panels, lattice, or strategically placed evergreen plantings on the lot perimeter are the typical PNW solutions. Glass panel railings offer a different trade-off — wind protection and a sleek aesthetic without the visual barrier of wood balusters, but also no privacy benefit.
At the patio level, privacy is usually managed through planting, fencing, or overhead structures rather than the patio material itself. A 6-foot cedar privacy fence along the property line combined with tall arborvitae or Western red cedar planted inside the fence creates the kind of enclosed garden feeling that makes ground-level patios genuinely livable.
Choosing Materials: Composite Decking vs. Cedar Above, Concrete vs. Pavers Below
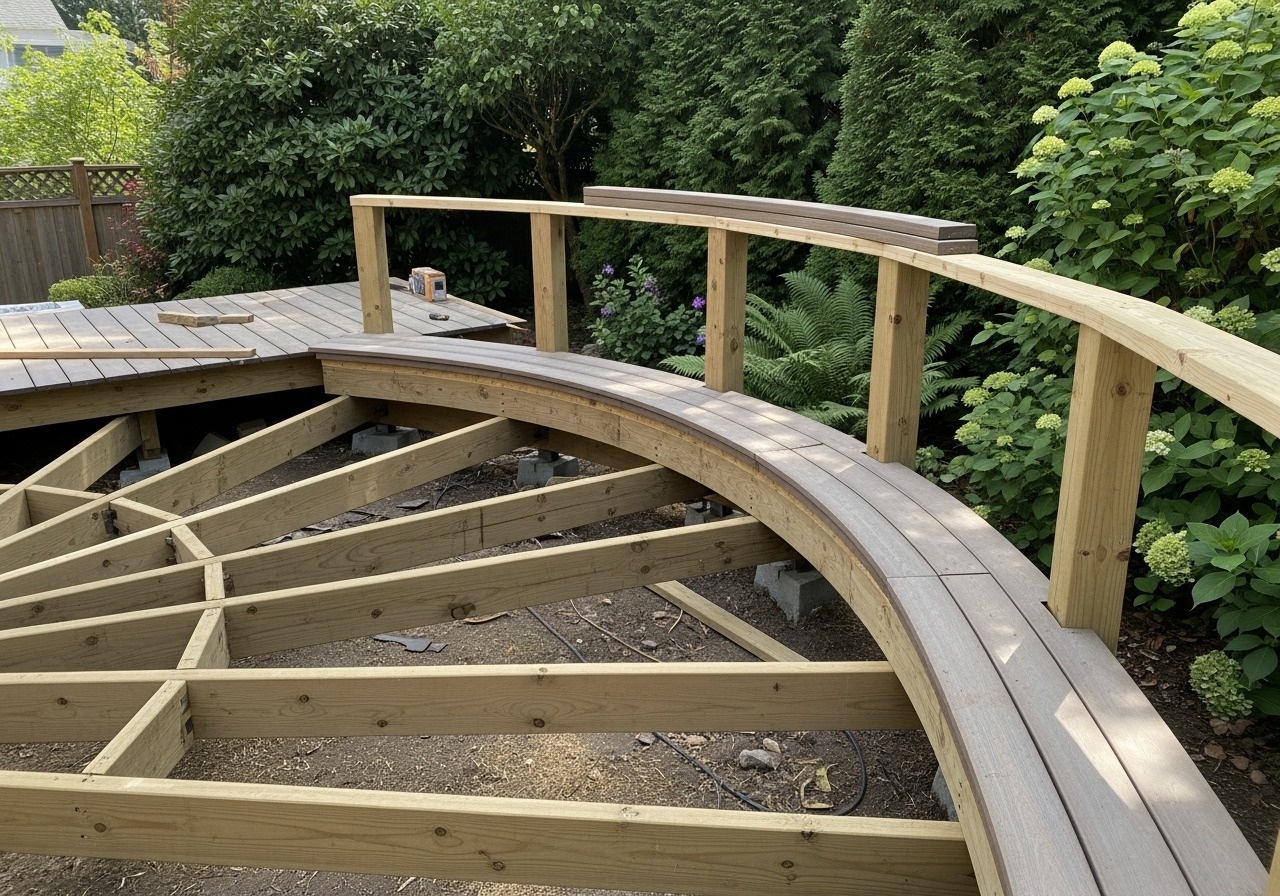
Material selection for a deck and patio combo involves two separate but related decisions — what goes on the elevated deck surface and what covers the ground-level patio. Getting both right means thinking about durability, maintenance, aesthetics, and how the two materials will read together visually from inside the house, from the deck looking down, and from the yard looking up.
Deck Surface: Composite vs. Cedar in the PNW
For the elevated deck surface in a Seattle-area combo, the two primary material choices are composite decking (Trex, Fiberon, AZEK, TimberTech) and naturally rot-resistant cedar. We've written extensively about this comparison in our composite vs. cedar guide, but here's the short version as it applies to combo builds specifically.
Cedar is a legitimate option in the Pacific Northwest — Western red cedar has natural oils that resist rot and insect damage, it's locally sourced, and the warm grain and color are hard to replicate with composite products. But cedar in a Seattle climate requires maintenance. You should plan on cleaning and resealing every 1-2 years, and even with consistent maintenance, cedar will gray and weather over time. In the context of a combo build where the deck sits above a patio, cedar also creates a maintenance access challenge — staining and sealing a deck that overhangs a finished patio requires care to avoid drips on the patio surface below.
Composite decking from manufacturers like Trex, Fiberon, AZEK, and TimberTech eliminates most of those maintenance concerns. A high-quality capped composite deck requires only periodic cleaning with soap and water — no staining, no sealing, no annual treatment. The color holds for decades, and the surface doesn't develop the splinter risk or checking that weathered cedar develops. For a combo where the deck will be the primary dining and entertaining surface, composite is almost always the right call for Seattle homeowners who want the combination to look as good in year 10 as it does in year 1.
Key insight
For a more detailed breakdown of specific composite brands, see our Trex vs. Fiberon vs. TimberTech comparison and our best decking materials guide for 2026.
Patio Surface Options: Pavers, Stamped Concrete, and Natural Stone
The ground-level patio presents a different set of material options. Unlike the elevated deck, where the structural system is wood framing regardless of the surface material, the patio is essentially a hardscape surface laid over a prepared gravel base or concrete slab. The primary options in Seattle-area combo builds are:
Concrete pavers — the most popular choice in King County for combo patio work. Concrete pavers are durable, relatively affordable ($10–$18 per square foot installed), available in dozens of colors and patterns, and can be reset if ground movement causes settling. They also complement both composite and cedar decking well, especially in earth tones like charcoal, sandstone, or slate gray that echo the color palette of most composite decking products.
Natural stone — bluestone, travertine, and flagstone are the most common choices in premium combo builds. Natural stone costs more ($18–$30+ per square foot installed) but creates a genuinely different aesthetic — organic, textured, and impossible to replicate with manufactured materials. In neighborhoods where homes are higher-end and the outdoor space is meant to feel like a garden room rather than a utility space, natural stone on the patio is worth the premium.
Stamped concrete — a poured concrete slab with a pattern pressed in before curing, often colored to mimic pavers or stone. Stamped concrete is cost-competitive with mid-range pavers ($12–$22 per square foot) and creates a seamless, unified surface without the joint lines of pavers. The trade-off is that it cracks over time (Seattle's clay soil and freeze-thaw cycles are hard on concrete slabs), and individual sections can't be lifted and reset the way pavers can.
Gravel or decomposed granite — occasionally used for casual, naturalistic patio zones, particularly in the lower sections of large sloped lots. Very affordable ($4–$8 per square foot) but not appropriate for primary outdoor dining or entertaining spaces in a finished combo build.
Material Pairing Logic
The guiding principle for material pairing in a combo is complementary but distinct — the two surfaces should clearly belong to the same design family while being different enough that they define separate spaces. The most common and successful pairings we use:
| Deck Surface | Patio Material | Visual Result |
|---|---|---|
| Trex Transcend Tiki Torch (warm brown) | Charcoal concrete pavers | Warm-cool contrast, modern-organic |
| TimberTech Antique Leather (gray-brown) | Bluestone natural stone | Pacific Northwest natural palette |
| AZEK Aged Teak (golden) | Travertine pavers | Warm, Mediterranean-inspired |
| Cedar (natural or stained brown) | Buff concrete pavers | Traditional Northwest warmth |
| Fiberon Sanctuary Weathered Teak | Slate gray porcelain tile | Contemporary, low-maintenance |
| Trex Transcend Island Mist (gray) | Light sandstone pavers | Clean, coastal, minimal |
How to Define Functional Zones in Your Combo Layout
One of the most common mistakes we see in deck and patio combo designs is treating each level as a single undifferentiated space — a big deck up top where you put some furniture and a patio down below where you put some more furniture. The result is a yard that has a lot of surfaces but doesn't feel purposeful or organized.
The better approach — and the one that consistently produces outdoor spaces people actually use — is zone planning. Every outdoor space, regardless of size, benefits from being divided into defined functional zones, each with its own purpose, its own furniture arrangement, and its own relationship to the rest of the layout.
The Elevated Deck: Cooking and Dining Zone
The elevated deck, by virtue of its connection to the home's interior, is naturally positioned as the cooking and dining zone. It's where your grill or outdoor kitchen lives because it's close to the indoor kitchen for food prep and traffic. It's where the outdoor dining table goes because it's the easiest surface to access from inside with dishes, drinks, and servingware. And it's typically where you want to spend the first part of an outdoor evening — cooking and eating — before migrating down to the patio for the social, fireside portion of the night.
This zone logic also informs deck sizing. A dining zone for 6–8 people needs roughly 12 by 14 feet of clear deck surface just for a table and chairs with comfortable circulation. Add a grill station with 3 feet of clearance on each side and you're looking at a minimum deck of 14 by 16 feet (224 sq ft) before you add any secondary lounging area. For most Seattle combo builds, we recommend a primary deck in the 200–300 sq ft range to make the cooking and dining zone functional without the deck overwhelming the patio below.
The Ground-Level Patio: Lounge and Fire Zone
The patio is where the party goes later in the evening. It's the social, relaxed, gather-around-the-fire zone — less transactional than the cooking and dining area above, more about extended conversation and s'mores than about getting food on the table. Fire pits (either gas or wood-burning, subject to Seattle Fire Department rules) are almost universally requested as the focal point of the lower patio zone, and rightfully so — in Seattle's cool evenings, a fire pit extends outdoor season meaningfully from May through October.
Patio sizing for the lounge zone depends on the seating configuration. A sectional sofa around a fire pit requires roughly 14 by 14 feet of open space. Four Adirondack chairs around a round fire pit can work in a 12 by 12 foot zone. For a combo patio that also includes a secondary dining area or a built-in outdoor bar, plan for at least 300–400 sq ft of patio surface.
Note
The Staircase as Transition Zone
The staircase connecting deck to patio is more than a functional element — it's a transition zone in its own right. In well-designed combos, the stair landing or stair edges become secondary surfaces for plants, lighting, or even seating. Wide stairs (60–72 inches) with broad treads (12–14 inches) create a naturally comfortable sitting spot, especially when the stair nosing is finished in a material that differentiates it slightly from the main deck surface.
Landing zones at the base of the stairs are a design opportunity that most cookie-cutter deck builders ignore. A 4 by 6 foot landing at the bottom of the stair, paved in the same material as the main patio but possibly edged in a contrasting material, signals the arrival point on the lower level and creates a natural threshold between the vertical movement of the stairs and the horizontal movement of the patio.
Lighting as Zone Definition
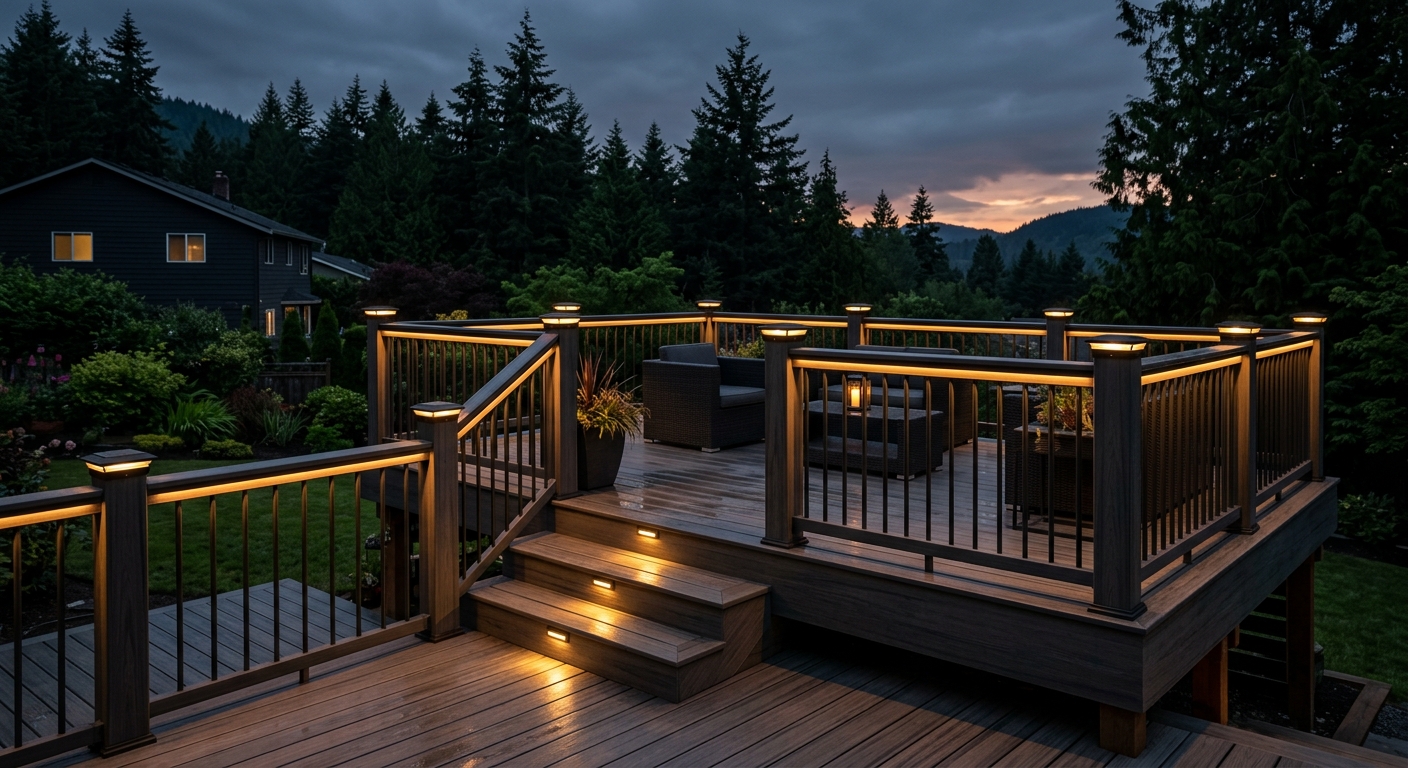
In Seattle where evenings cool down quickly and sunset can feel premature on overcast days, outdoor lighting is not an optional finish — it's a core functional element of any combo layout. Zone-specific lighting reinforces the spatial hierarchy you've established with materials and furniture:
- Deck zone: overhead string lights or a pergola-mounted lighting system for general ambiance; task lighting (recessed downlights or pendant fixtures) over the dining table and at the grill station
- Stair zone: tread-integrated step lights or post cap lights that mark the transition between levels
- Patio zone: fire pit as primary ambient light source supplemented by pathway lighting along patio edges and uplighting in adjacent planting beds
We integrate lighting planning into every combo design we do — it's that important to the livability of the finished space. See our deck lighting detail guide for specifics on fixture types and placement strategies for PNW conditions.
Seattle Permits and Regulations: What You Need to Know Before You Build
Permit requirements for a deck and patio combo in Seattle are genuinely complicated — not because the code is unreasonable, but because a combo involves two structurally distinct elements that are treated differently under Seattle and King County building code. Understanding the permit landscape before you design saves time, money, and significant frustration.
Deck Permits in Seattle
Seattle SDCI requires a construction permit for any deck with a walking surface more than 18 inches above grade. This threshold applies to the finished deck surface height above the adjacent ground level — not the height of the framing or the distance to the foundation. If your kitchen door is 30 inches above the backyard grade and you're building a flush deck, you need a permit.
Decks that trigger full plan review — rather than a simpler field inspection permit — include those that are over 8 feet above grade, have beams 14 or more feet in span, exceed 750 square feet in total area, or are located in environmentally critical areas (ECAs). ECAs in Seattle include steep slopes (greater than 40% grade), designated wetlands, riparian corridors, and areas with known soil liquefaction or landslide hazard. A significant number of Seattle lots in neighborhoods like Queen Anne, Capitol Hill, and West Seattle have ECA designations that homeowners aren't aware of until they apply for a permit.
Full plan review requires engineered drawings stamped by a licensed Washington State structural engineer. SDCI's current hourly rate for plan review is $274 per hour. Complex decks — multi-level, high elevation, large spans — can accrue 6–10 hours of review time before a permit is issued, adding $1,600–$2,700 in permit soft costs before construction begins. Our complete King County permit guide covers the permit application process in detail.
For homes in unincorporated King County — areas like Maple Valley, Covington, and portions of Sammamish and Black Diamond that are not within city limits — permits are issued through King County DLS rather than SDCI, and the requirements and review timelines differ.
Lot Coverage: The Calculation That Surprises Homeowners
One permit consideration that surprises many Seattle homeowners: decks elevated more than 36 inches above grade count toward lot coverage calculations. Seattle's residential zones (SF 5000, SF 7200, LR1, etc.) cap total impervious or covered lot coverage at varying percentages — typically 50% for most single-family zones.
If your home plus garage plus driveway plus existing covered structures is already consuming 40–45% of your lot, adding a 300 sq ft elevated deck may push you past the coverage limit. This isn't a hypothetical edge case — it's a real constraint that affects homes in denser neighborhoods like Ballard, Fremont, and the Central District where lots are smaller and existing structures cover significant ground.
Combo patios at grade, by contrast, are typically treated differently under coverage calculations depending on their material. Permeable pavers that allow water infiltration may be credited differently than solid concrete. Your permit drawings should address this clearly.
Important
Patio Permits: When You Need One and When You Don't
Ground-level patios in Seattle are generally not subject to construction permits when they are at or near natural grade and are not enclosed structures. A concrete slab patio, a paver patio, or a natural stone patio that sits on the ground, drains properly, and doesn't involve any structural framing or roofing can typically be installed without a permit.
That said, patio work that involves significant grading, retaining walls over 4 feet in height, or drainage modifications affecting adjacent properties may trigger grading permits or shoreline permits depending on the site. If your combo patio involves substantial excavation or soil removal, your contractor should evaluate the grading permit threshold before work begins.
Build Sequence: Why We Start with the Patio, Then Frame the Deck
Every experienced deck and patio combo builder knows the rule: patio first, deck second. This isn't arbitrary — it's grounded in practical construction logic that affects cost, quality, and timeline.
The Excavation and Grading Problem
When a deck is framed above a patio area, equipment access to the ground beneath the deck becomes severely limited. A mini-excavator that could easily move 40 cubic yards of soil in a day to establish the patio base grade can't fit under a deck that's 5 feet above the ground. Hand excavation in a confined space under a framed deck is slow, expensive, and harder to control for uniform grade and compaction.
As the team at Earth Turf Wood correctly notes in their construction sequencing guidance: excavation, grading, and drainage work should be completed while the ground is fully accessible, before any overhead structure limits equipment reach. We've seen combinations where a homeowner or a less experienced contractor installed the deck first and then tried to do patio work beneath it. The result is always the same: higher labor costs for hand excavation, less precise grade control, and drainage work that's difficult to inspect properly.
Drainage Is the Most Critical Sequencing Factor
In Seattle's wet climate, proper drainage design for the patio area beneath the deck is not optional. Without positive drainage (typically a 1–2% slope away from the house foundation), water that falls on or around the patio will pool against the foundation, migrate under the footing zone, and create long-term moisture problems for both the deck structure and the home itself.
The drainage system — perforated pipe, gravel bed, surface slope, and connection to a daylight drain or French drain — needs to be designed before the patio surface is installed and absolutely needs to be in place before the deck above is framed. Once the deck is up, you can't see what's happening to water beneath it until there's a visible problem.
The Construction Sequence We Follow
For a standard Seattle deck and patio combo, our build sequence is:
- Permit application and approval — submit drawings, wait for SDCI review (4–8 weeks for standard permits, 8–16 weeks for full plan review)
- Utility locates — 48-hour advance notice for underground locates before any excavation
- Site preparation and excavation — strip and export sod and topsoil from patio area; establish finish grades
- Foundation and drainage work — dig and pour deck footings (concrete piers); install patio drainage system (French drain or surface drain); compact patio base aggregate
- Patio base installation — 4–6 inches of compacted crushed rock base over geotextile fabric
- Deck framing — install ledger on house; set posts on poured footings; frame beams, joists, and stair carriages
- Patio surface installation — pavers, natural stone, or stamped concrete installed over prepared base; now accessible with the deck frame up but before decking boards obstruct access from above
- Deck surface installation — composite or cedar boards; stairs; blocking
- Railings — deck railings, stair railings; post caps
- Electrical and lighting — rough-in during framing; fixtures after decking
- Final inspection — SDCI final or King County DLS final as applicable
- Finish landscaping — planting beds, edging, finish grading at patio perimeter
The total timeline for a permitted combo build in Seattle typically runs 3–5 months from initial consultation to final inspection — longer for complex projects requiring full plan review or for projects during Seattle's peak building season (March through September) when SDCI review times stretch.
Cost Breakdown: What a Deck and Patio Combo Costs in Seattle in 2025
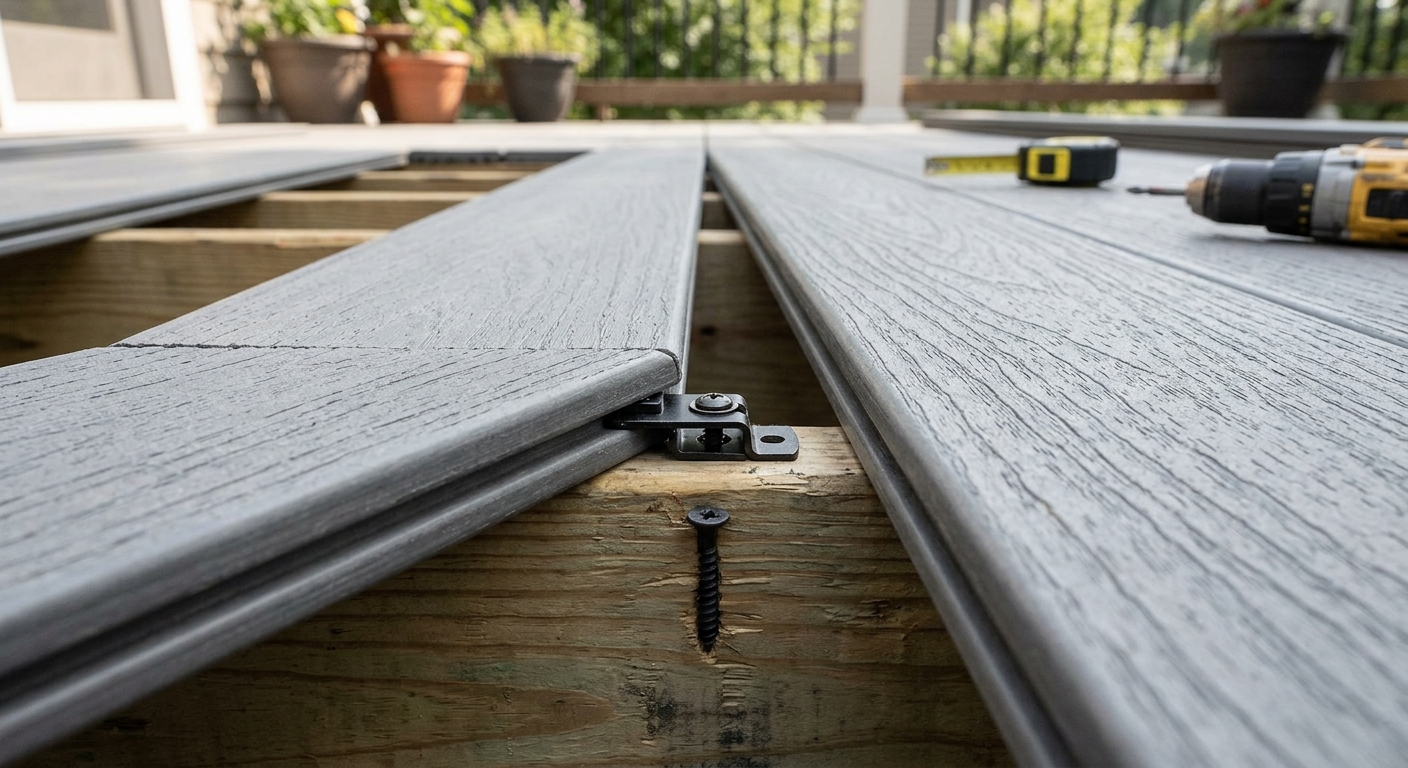
Pricing a deck and patio combo requires separating the two components and then accounting for the integration work — stairs, shared foundation elements, lighting, and permitting — that makes the combo more than the sum of its parts.
Elevated Deck Cost: Seattle 2025 Benchmarks
Based on current Seattle-area construction pricing, elevated deck costs range from $65 to $110 per square foot for standard composite or cedar builds, according to local contractor data and Redrra's 2025 Seattle deck cost analysis. This per-square-foot range includes materials, labor, footings, framing, decking boards, and standard railings. It excludes stairs (which are priced separately), built-in features like outdoor kitchens, and permit costs.
For specific sizing benchmarks:
| Deck Size | Material | Estimated Range (Seattle, 2025) |
|---|---|---|
| 10 x 12 (120 sq ft) | Cedar | $7,800–$13,200 |
| 12 x 16 (192 sq ft) | Composite (Trex/Fiberon) | $12,480–$21,120 |
| 14 x 20 (280 sq ft) | Composite (TimberTech/AZEK) | $18,200–$30,800 |
| 20 x 20 (400 sq ft) | Composite premium | $26,000–$44,000 |
| 20 x 24 (480 sq ft) | Composite premium | $31,200–$52,800 |
Stairs add $1,200–$3,500 depending on rise, width, and material. Railings add $150–$400 per linear foot depending on style — see our deck railing options guide for a complete pricing breakdown. Our deck cost guide has full detail on Seattle deck pricing by neighborhood and material.
Ground-Level Patio Cost: Seattle 2025 Benchmarks
Ground-level concrete or paver patio installation in the Seattle area typically runs $10–$25 per square foot installed, depending on the material choice and site conditions.
| Patio Size | Material | Estimated Range (Seattle, 2025) |
|---|---|---|
| 12 x 16 (192 sq ft) | Concrete pavers | $1,920–$3,456 |
| 16 x 20 (320 sq ft) | Concrete pavers | $3,200–$5,760 |
| 16 x 20 (320 sq ft) | Natural stone (bluestone/flagstone) | $5,760–$9,600 |
| 20 x 24 (480 sq ft) | Stamped concrete | $5,760–$10,560 |
| 20 x 24 (480 sq ft) | Travertine pavers | $8,640–$14,400 |
These ranges include base preparation, drainage, and surface material installation. They do not include fire pit installation ($800–$5,000 depending on gas vs. wood, prefab vs. custom), pergola structures ($8,000–$25,000), or extensive grading work.
Integration Costs: Stairs, Permits, Lighting
The integration elements that connect the deck and patio add meaningful cost to a combo build:
- Permit fees: $500–$4,500 depending on project complexity and review type; full plan review at SDCI's $274/hour rate adds significant cost for complex elevated decks
- Foundation work: Concrete pier footings for the deck add $300–$800 per footing; a standard 300 sq ft deck typically requires 4–8 footings
- Drainage system: French drain or surface drain installation beneath the deck zone runs $1,500–$4,500 depending on system complexity and soil conditions
- Integrated lighting: Deck and patio lighting package (step lights, post cap lights, string light infrastructure, low-voltage pathway lighting) runs $2,500–$8,000 installed
- Design fees: If the project requires engineered drawings, expect $1,500–$3,500 for structural engineering and permit drawing preparation
Total Combo Cost Ranges
Estimated total installed costs for complete deck and patio combo projects in Seattle, including permits, drainage, stairs, and standard lighting. Premium finishes (natural stone, outdoor kitchen, pergola) add 20–40%.
| Category | Value |
|---|---|
| Basic (cedar deck + concrete pavers, ~300 sq ft combined) | $28,000 |
| Mid-range (composite deck + paver patio, ~480 sq ft combined) | $42,000 |
| Premium (AZEK/TimberTech + natural stone, ~600 sq ft combined) | $65,000 |
| High-end (custom multi-level + outdoor kitchen + pergola) | $95,000 |
For homeowners comparing the investment against return, the National Association of Realtors remodeling impact report consistently rates deck additions among the highest-ROI outdoor remodeling projects, with cost recapture in the 65–80% range in markets like Seattle where outdoor living space is highly valued. Combined deck and patio projects that expand the total outdoor living footprint significantly tend to perform at the higher end of that range.
For full Seattle-specific cost detail by material and project scope, see our deck cost calculator page and our deck addition planning guide.
Railing and Finishing Options for Seattle Deck and Patio Combos
The railing system on the elevated deck is one of the most visible elements of the entire combo — it defines the deck's edge from the yard, creates the safety barrier between the deck level and the lower patio, and significantly affects the aesthetic of both spaces simultaneously. Getting the railing right matters more in a combo than in a standalone deck precisely because the railing is viewed from two levels rather than one.
Cable Railing: The Modern PNW Standard
Stainless steel cable railing has become the dominant choice for elevated decks in King County's newer builds and renovation projects, and for good reason. Horizontal stainless cables with powder-coated steel or aluminum posts create a minimal visual profile that doesn't block sightlines from the deck to the yard or from the yard looking up at the deck. From the patio below, a cable-railed deck has an open, light quality that a traditional wood baluster deck doesn't — you can see the sky through the cable lines, and the deck doesn't loom over the patio in a heavy way.
Cable railing costs $150–$280 per linear foot installed, making it mid-range for Seattle deck railing systems. For a 40-foot deck perimeter, that's $6,000–$11,200 for the cable railing alone. Our full cable railing Seattle guide covers the maintenance, code requirements (cable spacing must comply with IRC Section R312 — cables must not allow a 4-inch sphere to pass), and best practices for cable tensioning in Seattle's temperature range.
Glass Panel Railing: Premium and Practical
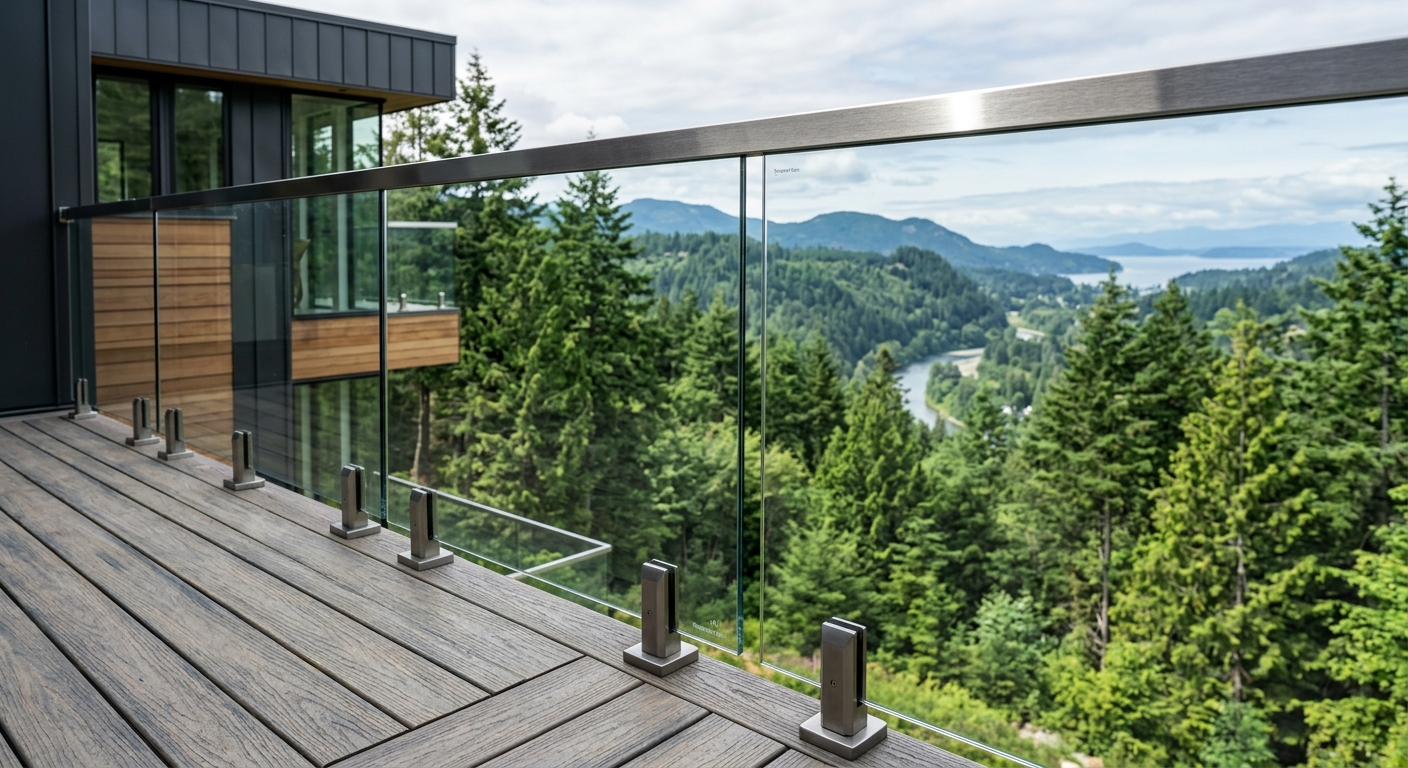
Glass panel railing systems — frameless or semi-frameless tempered glass panels with aluminum posts and top rail — offer the ultimate in unobstructed views and a genuinely premium aesthetic. They're particularly well-suited to decks on sloped lots where the view over the railing is a feature (rather than just a safety boundary), and to combo builds where the patio zone is designed as a garden or naturalistic space that you want to see clearly from the elevated deck.
Glass panel railing runs $200–$400 per linear foot installed, making it the most expensive standard railing option. It also requires regular cleaning to maintain its appearance — Seattle's moss spores, pollen, and mineral-rich rainfall leave a film on glass surfaces that's more visually apparent than on opaque railing materials. See our glass railing detail for visual reference.
Traditional Composite Baluster Railing
For homeowners prioritizing budget and low-maintenance over view preservation, composite baluster railing systems — posts, rails, and balusters all in composite material — provide a clean, traditional aesthetic at $100–$180 per linear foot installed. They're compatible with all composite decking brands, require no painting or staining, and hold their color through Seattle's wet seasons without rusting or rotting. Not as visually striking as cable or glass, but solid, code-compliant, and durable.
Working with a Seattle Deck Builder: What to Expect from Design to Completion
Choosing the right contractor for a deck and patio combo in Seattle is genuinely consequential in a way that choosing a contractor for a simpler, single-trade project is not. A combo build involves deck framing, concrete work, hardscape installation, drainage engineering, electrical work, and permit management across multiple inspections. Coordinating all of those trades, keeping the project sequenced correctly, and managing the permit process with SDCI or King County DLS requires a contractor with real multi-trade project management experience — not just someone who knows how to install decking boards.
What to Look For in a Seattle Deck Contractor
The North American Deck and Railing Association (NADRA) maintains a certification program and member directory that's worth consulting when evaluating contractors. NADRA-certified contractors have demonstrated knowledge of deck code compliance, structural design, and professional practice standards that go beyond basic contractor licensing.
Beyond certification, here's what to evaluate:
Washington State contractor licensing: Verify through the Washington State Labor and Industries Contractor Lookup that your contractor holds a current general contractor license, a bond, and liability insurance. For combo projects that involve electrical work, verify that the electrical subcontractor holds a Washington State electrical contractor license.
Permit management experience: Ask specifically whether the contractor manages permit applications or expects the homeowner to manage them. At The Seattle Decking Company, we handle the entire permit process — drawings, application, inspection scheduling, and final sign-off — as part of our project management. Not all contractors do this, and leaving permit management to a homeowner who isn't familiar with SDCI's requirements is a recipe for delays.
Multi-trade coordination: Ask for examples of past combo projects and how they managed the sequencing between patio excavation, deck framing, and surface installation. If a contractor can't clearly describe a build sequence, that's a red flag.
References from King County projects: Seattle's permit and inspection environment is specific enough that experience with SDCI and King County DLS processes matters. Ask for references from projects in the same jurisdiction as yours.
The Design Process at The Seattle Decking Company
Our process for a deck and patio combo begins with a site visit — not a phone call or a virtual meeting, but an actual visit to your property in Bothell, Kenmore, Woodinville, Kirkland, Bellevue, or wherever you are in King County. We look at the door positions, the grade, the drainage patterns, the sun exposure, the neighbor sightlines, and the existing landscaping. We talk about how you use your home and what you actually want from the outdoor space.
From that site visit, we produce a design proposal — a deck plan, a patio layout, a material specification, and a permit plan if required — along with a detailed estimate. We don't provide ballpark quotes over the phone because Seattle projects are too site-specific for ballpark quotes to be meaningful. A quote that doesn't account for your specific soil conditions, your permit requirements, and your material selection isn't a quote — it's a number that will change.
After design approval, we manage the permit process, provide a construction schedule with key milestone dates, and assign a project lead who is on-site for every phase of the build. We don't subcontract out the deck framing and show up only for the finishing work. The crew that frames your deck is the same crew that installs your decking boards and your railings — consistent personnel who know the project at every stage.
We serve homeowners throughout King County including Bothell, Kenmore, Kirkland, Redmond, Bellevue, Sammamish, Issaquah, Renton, Maple Valley, Auburn, and into South Snohomish County. If you're in the greater Eastside or North Seattle corridor, we're likely already working on a project near you.
Common Design Mistakes to Avoid in Seattle Deck and Patio Combos
After building dozens of deck and patio combos across King County, we've seen the same mistakes appear repeatedly — both in projects we've been hired to fix and in projects where homeowners asked us to review a competitor's plan before signing. Here are the most significant pitfalls.
Undersizing the Patio
The most common mistake: building a patio that's just large enough to technically qualify as a patio but not large enough to actually use. A 10 by 10 foot concrete pad under a deck isn't a patio zone — it's overflow storage for garden tools. For a lounge and fire pit zone to function, plan for a minimum 16 by 16 feet, and ideally 18 by 20 or larger if your yard allows it.
Ignoring Drainage Before the Deck Goes Up
We've addressed this in the build sequence section, but it bears repeating: drainage design and installation beneath the deck must happen before the deck is framed. We have seen — more than once — homes where a contractor poured the patio concrete first without adequate drainage planning, then framed the deck above, and within two or three rainy seasons the homeowner had standing water under the deck, efflorescence (white mineral staining) on the concrete, and moisture migration toward the foundation. This is a $3,000–$8,000 fix after the fact. It's a $500–$1,500 drainage system installed correctly in sequence.
Railing Heights That Don't Account for Both View Levels
Railing height code in Seattle follows IRC R312 — 36-inch minimum rail height for decks less than 30 inches above grade, 42-inch minimum for decks 30 inches or more above grade. These are minimums. Many homeowners in hillside Seattle neighborhoods want 42-inch rails even on lower decks for safety and aesthetic reasons. But in a combo build, you also need to think about how the railing height reads from the patio level below. A 42-inch rail on a deck that's 6 feet above the patio creates a significant visual barrier when viewed from the lower level. Cable or glass railing mitigates this; solid baluster railing amplifies it.
Building Without Considering the Lot Coverage Math
As noted in the permit section: elevated decks count toward lot coverage in most Seattle residential zones. In Ballard, the Central District, and similar neighborhoods where lots are 4,000–6,000 square feet and existing structures cover 35–45% of the lot already, a 300 sq ft combo deck addition may be the project that pushes you over the coverage limit. Always calculate lot coverage before finalizing deck size. Your contractor should do this as part of the permit drawing preparation — if they're not doing it, ask why not.
Poor Stair Design
Stairs are the functional and visual spine of a combo build, and poorly designed stairs are the single element that most often makes a combo feel disjointed rather than integrated. Stairs that are too narrow (less than 36 inches, which is the code minimum — and the minimum is too narrow for a combo stair that people will use regularly), stairs with risers that are too tall (7-inch maximum per code, but 6-inch is more comfortable for Seattle's older population and for guests in heeled shoes), or stairs positioned awkwardly relative to both the deck door and the patio focal point undermine everything else in the design.
We consistently recommend 48–60 inch wide stairs with 11–12 inch treads and 6–7 inch risers for combo builds. They cost more than a narrow 36-inch code-minimum stair, but the difference in how the whole system feels in use is significant.
Deck and Patio Combo vs. Standalone Deck: When Each Makes Sense
Not every Seattle backyard calls for a combo build. Understanding when to invest in the full deck-plus-patio system versus a simpler standalone deck is part of an honest builder's job.
When a Combo Is the Right Choice
- Sloped lots where the yard has meaningful grade change and a ground-level patio footprint is naturally available below the deck level
- Larger lots (7,000 sq ft or more) where there's space to develop both levels without one overwhelming the other
- Active households where different family members or activities want simultaneous access to different outdoor zones — kids on the lower level, adults cooking above
- Homeowners planning to stay long-term who want to maximize the outdoor living investment with a complete system rather than partial solutions
- Higher-value homes where the cost of the combo is proportional to the home value and the addition makes sense for resale appeal
When a Standalone Deck Is Sufficient
- Smaller lots (under 5,000 sq ft) where a patio addition would consume most of the remaining green space
- Minimal grade change where the yard is essentially flat and the deck is only 18–30 inches above grade — a simple deck with a landing at grade accomplishes everything a combo would
- Budget constraints where the combo would require compromising both the deck and the patio to hit a number — in that case, building an excellent standalone deck now and adding the patio later is the better sequence
For more detail on deck-only options and what a Seattle deck addition looks like as a standalone project, see our deck addition guide.
Maintenance Realities for Seattle Deck and Patio Combos
Building a combo isn't the end of the story — it's the beginning of a relationship with an outdoor living system that requires some ongoing attention, particularly in Seattle's wet climate.
Composite Deck Maintenance
Capped composite decking from Trex, Fiberon, AZEK, and TimberTech requires the least maintenance of any deck surface option: clean it with a deck brush and mild soap annually (or after significant pollen fall in spring), and clear debris from between boards to prevent organic matter buildup that can promote mold growth. In Seattle, the late summer pollen drop from alder and big-leaf maple is the most significant maintenance trigger — a good cleaning in September keeps the surface looking sharp through the winter. Our composite deck maintenance guide covers the full annual maintenance protocol.
Cedar Deck Maintenance
If you've chosen cedar for the elevated deck, plan on a fall cleaning and resealing every 12–24 months. Use a quality penetrating oil or deck stain rated for horizontal surfaces in high-moisture environments — we have specific product recommendations in our cedar deck sealing guide. Cedar that's allowed to gray and weather without periodic sealing will develop checking (surface cracks) and is more susceptible to moss and mildew in the PNW climate.
Patio Maintenance
Concrete pavers in Seattle require periodic joint sand replenishment (polymeric sand settles over time, especially in areas with significant water flow), annual cleaning with a pressure washer or stiff brush, and occasional releveling of individual pavers that have shifted due to ground movement. Natural stone requires similar care with the addition of periodic sealing on porous materials like travertine and sandstone. Stamped concrete needs resealing every 2–3 years with a penetrating concrete sealer to prevent moisture intrusion and freeze-thaw damage.
The combination of a low-maintenance composite deck above and well-installed concrete pavers below creates the lowest-maintenance combo scenario — an hour or two of cleaning per level per year and occasional inspection of drainage and joint materials. That's a realistic maintenance ask for a system you'll use heavily for 25 or more years.
Ready to Design Your Seattle Deck and Patio Combo?
A deck and patio combo is one of the most impactful investments you can make in a Seattle-area home — and one of the most complex projects to execute well. The permit process, the drainage engineering, the material coordination, the build sequencing, and the zone planning all have to come together under a single coordinated vision. When they do, the result is an outdoor living system that genuinely changes how you use your home for the next 20 years.
The Seattle Decking Company builds deck and patio combos throughout King County — Bothell, Kenmore, Kirkland, Bellevue, Sammamish, Renton, and beyond. We manage everything from initial design through permit application to final SDCI inspection and final walkthrough. We're not a marketing company with a subcontractor network — we're builders, and the crew you meet at the design meeting is the crew that builds your deck.
To talk through your project — even if you're in the early planning stages and don't yet have dimensions or a budget — reach out to us at (425) 675-6259 or visit our contact page. Our office is at 22722 29th Drive SE, Bothell, WA 98021. We'll set up a site visit, walk your yard with you, and give you an honest assessment of what's possible and what it will cost. No obligation, no high-pressure sales process — just a straight conversation from people who build these things for a living.
Frequently Asked Questions
Do I need a permit to build a deck and patio combo in Seattle?
What does a deck and patio combo cost in Seattle in 2025?
Should I build the deck or the patio first in a combo project?
What are the best materials for a deck and patio combo in Seattle's climate?
How large should my deck and patio be in a combo layout?
Can I add a fire pit to the patio in a deck and patio combo in Seattle?
What railing style works best for a deck and patio combo in Seattle?
How long does it take to build a deck and patio combo in Seattle?
Does an elevated deck above a patio affect the patio's weather protection?
Will a deck and patio combo add value to my Seattle home?
Does The Seattle Decking Company handle both the deck and the patio in a combo build?
What neighborhoods in Seattle and King County does The Seattle Decking Company serve?
Planning a deck in the Seattle area?
Get an onsite design review and a clear, itemized quote from a licensed local builder.
Request a Free Quote