
Every summer, we get a version of the same phone call. It's mid-July, the sun is finally out, and a homeowner in Kirkland or Shoreline or Renton has decided this is the year they're finally getting that deck built. They've picked out their composite boards, they've measured the backyard, they've shown their spouse the inspiration photos. They call us, ready to pull the trigger.
And we have to tell them the truth: we're booked until September.
That's not a complaint — it's just the reality of deck building in the Pacific Northwest. The same weather patterns that make Seattle summers magical also compress every homeowner's desire to build outdoor living space into a four-month window. When the sun comes out, everyone calls at once. Contractors who work year-round — and the good ones do — are already committed to projects they booked in February. The homeowner who waited until July to make the call is, in practical terms, at the back of the line for a season that's already half over.
The good news is that this is entirely avoidable. The Seattle deck season is longer, more nuanced, and more strategic than most homeowners realize. Fall builds are often smoother than summer builds. Winter builds are more feasible in the PNW than anywhere else in the country. And the deck installation process itself — from permit to first board to final inspection — has a rhythm that rewards the homeowner who understands it and plans accordingly. This guide is about that rhythm.
Why July Is Already Too Late: Understanding Seattle's Deck Rush
There's a meteorological explanation for the Seattle deck rush, and it's worth understanding because it directly governs contractor availability. Seattle's climate follows what climatologists call a Mediterranean pattern in the summer months — minimal rainfall, consistent temperatures in the upper 60s to mid-70s, and long daylight hours from late June through early September. The rest of the year — roughly October through May — is dominated by the marine layer that flows in from the Pacific, bringing the overcast skies and persistent drizzle that define the PNW to everyone who doesn't live here.
The result is that Seattle homeowners make a collective, unconscious decision to schedule all of their outdoor construction in about a 10-week window. Not because building is impossible the rest of the year — it isn't — but because the sun triggers the impulse to finally make the backyard call. By late June, every decent deck contractor in King County is receiving multiple inquiries per day. By early July, the best crews are committed through mid-September. A homeowner calling on July 15 and hoping to have a deck for a Labor Day party is, almost without exception, going to be disappointed.
The Contractor Booking Math
Let's put some numbers to this. A crew that builds decks professionally can typically complete one standard deck — say a 300 to 400 square foot composite or cedar build on a flat lot — in 10 to 14 business days, start to finish. That includes site prep, footing work, framing, and boards. A two-crew operation running projects sequentially might complete 25 to 35 decks in a full season.
If that contractor booked up through April — which the best contractors do — their July calendar is already allocated. They might squeeze in a project that falls through, or they might have a smaller job that wraps early and creates a window. But those openings go to people who are already in communication with the contractor, not to cold callers in July. The homeowner who waited has to either take whoever is available (which, in a seller's market for contractor time, often means less experienced crews), accept a September or October start date, or both.
What "Booked Out" Actually Means for Your Deck
When contractors say they're booked, homeowners sometimes interpret that as a negotiating posture. It isn't. What it means, practically, is that a contractor has committed to sequencing a set of projects — they know which site they'll be at on which week, they've ordered materials on a delivery schedule, and their subcontractors (concrete work, electrical for lighting, inspectors) are slotted in accordingly. Adding a new project to that schedule isn't a matter of saying yes. It means bumping someone who was already waiting, resequencing material deliveries, and renegotiating subcontractor schedules. The good contractors don't do that to their existing clients to accommodate someone who called last.
The implication is direct: if you want a summer deck, you need to have started the conversation in late winter or very early spring. And if you're reading this in June or July, the most useful thing this article can do is help you understand your actual options — which are better than most homeowners think.
Note
The Real Seattle Deck Season (It's Not What You Think)
Here's the reframe that changes everything for Seattle homeowners: the deck season isn't summer. The deck season, for a homeowner who wants to optimize for quality, cost, and contractor access, runs from October through May. Summer — June through August — is when you enjoy your deck, not when you build it.
This sounds counterintuitive until you spend some time thinking about what actually drives a good build. Temperature stability matters more than sunshine. Consistent, moderate temperatures are better for concrete curing, better for wood acclimation, and better for composite board installation than the temperature swings of early summer. Seattle's fall and spring offer exactly those conditions. The mild PNW climate — with average daytime highs in the 50s from October through March — is actually well-suited to most phases of deck construction.
Month-by-Month Breakdown of the Seattle Build Window
October and November are the most underrated months in the Seattle deck calendar. Contractor schedules open up as summer projects wrap, material suppliers are willing to deal on overstock from the season, and the ground is workable. Rain is a factor, but experienced crews in the PNW build through it — they've been doing it their whole careers. Concrete footings can be poured and protected, framing goes up in any weather, and composite boards are more forgiving of cool, damp installation conditions than most homeowners realize. A homeowner who contracts in October for a November build often ends up with the same quality of work for less money and with more contractor attention than someone who squeezed into a July slot.
December and January are the realistic limit for active building in most years. Not because of frost — Seattle averages fewer frost days than almost any major US city, and the ground typically doesn't freeze to footing depth. But rainfall intensity peaks in December and January, and there are practical limits to how much concrete work can happen in heavy rain. A contractor who knows their crew will tell you honestly whether a December build makes sense for your specific project. Smaller projects — a ground-level platform deck, a front entry stoop, a deck repair job — often proceed without issue. Larger projects with extensive footing work might benefit from waiting until February.
February and March represent what we think of internally as the startup season. Rainfall starts to taper, temperatures stabilize, and the construction window opens up reliably. The homeowner who called in October, permitted in November or December, and contracted a crew in December for a February start is in the best possible position: materials ordered, permit in hand, contractor committed. By the time their neighbors are making summer calls in June, this homeowner is already hosting barbecues on a finished deck.
April and May are excellent building months — arguably the best weather conditions of the year for outdoor construction. Temperatures are mild, rain is moderate and predictable, and the build environment is ideal. The catch is that contractor schedules are filling fast. A homeowner who hasn't called by March is competing with everyone who made the same April realization. This is still substantially better than the July rush, but it's not the frictionless booking experience you get by going earlier.
June through August is when you use the deck. If your project isn't permitted and contracted by mid-May, accept gracefully that your build is a fall project and plan accordingly.
Tip
Fall and Winter Builds: The Contractor Availability Window Seattle Homeowners Miss
The PNW weather reputation works against Seattle homeowners when they're thinking about fall and winter deck builds. The assumption is that it rains too much, that crews won't work, that concrete won't cure, that wood will warp. Some of these concerns are worth taking seriously; most of them are overstated by people who haven't built in Seattle's specific climate.
Let's address each one directly, because the homeowner who understands the actual constraints can make a genuinely informed decision instead of defaulting to the summer rush out of habit.
Concrete in PNW Conditions
Concrete footings are the foundation of any elevated deck, and proper curing is non-negotiable. The chemistry of concrete curing requires temperatures above 40°F — freezing concrete before it's cured causes the water in the mix to expand, weakening the structure. This is a real concern in much of the country. In Seattle, it's rarely a problem. Average low temperatures from October through February stay in the mid-30s to low 40s, and sustained freezes below 32°F are uncommon. When they do occur, experienced contractors use insulating blankets and protective coverings to maintain footing temperature during cure — standard practice for PNW winter work.
TimberTech's deck building resource center notes that concrete footings must be dug below the frost line and allowed to cure at least 24 hours before proceeding with any framing. In King County, the standard footing depth requirement is typically 18 inches minimum, with some jurisdictions requiring deeper footings depending on local soil conditions and structural load. An experienced contractor knows these requirements and plans the footing schedule accordingly regardless of season.
Composite Board Installation in Cool Weather
Composite decking materials — boards from manufacturers like Trex, Fiberon, AZEK, and TimberTech — are actually more forgiving in cool weather than in hot weather, in one important respect: thermal expansion. Composite boards expand and contract with temperature, and installation guidelines specify that boards installed in cool weather will expand slightly when temperatures rise. This is accounted for in the gapping requirements — spacing left between board ends and along the length of each run. A contractor who knows their material handles this correctly regardless of season. What you want to avoid is installing composite in extreme cold below about 20°F, which can make boards brittle and prone to cracking during fastening. Seattle almost never sees those temperatures.
For cedar and other natural wood decking, cool weather installation is actually preferred by many experienced builders. Wood acclimation — the process of allowing boards to adjust to the ambient moisture content of the installation environment before fastening — is more stable in the moderate humidity and temperature conditions of a Seattle fall than in the drier conditions of a hot summer. A cedar deck installed in October on the Eastside is going to acclimate more smoothly than one rushed into place during an August hot spell.
What the Numbers Say About Off-Season Pricing
The relationship between contractor availability and pricing follows basic supply and demand. When contractor schedules are full in July, they have no incentive to compete on price — they're turning work away. When schedules open up in October and November, the dynamic shifts. This doesn't mean contractors cut corners or work below cost. What it means is that a homeowner who comes with a well-planned, permit-ready project during the slow season is a genuinely attractive client, and savvy contractors price accordingly.
In our experience, off-season projects — October through February builds — frequently come in 5% to 15% below what the same project would cost in peak season. On a $20,000 deck, that's $1,000 to $3,000 back in the homeowner's pocket. Combine that with better contractor availability and more focused attention on your project (versus a contractor juggling four summer projects at once), and the case for off-season building is hard to argue against.
Key insight
Seattle Deck Permit Requirements: What SDCI Requires Before You Break Ground
This section matters more than most homeowners want it to. Permit requirements are the part of the deck installation process that people try to skip, rationalize away, or quietly ignore — and it's the part that most frequently derails timelines, creates legal and financial problems at resale, and leads to emergency teardowns when unpermitted work is discovered. We build permits. Always. Here's what you need to know.
The Seattle Department of Construction & Inspections (SDCI) requires a construction permit for any deck that is more than 18 inches above the ground at any point, or for any rooftop deck regardless of height. This threshold captures the vast majority of decks — any deck that requires structural framing and footings will almost certainly exceed 18 inches somewhere in its elevation, especially on the sloped lots that are common across Seattle's hillside neighborhoods.
For homeowners in unincorporated King County — Bothell, parts of Woodinville, portions of Bellevue not served by their own permit office — the relevant authority is King County's Department of Local Services, which has its own permit process and fee schedule that differs somewhat from the City of Seattle's.
What the Permit Application Requires
A residential deck permit application in Seattle requires, at minimum:
- Site plan: A drawing showing the property lot, existing structures, proposed deck location, setbacks from property lines and existing structures, and any easements or critical area buffers.
- Construction drawings: Structural drawings showing the framing plan, beam sizes, joist layout, post spacing, footing size and depth, and connection hardware details. For larger or elevated decks, these may need to be stamped by a licensed structural engineer.
- Scope of work description: A written description of the project, materials, and estimated value of construction.
- Permit fee payment: Seattle SDCI permit fees for deck projects typically range from $800 to $2,500 depending on the declared value of the construction. A $15,000 deck project will generate a permit fee somewhere in the $1,000 to $1,500 range, though exact fees are calculated using SDCI's current fee schedule.
The permit application goes through plan review, which at Seattle SDCI currently takes anywhere from 3 to 8 weeks depending on current workload and project complexity. Simple, straightforward deck plans on flat lots in established neighborhoods often move through plan review in 3 to 4 weeks. Complex projects — elevated decks with significant structural requirements, projects near critical areas (steep slopes, streams, wetlands), or projects in neighborhoods with specific design guidelines — can take longer.
Critical Areas: What Seattle Homeowners Near Slopes and Streams Need to Know
Seattle has more critical area designations than most homeowners realize. The city's critical area regulations govern construction near steep slopes (defined as areas with grades exceeding 40%), streams, wetlands, and geologically hazardous areas. Many of the neighborhoods where elevated decks are most desirable — Queen Anne, Magnolia, West Seattle, Capitol Hill, Ravenna — sit on or near designated steep slope areas.
If your property has a critical area designation, the permit process involves additional review, potentially a critical area report from a qualified environmental professional, and sometimes specific engineering requirements for footings and drainage. This isn't a reason not to build — it's a reason to start the permit process earlier than you think you need to. A project that triggers critical area review should budget 8 to 12 weeks for permit processing, not 4 to 6 weeks.
For guidance on navigating King County's permit process, our deck permit King County guide walks through the specific requirements, fee schedules, and review timelines in detail.
The Permit Is Also Your Protection
Beyond legal compliance, a building permit and the required inspections serve a concrete function that benefits the homeowner: they create a documented record that the deck was built to code. This matters at resale — real estate agents and buyers routinely ask for permits on decks and additions, and an unpermitted deck creates negotiating leverage for buyers or can kill deals entirely. It also matters for insurance: an unpermitted deck that fails and injures someone creates significant liability exposure that a homeowner's insurance policy may not cover.
Pull the permit. It costs real money and real time, and it's worth every dollar and every day.
The Deck Installation Process Step by Step: What to Expect from Start to Finish
Understanding the deck installation process in sequence helps homeowners set realistic timeline expectations and understand why certain phases can't be rushed. Deck building isn't a continuous flow of work from day one to completion — it has phases with built-in wait times that are non-negotiable from a structural and code standpoint.
Here's the actual sequence for a permitted deck build in King County:
Phase 1: Planning, Design, and Permitting (4–10 weeks)
This phase happens before any dirt is moved. A contractor or designer produces the drawings, the homeowner submits the permit application, and plan review runs its course. Simultaneously, the contractor is ordering materials — composite boards in particular often have 2 to 4 week lead times for specific colors and profiles — and scheduling subcontractors.
The work of this phase looks like nothing from the backyard. That's why homeowners underestimate it. But this phase is where most project delays originate. A permit application submitted with incomplete drawings gets a correction notice that adds 2 to 3 weeks. Materials ordered late push board installation into a rain window. Subcontractor schedules that aren't locked early push the project into someone else's queue. Get this phase right and everything downstream is smoother.
Phase 2: Site Preparation and Layout (1–2 days)
Once permit is in hand and materials are scheduled, actual site work begins. This means clearing the build area of vegetation, grading if necessary for drainage, and laying out the deck footprint with stakes and string lines. The contractor verifies dimensions against the permit drawings, checks setbacks from property lines and structures, and marks footing locations for excavation.
On a flat lot in Kirkland or Redmond, this phase is genuinely a day's work. On a sloped lot in Bellevue or on the north face of a Queen Anne hill, site prep can involve significant grading, erosion control measures, and careful attention to water drainage away from the foundation. The complexity of your site directly governs how long this takes.
Phase 3: Footing Excavation and Concrete Pour (2–4 days plus cure time)
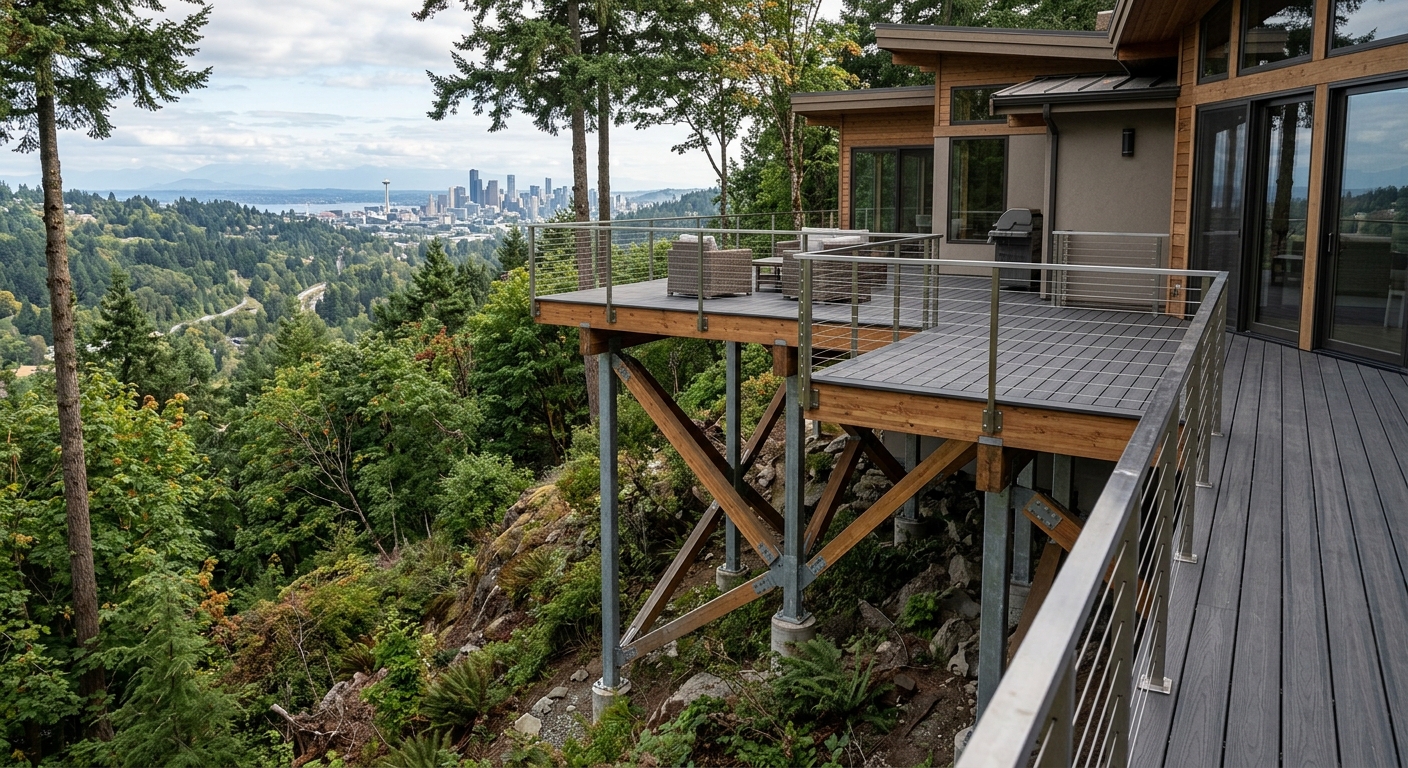
Footings are the literal foundation of the deck. Each post that supports the deck's structural frame sits on a concrete footing that transfers the deck's load to the ground below the frost line. In King County, footings typically need to extend at least 18 inches below grade, with diameter and depth calculated based on the post load and soil bearing capacity.
Excavation for footings on a standard 300 to 400 square foot deck might involve 6 to 12 individual footing holes, depending on post spacing and beam layout. Once holes are dug, they're inspected by the building department — this is the first required inspection on most permits, and it has to happen before concrete is poured. Scheduling the inspection and getting the inspector out to site can take 1 to 3 business days, which is built into the footing timeline.
After the inspection, concrete is poured and the post base hardware is set. Then you wait. Concrete achieves sufficient strength to support framing loads in 24 to 48 hours under normal conditions, but many contractors prefer to wait 48 to 72 hours before loading footings with framing weight, especially in cooler weather when cure is slower. You cannot compress this timeline — it's chemistry, not scheduling.
Phase 4: Post and Beam Installation (1–3 days)
Posts are set on the cured footings and connected with the post base hardware installed during the footing pour. Beams — the primary structural members that span between posts — are lifted into place and connected to post tops. Joist hangers are installed on the house's ledger board (if the deck is attached to the house) and on the outer beam.
This phase is when the deck starts to look like a deck. For an attached deck, the ledger connection to the house is a critical structural element that the inspector will check carefully. Ledger connections must use proper flashing and fastening hardware to prevent water intrusion at the house connection — this is one of the most common failure points on deck repairs we see, and it's a phase where cutting corners has long-term consequences.
Phase 5: Joist Installation and Blocking (1–2 days)
Joists span between the ledger and the outer beam, creating the structural grid that will support the decking boards above. Joist spacing — typically 12 or 16 inches on center for residential decks, as noted in TimberTech's construction guidelines — is determined by the decking material. Composite boards from manufacturers like Trex and Fiberon typically require 12-inch joist spacing when boards run at a diagonal, and 16-inch spacing for boards running parallel to the joists. Check your specific material's installation guide, because getting this wrong means you either have to reframe before boards go down or you void the manufacturer's warranty.
Blocking — short sections of joist material installed perpendicular to joists at mid-span — provides lateral stability and prevents joists from rotating under load. On longer spans, bridging serves a similar function. This is structural work that affects the long-term rigidity of the deck.
Phase 6: Decking Board Installation (2–5 days depending on size)
This is the most visible phase and, for most homeowners, the most satisfying to watch. Boards go down in sequence, with consistent gapping maintained using spacers or hidden fastener systems. For composite boards, end cuts get treated with end-cut sealant where specified by the manufacturer. Hidden fastener systems — which clip boards from below and leave no visible screws on the deck surface — take longer to install than face-screwing but produce a cleaner finished look and are worth the investment on premium composite installations.
Cedar boards are typically face-screwed with stainless steel screws or nails — galvanized hardware reacts with cedar's natural tannins and causes staining. Pre-drilling each board prevents splitting, particularly for boards near the ends where splitting is most common.
For more on composite board options, gapping, and fastener systems, our composite deck maintenance guide covers what to expect from installed composite boards over their service life.
Phase 7: Railing Installation and Final Inspection (1–3 days plus inspection scheduling)
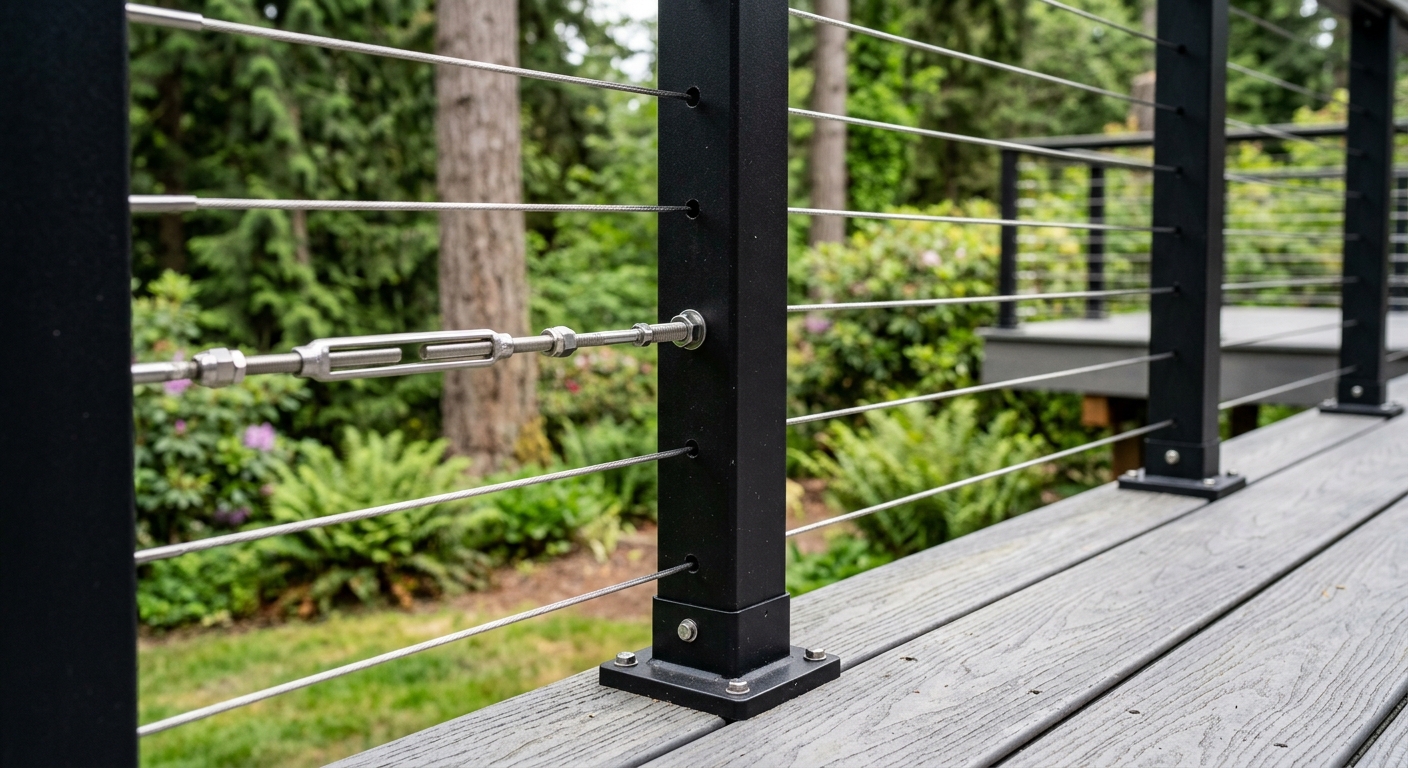
Railings are required by code on any deck surface more than 30 inches above grade. The specific requirements — minimum height (36 inches for most residential decks, 42 inches for decks more than 72 inches above grade in some jurisdictions), baluster spacing (maximum 4-inch gap), post connection hardware — are checked by the inspector at final inspection.
Railing installation takes longer than most homeowners expect because it involves precise post spacing, level installation, and connection to the deck framing with hardware rated for the required load. A railing that looks good but isn't properly connected to the framing is a serious safety hazard. Our deck railing options guide and cable railing guide cover the specific options available in Seattle and what they cost.
Final inspection is the last step — the building department sends an inspector who verifies that the construction matches the permit drawings and meets code requirements. Once the inspector signs off, you get your certificate of occupancy for the deck and you're done.
Important
Seattle Deck Pricing in 2025–2026: Cost by Material, Neighborhood, and Complexity
Deck pricing in Seattle is genuinely variable, and anyone who gives you a single number without knowing your site, your material choice, and your design complexity is guessing. But the ranges are knowable, and understanding what drives cost helps homeowners budget realistically and evaluate contractor quotes intelligently.
Installed cost per square foot including materials, labor, framing, footings, and permit. Source: King County contractor averages. Elevated/hillside builds add 30–50% to base cost.
| Category | Value |
|---|---|
| Pressure-Treated (Flat Lot) | $37 |
| Cedar (Flat Lot) | $42 |
| Composite Entry-Level (Flat Lot) | $45 |
| Composite Premium (Flat Lot) | $55 |
| Cedar (Hillside/Elevated) | $65 |
| Composite Premium (Hillside) | $80 |
Material Cost Breakdown
The material you choose is the single biggest driver of per-square-foot cost, but it interacts with maintenance costs over the deck's life in ways that pure upfront pricing misses.
| Material | Installed Cost/Sq Ft | 10-Year Maintenance Cost | Expected Lifespan |
|---|---|---|---|
| Pressure-treated lumber | $37–$45 | $2,000–$4,000 | 15–25 years |
| Western red cedar | $42–$52 | $2,500–$5,000 | 20–30 years |
| Entry composite (Trex Select, etc.) | $45–$55 | $500–$1,000 | 25–30 years |
| Premium composite (Trex Transcend, TimberTech Legacy) | $55–$70 | $200–$500 | 30–50 years |
| PVC (AZEK, TimberTech Azek) | $65–$80 | $100–$300 | 30–50+ years |
For a detailed side-by-side analysis of composite versus cedar for Seattle's specific climate, see our composite vs. cedar decking guide. For brand-specific composite comparisons, the Trex vs. Fiberon vs. TimberTech guide covers what each manufacturer offers and how they perform in PNW conditions.
Neighborhood and Site Complexity
Where you live in King County has as much impact on your deck cost as what material you choose. The reason is simple: site complexity. A flat lot in Bothell or Kenmore with easy access, simple drainage, and no critical area concerns is the easiest possible build. A hillside lot on Queen Anne with a 15-foot elevation change, limited access for equipment, proximity to a slope critical area, and structural requirements for extended posts is among the most complex.
| Seattle Neighborhood/Area | Typical Site Complexity | Expected Cost Premium |
|---|---|---|
| Bothell, Kenmore, Shoreline (flat) | Low | Base price |
| Redmond, Kirkland, Bellevue (gentle slope) | Low–Medium | 5–15% premium |
| Magnolia, West Seattle (moderate slope) | Medium | 20–35% premium |
| Queen Anne, Capitol Hill (steep slope) | High | 35–55% premium |
| Seward Park, Leschi, Madrona (bluff lots) | Very High | 50–70%+ premium |
The elevation premium reflects real additional costs: longer posts require larger footings, more concrete, and more structural steel hardware. Access limitations mean hand-carrying materials up slopes rather than driving equipment to the site. Structural engineering fees add $800 to $2,500 to projects that require stamped drawings. These aren't contractor margin — they're real expenses that show up in material invoices and subcontractor bills.
Total Project Cost Examples
For a 200 square foot cedar deck on a flat Bothell lot: $8,000 to $10,000 all-in including permit.
For a 300 square foot composite deck (Trex Enhance level) on a gentle slope in Kirkland: $13,500 to $17,000 including permit.
For a 400 square foot premium composite deck (Trex Transcend or TimberTech Legacy) elevated 8 feet above grade on a Queen Anne slope: $28,000 to $38,000 including engineering and permit.
For a comprehensive breakdown including railing options, lighting, and stairs, the Seattle deck cost guide for 2025 covers per-square-foot pricing in detail, or see our dedicated deck cost page.
For additional context on what drives pricing across the region, the National Association of Realtors remodeling impact report tracks the return on investment for deck additions nationally — deck projects consistently return 65–80% of cost at resale, making them among the better-performing exterior home investments.
The NADRA (North American Deck and Railing Association) also provides industry benchmarks for installation quality standards and contractor credentials worth reviewing when vetting potential builders.
How to Book a Seattle Deck Contractor Without Getting on a 2-Month Wait List
The mechanics of booking a quality deck contractor in Seattle during peak season are more specific than most homeowners realize. Here's what actually works.
Start Earlier Than You Think You Need To
The math is straightforward. A contractor who books up by late May is unavailable in July. To be in their schedule, you need to be in conversation with them by February or March at the latest for a summer build. For a spring build, you need to be talking to them in November or December. For an off-season fall build, September or October.
Most homeowners don't start thinking about a deck until the weather turns warm — typically April or May at the earliest. This means they're competing with everyone who had the same thought. The homeowner who starts in the fall isn't competing with anyone.
What to Have Ready When You Call
Contractors book projects more readily when the project is defined. When you make that first call, have the following ready:
- Approximate deck dimensions and location: Not a finished plan, but enough to describe the project — "16x20 off the back of the house, flat lot, attached to the house ledger" gives a contractor enough to quote in the right range.
- Material preference or at least a budget range: Knowing whether you're thinking cedar or premium composite affects the quote significantly and signals that you've thought about the project.
- Your permit status: Have you applied? Are you applying? The contractor needs to know where the permit process stands to schedule site work.
- Your flexibility on timing: A homeowner who can start in October is a much easier booking than one who needs to start July 1 for a July 4th party.
Vetting the Contractor
The Seattle contractor market includes excellent builders and it includes people who shouldn't be building decks. The things that separate them aren't always obvious. Look for:
- Washington State Contractor License: Verifiable at the L&I contractor lookup. Any contractor working on a permitted project must be licensed and bonded.
- Specific deck experience: A general remodeler who occasionally builds decks is different from a dedicated deck contractor who's built 200+ decks in King County. Ask for references and photos from projects similar to yours.
- Permit knowledge: A contractor who says they can "handle the permit" without understanding what that means is different from one who can walk you through the SDCI process and knows the typical review timeline for your neighborhood.
- Manufacturer certifications: Contractors who are certified installers for Trex, TimberTech, or other composite brands have completed manufacturer training. This matters for warranty coverage — composite warranties often require professional installation by a certified contractor.
The NADRA website maintains a directory of member contractors and provides industry standards that credentialed builders adhere to. It's a useful starting point for vetting.
Get Multiple Quotes, But Understand What You're Comparing
Three quotes is the right number for a deck project. More than three and you're spending significant time managing the process; fewer than three and you don't have enough data points to evaluate pricing.
When quotes come back, make sure you're comparing the same scope. A quote that's 20% lower might be using a different framing lumber grade, skipping blocking, or planning to face-screw composite boards in a pattern that voids the warranty. Ask every contractor to specify the exact materials by product name and grade, the framing layout (post spacing, beam size, joist spacing), and what's included versus excluded (permit fees, demolition of existing structure, stair costs).
Price differences that can't be explained by scope differences should raise questions, not just excitement.
Timeline Planning Guide: When to Call, When to Permit, When to Build
This section consolidates the timing information from throughout this article into a practical planning tool. Use this to work backward from your desired deck completion date and understand what you need to do and when.
If You Want a Deck Ready by Memorial Day (late May)
- Call a contractor: October–November of the prior year
- Submit permit application: November–December
- Expect permit approval: January–February
- Construction window: February–April
- Buffer for weather delays: 2–3 weeks
If You Want a Deck Ready for Summer (July–August)
- Call a contractor: January–February
- Submit permit application: February–March
- Expect permit approval: March–April
- Construction window: April–June
- Buffer for contractor schedule: Build in 4–6 weeks of schedule flexibility
If You Want a Deck Ready by Fall (September–October)
- Call a contractor: April–May at the latest (though you may be getting into competitive booking territory)
- Submit permit application: May–June
- Expect permit approval: June–July
- Construction window: July–September
- Note: This timeline puts you squarely in peak season for both contractor demand and permit review workload
If You Want a Fall/Winter Build (October–December)
- Call a contractor: August–September
- Submit permit application: September
- Expect permit approval: October
- Construction window: October–December
- Note: This is the strategic sweet spot — contractor availability is good, pricing is favorable, and the building window is real
If You're Planning a New Deck and Reading This in Summer
Stop planning to build this summer. Accept that you have a fall or winter project, engage a contractor now to get into their fall schedule, and use the remaining summer months to finalize your design, get your permit application together, and select materials. When fall comes, you'll have everything ready.
The homeowners who are happiest with their deck experience — the ones who got the contractor they wanted, the material they wanted, the price that made sense, and the timing that worked — are almost always the ones who started this process 4 to 6 months before they expected to be using the deck. That's the Seattle deck season, honestly described.
For specific material selection guidance as you do your planning, the best decking materials guide for 2026 covers every major option available for King County builds with PNW-specific performance notes.
The Compound Value of Planning Early: Deck ROI in Seattle's Market
We want to close with a point that ties together the seasonal strategy, the permitting timeline, and the contractor booking reality into something concrete: the financial case for planning early is stronger than most homeowners realize.
Start with the NAR Remodeling Impact data. Nationwide, deck additions return 65–80% of project cost at resale — one of the stronger returns of any exterior home improvement. In a strong real estate market like King County, where outdoor living space is a premium feature year-round rather than just in summer, the return can push higher than the national average. A permitted, professionally built deck in Kirkland or Bellevue adds demonstrable value to a listing.
But the ROI calculation doesn't just include sale price. It includes years of enjoyment. A homeowner who gets their deck built in October has it for the following spring, summer, and fall — three full seasons of use — before the homeowner who waited until July to call a contractor and ended up starting in September has even started their build.
There's also the cost of rushed decisions. Homeowners who are squeezed into the summer rush tend to make material decisions quickly, accept the first available contractor rather than the right contractor, and skip the design conversations that produce a deck that actually works for how they live in their space. The pressure of "we need this done before fall" produces compromises. The homeowner who planned early isn't under that pressure — they can evaluate multiple railing options, think through lighting placement, decide whether the stair configuration makes sense for how they'll actually move through the space.
A deck is a 25-year investment for most materials and a 40-plus year investment for premium composites and PVC. The three months of planning ahead that it takes to get into the right contractor's schedule, permit the project properly, and make good material decisions will pay dividends across all of those years.
The deck and patio combo guide and the deck addition guide cover specific design configurations that work well for Seattle lots — worth reading during the planning phase before you finalize dimensions and layout.
For custom work including curved deck designs, the curved deck guide walks through the structural and design considerations for more complex shapes that require earlier planning and more detailed permit drawings than standard rectangular builds.
Ready to Get on the Right Schedule?
If you've read this far and your takeaway is "I need to call sooner than I was planning to," that's the right read. The Seattle deck market rewards homeowners who engage early and penalizes those who wait for the summer impulse.
The Seattle Decking Company builds in King County year-round. We know the SDCI permit process, we work in every neighborhood from Bothell to Magnolia to Renton, and we build in cedar and in every major composite brand on the market. We're not the right contractor for every project — but we'll always tell you honestly whether we are, and we'll always tell you honestly what the timeline looks like and what the permit process requires.
If you're thinking about a deck — this fall, this winter, or next spring — the best time to start the conversation is now. Call us at (425) 675-6259 or reach out through our contact page and we'll talk through your project, your site, and your timeline without any pressure and without any guessing.
Frequently Asked Questions
What is the best time of year to build a deck in Seattle?
Can you build a deck in Seattle in the winter?
How long does it take to get a deck permit in Seattle?
Does every deck in Seattle need a permit?
What does a deck permit cost in Seattle?
How much does a deck cost in Seattle?
How long does it take to build a deck in Seattle?
Is composite or cedar better for Seattle's climate?
Why are Seattle deck contractors so booked in summer?
Do I need a structural engineer for my Seattle deck?
What is the deck installation process from start to finish?
What deck railing options are available in Seattle?
Planning a deck in the Seattle area?
Get an onsite design review and a clear, itemized quote from a licensed local builder.
Request a Free Quote