
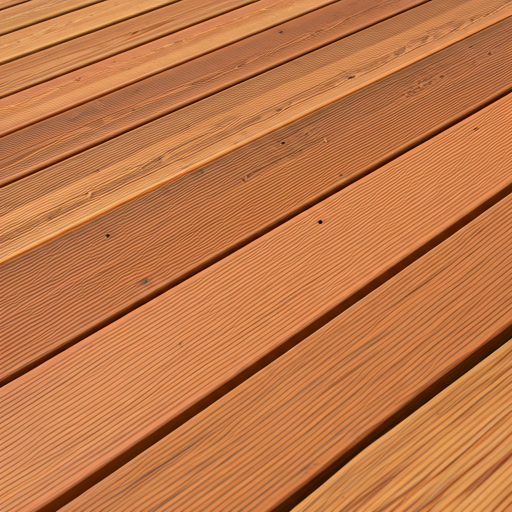
When Seattle homeowners start planning a new deck, most conversations jump straight to material choice — cedar or composite, Trex or TimberTech — and skip right past one of the most consequential decisions in the entire project: the direction and pattern the boards run. That is a mistake. In a city where it rains more than 150 days per year, where lot sizes in Bellevue, Kirkland, and Maple Valley vary wildly, and where the Seattle Department of Construction and Inspections enforces stormwater management rules that directly affect how your deck sheds water, the board pattern you choose is a structural and functional decision as much as it is an aesthetic one. Get it wrong and you are looking at pooling water, accelerated rot on wood decks, or a framing bill that runs thousands of dollars higher than your contractor originally quoted.
The pattern question also has a way of surfacing mid-project, when it is too late to change the framing layout without a costly tear-out. A homeowner in Woodinville decides during the design phase that they want diagonal boards. Great — but their contractor has already quoted standard 16-inch-on-center joist spacing. Diagonal boards need 12-inch spacing to properly support the angled span, which means more lumber, more labor, and a higher permit valuation fee from King County. The pattern conversation needs to happen before the permit gets pulled, before the framing crew shows up, and before a single board gets cut. This article gives you the information to have that conversation with confidence.
Why Board Pattern Matters More in Seattle Than Most Cities
Walk into a lumber yard in Phoenix or Dallas and ask about deck board patterns, and you will mostly get an aesthetic conversation. The climate there is forgiving. Boards dry fast. Standing water is rarely an issue. In the Pacific Northwest, the conversation is different because the climate makes it different.
Seattle averages around 38 inches of rainfall annually, with most of it falling between October and April in a nearly continuous drizzle that keeps surfaces wet for days at a time. A deck that does not shed water efficiently will retain moisture between and beneath boards, accelerating rot on wood decks and creating the mold and mildew conditions that even quality composite products are engineered to resist. The slope of your deck — a minimum of 1/4 inch per foot away from the house is the standard — is the first line of defense. The board pattern is the second.
Here is the part most homeowners do not realize: the direction boards run changes how effectively water drains off the surface. Straight boards running perpendicular to the house, parallel to the home's foundation wall, create channels that run water directly toward the gaps between boards and off the edge. That works adequately on a well-sloped deck. Diagonal boards, running at 45 degrees to the joist framing, create a different drainage geometry — water follows the gap lines at an angle across the deck surface, which on a flat or low-slope deck can actually distribute runoff more evenly and reduce pooling at the low end. Herringbone patterns, with their alternating V-shaped angles, create still another drainage geometry that experienced builders evaluate on a project-by-project basis.
Seattle's Stormwater Reality
The Seattle Department of Construction and Inspections takes stormwater management seriously, and for good reason. The city sits within the Lake Washington and Puget Sound watersheds, both of which are subject to ongoing environmental protection requirements. When you build a deck, you are adding what the city classifies as an impervious or semi-impervious surface. Depending on the total area of hard surfaces on your lot, a new deck can trigger stormwater management requirements that go beyond the simple drainage slope. You can review the current Seattle SDCI deck requirements at https://www.seattle.gov/sdci/permits/common-projects/decks.
This is relevant to the pattern discussion because certain patterns — particularly tightly-spaced herringbone with narrow 3.5-inch boards — reduce the total open gap area between boards compared to wider-spaced straight patterns. Less gap area means slower surface drainage. On a composite deck over a permeable gravel base, this may be a non-issue. On a deck built over a concrete patio or close to the house foundation, it becomes a drainage design question your contractor should address explicitly.
Note
Pattern as a Statement of Style and Neighborhood Fit
Beyond drainage, board pattern carries real aesthetic weight that interacts with the architectural character of your home and neighborhood. The Craftsman bungalows of Ballard and Green Lake read differently than the mid-century moderns of Mercer Island or the new construction colonials going up in Sammamish. A diagonal pattern with a picture frame border has a classic, tailored look that suits Craftsman and traditional architecture well. A straight-field pattern with hidden fasteners and a clean cable railing reads more contemporary. Herringbone, done right, is a statement piece — it signals intentional design in a way that no other residential deck pattern achieves.
Understanding the full range of options, what they cost, how they affect the framing, and what they demand from your material choice puts you in a far better position to make a decision you will be satisfied with for the 25 to 30 years a quality composite deck should last.
Diagonal Deck Boards: Visual Impact, Structural Changes, and Waste to Budget For
Diagonal decking is the most popular non-standard pattern in the Seattle market. It is popular for good reasons — the 45-degree angle across the deck surface creates strong visual energy, makes the deck feel larger than it is, and naturally draws the eye outward toward the yard and view. On a waterfront property in Kenmore or a hillside lot in Issaquah, where the deck is a viewing platform as much as a living space, diagonal boards emphasize the outward orientation of the space. It is also a pattern that transitions well from contemporary to traditional homes, making it broadly applicable across Seattle's diverse housing stock.
But diagonal boards are not a free visual upgrade. They come with two specific structural and cost consequences that every Seattle homeowner needs to understand before committing to the pattern.
The Joist Spacing Requirement
Standard deck framing uses joists spaced 16 inches on center. This spacing is designed to support deck boards that run perpendicular to the joists — the boards span the 16-inch gap between joists in their strongest orientation, along their length. When you rotate the boards 45 degrees, they now span the diagonal distance between joists, which is longer than the perpendicular span. For most composite and 5/4-inch wood decking products, spanning the longer diagonal distance at 16-inch joist spacing creates too much flex and board movement. The industry standard fix is to reduce joist spacing to 12 inches on center when installing diagonal boards.
What does that mean in dollar terms? On a 200-square-foot deck — a common size for Seattle project quotes — reducing joist spacing from 16 to 12 inches means increasing the number of joists by approximately 33 percent. If you were originally framing with 14 joists, you now need closer to 19. At current Seattle lumber prices for pressure-treated framing material (which runs the structural members regardless of whether your decking surface is cedar or composite), that additional framing lumber adds between $400 and $800 in material cost on a 200-square-foot deck, plus the additional labor to install the extra members. On larger decks — 400 or 500 square feet — the framing cost difference becomes more significant and should be a line item in your contractor's quote, not an afterthought.
Some composite decking manufacturers have products rated for diagonal installation at 16-inch spacing. Always verify the specific product's installation guidelines before assuming you can skip the joist spacing reduction. Trex, for example, specifies installation requirements by product line, and some of their premium capped composite lines have different span ratings than their standard products. You can review current Trex installation specifications at https://www.trex.com/.
The 15 Percent Waste Factor
The second cost consequence of diagonal installation is material waste. When boards run at 45 degrees across a rectangular deck, every board that intersects a deck edge or a house wall must be cut at an angle. Those angled cuts create triangular offcuts at every board end — and those offcuts are rarely long enough to be used elsewhere on the project. The industry consensus, supported by sources like DecksDirect's pattern guide, is that diagonal installation increases material waste by approximately 15 percent compared to a straight perpendicular installation.
On a 200-square-foot deck using composite decking priced at $30 to $45 per square foot for materials, a 15 percent waste factor means you are effectively buying 230 square feet of decking to cover 200 square feet of deck surface. At the midpoint of $37.50 per square foot, that is an additional $1,125 in material cost that goes into the dumpster as angled offcuts. On larger decks, this figure climbs proportionally. If you are working with premium composite like AZEK or TimberTech Landmark at the higher end of the material cost range, the waste cost climbs even faster. You can see current TimberTech product lines at https://www.timbertech.com/.
Tip
Combining Diagonal with a Picture Frame Border
The most common professional application of diagonal decking in Seattle is to combine the diagonal field with a picture frame border. The border boards run parallel to the deck edges and contain the diagonal field, creating a clean termination for the angled boards without visible rough end cuts. This combination is visually sophisticated and structurally logical — the picture frame provides a structural border to which the diagonal field boards can be fastened.
We cover picture frame borders in detail in the next section, but it is worth flagging here that the diagonal-plus-picture-frame combination does require additional framing at the deck perimeter. The border boards typically need a doubled-up rim joist or blocking to provide fastening surface, which adds a modest amount to framing cost. Your contractor should account for this in the quote — it is not a large add, but it is not free.
For more on how material choice interacts with diagonal installation, see our article on composite vs. cedar decking in Seattle, which covers how each material handles the additional cut edges that diagonal patterns create.
Picture Frame Borders: The Easiest Upgrade With the Biggest Visual Payoff
If there is one deck design element that consistently delivers the most visual upgrade for the least additional cost, it is the picture frame border. For most Seattle homeowners, this is the right place to start when thinking about non-standard patterns — it is achievable on virtually any deck size, compatible with straight, diagonal, or other field patterns, and the visual result transforms a plain deck into something that looks intentionally designed rather than utilitarian.
The picture frame is exactly what it sounds like: a row — or sometimes two or three rows — of decking boards running parallel to and along the perimeter of the deck, forming a visual frame around the main field of boards inside. On a typical Seattle deck, this means one or two board widths (nominally 5.5 inches wide for standard composite boards) running along each edge, with the field boards inside running in whatever direction the design calls for.
Why Picture Frame Borders Solve a Real Problem
Beyond aesthetics, the picture frame border solves a genuine construction problem that most homeowners are not aware of until their contractor explains it. When field boards — diagonal, straight, or herringbone — terminate at the edge of the deck, they expose the end grain of the board (for wood) or the end cross-section of the board (for composite). On wood boards, exposed end grain absorbs moisture far faster than the face grain, which is why wood deck edges are the first place you see checking, splitting, and rot. Proper cedar deck construction requires end-grain sealing at every exposed cut, which adds labor time and ongoing maintenance requirements. On composite boards, the end cross-section exposes the interior core material, which on uncapped or partially capped products can be more vulnerable to moisture intrusion than the capped face and sides.
The picture frame border eliminates this problem entirely. Instead of field boards running to the deck edge and exposing their ends, they terminate against the inside face of the border boards, which are installed parallel to the edge with their end cuts at the corners where they are much less exposed. The border boards themselves can be fastened from the outside face, concealing fasteners with a clean, finished look.
The result is a deck edge that looks finished and intentional rather than raw and terminated. It is the difference between a deck that looks like the boards just stopped and a deck that looks like the design was thought through.
Framing Considerations for Picture Frame Borders
Installing a picture frame border requires some additional framing that your contractor should plan for from the start. The border boards typically need a doubled rim joist or continuous blocking to provide adequate fastening surface — you need to be able to fasten the border boards from their outer face into a solid structural member, and you also need the field boards to have something to land on at their termination point inside the border. This is particularly important when the border and the field boards run at different angles, as in the diagonal-field-plus-picture-frame combination.
On a simple square or rectangular deck, the framing addition for a picture frame border is modest — a doubled rim joist on two or four sides depending on the layout, plus some additional blocking at corners. For a contractor familiar with the detail, it adds perhaps two to four hours of framing labor to a standard deck build. The material cost of the additional lumber is minimal relative to overall project cost.
The more complex situation arises on decks with irregular shapes — L-shapes, decks with bump-outs, or multi-level decks where the picture frame needs to navigate changes in elevation. In those cases, the border framing requires more planning and custom blocking, and your contractor should walk you through the specific approach for your deck's geometry.
Border Width and Board Selection
Most Seattle deck builders default to a single-board picture frame — one row of standard-width boards around the perimeter. This is clean and effective. Some designs call for double or triple borders, which creates a more formal, layered look — think of the concentric picture frames on the back of a high-end picture frame. Double borders work particularly well on larger decks (400 square feet and up) where the additional visual mass of the border is proportionate to the overall deck scale.
For composite decks, the border boards are typically the same product as the field boards — matching color and texture throughout. Some designers specify a contrasting color for the border to create a two-tone effect, using a darker border around a lighter field or vice versa. This can be striking on the right home but requires careful consideration of long-term maintenance — composite colors can shift slightly over time (a process called weathering) and the two products need to weather at similar rates to maintain the intended contrast. Manufacturers like Fiberon offer multi-width product lines specifically designed for mixed-pattern installations. See current Fiberon options at https://www.fiberon.com/.
Key insight
For a deeper look at railing options that pair well with picture frame borders, see our guide on deck railing options for Seattle homes.
Herringbone Decking: When to Go for It and What It Really Costs
Herringbone is the pattern people save photos of on Pinterest and bring to their contractor meetings with the optimistic energy of someone who has not yet heard the framing conversation. It is undeniably spectacular when executed well. A herringbone deck — boards arranged in alternating V-shapes at 45 degrees — has a visual complexity that no other residential pattern achieves. It looks like the work of someone who genuinely cared about every detail of the design, because it is.
It is also the most structurally demanding and material-intensive pattern available for residential decking, and in Seattle's construction market, that translates directly to project cost. This section is going to give you an honest accounting of what herringbone actually requires, so you can decide whether it is the right call for your project.
The Structural Requirements
TimberTech's technical resources on herringbone installation describe what builders know from field experience: herringbone requires a combination of single and double joists wherever board ends meet. In a herringbone pattern, the boards alternate direction in a V or zigzag arrangement, and each V-point is where multiple board ends converge at a single location. Those convergence points need a double joist beneath them — two joists side by side — to provide adequate bearing surface for the fasteners from both adjoining boards. Between the convergence points, where the boards run consistently in one direction, a single joist suffices. The result is a framing layout that alternates between single and double joists in a pattern that matches the herringbone layout above.
This framing pattern is significantly more complex and labor-intensive to lay out and install than either straight or diagonal framing. A standard straight or diagonal deck can be framed by a two-person crew in a single day for most residential sizes. A herringbone layout at the same deck size may take one and a half to two days to frame correctly, and it requires a crew that has done it before — the layout math for matching double joist positions to the herringbone pattern above is not forgiving of errors.
Material Waste and Board Width
Herringbone is typically executed with narrower boards — 3.5-inch-wide boards (true 4-inch nominal) rather than the standard 5.5-inch-wide boards most composite products are sold in. The narrower boards are necessary to achieve the geometric proportions of the pattern at human scale; wider boards make the individual V-units too large and the pattern loses its visual refinement. Several composite manufacturers produce 3.5-inch-wide products for this reason, but the narrower boards cost more per square foot of coverage, and they generate more linear feet of waste cuts.
The material waste for herringbone is higher than for diagonal installation — estimates from experienced contractors run from 15 to 20 percent, depending on the deck geometry. On irregular or non-rectangular deck shapes, waste can run higher still, because the angled cuts at the perimeter of each V-unit do not align predictably with deck edges the way diagonal cuts do.
Cost estimates based on mid-range composite materials ($37.50/sq ft) plus Seattle-area labor ($12/sq ft avg). Pattern premiums reflect framing upgrades, waste, and labor complexity. Source: The Seattle Decking Company field data, 2025.
| Category | Value |
|---|---|
| Straight Field | $9,900 |
| Straight + Picture Frame | $10,300 |
| Diagonal Field | $11,200 |
| Diagonal + Picture Frame | $11,700 |
| Herringbone | $13,500 |
Labor Premiums in the Seattle Market
Seattle contractors who specialize in complex deck patterns — and not all contractors do — typically price herringbone at a meaningful premium over standard installation. Where standard composite deck installation in the Seattle market runs $10 to $14 per square foot in labor, herringbone installation runs $16 to $22 per square foot in labor, depending on the contractor and the specific complexity of the layout. Combined with higher material costs (narrower boards, more waste), a herringbone deck on a 200-square-foot footprint can realistically cost $13,000 to $16,000 fully installed, compared to $8,000 to $11,000 for a comparable straight or diagonal installation.
That premium is real, and it reflects real additional work. If you are committed to herringbone, you should get quotes from contractors who have actually built herringbone decks before — ask to see photos of completed projects and references from clients who had the pattern installed. A crew that has not done herringbone before will either underbid the complexity and come back with change orders, or they will overbid it out of uncertainty. Neither outcome serves you well.
For a detailed comparison of how the major composite brands perform for complex patterns, see our article on Trex vs. Fiberon vs. TimberTech in Seattle.
Is Herringbone Right for Your Project?
The honest answer is that herringbone makes sense for a specific type of project: a large, prominently visible deck (300 square feet or more) on a home where design investment is proportionate to property value, where the homeowner is planning to be in the home long enough to enjoy the pattern, and where the budget allows for the premium without strain. Herringbone on a 120-square-foot back deck in a Renton neighborhood where comparable homes sell at modest prices is a difficult return-on-investment case.
On a Mercer Island home with an expansive deck overlooking the water, or a high-end new construction project in Medina, herringbone is entirely appropriate and the project investment is well-placed. The National Association of Realtors' Remodeling Impact Report (available at https://www.nar.realtor/remodeling-impact) consistently shows that outdoor living improvements recover meaningful value at resale, and a herringbone deck on the right home is a feature that resonates with buyers in the premium market.
Drainage and Seattle's Stormwater Code: How Pattern Affects Water Runoff
Any deck builder operating in King County and Seattle who does not talk to you about drainage is leaving an important part of the conversation on the table. Drainage is not just a performance issue — it is a code issue, a maintenance issue, and over the 25-to-30-year lifespan of a quality composite deck, it is a money issue.
Let us start with the basic principle. Decks need to shed water. On an attached deck, water that does not drain away from the house eventually finds its way to the ledger board connection, the rim joist of the house, and the wall framing behind the siding. That is how deck construction causes rot in the house itself — a problem that goes undetected for years and costs far more to remediate than it would have cost to slope the deck correctly from the start.
The 1/4-Inch-Per-Foot Slope Standard
The standard for residential deck drainage in the Seattle market is a minimum slope of 1/4 inch per foot away from the house. On a 12-foot-deep deck, that means the outer edge is 3 inches lower than the ledger connection. On a 16-foot-deep deck, the outer edge is 4 inches lower. This slope is built into the framing — the joist hangers at the ledger are set level, and the beam or posts at the outer edge are set the appropriate amount lower.
This slope standard is not specific to Seattle — it is widely recognized in residential deck construction nationally. What is Seattle-specific is the frequency and duration of rainfall that makes adequate drainage non-optional rather than merely advisable. A flat deck in Phoenix might shed its occasional rainfall without visible problems. A flat deck in Redmond, Washington will show pooling, standing water, and eventual staining, mold, or rot issues within a few seasons.
How Pattern Direction Affects Drainage
Here is where board pattern and drainage intersect in a way that is not immediately obvious. On a deck sloped 1/4 inch per foot away from the house, water naturally wants to flow toward the low edge — the outer edge of the deck. The gaps between boards are the primary drainage path. The efficiency of that drainage path depends partly on the direction the gaps run relative to the slope direction.
Straight boards running perpendicular to the house (the most common layout) have their gaps running parallel to the slope direction — the gaps run from the house out toward the yard, which is exactly the direction water wants to flow. This is the most efficient drainage geometry for a standard deck slope.
Diagonal boards, by contrast, have gaps running at 45 degrees to the slope direction. Water still drains, but it travels along the gap diagonally before reaching the edge. On a well-sloped deck, this is not a meaningful problem — the water still gets off the deck. On a deck with a minimal slope or a flat section near a house wall, diagonal gaps can slow drainage slightly compared to perpendicular gaps.
Herringbone has the most complex drainage geometry of any pattern, with gaps running in two alternating directions. The V-points of the herringbone create small convergence zones where water from adjacent gap channels meets — these convergence points should be considered when evaluating deck slope and drainage design.
Important
Seattle SDCI Stormwater Requirements
Seattle's stormwater code, enforced through the SDCI permitting process, treats decks as impervious or semi-impervious surfaces depending on construction type. An open-structure deck with gaps between boards over a permeable ground surface (gravel, permeable pavers, vegetation) is generally treated as semi-pervious — water passes through the deck surface and infiltrates into the ground below. A solid-surface deck, or a deck built over a concrete pad, is treated as impervious.
The distinction matters because Seattle tracks total impervious surface area on residential lots. If your lot already has significant impervious coverage — driveway, house footprint, existing concrete — adding a new deck can push the total over thresholds that trigger stormwater management requirements. In those cases, you may need to incorporate a dispersion trench, infiltration facility, or other stormwater management measure as a condition of your permit.
None of this is reason to avoid building a deck. It is reason to work with a contractor who understands Seattle's permitting environment and includes a stormwater review as part of the design process. You can review current King County building permit requirements at https://kingcounty.gov/en/dept/dls/building-safety-inspection/building/permits and Seattle SDCI deck requirements at https://www.seattle.gov/sdci/permits/common-projects/decks.
For a full walkthrough of the King County permitting process, see our guide on deck permits in King County.
Permitting in Seattle: What Complex Patterns Mean for Your SDCI Application
The permitting conversation is one where Seattle homeowners often receive incomplete information. The standard explanation is straightforward: Seattle's SDCI requires a construction permit for any deck with a walking surface more than 18 inches above grade. Below 18 inches (measured at any point beneath the deck), you are in permit-exempt territory for most residential decks, subject to the applicable zoning setbacks and lot coverage limits.
What the standard explanation often leaves out is how complex patterns affect the permit process — not in terms of pattern-specific code requirements (there are none for pattern alone) but in terms of how increased project complexity and cost interact with permit valuation and fees.
How Permit Valuation Works
Seattle building permits are assessed based on the declared value of the construction project. The permit fee is a percentage of the project valuation, using a sliding scale established by the SDCI fee schedule. When you submit a permit application for a deck, you declare the project value — which is the total cost of materials and labor for the full project.
A herringbone composite deck on a 300-square-foot footprint in Bellevue, fully installed, might carry a project valuation of $18,000 to $22,000. A straight-field composite deck of the same size might be valued at $12,000 to $15,000. The permit fee on the higher-value project is meaningfully higher — not dramatically so in absolute terms (we are typically talking about a difference of a few hundred dollars in permit fees), but it is part of the total cost equation.
The more significant permitting implication of complex patterns is lead time and review complexity. Decks with complex framing layouts — particularly herringbone, which requires a non-standard alternating single-and-double-joist layout — require more thorough plan review to verify structural compliance. In King County's current permitting environment, plan review times for residential deck permits have been running four to eight weeks for over-the-counter or standard review. Complex structural layouts occasionally flag for additional engineering review, which can add time.
Working with an Engineer for Herringbone Layouts
For herringbone decks, particularly on elevated decks more than 30 inches above grade or on decks attached to houses where the ledger connection carries significant load, some Seattle area plan reviewers request a stamped structural engineering drawing. This is not always required, but it is more common for complex framing layouts than for standard decks. A structural engineering review typically costs $500 to $1,500 for a residential deck, and the resulting stamped drawings generally sail through permit review without complications.
If your contractor suggests getting an engineering review on a herringbone deck, take the advice. It protects you, it protects the contractor, and it produces documentation that can be valuable at resale — buyers in Seattle's market increasingly ask for permit documentation on exterior structures.
Permit Implications of the Pattern-Framing Relationship
Here is a practical note for homeowners navigating the permit process. When you pull a permit for a deck, the permitted drawings need to accurately reflect the framing layout as built. If you permitted a deck with standard 16-inch joist spacing and then asked your contractor to go diagonal without updating the permit, the as-built framing would not match the permitted drawings. That is a problem for the inspection, and potentially a problem for your homeowner's insurance if a claim ever arises related to the deck.
Make sure your contractor is updating the framing plan in the permit documents when a pattern change drives a framing change. This is basic permit compliance, but it is easy to overlook in the middle of a fast-moving project.
Tip
Material Choice by Pattern: Wood vs. Composite in a Wet Climate
The intersection of material choice and board pattern is more complex than most homeowners expect. The conventional wisdom — composite is low-maintenance, cedar is beautiful — misses several important technical considerations that matter specifically when you are combining a particular material with a particular pattern in Seattle's climate.
Cedar and Complex Patterns: The End-Grain Problem
Western red cedar is the traditional choice for Pacific Northwest decking, and it is genuinely beautiful. The grain character, the natural color, and the dimensional stability of quality clear cedar make it a material that experienced builders respect. But cedar has a specific vulnerability in complex patterns that composite does not: end grain.
In a straight deck layout, most of the board ends are at the two short sides of the deck — two edges. Those ends can be treated with end-grain sealer and largely hidden under the deck framing or under a picture frame border. In a diagonal layout, every board has two angled end cuts at the deck perimeter — and those end cuts expose the full cross-section of the cedar board, including the end grain. In a herringbone layout, the number of exposed end cuts is even higher, because every V-point also involves board ends that converge in the field.
Exposed end grain on cedar absorbs moisture at several times the rate of face or edge grain. Without consistent treatment and maintenance — typically annual or biennial application of a penetrating oil or sealant — cedar end grain will check (develop surface cracks), darken from tannin extraction, and eventually begin to degrade faster than the face surfaces of the boards. On a diagonal cedar deck, this means the perimeter is your highest maintenance priority, every year.
Composite decking eliminates this problem almost entirely. Quality capped composite from Trex, TimberTech, AZEK, or Fiberon has an extruded cap that protects the face, edges, and ends — when you cut a capped composite board, the cut end loses the cap protection, but the interior composite material is far less moisture-sensitive than cedar end grain. Some composite installations use color-matched end caps or color-matched paint to finish exposed ends, but in practice, the cut ends of quality composite boards in a well-built deck are not a maintenance vulnerability the way cedar end grain is.
This matters for pattern selection because diagonal and herringbone patterns generate the most cut ends. If your heart is set on cedar, a straight-field pattern with a picture frame border (which minimizes the number of exposed end cuts) is the most defensible choice for longevity. If you want diagonal or herringbone, composite is the technically superior material choice for the Seattle climate. For a detailed comparison, see our article on composite vs. cedar decking in Seattle.
Composite Product Selection for Pattern Work
Not all composite products are equally suited to complex pattern work. There are several product characteristics to evaluate when specifying composite for a diagonal, picture frame, or herringbone installation.
Board width: Standard composite decking is sold in nominal 6-inch width (actual 5.5 inches). For herringbone, the preferred width is nominal 4-inch (actual 3.5 inches). Not all brands offer 3.5-inch boards. TimberTech and AZEK both offer multi-width product systems — confirm availability and lead times before specifying, as narrower boards may carry longer order times in the Seattle market.
Straightness and consistency: Complex patterns are less forgiving of board bow or camber than straight installations. A slightly bowed board in a straight layout can be persuaded into position with fasteners. In a herringbone layout, where every board needs to meet its neighbor at a precise 45-degree angle, bowed boards create gaps and misalignments that are visible in the finished surface. Specify products that are noted for dimensional consistency, and inspect delivery loads before installation begins.
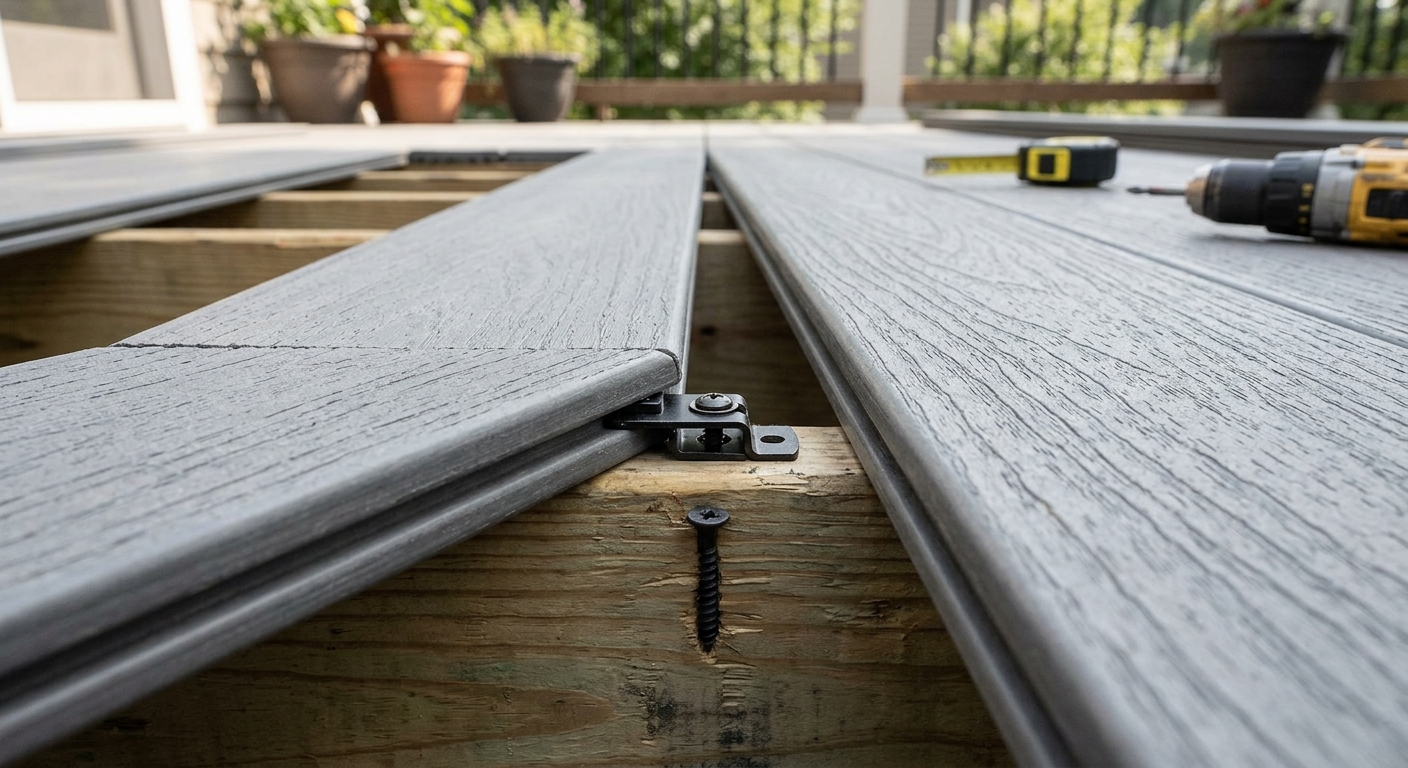
Fastener system compatibility: Hidden fastener systems — the T-clips or grooved-edge systems from Trex, TimberTech, and others — are designed for straight installation. Diagonal installation with hidden fasteners requires careful layout to ensure the clips can be installed at the correct angle. Some patterns are more naturally suited to face-fastening with color-matched composite screws, particularly at perimeter boards and picture frame borders. Your contractor should specify the fastening approach explicitly as part of the installation plan.
Color and fade consistency: On a large herringbone or diagonal deck, boards from multiple production lots can show slight color variation — a phenomenon common to all composite products. In a straight-field layout, any color variation is spread randomly and is visually diffuse. In a diagonal or herringbone pattern, where the eye naturally follows the geometric lines of the pattern, any systematic color variation between board rows can be more noticeable. Order all materials from the same production run where possible, and blend boards from multiple bundles during installation to distribute any within-run variation.
| Material | Pattern Suitability | End-Cut Vulnerability | Maintenance (Seattle Climate) | Cost Range (Materials) |
|---|---|---|---|---|
| Western Red Cedar | Straight, Picture Frame best; Diagonal OK | High — annual sealing required | High — annual oil/seal treatment | $25–$35/sq ft |
| Pressure-Treated Lumber | Straight, Picture Frame only | Moderate — PT preservative helps | Medium — periodic sealing | $15–$25/sq ft |
| Standard Composite (uncapped) | Straight, Diagonal | Moderate — exposed core at cuts | Low-medium | $22–$30/sq ft |
| Capped Composite (Trex, Fiberon, TimberTech) | All patterns including Herringbone | Low — cap protects face/edges | Low — wash annually | $30–$45/sq ft |
| PVC Decking (AZEK) | All patterns | Very Low — solid PVC throughout | Very Low — no staining, no sealing | $35–$50/sq ft |
For specific product comparisons relevant to Seattle projects, see our best decking materials for Seattle 2026 guide and our detailed comparison of Trex vs. Fiberon vs. TimberTech.
Cedar Sealing and Maintenance for Pattern Work
If you do choose cedar with a diagonal or complex pattern, the maintenance protocol needs to be more rigorous than for a straight cedar deck. In addition to standard annual cleaning and biennial sealing of the field surface, pay specific attention to the board ends at the perimeter. End-grain sealer should be applied at every exposed cut end during installation — before the boards go down, not after. Applying sealer after installation leaves the underside of the end cut unprotected, and moisture wicks up from below just as readily as it penetrates from above.
For more on cedar deck maintenance in the Seattle climate, see our guide on cedar deck sealing in Seattle.
Choosing the Right Pattern for Your Seattle Home's Style and Budget
After covering the structural, drainage, permitting, and material considerations in detail, this section brings everything together into a practical decision framework for Seattle homeowners. The pattern decision is ultimately a combination of four factors: visual goals, structural realities of your specific site, material preference, and budget.
Pattern Comparison at a Glance
| Pattern | Visual Effect | Framing Complexity | Material Waste | Relative Cost (vs. Straight) | Best For |
|---|---|---|---|---|---|
| Straight Perpendicular | Clean, traditional | Low — standard 16" o.c. | Minimal | Baseline | Any project, budget-conscious |
| Straight + Picture Frame | Finished, tailored | Low + doubled rim joist | Minimal | +3-5% | Any project as an easy upgrade |
| Diagonal | Dynamic, expansive | Medium — 12" o.c. required | +15% | +10-18% | Traditional or transitional homes, view-oriented decks |
| Diagonal + Picture Frame | Sophisticated, classic | Medium + doubled rim joist | +15% | +13-22% | The most popular premium pattern in Seattle |
| Herringbone | Dramatic, architectural | High — alternating single/double joists | +15-20% | +30-50% | Large decks on premium properties |
Matching Pattern to Architecture
Seattle's housing stock is diverse, and pattern choice should reflect the architectural character of the home. Here is how experienced builders typically match patterns to home styles in the region.
Craftsman and bungalow architecture (common in Ballard, Green Lake, Columbia City, and Maple Leaf) pairs naturally with diagonal-and-picture-frame or straight-with-picture-frame patterns. The picture frame detail echoes the trim-conscious character of Craftsman design, and the diagonal field adds visual interest without departing from a traditional vocabulary.
Mid-century modern (Mercer Island, Bellevue's older neighborhoods, parts of Shoreline) suits straight-field composite with hidden fasteners and a clean, flush perimeter — no picture frame required. The simplicity of the straight pattern complements mid-century minimalism, and the pattern lets the material and railing design carry the visual character. A cable railing in stainless steel with straight composite boards is a classic mid-century deck composition. See our guide on cable railing in Seattle for details on that pairing.
Contemporary new construction (throughout Sammamish, South Bellevue, Eastside suburbs) often features two-tone composite installations — a darker picture frame border around a lighter field, or a straight field with a contrasting border and a glass panel railing. The pattern works as part of an overall contemporary composition, not as the standalone feature.
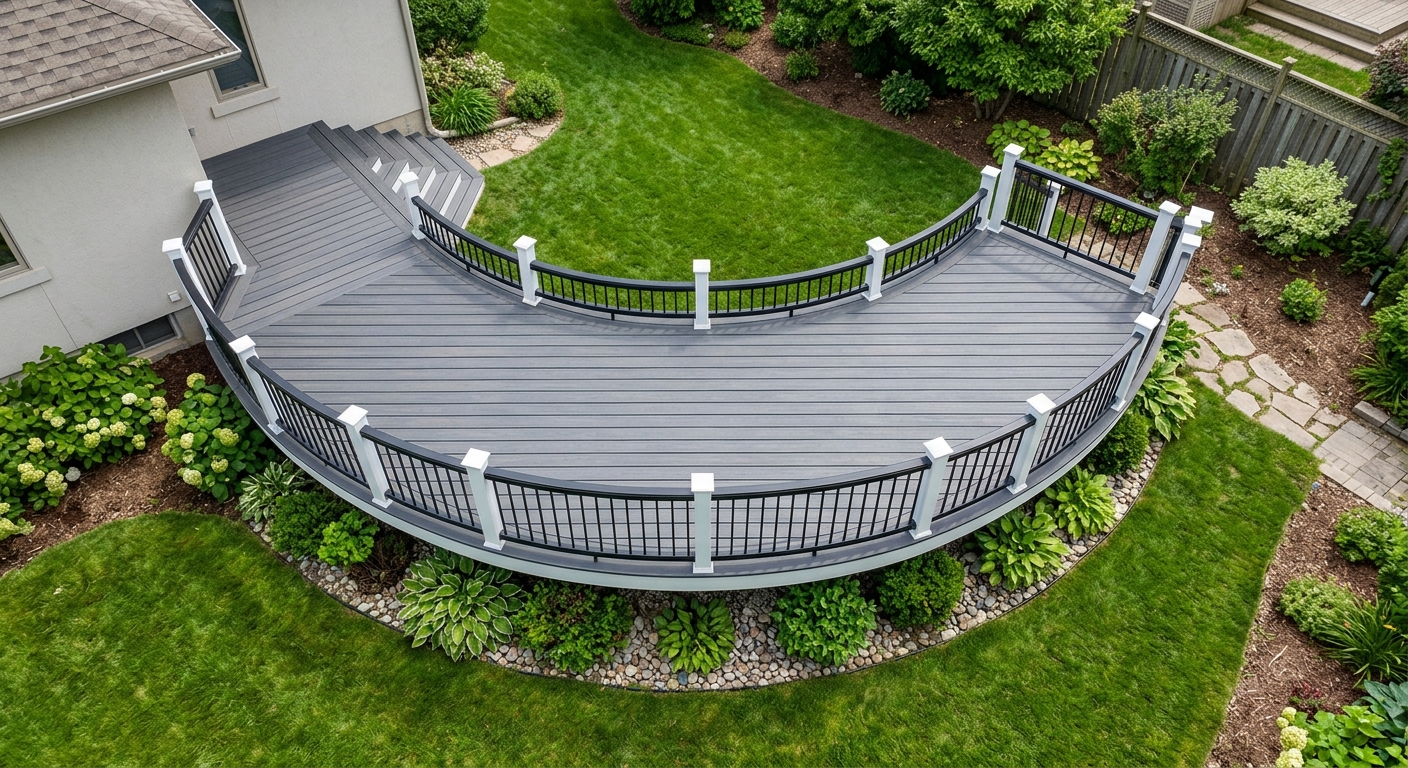
Larger or premium properties (Medina, Clyde Hill, Windermere, Yarrow Point) are where herringbone earns its keep. On a 500-square-foot deck on a premium property, the investment in herringbone framing and installation is proportionate to the property value and the intended use of the outdoor space. Combined with a custom curved edge, integrated lighting, and a multi-panel glass railing, herringbone becomes the centerpiece of an outdoor living space that photographs well and sells well.
For inspiration on how complex patterns work with custom deck shapes, see our articles on custom curved decks in Seattle and deck and patio combos in Seattle.
Budget Guidance for Pattern Decisions
Here is the honest budget conversation. In Seattle's construction market, a quality composite deck fully installed starts around $40 per square foot and goes up from there depending on site conditions, deck height, railing choice, and yes, pattern complexity. A 200-square-foot deck — a reasonable size for a back yard entertaining space — starts at roughly $8,000 for a basic composite installation and runs to $14,000 or more for a complex pattern with premium materials.
The National Association of Decking and Railing Professionals (NADRA, at https://www.nadra.org/) tracks cost and return data for residential deck projects nationally. The National Association of Realtors' Remodeling Impact Report (at https://www.nar.realtor/remodeling-impact) consistently shows composite deck additions recovering 60 to 70 percent of project cost at resale, with higher recovery rates in markets like Seattle where outdoor living spaces are highly valued.
For pattern-specific budget guidance:
- Straight or straight-plus-picture-frame: This is the right call when budget is the primary constraint and you still want a quality result. The picture frame border gives you a designed look without material waste or framing complexity.
- Diagonal or diagonal-plus-picture-frame: Budget for the 15 percent material waste and the framing upgrade in your material and labor estimate. If your contractor's quote doesn't explicitly include these, ask why.
- Herringbone: Budget for a 30 to 50 percent premium over a straight installation on the same footprint. Get at least two quotes from contractors who have built herringbone decks before, and ask for references.
For a comprehensive overview of deck project costs in the Seattle market, see our detailed guide on deck costs in Seattle 2025 and our Seattle deck cost overview.
Key insight
When to Start Simple and Add Complexity Later
One approach that experienced Seattle deck builders sometimes recommend to homeowners who are budget-constrained but design-conscious: build the framing to accommodate a future pattern upgrade. If you know you eventually want diagonal boards but cannot budget for the full project cost right now, discuss with your contractor whether the initial deck can be framed at 12-inch joist spacing from the start. The incremental cost of framing at 12 inches versus 16 inches is modest compared to the cost of re-framing a completed deck later. The surface boards can be installed straight at low cost now, and replaced with diagonal boards at a future re-deck when budget permits — which on a quality composite deck might be 20 to 25 years from now, so this is more of a theoretical option than a practical one.
More practically, picture frame borders can almost always be added to an existing straight deck during a re-deck project without framing changes, as long as the rim joist is structurally sound. If you are starting with a straight deck now and plan to upgrade the surface someday, the picture frame border is the easiest future add.
For questions about specific deck designs and cost scenarios for your Seattle home, see our deck addition guide for context on how board pattern fits into the larger addition planning process.
Real-World Pattern Decisions: What Seattle Homeowners Actually Choose
After years of building decks in King County — from waterfront properties in Kenmore and Kirkland to hillside lots in Issaquah and Maple Valley to urban backyards in Seattle's Rainier Valley and West Seattle neighborhoods — here is what we see in practice.
The most popular pattern combination in the Seattle market, by a significant margin, is diagonal-field-with-picture-frame-border in capped composite. It delivers a premium look at a cost premium that most homeowners in King County's price range find reasonable. The diagonal field gives the deck visual energy and makes smaller outdoor spaces feel larger. The picture frame creates a finished perimeter that distinguishes the deck from builder-grade straight installations. And capped composite in the Pacific Northwest climate means the pattern looks good at year five and year fifteen with minimal maintenance.
Straight with picture frame is the second most common choice, particularly on decks where the architecture does not call for the visual energy of diagonal — contemporary homes, minimalist landscapes, and situations where the railing or lighting design is intended to be the primary design statement.
Herringbone remains a specialty pattern — chosen by perhaps one in twenty homeowners who are seriously considering non-standard patterns. When it is chosen, it is usually on a larger deck with a clear premium property context, and by homeowners who have thought carefully about it and are committed to the investment. It is never an impulse choice, and it should not be — the structural and cost implications make it a decision that rewards deliberate planning.
Straight-field-only installation, with no border and standard fasteners, remains the most common overall because it is the most cost-effective and because many homeowners prioritize the structural and functional elements of the deck — railing, lighting, stairs, built-in seating — over the pattern of the field boards. That is a legitimate choice, and it is worth noting that a well-built straight-field composite deck with quality railing and lighting can be just as visually compelling as a complex pattern on a deck with lower-quality other elements.
If you are planning a new deck in the Seattle area and want to talk through which pattern makes sense for your specific home, lot, and budget, The Seattle Decking Company is available to walk through the options with you. We build decks throughout King County — Bothell, Kirkland, Bellevue, Issaquah, Sammamish, Redmond, Kenmore, and the surrounding communities — and we bring the framing expertise, material knowledge, and permitting experience to make complex pattern projects work correctly the first time. Reach us at (425) 675-6259, visit us at 22722 29th Drive SE, Bothell, WA 98021, or use our contact form to describe your project and schedule a consultation.
Frequently Asked Questions
Do diagonal deck boards cost more than straight boards in Seattle?
Is herringbone decking worth the cost for a Seattle home?
Do I need a permit for a complex-pattern deck in Seattle?
Does the board pattern affect how water drains off a Seattle deck?
Can I install a picture frame border on an existing deck?
What is the best composite decking material for diagonal or herringbone patterns in Seattle?
How much waste should I budget for diagonal deck boards?
Does Seattle's stormwater code affect which deck pattern I can choose?
Which deck board pattern adds the most resale value in King County?
How long does it take to install a diagonal or herringbone deck pattern vs. straight boards?
Can cedar be used for diagonal or herringbone patterns in Seattle?
Do I need a structural engineer for a herringbone deck permit in Seattle?
Planning a deck in the Seattle area?
Get an onsite design review and a clear, itemized quote from a licensed local builder.
Request a Free Quote