
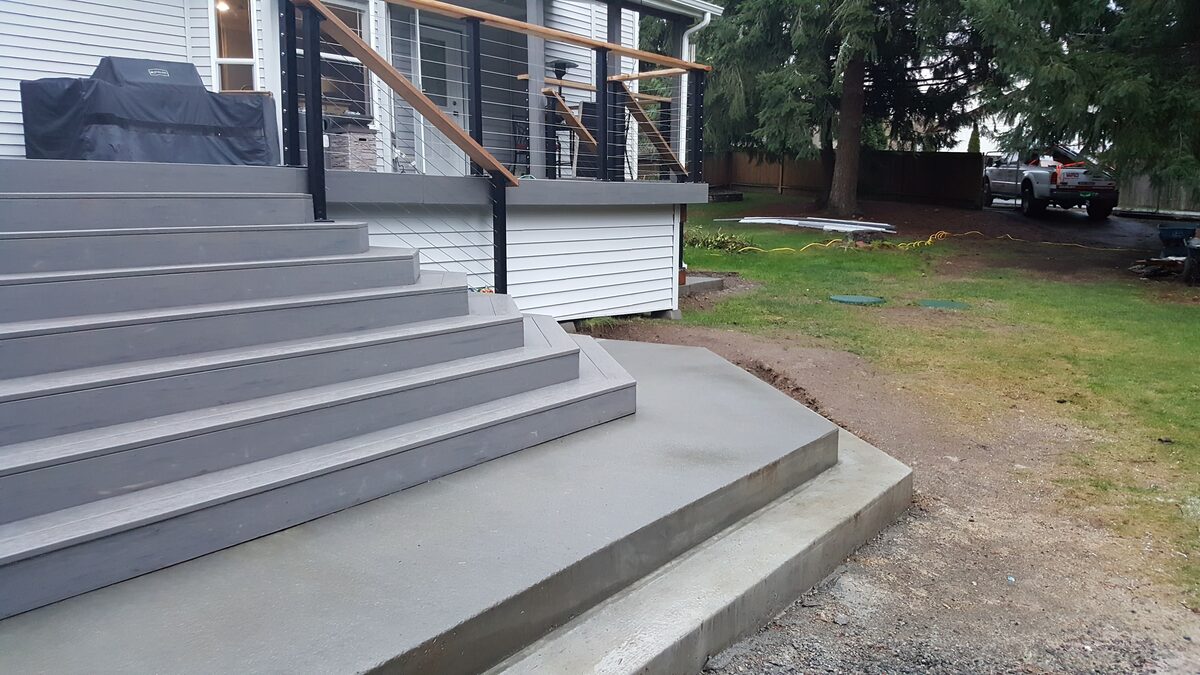
If there's one question we field on nearly every consultation call, it's some version of: "How big should my deck be?" It sounds simple — but in Seattle, the answer depends on at least half a dozen variables that have nothing to do with what you see on Pinterest. Your lot's actual usable footprint after setbacks, the slope of your yard, proximity to trees protected under King County's urban canopy rules, your home's square footage, and what you actually plan to do out there — all of it matters. Get the size wrong in either direction and you've either built a deck that feels cramped the moment you set up a table and four chairs, or you've saddled yourself with a maintenance burden that takes up entire weekends every spring.
Here's what we see in practice: most Seattle homeowners land in the 300–400 square foot sweet spot. That's enough for a six-person dining set, a couple of lounge chairs, and maybe a small fire table without things feeling crowded. But "most" doesn't mean "right for you." A Montlake bungalow with a narrow 40-foot lot rear yard has completely different constraints than a Sammamish colonial on a third of an acre. And a homeowner who wants a dedicated outdoor kitchen, a sectional sofa, a hot tub, and a dining area for twelve is operating in a different universe than someone who just wants to sip coffee outside in the morning. This guide will give you the specific numbers, the local regulatory constraints, and the honest cost ranges to right-size your deck before you ever talk to a contractor.
One more note before we dive in: Seattle's building environment is genuinely different from the national averages you'll read about on home improvement aggregator sites. Labor is more expensive. Engineered fill on sloped lots drives up structural costs. King County's tree protection ordinances frequently reshape what's actually buildable in your backyard. The Seattle Department of Construction and Inspections (SDCI) has its own permit thresholds that don't perfectly mirror the statewide IRC defaults. We'll address all of that here, with real numbers.
Size by Use Case: Start With How You Actually Live Outside
Before you pick a number, define what you want the deck to do. This sounds obvious, but most homeowners start by guessing a size and then try to fit their life into it, which is backwards. Start with use cases — specific activities with real furniture and real people — then calculate the square footage those activities require.
Dining Only: The Minimum Viable Deck
If your primary goal is a dining space where you can eat outside with your household, a 10x12 (120 sq ft) deck is the true minimum. That accommodates a 48-inch round table with four chairs and a few feet of clearance on each side. But 120 sq ft is genuinely tight — you're not getting a grill station, a planter, or a serving cart in there without it feeling like a restaurant kitchen during a rush.
A more realistic dining-only footprint is 12x14 (168 sq ft) or 12x16 (192 sq ft). At 192 sq ft, you can fit a six-seat rectangular table with adequate clearance, a small cart for grilling equipment, and a potted plant or two. This is also the size range that sometimes qualifies for a simplified permit process in unincorporated King County — though in the City of Seattle, virtually all attached deck projects require at least a subject-to-field-inspection permit regardless of size.
Note
Dining Plus Lounging: The Seattle Sweet Spot
When you add a separate lounging zone — a sectional, a few Adirondack chairs, a fire table — you're looking at 300–400 sq ft minimum. This is by far the most requested size range we build in the greater Seattle area, and it makes sense: it's large enough to feel like a real outdoor room, and small enough to remain manageable on a typical suburban lot after setbacks eat into your rear yard.
At 300 sq ft (say, 15x20), you can run a six-seat dining arrangement on one end and a two-chair lounging nook on the other, with a natural traffic lane between them. At 400 sq ft (16x25 or 20x20), you gain enough room to make both zones feel generous rather than squeezed. For a household that entertains occasionally — dinner for eight, Sunday coffee for the neighbors — 300–400 sq ft is typically the right call.
The National Association of Deck and Railing (NADRA) consistently identifies 300–400 sq ft as the most popular deck size nationwide, with the average deck size trending slightly upward over the past decade as outdoor living has become more central to home design.
Full Outdoor Room: 400–600 Sq Ft
If you're planning an outdoor kitchen with a built-in grill, side burner, and refrigerator; a hot tub; a covered pergola section; and a full sectional seating arrangement — you're in the 400–600 sq ft territory. A 20x24 (480 sq ft) or 20x30 (600 sq ft) deck can accommodate all of that without feeling chaotic, but the design has to be intentional. Zones need to be clearly defined, traffic flow has to be planned, and the structural engineering gets more complex as you add weight loads from hot tubs and kitchen appliances.
Above 600 sq ft, you're either building a multi-level structure (which adds significant cost and permitting complexity), or you have a genuinely large rear yard on a relatively flat lot — which is less common in the hillside neighborhoods of Seattle than in the Eastside suburbs.
Tip
Multi-Level Decks: Adding Square Footage Without Expanding the Footprint
On sloped lots — which describes a significant portion of Seattle's residential landscape — the answer to "how do I get more usable area" is often vertical rather than horizontal. A multi-level deck splits the available square footage across two or more tiers, with each tier serving a specific function. Lower tier for hot tub or fire feature; upper tier off the house for dining and lounge.
Multi-level builds are more expensive per square foot because each tier requires its own structural framing, stairs, and railing runs. But they allow you to create 500–700 sq ft of total functional area on a lot where a single-level deck could only occupy 250–300 sq ft before hitting setback lines or tree protection zones. We cover the full design breakdown in our article on multi-level decks in Seattle.
Seattle-Specific Size Drivers: What Limits Your Available Footprint
This is the section that most national deck size guides skip entirely. In Seattle and the surrounding King County municipalities, several regulatory and physical site conditions routinely force decks to be smaller than homeowners originally envision. Knowing these constraints upfront saves you from designing a 400 sq ft deck only to discover you can legally build 280 sq ft.
Setback Requirements: The Real Footprint Killer
Under Seattle's current zoning code (SMC Title 23), most single-family residential lots in NR3 zones — the most common zone in Seattle, formerly SF5000 — carry these setbacks:
- Front yard: 20 feet
- Side yards: 5 feet each
- Rear yard: 25 feet (reduced to 20 feet on lots less than 85 feet deep)
Unenclosed decks and balconies may project up to 4 feet into required setbacks, but structures taller than 18 inches cannot be built within the front yard setback or within the standard side and rear setback areas without a variance.
Let's translate that into real numbers. Take a typical 50x100 foot lot in Ballard or Wallingford. After the 20-foot front and 25-foot rear setbacks, you have 55 feet of lot depth to work with. Your house occupies, say, 30 feet of that. You're left with 25 feet of rear yard depth before the setback line. With a 5-foot setback on each side, your maximum deck width is 40 feet. Your maximum depth without hitting the setback line is 25 feet. That gives you a theoretical maximum of 40x25 = 1,000 sq ft. But "theoretical maximum" and "practical maximum" are very different numbers once you account for the yard space you want to keep, the location of your sewer cleanout or gas meter, and existing trees.
For King County unincorporated areas outside Seattle city limits — Bothell, Kenmore, and surrounding communities where our shop is based — setback requirements vary by zoning district. You can verify the requirements for a specific parcel using the King County Permit FAQ or through the King County GIS portal.
Important
Slope and Grade: Usable Area vs. Total Area
Seattle's topography is dramatic. Neighborhoods like Capitol Hill, Beacon Hill, Queen Anne, and West Seattle routinely feature rear yards that drop 10–20 feet over a 30-foot run. On these lots, the "available area" on paper can be very different from the "usable area" in practice.
A severe slope doesn't just affect what you can build — it affects what you'd want to build. A 400 sq ft deck cantilevered 15 feet above a steeply sloping yard is a structurally complex and expensive proposition. The framing depth, post heights, lateral bracing requirements, and diagonal footing designs all escalate cost significantly. More practically, an elevated deck with nothing usable below it (or a frightening view straight down through the deck boards) can feel uncomfortable to use.
For slopes exceeding a 3:12 pitch in the buildable area, we generally recommend either a smaller footprint elevated deck (200–300 sq ft) combined with a grade-level patio at the base, or a multi-level configuration that steps down with the grade. This produces better outcomes — both aesthetically and structurally — than trying to build one large flat surface on a dramatic hillside.
See our full guide to hillside deck construction in Seattle for site-specific structural considerations.
Tree Protection Zones: The Constraint Nobody Mentions
Seattle's tree protection ordinance (SMC 25.11) protects trees with a trunk diameter of 6 inches or more at breast height (DBH). The critical root zone for a protected tree is typically calculated as a radius equal to 1 foot per inch of trunk diameter — meaning a 12-inch DBH tree has a 12-foot critical root zone radius. No deck footings, no concrete, no grade changes within that zone without an arborist report and often a permit modification.
If your rear yard has a 24-inch DBH Douglas fir — common in older Seattle neighborhoods — you're looking at a 24-foot critical root zone radius. That can eliminate a substantial chunk of your buildable footprint before you've even thought about setbacks.
King County's urban forestry program adds another layer in unincorporated areas, particularly in tree-dense neighborhoods around Bothell, Kenmore, and Woodinville. Our article on building a deck near trees in Seattle covers the full arborist report process and what deck designs are permissible near protected trees.
How to Measure Your Available Space Accurately
Here's a step-by-step process for determining your true buildable footprint before you call a deck builder — or at minimum, what to have ready when you do.
Step 1: Pull Your Property Survey or Plat Map
If you have a survey from when you purchased the home, start there. Identify the rear and side property lines precisely. If you don't have a survey, contact your county assessor's office or use the King County iMap portal to get a parcel footprint approximation — but understand that GIS data has accuracy limitations and a survey is always more reliable for construction planning.
Step 2: Apply Your Setbacks
Using the survey, mark the setback lines with a chalk line or stakes in your actual yard. Walk the space. What's left? That's your buildable envelope. Most homeowners discover their buildable envelope is noticeably smaller than they imagined.
Step 3: Identify Obstructions and Utility Easements
Mark the location of your sewer cleanout (typically a 4-inch PVC cap near the foundation or in the rear yard), gas meter, electrical conduit, and any utility easements documented in your title report. Most of these locations require clearance that takes them out of the buildable footprint.
Step 4: Identify Trees That May Trigger Protection Rules
Walk the rear yard and estimate the DBH of any trees 6 inches or larger. If you're in Seattle proper, assume these require consideration under the tree protection ordinance. For each tree, roughly mark the critical root zone (1 foot radius per inch of DBH) and see how much of your remaining envelope it overlaps.
Step 5: What You're Left With Is Your Realistic Maximum
Once you've done those four steps, measure the remaining clear area. This is your hard ceiling — the largest deck you can build. From here, you size down based on use case, budget, and proportion to your home.
Key insight
Common Deck Configurations in Seattle: Dimensions That Work
Rather than picking a square footage in the abstract, it's helpful to think in terms of concrete rectangular configurations. Here are the most common sizes we build and what they work best for:
12x16 (192 Sq Ft): The Compact Starter Deck
This is the smallest size that functions as a genuine outdoor room rather than just a landing pad outside the back door. It accommodates:
- A 4-to-6 person dining table (36x60 inches) with chair clearance
- A small grill station at one end
- Container plantings along the rail
Best for: smaller lots, single or couples households, or homeowners who primarily want outdoor dining without a lounging zone. Also the most likely configuration to qualify for a simplified permit pathway in some King County jurisdictions.
14x20 (280 Sq Ft): The Most Versatile Small Deck
This is the minimum where you start to have genuine zoning — one end for dining, one end for a pair of lounge chairs or a small love seat. It's large enough to feel spacious when empty, and functional when occupied by 6–8 people for a casual gathering.
Best for: households that want both dining and lounging without going to a larger footprint. Works well on narrower lots where width is constrained to 14 feet after setbacks.
16x24 (384 Sq Ft): The Seattle Sweet Spot
This is the configuration we build most often, particularly for homes in the 1,600–2,400 sq ft range. It provides:
- A dedicated 8-person dining zone (one end, roughly 12x16)
- A full lounging zone with a sofa and two chairs (opposite end, roughly 12x12)
- A natural traffic lane between zones
- Room for a container garden along one or two rail sections
Best for: households that entertain regularly, families with kids, or anyone who considers outdoor living a primary use of their home.
20x24 to 20x30 (480–600 Sq Ft): The Full Outdoor Room
At this scale you can add an outdoor kitchen, a dedicated hot tub zone, or a covered pergola section without sacrificing the dining and lounging areas. The structural framing becomes more complex, and the permit process escalates slightly, but the result is a true extension of your home's living space.
Best for: larger homes (2,400 sq ft+), lots with ample rear yard depth, households with outdoor kitchen or hot tub aspirations. See our service page on outdoor kitchen decks for what this adds to scope and cost.
Multi-Level Configurations: When One Tier Isn't Enough
As discussed in the slope section above, multi-level decks are frequently the right answer for Seattle's hillside lots. Common configurations:
| Configuration | Total Sq Ft | Best Use |
|---|---|---|
| Two-tier, 12x16 + 12x12 | ~330 sq ft | Dining up top, hot tub or fire pit on lower tier |
| Two-tier, 16x20 + 16x12 | ~512 sq ft | Full outdoor room split across levels |
| Three-tier, stepped | 600+ sq ft | Dramatic sloped lots, estate-scale builds |
Multi-level decks require more detailed engineering documentation and typically trigger a full building permit regardless of individual tier size. Budget accordingly.
Deck Size and Permits: What Seattle and King County Actually Require
The permit question is one of the most misunderstood aspects of deck planning, and getting it wrong — in either direction — creates real problems. Build without a required permit and you'll face issues at resale and potential forced removal. Over-build your permit requirements and you'll waste money on documentation that wasn't necessary.
City of Seattle (SDCI)
According to Seattle's SDCI, most deck projects in Seattle require at minimum a Subject-to-Field-Inspection (STFI) permit. A more comprehensive building permit is required when:
- The deck will be more than 8 feet above grade
- The design includes beams 14 feet or longer
- It's a roof deck
- It's located in or near an Environmentally Critical Area (ECA)
- The deck flooring is a solid surface (no gaps between boards, such as membrane decking)
- The total deck area exceeds 750 sq ft
The practical upshot: in Seattle, virtually every attached deck requires some form of permit. There is no meaningful "under 200 sq ft exemption" for attached decks in the City of Seattle the way some other jurisdictions provide.
Note
King County Unincorporated Areas (Including Bothell Area)
For properties in unincorporated King County — which covers a significant portion of the Bothell, Kenmore, and Woodinville service area where we operate — the permit thresholds differ slightly from Seattle's. The King County Permits division generally follows the Washington State Building Code (which adopts the IRC), with some local amendments.
Under the IRC, freestanding decks under 200 sq ft that are less than 30 inches above grade may qualify for a permit exemption in some jurisdictions. However, King County has its own code amendments and not all of these exemptions carry over cleanly. Attached decks nearly always require permits regardless of size.
Our full breakdown of the permit process — including fee estimates and typical timelines — is in our guide to deck permits in King County.
The Washington L&I Connection: Contractor Licensing
Regardless of permit requirements for the deck itself, any contractor you hire to build it must be licensed with Washington Labor & Industries. This is non-negotiable. A licensed, bonded, and insured contractor is a prerequisite for any permitted work — and for your protection even on unpermitted projects. Verify your contractor's L&I status before signing any contract.
Cost by Deck Size: Real 2026 Seattle Numbers
Let's talk money. These are the ranges we see in practice, not national averages padded for local cost of living. They assume standard single-level deck construction with composite or cedar decking, standard railing, and a relatively flat lot. Hillside and multi-level projects sit at the higher end of each range or above it.
Installed cost ranges for standard single-level decks in the Seattle metro area. Composite materials; includes permit, framing, decking, and standard railing. Source: The Seattle Decking Company project data 2025–2026.
| Category | Value |
|---|---|
| 100–200 sq ft | $K19 |
| 200–400 sq ft | $K32 |
| 400–600 sq ft | $K57 |
| 600+ sq ft | $K80 |
100–200 Sq Ft: $13,000–$25,000
The wide range here reflects material choice more than size. A 150 sq ft pressure-treated deck with simple railing might land at $13,000–$16,000 all-in. The same footprint in composite decking (Trex, TimberTech, or Fiberon) with cable railing runs $18,000–$25,000. At this scale, fixed costs (permit, design, mobilization) represent a larger percentage of the total, so the cost per square foot is actually higher than for larger decks — often $100–$130/sq ft for composite builds.
If you're considering this size range, read our cost comparison at /deck-cost-seattle for a detailed per-square-foot breakdown by material.
200–400 Sq Ft: $20,000–$45,000
This is the most common project size range we see, and the range reflects enormous variation in material and specification choices. A 300 sq ft cedar deck with treated framing, cedar decking, standard aluminum balusters, and basic stair access: roughly $22,000–$28,000. The same 300 sq ft in Trex Transcend composite with black powder-coated cable railing and a multi-tread stair: $35,000–$42,000.
Slope adds $8,000–$15,000 even in this size range if you're more than 4 feet above grade and require tall posts with additional lateral bracing.
See our detailed article on Seattle deck costs in 2025 for a full cost breakout by material type, elevation, and complexity factors.
400–600 Sq Ft: $40,000–$75,000
At this scale, you're building something substantial. The $40,000 floor assumes a straightforward flat-lot composite build with standard railing and simple stairs. The $75,000 ceiling is for an elevated deck with complex framing, premium composite (like TimberTech Vintage Collection or AZEK), cable or glass railing, and integrated lighting. Hot tub reinforcement adds $2,000–$4,000 to structural costs alone.
Most homeowners at this budget level are also considering a pergola addition. A freestanding or attached pergola over 200–300 sq ft of the deck adds $12,000–$25,000 depending on material and coverage type.
600+ Sq Ft: $65,000 and Up
At 600+ sq ft, you're building what amounts to a major home addition — just outdoors. Projects in this range consistently run $65,000–$120,000+ and often involve multiple permits, engineered drawings, and construction schedules of 4–6 weeks or more. Multi-level decks in this range with outdoor kitchens, pergolas, and premium materials routinely reach $100,000–$150,000.
Key insight
| Deck Size | Low End | High End | Best Fit For |
|---|---|---|---|
| 100–200 sq ft | $13,000 | $25,000 | Small lots, dining only, budget constraints |
| 200–400 sq ft | $20,000 | $45,000 | Most Seattle households; dining + lounging |
| 400–600 sq ft | $40,000 | $75,000 | Full outdoor room, hot tub, entertaining |
| 600+ sq ft | $65,000 | $130,000+ | Estate builds, multi-level, outdoor kitchen + more |
For financing options on larger projects, see our guide to deck financing in Seattle.
The 20–25% Rule: Sizing Your Deck to Your Home
One of the most reliable rules of thumb in residential deck design is what we call the 20–25% rule: your deck's total square footage should represent approximately 20–25% of your home's main floor square footage. This produces a deck that feels proportional to the house — large enough to be usable, not so large that it overwhelms the structure visually or dominates the yard.
Here's how this translates in practice across common Seattle home sizes:
| Home Main Floor Sq Ft | 20% Target | 25% Target | Recommended Range |
|---|---|---|---|
| 1,000 sq ft | 200 sq ft | 250 sq ft | 200–250 sq ft |
| 1,400 sq ft | 280 sq ft | 350 sq ft | 280–350 sq ft |
| 1,800 sq ft | 360 sq ft | 450 sq ft | 360–450 sq ft |
| 2,200 sq ft | 440 sq ft | 550 sq ft | 440–550 sq ft |
| 2,800 sq ft | 560 sq ft | 700 sq ft | 560–700 sq ft |
This rule works well for most single-level homes with a traditional rear yard. It breaks down for two-story homes where the main floor is relatively small but the house overall is large, or for homes with unusual footprints. In those cases, use it as a starting point and adjust based on actual lot constraints and use case.
From an appraisal and resale perspective, this proportionality matters. The National Association of Realtors (NAR) Remodeling Impact Report consistently shows that deck additions recover a meaningful percentage of their cost at resale — but this recovery depends in part on the deck being appropriately scaled to the home. An oversized deck on a modest home can actually suppress value if it reduces the yard to a thin strip or makes the home appear maintenance-heavy.
Over-Sizing Mistakes: When Bigger Isn't Better
We've built a lot of decks over the years, and we've also been called in to consult on projects that went wrong. Here are the most common over-sizing mistakes we see in Seattle:
1. The Deck That Ate the Yard Homeowners design a 600 sq ft deck on a lot where the rear yard is only 900 sq ft within the setbacks. Once the deck is built, there's no yard left for kids to play, for a garden, or for a simple patch of grass. The outdoor space becomes all-deck, which feels more like a parking lot than a backyard.
2. The Deck That Dwarfs the House A 500 sq ft deck on a 900 sq ft bungalow is visually out of proportion and can create code compliance questions in some zoning districts that limit accessory structure coverage. Scale matters aesthetically.
3. The "We'll Grow Into It" Deck Building 500 sq ft because you might want to add outdoor furniture someday sounds reasonable, but that extra 200 sq ft you're not using still needs to be cleaned, refinished, and maintained. With composite decking, maintenance is minimal but not zero. With cedar, that extra square footage adds real annual maintenance hours and periodic staining costs.
4. The Deck Built for the Party You Never Have We hear this a lot: "We want to be able to host 30 people." The math says you need 700+ sq ft for that. But how often do you actually host 30 people? If it's once every two years, you're paying for and maintaining 700 sq ft of deck to host the neighborhood block party occasionally. Design for your actual life, not your aspirational entertaining life.
Important
Material Choice and How It Affects the Size Decision
Your choice of decking material doesn't just affect aesthetics and cost — it actually should influence your size decision in subtle but real ways.
Cedar: Lower Cost Per Square Foot, Higher Maintenance
Western red cedar runs roughly $60–$90 per sq ft installed in Seattle. At that price point, a 400 sq ft cedar deck costs meaningfully less than a 400 sq ft composite deck. Some homeowners use this delta to justify going larger with cedar. The math works short-term, but cedar requires staining every 2–3 years in the Pacific Northwest — our rain cycles accelerate UV breakdown and mold colonization on unprotected wood surfaces. Every additional square foot of cedar is more annual maintenance time and cost.
Our detailed comparison of cedar decking vs. staining vs. composite breaks down the 10-year total cost of ownership by material. Spoiler: composite often catches up to cedar on total cost over a 10–12 year horizon when you factor in refinishing labor and materials.
Composite: Higher Initial Cost, Lower Maintenance Burden
Composite decking — Trex, TimberTech, Fiberon, and their competitors — runs $75–$130 per sq ft installed. The higher initial cost means homeowners sometimes downsize the deck footprint to hit a budget target. We'd generally caution against that trade-off: it's better to build the right size in composite than a larger deck in cedar that you'll struggle to maintain.
Composite decking's low maintenance requirement also makes larger decks more manageable. A 500 sq ft composite deck requires nothing more than an annual hose-down with mild soap. The same square footage in cedar requires a weekend of sanding, cleaning, and staining every few years.
For a comparison of the leading composite brands available in the Seattle market, see our article on Trex vs. Fiberon vs. TimberTech in Seattle.
Membrane Decking: For Waterproofing, Not Just Walking
If you have space below your deck that you want to keep dry — a basement entrance, a covered storage area, or a garage — membrane decking is the right call regardless of square footage. Membrane systems like Duradek or similar products waterproof the deck surface and channel water to a drain. The per-square-foot cost is higher ($85–$140 installed), which again argues for right-sizing the footprint rather than maximizing it. Our guide to membrane decking in Seattle covers the full scope and cost of this system.
The Sizing Conversation With Your Contractor: What to Bring
When you're ready to call a deck builder, the conversation goes much faster and produces better outcomes if you come prepared with this information:
- A rough sketch of your rear yard with approximate dimensions, including the distance from the house to the property line and any obvious obstructions (existing trees, utilities, grade change)
- Your main floor square footage (from your county assessor records or your appraisal report) — this gives the builder a proportionality baseline
- A furniture layout concept — even a rough sketch showing where you want the dining table, the lounge furniture, the grill, etc. This is the single most useful piece of information you can provide
- A budget range — even a rough one. This helps the builder quickly calibrate the conversation between a 200 sq ft and a 400 sq ft scope
- Your permit knowledge — whether you've spoken to SDCI or King County permits about any specific constraints on your parcel (ECA, tree protection, unusual zoning)
A good contractor will also conduct a site visit before providing a firm proposal. Be wary of any builder who quotes a price without visiting your property — slopes, tree locations, soil conditions, and access constraints all affect cost and none of them are visible from a satellite image.
Our guide on how to find a deck builder in Seattle covers the full contractor vetting process, and our article on questions to ask your deck builder gives you a full checklist for those initial conversations.
Ready to Right-Size Your Seattle Deck? Let's Talk.
Getting deck size right is one of the highest-leverage decisions you'll make in this whole process. Too small and you'll wish you had more room every time you host. Too large and you're maintaining square footage you don't use. The 300–400 sq ft sweet spot works for most Seattle households — but your lot, your home, and your lifestyle determine what's actually right for you.
We've been building decks throughout the greater Seattle area, Bothell, Kenmore, Woodinville, and surrounding King County communities for years. Our consultation process starts with your site — not a template. We measure your actual usable footprint after setbacks, identify any tree protection or ECA constraints, and design a deck that fits your life and your lot.
Call us at (425) 675-6259 to schedule a free on-site consultation. Or fill out our project inquiry form at /contact and we'll be in touch within one business day. We serve Seattle, Bothell, Kenmore, Kirkland, Bellevue, Redmond, Woodinville, and throughout King and Snohomish Counties.
Frequently Asked Questions
What is the average deck size in Seattle?
What's the minimum deck size for a dining table and chairs?
Do I need a permit for a small deck in Seattle?
How does slope affect how big my deck can be?
Can Seattle setbacks really reduce my available deck area that much?
What's the rule of thumb for how big a deck should be relative to my home?
How much does a 400 sq ft deck cost in Seattle in 2026?
Is a multi-level deck more expensive than a single-level deck of the same total square footage?
What's the largest deck I can build in Seattle without a full building permit?
Will a larger deck increase my home's resale value?
How wide should a deck be minimum for comfortable furniture placement?
Can I build a deck in a protected tree's root zone in Seattle?
Planning a deck in the Seattle area?
Get an onsite design review and a clear, itemized quote from a licensed local builder.
Request a Free Quote